
Materials Needed
Before you embark on making your own bar shelf, it’s important to gather all the necessary materials. Here is a list of essential items you will need:
- 1. Wood boards: Choose a sturdy wood like pine, oak, or plywood. The size and quantity will depend on the dimensions of your desired shelf.
- 2. Screws: Opt for screws that are appropriate in size and length for the thickness of your wood boards.
- 3. Wood glue: Get a high-quality wood glue to ensure strong and durable joints.
- 4. Sandpaper: Prepare a couple of different grits of sandpaper, including coarse and fine, to smooth out the wood surfaces.
- 5. Stain or paint: Decide on the finish you prefer for your bar shelf. Stain can enhance the natural beauty of the wood, while paint offers a customizable color option.
- 6. Varnish or sealant: This is necessary if you choose to stain the wood. It will protect the surface and give it a polished look.
- 7. Saw: You’ll need a saw to cut the wood to the desired dimensions. A circular saw or a miter saw works well for this project.
- 8. Drill: A power drill is essential for drilling pilot holes and screwing in the screws.
- 9. Measuring tape and ruler: Accurate measurements are crucial for a properly constructed bar shelf.
- 10. Safety goggles and gloves: Don’t forget to protect yourself with safety goggles and gloves to ensure a safe woodworking experience.
Make sure to gather all the necessary materials before starting your project. It’s better to have everything on hand so you can work efficiently and avoid unnecessary delays.
Tools Needed
When it comes to building a bar shelf, having the right tools is essential. Here is a list of tools you’ll need to successfully complete the project:
- 1. Saw: A saw is necessary for cutting the wood boards to the desired dimensions. A circular saw or a miter saw is recommended for this task.
- 2. Drill: A power drill will be used for drilling pilot holes and securing screws in place. Make sure to have drill bits of different sizes to accommodate your needs.
- 3. Screwdriver: A screwdriver is essential for tightening the screws and ensuring a secure assembly.
- 4. Sandpaper: Prepare a couple of different grits of sandpaper, including coarse and fine, to smooth out the wood surfaces and achieve a polished finish.
- 5. Clamps: Clamps are useful for holding the wood boards together while the glue dries or while you’re attaching the shelves.
- 6. Measuring tape and ruler: Accurate measurements are crucial for a properly constructed bar shelf, so make sure to have these tools on hand.
- 7. Pencil or marker: Use a pencil or marker to mark the measurements and cut lines on the wood boards for accuracy.
- 8. Safety goggles and gloves: Protect your eyes with safety goggles and your hands with gloves to ensure a safe woodworking experience.
- 9. Level: A level will help you ensure that the bar shelf is mounted evenly on the wall.
- 10. Paintbrush or foam brush: If you choose to paint the bar shelf, a paintbrush or foam brush will be needed to apply the paint evenly.
Having these tools at your disposal will make the construction of your bar shelf much easier and ensure that you achieve professional-looking results. Make sure to gather all the necessary tools before starting the project so you can work efficiently and effectively.
Step 1: Measure and Plan
The first step in building a bar shelf is to carefully measure and plan the design. This will ensure that your shelf fits perfectly in the desired space and meets your specific requirements. Follow these steps to get started:
- Measure the area: Use a measuring tape to measure the space where you want to install the bar shelf. Take accurate measurements of the width, height, and depth to determine the appropriate dimensions for your shelf.
- Consider the function: Think about how you intend to use the bar shelf. Will it primarily be used for storing bottles and glassware? Do you also want space for displaying decorative items? Consider the purpose of the shelf and how many shelves you will need to accommodate your items.
- Sketch the design: Use a ruler and pencil to sketch a rough design of your bar shelf. Take into consideration the dimensions, the number of shelves, and any additional features or details you want to include.
- Select the wood: Decide on the type of wood you want to use for your bar shelf. Consider the aesthetic you want to achieve and choose a wood that complements your overall decor. Take note of the thickness of the wood as it will affect the stability of your shelf.
- Plan the joinery: Determine how you plan to join the wood boards together. This could be through butt joints, miter joints, or using pocket screws. Each method has its own advantages, so choose the one that suits your skill level and desired outcome.
- Estimate the materials: Based on your measurements and design, estimate the amount of wood, screws, wood glue, and other materials you will need. This will help you create a shopping list and ensure you have everything before you start building.
By taking the time to measure accurately and plan your design, you will have a solid foundation for constructing a functional and visually appealing bar shelf. This step is crucial to ensure that the subsequent steps flow smoothly and result in a successful project.
Step 2: Cut the Wood
Once you have measured and planned your bar shelf, it’s time to proceed with cutting the wood. This step is essential for creating the individual components of your shelf. Follow these guidelines for accurate and precise cuts:
- Prepare your work area: Set up a dedicated workspace for cutting the wood. Clear any clutter and ensure you have enough space to maneuver the wood boards.
- Measure and mark the wood: Transfer the measurements from your plan onto the wood boards using a pencil or marker. Use a measuring tape and a straight edge to ensure accurate and straight lines.
- Select the appropriate saw: Depending on the type and thickness of your wood, choose the appropriate saw for cutting. A circular saw or miter saw is commonly used for this step.
- Safety first: Put on safety goggles and gloves to protect yourself from any potential accidents. Safety should always be a priority when working with power tools.
- Cut straight and steady: Align the saw blade with the marked cut line and guide the saw along the line, maintaining a steady and controlled motion. Take your time and make sure to cut with precision.
- Repeat for all the wood pieces: Depending on your design, you may need to cut multiple wood pieces for the frame and shelves of your bar shelf. Repeat the measuring and cutting process for each piece.
- Check for accuracy: After making the cuts, double-check the dimensions and ensure they match your initial measurements. This will guarantee that the pieces fit together properly during assembly.
- Sand the cut edges: Use sandpaper to smooth out any rough or uneven edges resulting from the cutting process. This will ensure a clean and professional finish.
By carefully cutting the wood according to your measurements and design, you will have the necessary components to move on to the next step. Take your time and pay attention to detail during this step to achieve accurate and precise cuts.
Step 3: Sand the Wood
After cutting the wood for your bar shelf, it’s time to smooth the surfaces and create a polished finish. Sanding the wood is an important step to ensure a professional and refined look. Follow these steps to effectively sand the wood:
- Gather the necessary sandpaper: Prepare sandpaper of different grits, including coarse and fine. The coarse-grit sandpaper, such as 80 or 100 grit, is ideal for removing any rough spots or imperfections. The fine-grit sandpaper, such as 220 or 240 grit, will provide a smooth and flawless finish.
- Sand the edges: Begin by sanding the cut edges of the wood pieces. Hold the sandpaper firmly and move it back and forth along the edge, applying even pressure. This will eliminate any splinters or roughness.
- Sand the surfaces: Move on to sanding the flat surfaces of the wood pieces. Use long, even strokes and sand with the grain of the wood. This will prevent any unwanted scratches or damage to the surface.
- Round the corners (optional): If desired, you can use sandpaper to lightly round the corners of the wood pieces. This will give your bar shelf a more polished and refined look.
- Progressively switch to finer grits: As you sand, progressively switch to finer grits of sandpaper. Start with a coarse grit and move to medium grit, and finally to the finest grit. This will help achieve a smoother and more desirable finish.
- Check for smoothness: Regularly inspect the wood surfaces as you sand to ensure they are becoming smooth and free of roughness. Use your hands to feel for any imperfections that may need further sanding.
- Clean the wood: Once you are satisfied with the smoothness of the wood, use a clean cloth or brush to remove any dust or debris. This will prepare the wood for the next steps, including staining or painting.
Sanding the wood will create a refined and polished surface for your bar shelf. This step is crucial for achieving a professional-looking end result. Take your time and pay attention to detail during the sanding process to ensure a smooth and flawless finish.
Step 4: Assemble the Frame
Now that you have prepared the wood pieces for your bar shelf, it’s time to move on to assembling the frame. The frame is the structural backbone of the shelf and will provide stability and support. Follow these steps to assemble the frame:
- Lay out the wood pieces: Start by laying out the wood pieces according to your design. Take note of the measurements and the orientation of each piece.
- Apply wood glue: Apply a thin, even layer of wood glue to the edges of the wood pieces that will be joined together. This will help create a strong bond between the pieces.
- Align the pieces: Carefully align the edges of the wood pieces and press them firmly together. Make sure the pieces are flush and level with each other.
- Secure with screws: Once the pieces are aligned, use a power drill to create pilot holes through one piece of wood into the adjoining piece. This will prevent the wood from splitting. Then, insert screws into the pilot holes and tighten them securely.
- Repeat for all joints: Repeat the gluing and screwing process for each joint in the frame. Ensure that all the corners and connections are securely fastened.
- Check for squareness: Use a carpenter’s square or a measuring tape to check for squareness. Measure diagonally from one corner to the opposite corner, making sure the measurements are equal. This will ensure the frame is square and balanced.
- Wipe off excess glue: As you assemble the frame, some excess glue may squeeze out. Use a damp cloth or sponge to wipe off the excess glue before it dries. This will prevent any unsightly marks or stains on the wood.
Assembling the frame is a critical step in constructing your bar shelf. Taking the time to align and secure the wood pieces properly will ensure a sturdy and durable structure. Keep in mind the importance of squareness and always double-check your measurements and connections.
Step 5: Attach the Shelves
With the frame of your bar shelf securely assembled, it’s time to move on to attaching the shelves. The shelves will provide the storage and display area for your bar essentials. Follow these steps to attach the shelves:
- Measure and mark the shelf placement: Use a measuring tape and a pencil to measure and mark the desired height for each shelf. Take into consideration the items you plan to store on each shelf and ensure there is enough space between them.
- Apply wood glue: Apply a thin layer of wood glue to the edges of the frame where the shelf will be placed. This will help create a strong bond between the shelf and the frame.
- Position the shelf: Carefully place the shelf on top of the wood glue, aligning it with the marked measurements. Ensure that the shelf is level and centered within the frame.
- Secure with screws: Once the shelf is in position, use a power drill to create pilot holes through the shelf and into the frame. Then, insert screws into the pilot holes and tighten them securely. This will anchor the shelf to the frame.
- Repeat for each shelf: Repeat the gluing and screwing process for each shelf, following the marked measurements. Take your time to ensure each shelf is level and securely attached to the frame.
- Allow the glue to dry: Give the wood glue sufficient time to dry according to the manufacturer’s instructions. This will ensure that the shelves are firmly attached to the frame and can support the weight of your items.
Attaching the shelves is a crucial step in completing your bar shelf. By following these steps, you will create a sturdy and functional storage space for your bar essentials. Take care to align the shelves properly and allow sufficient drying time for the wood glue to ensure a secure and reliable attachment.
Step 6: Sand and Stain the Shelf
After attaching the shelves to your bar shelf, it’s time to sand and stain the wood to enhance its appearance and protect it from wear and tear. Follow these steps to achieve a beautiful finish:
- Sand the surfaces: Use a fine-grit sandpaper to lightly sand the surfaces of the wood, including the top and edges of the shelves. This will smooth out any imperfections and prepare the wood for staining.
- Remove dust: Wipe away any sanding dust with a clean, dry cloth or a tack cloth. Ensuring that the surfaces are clean will allow the stain to adhere evenly.
- Choose a stain: Select a wood stain that complements your desired aesthetic. Test a small area or piece of scrap wood to see how the stain looks before applying it to the entire shelf.
- Apply the stain: Follow the instructions on the stain can to apply the product to the wood surfaces. Use a brush or a cloth to distribute the stain evenly, following the direction of the wood grain.
- Wipe off excess stain: After applying the stain, wipe off any excess with a clean cloth. This will prevent the stain from becoming too dark or splotchy. Allow the stain to dry according to the manufacturer’s instructions.
- Inspect the finish: Once the stain has dried, inspect the surface to ensure an even and desired color. If necessary, apply additional coats of stain to achieve the desired shade.
- Apply a sealant (optional): If you want added protection for your bar shelf, consider applying a clear sealant or varnish. Follow the instructions on the product to ensure proper application and drying time.
- Allow for complete drying: Give the stain and sealant sufficient time to dry and cure. This will ensure a durable and long-lasting finish that can withstand regular use.
Sanding and staining the wood will not only enhance its natural beauty but also provide protection against moisture and damage. By following these steps, you can achieve a visually appealing and professional-looking finish for your bar shelf.
Step 7: Mount the Shelf
With your bar shelf fully assembled and finished, the next step is to mount it securely on the wall. Proper mounting ensures that your shelf is stable and safe to use. Follow these steps to effectively mount your bar shelf:
- Choose the mounting location: Determine where you want to mount your bar shelf on the wall. Consider the height, accessibility, and overall aesthetics of the space.
- Locate the wall studs: Use a stud finder to locate the wall studs in the chosen area. Mounting the shelf to studs provides added support and stability.
- Mark the stud locations: Mark the stud locations on the wall using a pencil. This will serve as a guide for attaching the shelf brackets.
- Attach the brackets: Position the shelf brackets over the marked stud locations and use a power drill to secure them to the wall. Make sure the brackets are level and aligned properly.
- Test stability: Once the brackets are attached, test the stability by applying pressure and gently shaking the shelf. Make any necessary adjustments to ensure a secure and level mounting.
- Place the shelf on the brackets: Carefully place the bar shelf onto the mounted brackets. Ensure that the shelf is centered and properly seated on the brackets.
- Secure the shelf to the brackets: With the shelf in position, use screws to secure the underside of the shelf to the brackets. This will prevent any movement or shifting.
- Double-check the levelness: Use a level to ensure that the shelf is perfectly level. Make any adjustments as needed to maintain a balanced appearance.
Mounting the shelf is a critical step to ensure its stability and functionality. Taking the time to properly attach the shelf to the wall will give you peace of mind and a secure storage and display space for your bar essentials.
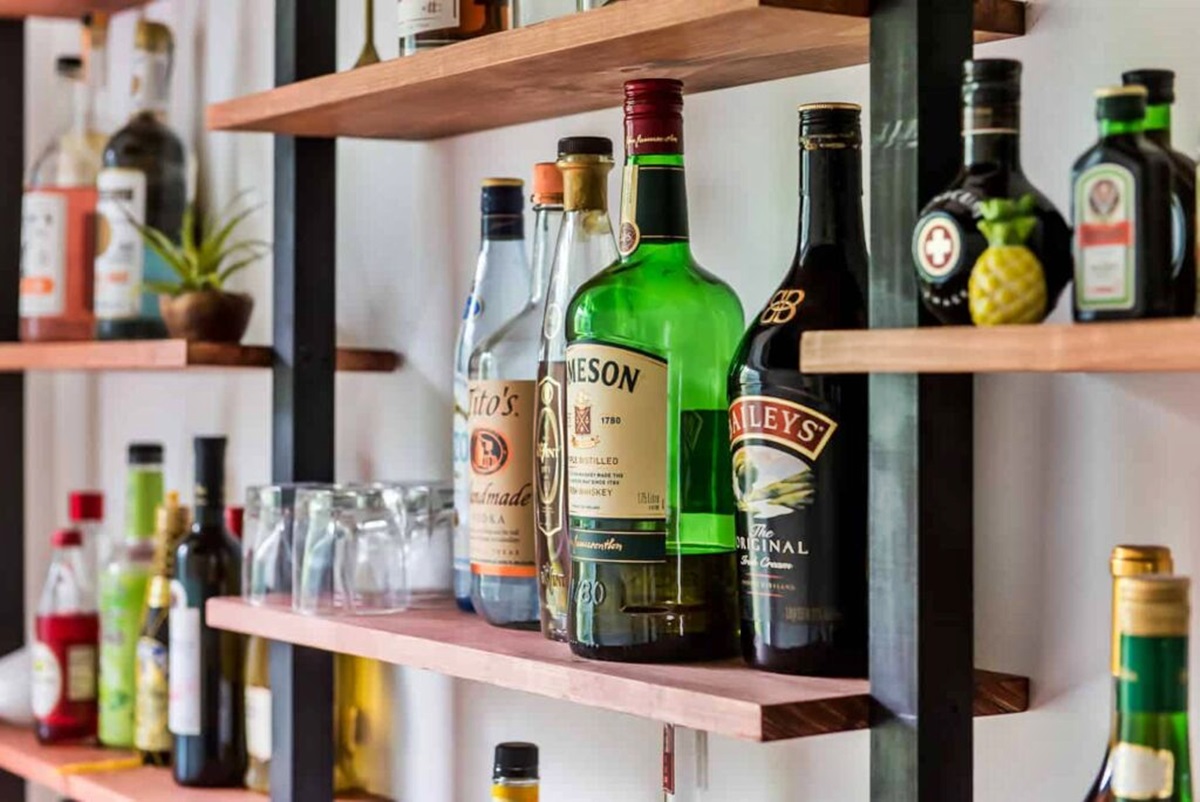
Step 8: Decorate and Organize
Now that your bar shelf is mounted and ready, it’s time to add the finishing touches by decorating and organizing it to fit your style and needs. Follow these steps to make your bar shelf visually appealing and functional:
- Add decorative items: Decorate your bar shelf with items that reflect your personal style and create a welcoming atmosphere. This could include decorative bottles, glassware, plants, artwork, or other accessories that complement the overall design.
- Arrange items strategically: Organize your bar essentials in a way that is both visually appealing and practical. Place frequently used items within easy reach, and consider grouping similar items together for a cohesive look.
- Use storage solutions: Incorporate storage solutions such as baskets, trays, or containers to keep smaller items organized and easily accessible. This will help maintain a tidy and clutter-free bar shelf.
- Add lighting: Consider adding lighting to highlight certain areas of your bar shelf or create a warm ambiance. This could be achieved by installing small LED spotlights, string lights, or even candles.
- Personalize the space: Make your bar shelf unique by adding personal touches. This could be displaying special mementos or incorporating personalized signs or artwork that reflect your interests or memories.
- Maintain functionality: Ensure that your bar essentials are easily accessible and that the shelf is organized in a way that makes it convenient for preparing and serving drinks. Consider incorporating hooks or racks for hanging wine glasses or bar tools.
- Regularly update and refresh: As your bar shelf evolves over time, update and refresh the decor and organization to keep it exciting and reflective of your current tastes and preferences.
Decorating and organizing your bar shelf is the final step in creating a space that is both visually appealing and practical. Take the time to carefully curate and arrange your items to showcase your style and create an inviting bar area that you can enjoy.