
Gather the Tools and Materials
In order to install new legs on your sofa, you will need to gather a few essential tools and materials. It’s important to have everything ready before you start the process to ensure a smooth and efficient installation. Here are the items you’ll need:
- Screwdriver or Drill: Depending on the type of screws or bolts used for the legs, you will need either a screwdriver or a drill with the appropriate bit to attach the legs securely.
- Tape Measure: It is crucial to measure the distance between the existing leg plates or the area where the new legs will be attached. This will help you determine the correct placement of the new legs.
- Pencil or Marker: To mark the precise position where the new leg plates or brackets will be attached to the sofa frame, you will need a pencil or marker. This will ensure accurate installation.
- Level: A level is necessary to ensure that the sofa legs are properly aligned and balanced. It will help you achieve a stable and even seating surface.
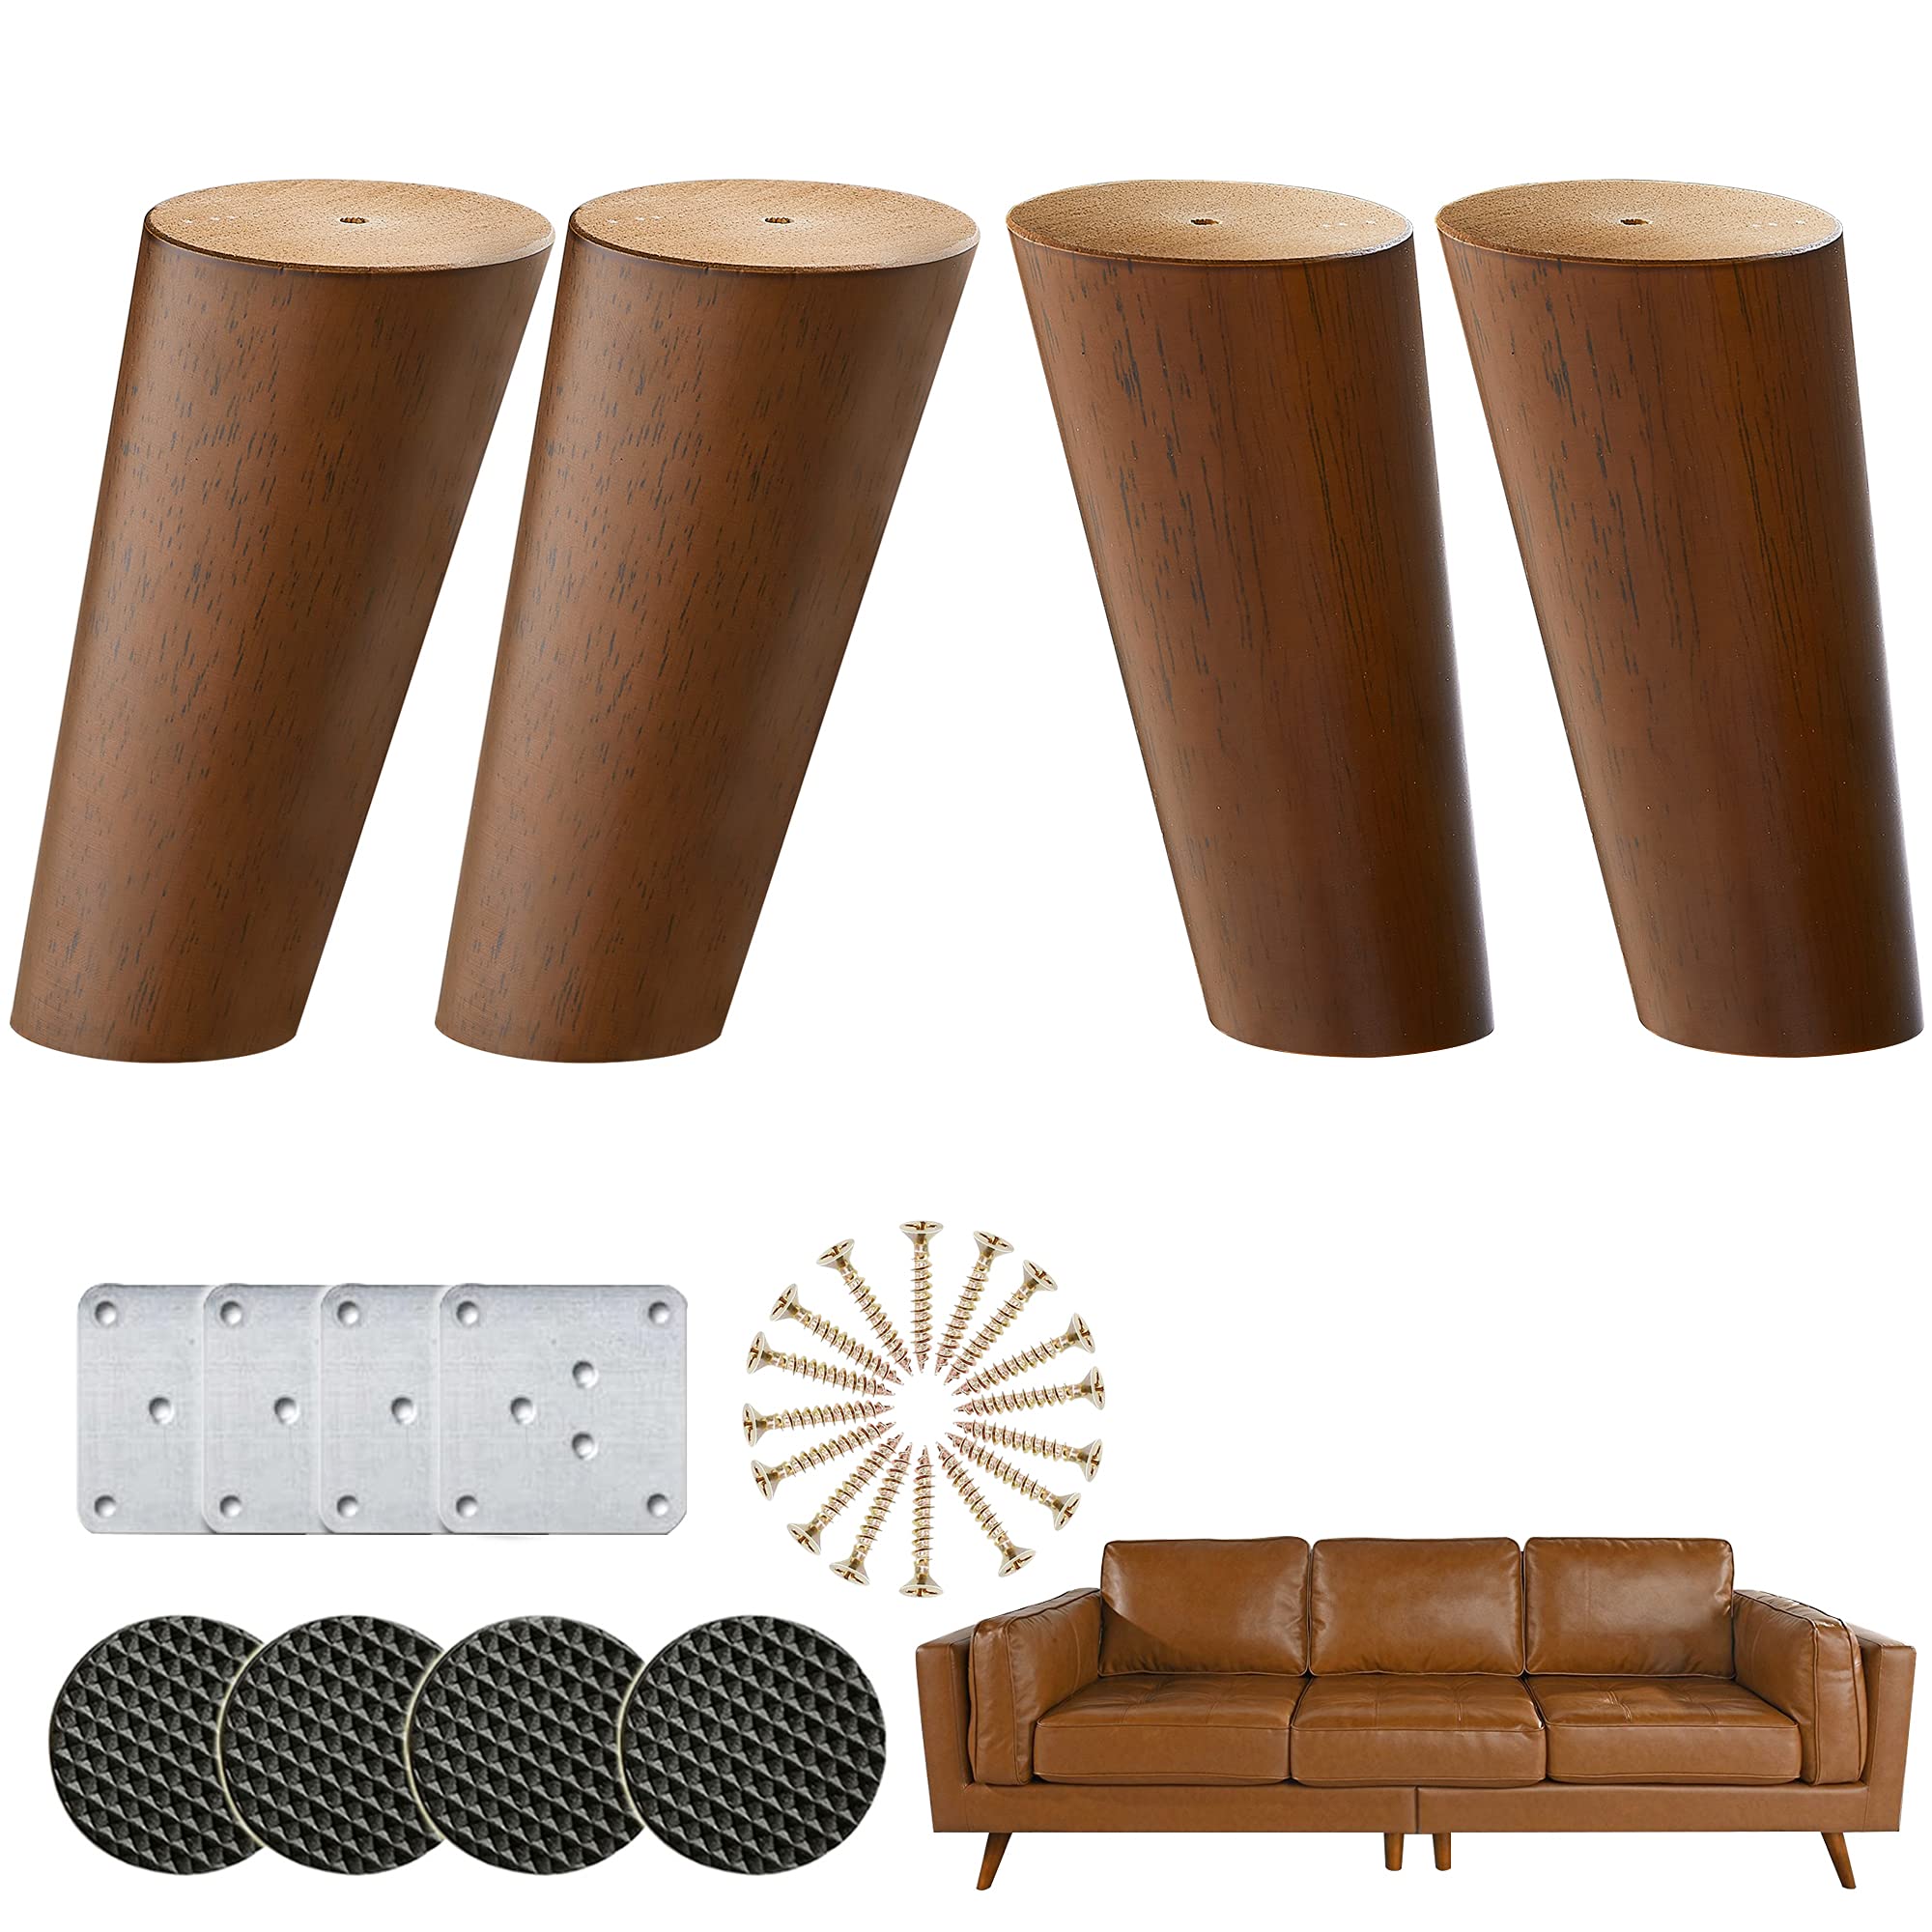
- New Legs: Of course, you will need the replacement legs themselves. Make sure to choose legs that are compatible with your sofa and match your desired aesthetic. There are various options available, such as wooden, metal, or plastic legs.
- Leg Plates or Brackets: If your sofa doesn’t already have leg plates or brackets attached, you will need to purchase them separately. These are the hardware pieces that will be screwed into the sofa frame to hold the legs securely in place.
- Optional: Additional Hardware: Depending on your sofa’s construction and leg attachment method, you may need additional screws, bolts, or washers to connect the leg plates or brackets to the sofa frame effectively.
Once you have gathered all these tools and materials, you are ready to proceed with the next steps of preparing the sofa for leg installation. Having everything within reach will save you time and make the process much easier.
Prepare the Sofa
Before you can install the new sofa legs, it’s crucial to properly prepare the sofa. This step ensures that the installation process goes smoothly and prevents any damage to the sofa or the new legs. Follow these steps to prepare your sofa:
1. Clear the Area: Start by removing any items, such as cushions or throw blankets, from the sofa. Clearing the area will give you enough space to maneuver and work comfortably.
2. Flip the Sofa: Carefully flip the sofa onto its back, making sure to protect the upholstery. You can use blankets or towels to cushion the sofa and prevent any scratches or damage from occurring during the process.
3. Locate the Existing Leg Plates: Examine the sofa frame to locate the existing leg plates or brackets. These are the points where the old legs are attached. If your sofa doesn’t have pre-installed leg plates, proceed to the next step.
4. Remove any Existing Legs: If your sofa has legs already attached, use a screwdriver or drill to unscrew them from the leg plates. Carefully set aside the old legs for disposal or repurposing.
5. Attach Leg Plates (If Necessary): If your sofa doesn’t have pre-installed leg plates, now is the time to attach them. Place the leg plates at the desired locations on the sofa frame, and use a pencil or marker to mark the screw holes. Then, using a screwdriver or drill, screw the leg plates securely into position. Ensure that they are level and flush with the bottom of the sofa frame.
6. Clean the Sofa Bottom: Before installing the new legs, take a moment to clean the bottom surface of the sofa to remove any dirt, dust, or debris. Wiping it with a damp cloth will create a clean and stable surface for the new legs to attach.
By following these preparation steps, you will have a clean and properly positioned sofa ready for the installation of the new legs. This ensures a seamless installation process and helps to maintain the integrity of your sofa for years to come.
Remove the Old Legs
Before you can install new legs on your sofa, you need to remove the old ones. This step is essential for a successful leg replacement and allows for a fresh start. Follow these steps to safely remove the old legs:
1. Position the Sofa: Carefully place the sofa in an upright position on a stable surface. This will make it easier to access and remove the old legs.
2. Locate the Leg Attachment Points: Look for the existing leg plates or brackets on the bottom of the sofa. These are the areas where the legs are attached. They are usually secured with screws or bolts.
3. Unscrew the Old Legs: Using a screwdriver or drill with the appropriate bit, carefully unscrew the old legs from the leg plates or brackets. Turn counterclockwise to loosen and remove the legs one by one. Place the old legs aside for disposal or repurposing.
4. Inspect the Leg Plates or Brackets: After removing the old legs, inspect the leg plates or brackets. Ensure that they are still in good condition and securely attached to the sofa frame. If there are any issues, such as loose or damaged leg plates, consider replacing them before installing the new legs.
5. Clean and Prepare the Leg Attachment Points: Take a moment to clean the leg attachment points on the sofa. Use a damp cloth to remove any dirt, dust, or debris. This will provide a clean surface for the installation of the new legs.
6. Verify Stability: Before proceeding, check the stability of the sofa. Gently apply pressure to different areas of the seating surface to ensure that it feels secure and balanced. If there are any concerns, address them before moving forward with the installation of the new legs.
By following these steps, you will effectively remove the old legs from your sofa. This prepares the sofa for the installation of the new legs and allows for a fresh and updated look.
Determine the Placement
When installing new legs on your sofa, it’s important to determine the proper placement for optimal stability and aesthetic appeal. Take the following factors into consideration when deciding where to position the new legs:
1. Symmetry: For a visually pleasing look, ensure that the new legs are positioned symmetrically. This means placing them at equal distances from the corners and along the centerline of the sofa.
2. Weight Distribution: Consider the weight distribution of the sofa when determining the placement of the new legs. Distribute the legs evenly to provide balanced support and prevent any undue stress on one side of the frame.
3. Stability: Identify the areas on the sofa frame where there is enough space, solid support, and structural integrity to attach the new legs. Avoid attaching them too close to the edges or corners, as this may compromise stability.
4. Clearance: Ensure that the new legs provide adequate clearance between the sofa and the floor. The height of the legs should allow for easy cleaning underneath the sofa and prevent any scraping or damage to the flooring.
5. Leg Position: Consider the desired positioning of the legs. Depending on the style and functionality you are aiming for, you can choose to position the legs towards the front, center, or back of the sofa. Each placement offers a different aesthetic and level of support.
6. Height Adjustments: Some sofa legs come with adjustable heights. If this is the case, determine the desired height adjustment that suits your preferences and the comfort level of the seating surface.
7. Mock Placement: Before committing to a final position, experiment with temporary placement using books, blocks, or other objects of similar height. This will give you a visual preview and allow you to assess the desired leg placement before permanently attaching them.
By taking these considerations into account, you can determine the ideal placement for your new sofa legs. This ensures both stability and aesthetic appeal, resulting in a beautifully upgraded piece of furniture.
Attach the Leg Plates
Attaching the leg plates is a crucial step in installing new legs on your sofa. These plates provide a stable and secure connection between the legs and the sofa frame. Follow these steps to properly attach the leg plates:
1. Determine the Leg Plate Placement: Refer to the markings you made earlier to position the leg plates on the sofa frame. Ensure they are aligned with the desired placement of the new legs.
2. Mark the Screw Holes: Use a pencil or marker to mark the screw holes on the sofa frame through the pre-drilled holes in the leg plates. Double-check for accuracy and adjust if needed.
3. Prepare the Screws: If the leg plates did not come with screws, select ones that are appropriate for the thickness of the sofa frame. Ensure the screws are long enough to securely fasten the leg plates but not too long to penetrate the other side.
4. Attach the Leg Plates: With the marked screw holes as a guide, position the leg plates back on the sofa frame. Insert the screws through the holes in the leg plates and into the sofa frame. Use a screwdriver or drill to tighten the screws firmly, but be careful not to overtighten and strip the holes.
5. Check for Stability: Once the leg plates are securely attached, check the stability by applying gentle pressure to the area around the leg plates. The leg plates should feel firm and not move or shift. If there is any instability, recheck the installation and tighten the screws if necessary.
6. Repeat for All Leg Plates: Depending on the number of legs your sofa has, repeat the above steps for each leg plate. Ensure consistent placement and proper attachment for all leg plates.
7. Verify Level Alignment: Use a level to confirm that the leg plates are aligned and level with each other. This will help ensure that the legs will be installed evenly and provide a stable seating surface.
By following these steps, you will successfully attach the leg plates to your sofa. This establishes a solid foundation for installing the new legs and helps ensure the stability and longevity of your sofa.
Screw in the Legs
After attaching the leg plates to the sofa frame, it’s time to screw in the new legs. This step is where you bring the desired aesthetic and functionality to your sofa. Follow these steps for a successful leg installation:
1. Select the New Legs: Choose the replacement legs that best suit your style and preferences. Ensure they are compatible with the leg plates and the weight-bearing capacity of your sofa.
2. Align the Legs with the Leg Plates: Place the new leg onto the corresponding leg plate. The holes on the leg should align with the holes on the leg plate. Ensure the leg is positioned securely on the leg plate.
3. Insert the Screws: Insert a screw through the hole in the leg and into the hole in the leg plate. Use a screwdriver or drill to turn the screw clockwise, gently tightening it into place. Repeat this step for each screw and leg.
4. Hand-Tighten the Screws: Tighten the screws using a screwdriver or drill, being careful not to overtighten. Stop once the legs feel secure and stable, ensuring they do not wobble or shift out of position.
5. Check for Leg Alignment: Double-check that the legs are aligned and parallel to each other. Use a level to ensure they are straight and create an even seating surface.
6. Adjust the Leg Height (If Applicable): Some legs come with adjustable heights. If your new legs have this feature, adjust the height according to your preference. This can help fine-tune the comfort and appearance of your sofa.
7. Test the Stability: Apply gentle pressure to the sofa from different angles to test the stability of the legs. The sofa should feel balanced and stable, with no excessive movement or wobbling. If any issues arise, adjust the screw tightness or alignment as needed.
8. Repeat for All Legs: Repeat the above steps for each leg, ensuring consistent installation and alignment throughout the sofa.
By following these steps, you will successfully screw in the new legs onto your sofa. This completes the installation process and brings a fresh look and stability to your furniture piece, enhancing both its appearance and functionality.
Test the Stability
Once you have installed the new legs on your sofa, it is essential to test the stability to ensure a safe and secure seating experience. Here are the steps to properly assess the stability:
1. Position the Sofa: Place the sofa on a level surface, ensuring that all legs are in contact with the floor.
2. Apply Pressure: Gently apply pressure to different areas of the seating surface, such as the arms and the backrest. This will help you identify any instability or wobbliness in the sofa.
3. Check for Unevenness: Pay attention to any unevenness or tilting of the sofa. It should sit flat and level on the floor, with all legs evenly supporting its weight.
4. Evaluate Wobbling: Rock the sofa slightly from side to side and front to back. It should not wobble excessively or feel unsteady. If you notice any wobbling, make sure all legs are securely attached and check for any loose screws.
5. Sit on the Sofa: Sit on the sofa and shift your weight across different areas. It should feel stable, with no sagging or excessive movement. Ensure that the legs provide sufficient support and distribute your weight evenly.
6. Repeat the Testing: Perform the stability test multiple times from various angles and positions to ensure consistency and accuracy in your assessment.
7. Make Adjustments: If you encounter any stability issues during the testing process, identify the problem area. Check for loose screws or misaligned legs, and make any necessary adjustments to improve the stability.
8. Seek Professional Help (If Needed): If you are unable to rectify stability issues on your own or if you notice significant structural problems with your sofa, it may be best to seek the assistance of a professional furniture repair service.
By thoroughly testing the stability of your sofa after installing the new legs, you can ensure a safe and comfortable seating experience. Addressing any stability concerns promptly will allow you to enjoy your renovated sofa with confidence and peace of mind.
Repeat for the Remaining Legs
Once you have successfully tested the stability of your sofa with the newly installed legs, it’s time to repeat the installation process for the remaining legs. Follow these steps to ensure a consistent and secure installation:
1. Prepare the Leg Plates: If you haven’t already done so, attach the leg plates or brackets to the remaining leg attachment points on the sofa frame. Ensure they are aligned correctly and securely fastened.
2. Select the Remaining Legs: Choose the next leg to install, ensuring that it matches the style and specifications of the previously installed legs.
3. Align the Leg with the Leg Plate: Position the leg onto the corresponding leg plate, aligning the holes on the leg with the holes on the leg plate. Ensure it fits securely and snugly onto the leg plate.
4. Insert and Tighten the Screws: Insert the screws through the holes in the leg, aligning them with the holes in the leg plate. Use a screwdriver or drill to tighten the screws, ensuring they are securely fastened but avoiding over-tightening.
5. Verify Alignment and Stability: Check the alignment of the leg with the other installed legs. Ensure that it is straight and parallel to create an even seating surface. Test the stability by applying gentle pressure and verifying that the leg does not wobble or shift.
6. Repeat for the Remaining Legs: Repeat the above steps for each of the remaining legs, following the same process of aligning, inserting, and tightening the screws. Take your time to ensure a consistent installation across all legs.
7. Test Overall Stability: Once you have installed all the remaining legs, perform a final stability test on the sofa. Apply pressure, check for any wobbling, and evaluate the overall stability of the seating surface with all legs in place.
8. Make Adjustments if Necessary: If you encounter any alignment or stability issues during the installation process or final stability test, recheck the leg attachment, tighten the screws, or make any needed adjustments to ensure optimal stability.
By repeating the installation process for the remaining legs, you ensure uniformity and consistency in their attachment. This finalizes the leg installation on your sofa, providing a balanced and stable foundation for years of comfortable seating.