
Choosing the Right Faucet Water Filter
When it comes to ensuring the quality and safety of your drinking water, a faucet water filter can be a game-changer. However, with so many options available on the market, choosing the right one can be a daunting task. To make the decision easier for you, here are some key factors to consider when selecting a faucet water filter:
- Water Contaminants: Start by assessing the specific contaminants present in your water supply. Some filters are designed to target specific contaminants like chlorine, lead, or pesticides, while others offer a broader range of filtration.
- Filtration Technology: Different filters use various technologies, such as activated carbon, reverse osmosis, or ceramic filters. Understand the pros and cons of each technology and determine which one best meets your needs.
- Filter Longevity: Consider the lifespan of the filter cartridge. Look for filters that offer a longer lifespan, as it will save you the hassle of frequent replacements. Some filters come with indicators that notify you when it’s time to replace the cartridge.
- Flow Rate: Check the flow rate of the filter to ensure it meets your household’s water needs. If the flow rate is too slow, it may be inconvenient for tasks like filling a pot or washing dishes.
- Installation: Evaluate the installation process of the filter. Choose a filter that can be easily installed without the need for professional assistance. Look for options that come with clear instructions and include all the necessary components.
- Compatibility: Make sure the filter you choose is compatible with your faucet. Measure the diameter and check if the filter’s adapter or connector fits snugly onto your faucet without any leakage.
- Cost: Set a budget for your faucet water filter. Compare prices and read reviews to find a filter that offers good value for money. Remember to consider ongoing filter replacement costs as well.
- Warranty and Customer Support: Look for filters that come with a warranty and reliable customer support. This ensures that you can reach out for help if you encounter any issues or have questions during installation or usage.
By considering these factors, you can find the perfect faucet water filter that suits your specific needs and provides you with clean and fresh drinking water. Don’t compromise on the health of you and your family; invest in a quality faucet water filter today!
Gathering the Necessary Tools and Supplies
Before you begin installing your faucet water filter, it’s important to make sure you have all the necessary tools and supplies on hand. Gathering these items in advance will help streamline the installation process and prevent any unnecessary delays. Here’s a list of the tools and supplies you’ll need:
- Faucet Water Filter Kit: Make sure you have purchased a faucet water filter kit that includes all the necessary components for installation. This typically includes the filter cartridge, adapter or connector, and any additional accessories specific to the brand or model you have chosen.
- Adjustable Wrench: An adjustable wrench will come in handy when detaching the aerator from your faucet. Ensure you have a wrench that fits the size of your aerator to easily loosen and remove it.
- Plumber’s Tape: Plumber’s tape, also known as thread seal tape, is essential for preventing leaks in the installation. Take a roll of plumber’s tape and keep it handy to use during the installation process.
- Bucket or Container: It’s a good idea to have a bucket or container nearby to catch any water that may spill during the installation process. This will help keep your workspace clean and prevent slippery surfaces.
- Cloth or Towel: Keep a cloth or towel nearby to wipe down any excess water and ensure a dry surface during the installation. This will help with a secure and leak-free connection between the components.
- Safety Glasses: While not necessarily a tool, safety glasses are recommended during installation to protect your eyes from any potential debris or splashing water.
- Instructions: Ensure that you have the installation instructions that come with your faucet water filter kit. Read through them thoroughly before beginning the installation process to understand the steps involved.
Gathering these tools and supplies beforehand will help make the installation process smooth and efficient. Take the time to check that you have everything you need, and if anything is missing, make a trip to the store before starting the installation. Having the right tools on hand will ensure a successful and hassle-free installation of your faucet water filter.
Preparing the Area
Before installing your faucet water filter, it’s important to prepare the area to ensure a smooth and efficient installation process. Taking the time to properly prepare the area will help minimize any potential issues and prevent damage to your faucet or countertop. Follow these steps to prepare the area for installation:
- Clean the Sink: Start by cleaning your sink thoroughly. Remove any debris, food particles, or residue from the surface. This will provide a clean and sanitary workspace for the installation.
- Clear the Surrounding Area: Remove any objects or items from the countertop surrounding the faucet. This will give you ample space to work and prevent any accidental damage to nearby items.
- Turn Off the Water: Locate the water shut-off valve under your sink and turn it off. This will stop the flow of water to the faucet and prevent any leaks or spills during the installation.
- Place a Towel or Cloth: To protect your countertop from scratches or damage, place a towel or cloth underneath the faucet area. This will provide a cushioned surface and catch any spills or drips that may occur during the installation.
- Determine the Orientation: Take a moment to determine the desired orientation of your faucet water filter. Consider factors such as ease of access, visual aesthetics, and functionality. Ensure that the filter will not obstruct the use of the sink or any other nearby fixtures.
- Check for Compatibility: Double-check that the filter’s adapter or connector is compatible with your faucet. Carefully examine the size and threading to ensure a proper fit. If necessary, refer to the manufacturer’s instructions or consult a professional for assistance.
- Read the Instructions: Take the time to thoroughly read the installation instructions provided with your faucet water filter kit. Familiarize yourself with the steps involved and any specific guidelines or recommendations from the manufacturer.
By following these steps and properly preparing the area, you will create an ideal workspace for installing your faucet water filter. This will help ensure a successful installation process and a functional and efficient filtration system for clean and fresh drinking water.
Detaching the Aerator from the Faucet
Before you can install your faucet water filter, you’ll need to detach the aerator from your faucet. The aerator is a small attachment located at the end of your faucet that helps regulate the flow of water. Follow these steps to safely remove the aerator:
- Gather the Necessary Tools: Ensure you have an adjustable wrench that fits the size of your aerator. This will make it easier to loosen and remove the aerator without causing any damage.
- Protect the Finish: To protect the finish of your faucet, wrap a cloth or tape around the aerator and the jaws of the adjustable wrench. This will help prevent any scratches or scuff marks during the removal process.
- Locate the Aerator: Identify the aerator at the end of your faucet. It is typically a small screen-like attachment that is screwed onto the faucet spout.
- Gently Loosen the Aerator: Using the adjustable wrench, grip the wrapped aerator firmly but gently. Turn the wrench counterclockwise to loosen the aerator. Be cautious not to apply excessive force that could damage the aerator or the faucet.
- Continue Loosening by Hand: Once you have loosened the aerator with the wrench, you should be able to continue unscrewing it by hand. Twist it gently until it is completely detached from the faucet spout.
- Set Aside the Aerator: Place the removed aerator in a safe place to keep it clean and prevent any loss of small parts. You may need to reinstall the aerator later if you decide to remove the faucet water filter in the future.
By following these steps, you will successfully detach the aerator from your faucet, making way for the installation of your faucet water filter. Remember to handle the aerator and the faucet with care to avoid any damage. Once the aerator is removed, you can proceed with the next steps of attaching the adapter or connector to your faucet.
Attaching the Adapter or Connector
Once you have successfully detached the aerator from your faucet, the next step in installing your faucet water filter is to attach the adapter or connector. This component serves as the bridge between your faucet and the filter. Follow these steps to securely attach the adapter or connector:
- Inspect the Adapter or Connector: Take a close look at the adapter or connector provided in your faucet water filter kit. Ensure that it is in good condition and free from any damage or defects.
- Identify the Correct Direction: Locate the correct orientation for the adapter or connector. Some may have arrows or indicators to guide you, while others may have specific shapes or threading patterns to align properly with your faucet.
- Apply Plumber’s Tape: Take a small strip of plumber’s tape and wrap it clockwise around the threading of your faucet. This will help create a tight and leak-proof seal when attaching the adapter or connector.
- Screw in the Adapter or Connector: Gently screw the adapter or connector clockwise onto the faucet spout. Use your hand initially to ensure a snug fit without forcing it. Then, use an adjustable wrench if necessary to give it a final tightening. Be careful not to overtighten, as this can cause damage.
- Check for Leaks: After attaching the adapter or connector, turn on the water supply to check for any leaks. Inspect the connections and ensure that there are no visible drips or water escaping from the joint. If you notice any leaks, try tightening the adapter or connector slightly until the leaks stop.
By following these steps, you will securely attach the adapter or connector to your faucet, creating a stable connection for your faucet water filter. Take your time and be diligent during this process to ensure a proper fit and prevent any leaks. Once the adapter or connector is securely attached, you can move on to the next step of installing the filter cartridge.
Installing the Filter Cartridge
With the adapter or connector securely attached to your faucet, it’s time to install the filter cartridge in your faucet water filter. The filter cartridge is the key component responsible for removing impurities and improving the quality of your drinking water. Follow these steps to install the filter cartridge properly:
- Prepare the Filter Cartridge: Remove the filter cartridge from its packaging. Rinse it gently under cold water to remove any loose particles or dust. This step will help prepare the cartridge for optimal filtration.
- Inspect the Cartridge: Take a moment to inspect the filter cartridge for any visible defects or damage. Check for any signs of leakage, cracks, or improper assembly. If you notice any issues, contact the manufacturer for assistance.
- Follow the Assembly Instructions: Refer to the manufacturer’s instructions to determine the proper assembly of the filter cartridge. Some cartridges may require specific attachments or pre-filters, so it’s crucial to follow the provided guidelines accurately.
- Align and Insert the Cartridge: Align the filter cartridge with the designated slot or opening in your faucet water filter. Insert it firmly and ensure a secure fit. It should click or lock into place, depending on the design of your filter system.
- Check for Proper Seating: Give the filter cartridge a gentle twist or push to ensure that it is seated correctly. It should fit snugly and securely in the designated space, without any wobbling or loose connections.
- Prime the Cartridge (if required): Some filter cartridges may require priming before use. This process helps remove any air pockets and ensures efficient water flow through the filter. Follow the manufacturer’s instructions on how to prime the cartridge, if necessary.
By following these steps, you will successfully install the filter cartridge in your faucet water filter. Take your time to ensure proper alignment and seating of the cartridge to prevent any leaks or malfunctions. Once the filter cartridge is in place, you can proceed to the next step of attaching the faucet water filter to your faucet.
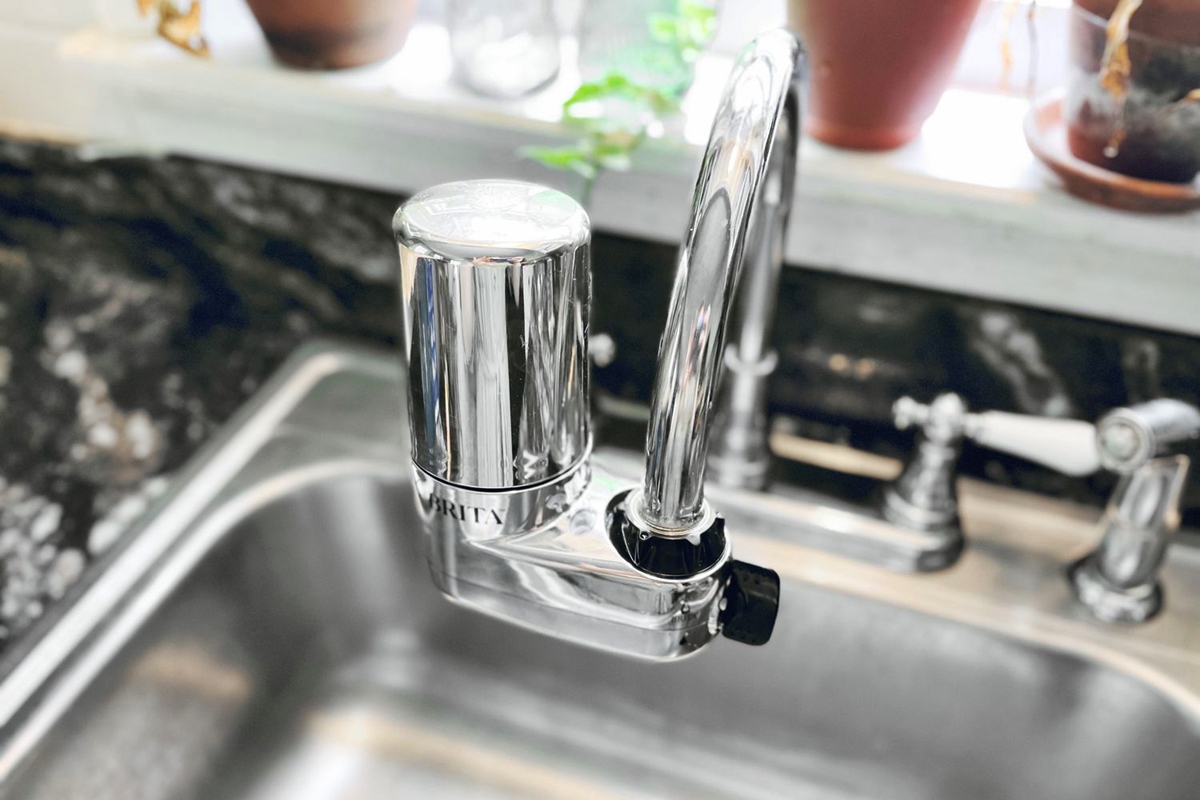
Attaching the Faucet Water Filter
With the filter cartridge installed in your faucet water filter, it’s time to attach the filter unit to your faucet. This step will complete the installation process and allow you to start enjoying clean and filtered water. Follow these steps to securely attach the faucet water filter:
- Prepare the Filter Unit: Ensure that the filter unit is clean and free from any dust or debris. Wipe the exterior surfaces with a clean cloth for a polished finish.
- Position the Filter Unit: Place the filter unit in a suitable position near your faucet. Take into consideration factors such as ease of access, clearance, and overall aesthetic appeal.
- Align the Connector: Align the connector on the filter unit with the adapter or connector attached to your faucet. Ensure that the threading or locking mechanism aligns to establish a secure connection.
- Screw or Lock the Connection: Depending on the design of your faucet water filter, either screw or lock the connection between the filter unit and the adapter/connector. Follow the manufacturer’s instructions for proper assembly.
- Tighten the Connection: Use your hand to firmly tighten the connection between the filter unit and the adapter/connector. Avoid over-tightening, as it may damage the components. Use an adjustable wrench if needed, but exercise caution to prevent damage.
- Check for Leaks: Once the filter unit is securely attached, turn on the water supply and check for any leaks. Inspect the connections, especially around the joined areas, and make sure there are no visible leaks or drips.
By following these steps, you will successfully attach the faucet water filter to your faucet. Take your time to ensure a proper and secure connection. Once the filter unit is attached, you can move on to the next steps of testing for leaks, flushing the filter, and enjoying clean and fresh drinking water.
Testing for Leaks
Once you have successfully attached the faucet water filter to your faucet, it’s crucial to test for any potential leaks. Testing for leaks ensures that your installation is secure and that there are no areas where water may escape. Follow these steps to test for leaks:
- Turn on the Water Supply: Slowly turn on the water supply to your faucet. Gradually increase the flow to its usual level.
- Observe the Connections: Carefully inspect the connections between the filter unit, adapter/connector, and faucet. Look for any water droplets, dripping, or moisture around the joints. Pay close attention to areas where the connections were made.
- Check for Drips: Examine the area underneath the filter unit and faucet for any signs of drips. Place a towel or container to catch any potential drips during the testing process.
- Inspect the Filter Cartridge: Check the filter cartridge for any leaks or abnormal water flow. Ensure that water is passing through the filter without any bypassing or spillage.
- Test for an Extended Period: Leave the water running for a few minutes to thoroughly test for leaks. Pay attention to any changes in water pressure or the presence of persistent leaks.
If you notice any leaks during the testing process, take immediate action to resolve the issue. Tighten the connections if necessary or adjust the positioning of the filter unit. If the problem persists, refer to the manufacturer’s instructions or contact customer support for assistance.
Properly testing for leaks ensures that you have a secure and functioning faucet water filter. By identifying and addressing any leaks early on, you can prevent water waste, potential damage to your fixtures, and ensure the long-term efficiency of your filtration system.
Flushing the Filter
After successfully testing for leaks and ensuring the secure installation of your faucet water filter, it’s important to flush the filter before use. Flushing the filter helps remove any impurities, carbon fines, or air pockets that may be present in the filter cartridge and the system. Follow these steps to properly flush the filter:
- Refer to the Manufacturer’s Recommendations: Check the manufacturer’s instructions for specific guidelines on how to flush the filter. They may provide specific steps or recommendations tailored to your faucet water filter model.
- Run Cold Water: Turn on your faucet and allow cold water to run for a few minutes. Flushing with cold water helps rid the filter cartridge of any debris or contaminants.
- Monitor the Water Flow: Observe the water flow during the initial flushing process. You may notice some discoloration or cloudy water. This is normal as the filter cartridge is being flushed.
- Continue Flushing: Keep the water running for the recommended duration, as specified by the manufacturer. This duration may vary depending on the type and brand of your faucet water filter.
- Check for Clear Water: After flushing for the recommended period, check the water flow. The water should be noticeably clear, indicating that any impurities or carbon fines have been flushed out of the system.
- Turn Off the Faucet: Once the water is clear, turn off the faucet. You have successfully completed the flushing process.
Flushing the filter ensures that your faucet water filter is ready to provide clean and fresh drinking water. By following the manufacturer’s instructions and flushing for the recommended duration, you remove any initial impurities and carbon fines, optimizing the filter’s performance.
Remember, regular maintenance and periodic filter replacements are essential to maintain the efficiency and effectiveness of your faucet water filter system. Refer to the manufacturer’s guidelines for specific recommendations on filter replacement intervals to maintain the highest quality of filtered water.
Enjoying Clean and Fresh Drinking Water
With your faucet water filter successfully installed and the flushing process completed, you can now enjoy the benefits of clean and fresh drinking water. By following these steps, you have taken an important step towards improving the quality and safety of the water you consume:
- Fill a Glass with Filtered Water: Turn on your faucet and fill a glass with filtered water. Take a moment to appreciate the clarity and taste of the filtered water.
- Experience the Difference: Notice how the filtered water is free from impurities and odors. Enjoy the peace of mind that comes with knowing you are consuming cleaner and healthier water.
- Stay Hydrated: Drink the filtered water regularly to stay hydrated and support your overall well-being. Make it a habit to reach for filtered water instead of relying on bottled or unfiltered tap water.
- Use Filtered Water for Cooking: Utilize the filtered water for cooking purposes such as boiling water, making coffee or tea, and preparing meals. The improved taste and quality will enhance the flavor of your dishes.
- Stay Consistent with Filter Replacements: Keep track of the recommended filter replacement intervals provided by the manufacturer. Regularly replace the filter cartridge to ensure continued optimal performance and clean drinking water.
- Spread the Word: Share your experience with friends, family, and colleagues. Inform them about the benefits of faucet water filters and encourage them to consider installing one in their homes as well.
By enjoying clean and fresh drinking water, you are prioritizing your health and well-being. The faucet water filter removes common contaminants, providing you with improved taste, odor, and peace of mind. Embrace this positive change in your daily routine and make filtered water a part of your healthier lifestyle.
Remember, regular maintenance and filter replacement are key to ensuring the longevity and effectiveness of your faucet water filter. Drink up and savor the difference that clean and filtered water can make in your life!