
Choosing the Right Materials for Rug Hooking
When it comes to rug hooking, selecting the right materials is crucial for a successful project. The materials you choose will not only impact the overall look and feel of your rug but also its durability and longevity. Here are some important considerations to keep in mind when choosing your rug hooking materials:
- Hook: The first and most important material you’ll need is a rug hook. These come in various sizes and styles, so choose one that feels comfortable in your hand and suits your rug hooking needs. A fine hook is ideal for detailed work, while a larger hook is better for creating texture.
- Foundation: The foundation of your rug is typically made of linen or burlap. Linen provides a more refined look and is best suited for intricate designs, while burlap is a more rugged and budget-friendly option.
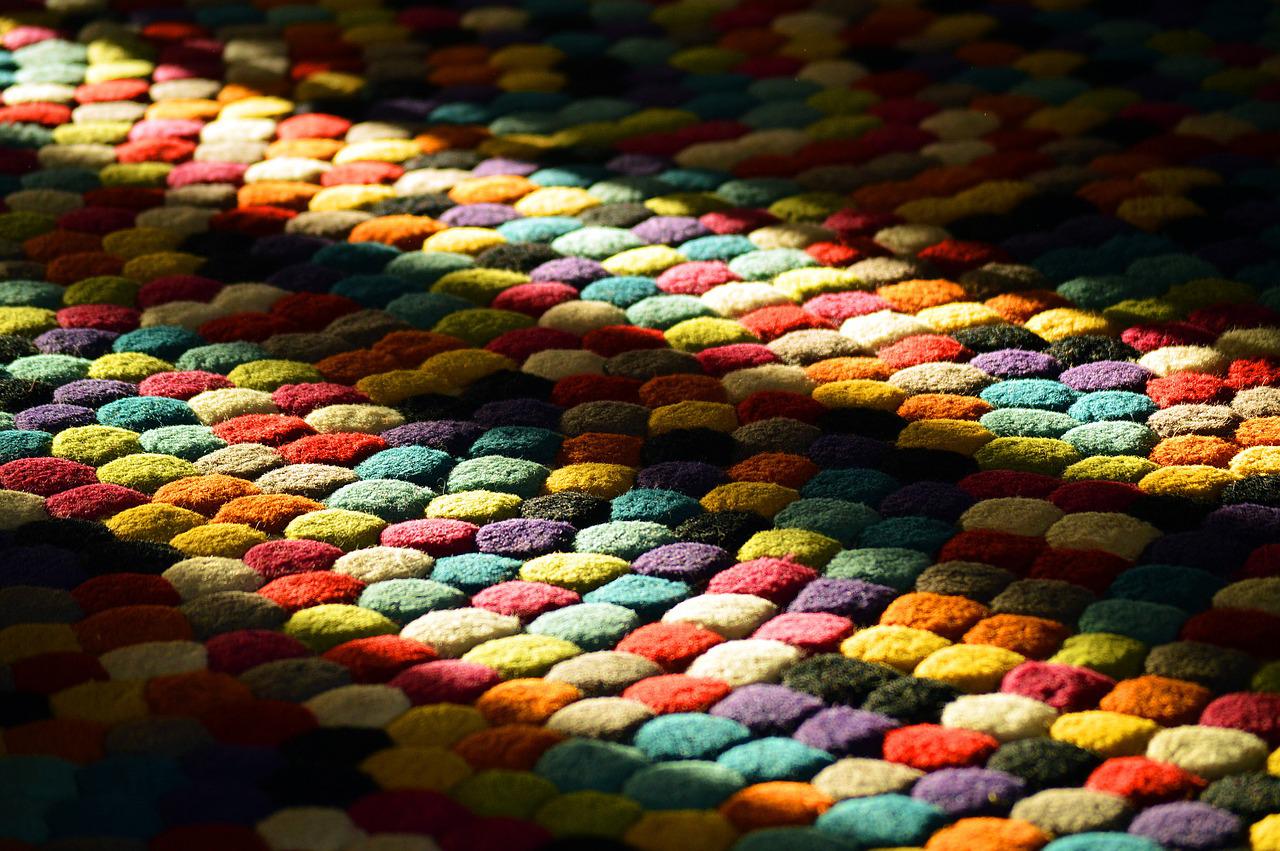
- Yarn: The type of yarn you choose will greatly affect the appearance and texture of your rug. Wool yarn is a popular choice for its durability, vibrant color options, and ability to hold up to frequent use. Experiment with different yarn weights and textures to achieve the desired effect.
- Color palette: Consider the color palette you want to incorporate into your rug. A harmonious combination of colors will create a visually pleasing result. You can choose to work with either solid colors or variegated yarns for a more textured look.
- Backing material: The backing material provides stability to your rug and prevents it from slipping on the floor. Options include rug canvas, rug warp fabric, or non-slip rug pad. Choose a material that suits your project size and requirements.
By carefully selecting your rug hooking materials, you can set the stage for creating a beautiful and durable rug. Take the time to explore different options, experiment with colors and textures, and find the perfect combination that reflects your personal style and artistic vision.
Preparing Your Materials for Rug Hooking
Before diving into the rug hooking process, it’s important to properly prepare your materials. This will ensure that your rug turns out smooth, well-constructed, and ready for hooking. Here are some essential steps to follow when preparing your materials:
- Washing and drying: Give your yarn a good wash before starting your project. This will remove any dirt, oils, or residue from the fibers, resulting in a cleaner and more even finish. Follow the manufacturer’s instructions for washing and drying to preserve the quality of the yarn.
- Cutting your yarn: Depending on the design and pattern of your rug, you may need to cut your yarn into specific lengths. Use sharp scissors or a yarn cutter to achieve clean and precise cuts. Take note of the required yarn lengths mentioned in your pattern or design plan.
- Preparing the foundation: If you’re using linen as your rug foundation, make sure to stretch it tightly over a frame or embroidery hoop to prevent it from puckering while hooking. For burlap foundations, check for any loose threads and trim them off. It’s a good idea to bind the edges of your foundation to prevent unraveling.
- Transferring your pattern: If you have a pattern that you want to replicate onto your rug foundation, use a transfer method such as tracing paper, transfer pens, or transfer pencils. Secure the pattern onto the foundation and carefully trace over the design. This step will help guide you during the hooking process.
- Organizing your yarn: To keep your yarn organized and easily accessible, consider using a yarn organizer. This can be a simple cardboard tray with compartments or a specialized organizer designed specifically for rug hooking. Sort your yarn by color or shade to quickly locate the desired yarn during hooking.
By taking the time to properly prepare your materials, you’ll set yourself up for a more enjoyable and successful rug hooking experience. The washed and well-cut yarn, properly stretched foundation, transferred patterns, and organized yarn will make the hooking process smoother and more efficient. Remember to pay attention to these preparation steps to ensure the best possible outcome for your rug.
Creating a Rug Hooking Pattern
A rug hooking pattern serves as a blueprint for your design, guiding you through the process and ensuring a cohesive and visually pleasing result. Whether you’re creating your own pattern or using an existing one, here are some steps to help you create an effective rug hooking pattern:
- Choose a theme or inspiration: Start by deciding on a theme or inspiration for your rug. It could be nature, geometric patterns, animals, or any other idea that sparks your creativity. This will give your rug a cohesive look and make the design process more focused.
- Gather reference images: Collect reference images that align with your chosen theme. These can be photographs, illustrations, or even sketches. Having a visual reference will help you in creating a more accurate and detailed pattern.
- Sketch your design: Using the reference images as a guide, sketch out your design on paper or digitally. Take into consideration the dimensions of your rug and how the design will fit within those dimensions. Make sure to capture the important elements and details of your chosen subject.
- Consider color placement: Think about the color scheme and placement of colors in your pattern. Experiment with different color combinations and shading techniques to create depth and visual interest. Keep in mind that different yarn textures and thicknesses can also impact the final look of your rug.
- Test your pattern: Before committing to your final pattern, it’s a good idea to create a small test swatch. This will allow you to see how your design translates into rug hooking and make any necessary adjustments before starting your full-sized rug.
- Document your pattern: Once you’re satisfied with your pattern, document it for future reference. This can be a digital file, a printed copy, or even a drawing in a sketchbook. Having a record of your pattern will help you recreate it or modify it in the future.
Creating a rug hooking pattern is an exciting and creative process. Whether you’re starting from scratch or using existing resources, taking the time to plan and sketch your design will ensure a successful and satisfying rug hooking experience.
Transferring the Pattern onto Your Rug Foundation
Once you have your rug hooking pattern ready, the next step is to transfer it onto your chosen rug foundation. Transferring the pattern accurately is crucial for ensuring that your design is replicated correctly during the hooking process. Here are some methods for transferring your pattern onto your rug foundation:
- Tracing method: One common method is to use tracing paper and a pencil or pen. Place the tracing paper over your pattern and position it onto your rug foundation. Secure them in place, and then carefully trace over the lines of your pattern. This technique allows you to see the pattern lines transferred onto the foundation below.
- Transfer pen or pencil: Another method is to use a transfer pen or pencil specifically designed for fabric. Trace your pattern directly onto the foundation using the transfer pen/pencil. The lines will be easily visible and can guide you during the hooking process.
- Carbon paper: For a more traditional approach, you can use carbon paper. Place the carbon paper, carbon side down, between your pattern and the foundation. Secure them together and use a pen or pencil to trace over the pattern lines. The pressure will transfer the carbon onto the foundation, leaving behind the pattern lines.
- Freehand drawing: If you’re confident in your drawing skills, you can also freehand draw the pattern directly onto the foundation. This method allows for more flexibility and creative interpretation but requires a steady hand and a good eye for proportions.
Whichever method you choose, make sure to transfer the pattern with care and precision. Double-check that all the lines and details have been transferred correctly before starting the rug hooking process. It’s also a good idea to keep a copy of your original pattern as a reference in case any areas need clarification during the hooking process.
Remember, the transfer method you choose depends on your personal preference and the complexity of your pattern. Take your time and choose the method that works best for you and your project. With a well-transferred pattern, you’ll be on your way to creating a beautiful and accurate rug hooking masterpiece.
Preparing Your Rug Foundation
Before you begin the rug hooking process, it’s important to properly prepare your rug foundation. Your foundation serves as the base for your rug, providing stability and support for the hooked yarn. Here are some essential steps to prepare your rug foundation:
- Stretching the foundation: If you’re using a fabric-based foundation like linen or monk’s cloth, it’s crucial to stretch it tightly over a frame or hoop. This helps prevent the foundation from puckering or shifting while you’re hooking. Secure the fabric evenly to ensure a smooth surface for your rug.
- Trimming and finishing: Take the time to trim any loose threads or frayed edges from your rug foundation. These loose threads can get tangled in the hooked yarn and create bumpy areas in your rug. Additionally, consider binding the edges of your foundation with a fabric or tape to prevent any unraveling during the hooking process.
- Marking guidelines: Creating guidelines on your foundation can be helpful for maintaining consistency and ensuring your design stays within the desired dimensions. Use a fabric marker or tailor’s chalk to lightly mark reference lines or boundaries on your foundation. These guidelines will serve as a visual aid as you hook your design.
- Backing material: Depending on your rug’s purpose and the surface you’ll be placing it on, you may want to attach a backing material to your foundation. This can be a non-slip rug pad, rug canvas, or rug warp fabric. The backing material adds stability to your rug and helps prevent it from sliding or shifting on the floor.
- Tapestry frame or lap frame: If you’re working on a large or complex rug, using a tapestry frame or lap frame can be beneficial. These frames hold the rug foundation taut, allowing you to work more comfortably and with better control. They also help prevent your rug from warping or distorting during the hooking process.
By properly preparing your rug foundation, you’ll create a solid base that will support your rug hooking and help ensure a successful outcome. Take the time to stretch your foundation, trim any loose threads, mark guidelines, and consider using a backing material and frame if necessary. With a well-prepared foundation, you’ll be ready to start hooking your rug and bring your design to life.
Starting the Rug Hooking Process
Now that your rug foundation is prepared, it’s time to embark on the rug hooking process. This is where you’ll bring your design to life by hooking yarn through the foundation. Here are some essential steps to get started with rug hooking:
- Prepare your workspace: Find a comfortable and well-lit space where you can work on your rug hooking project. Make sure you have all your materials and tools easily accessible, including your yarn, hook, and any patterns or guidelines.
- Select your first yarn color: Choose the yarn color you want to start with. This can be dictated by your pattern or your personal preference. Cut a length of yarn, ensuring it’s not too short but also manageable to work with.
- Pull the yarn through: Take your rug hook and insert it through a hole in the foundation from the backside. Leave a small tail of yarn on the back and bring the rest up to the front.
- Create a loop: Using the hook, catch the yarn and bring it back through the same hole, creating a loop on the front side of the rug. Make sure the loop is secured tightly enough to hold, but not too tight that it distorts the foundation.
- Repeat the process: Move to the next hole adjacent to the first one and repeat the process. Pull the yarn through from the back, create a loop, and continue hooking. Follow your pattern or design guidelines to determine the color placement and hooking technique.
- Continue hooking: Repeat the hooking process, working row by row, until you’ve filled in the desired area with the first yarn color. If you need to change colors, secure the end of the previous yarn and start with the new color following the same technique.
- Maintain consistency: As you hook each row, make sure to maintain a consistent tension and hooking depth. This will ensure that your rug has an even appearance and the loops are uniform in size.
- Take breaks and assess your work: Rug hooking can be time-consuming, so it’s important to take breaks periodically to rest your hands and evaluate your progress. Step back and observe your work from a distance to ensure your design is coming together as desired.
The rug hooking process requires patience and attention to detail. Take your time, focus on each individual loop, and enjoy the meditative nature of hooking. With practice and perseverance, you’ll gradually see your rug design taking shape, transforming your foundation into a beautiful hooked masterpiece.
Techniques for Rug Hooking
Rug hooking is a versatile craft that offers various techniques to create different textures and effects in your rugs. Understanding and utilizing these techniques can enhance the visual appeal and depth of your rug design. Here are some common techniques for rug hooking:
- Traditional hooking: This is the most basic and commonly used technique. Insert the hook through the foundation, catch the yarn, and pull it up to form a loop. Repeat the process, creating rows of loops. This technique creates a classic look with evenly spaced loops.
- Primitive hooking: With primitive hooking, the loops are intentionally varied in length and size. This technique gives the rug a more rustic and textured appearance.
- Punch needle hooking: Using a specialized punch needle tool, push the needle through the foundation to create loops on the front side of the rug. The loops are created on the surface rather than pulled through from the back. This technique allows for quicker hooking and can produce finer details.
- Proddy hooking: Also known as proddy rugs, this technique involves using fabric strips, ribbon, or other material instead of yarn. The fabric strips are pushed through the foundation with a hook, creating a plush and textured design.
- Combining materials: Experimenting with different materials and textures can add interest to your rug design. Combining yarn, fabric, or even adding embellishments like beads or buttons can create eye-catching effects.
- Gradation and shading: By using different shades or colors of yarn, you can create gradation and shading in your design. This technique adds depth and dimension to your rug, making it visually appealing and lifelike.
- Hooking techniques for specific elements: Different elements in your design may require specific techniques to achieve the desired effect. For example, geometric patterns may benefit from precise straight lines, while foliage or floral elements may require more organic and flowing lines.
Experimenting with these rug hooking techniques can help you explore different styles and create unique designs. Mix and match techniques to achieve the desired texture, depth, and visual interest in your rug. Practice and patience are key to mastering these techniques, so don’t be afraid to experiment and let your creativity flourish.
Maintaining Consistency in Rug Hooking
Maintaining consistency in rug hooking is essential for creating a polished and professionally finished project. Consistency ensures that your loops are even, the tension is uniform, and the overall appearance of your rug is balanced. Here are some tips to help you maintain consistency in your rug hooking:
- Tension control: Consistent tension is key to achieving even loops in your rug. Avoid pulling the yarn too tightly or leaving it too loose. Practice finding the right balance of tension so that your loops are consistent throughout the rug.
- Loop height: Pay attention to the height of your loops to ensure consistency. Whether you’re aiming for short, tight loops or longer, looser loops, try to maintain consistent loop height throughout the rug. This will result in a more uniform and visually appealing finished product.
- Hooking depth: Be mindful of the depth to which you insert your hook into the foundation. Consistency in hooking depth will help prevent uneven loops and make the surface of your rug smooth and cohesive.
- Pattern guidelines: If you’re following a pattern, carefully follow the guidelines provided. This includes color placement, stitch direction, and any specific instructions for achieving consistency. Take your time to understand the pattern and refer to it frequently to ensure your rug stays true to the intended design.
- Work in sections: Breaking your rug into manageable sections can help maintain consistency throughout the project. Focus on one section at a time, ensuring that the loops and tension remain consistent within that area before moving on to the next section. This approach allows for better control and attention to detail.
- Regular breaks and evaluation: Take breaks while working on your rug to rest your hands and step back to evaluate your progress. Viewing your work from a distance can help you identify any inconsistencies or areas that require adjustment. Make necessary corrections before continuing to ensure overall consistency in your rug.
- Practice and experimentation: Consistency in rug hooking comes with practice. Take the time to experiment with different techniques, tensions, and loop heights. The more you practice, the better you’ll become at maintaining consistency in your hooking projects.
Remember, achieving consistency in rug hooking requires attention to detail and a keen eye for maintaining uniformity. Practice these tips, be patient with yourself, and embrace the learning process. With time and effort, you’ll develop the skills to create rugs that showcase a consistent and professional finish.
Exploring Different Rug Hooking Styles
Rug hooking is a versatile craft that offers various styles, allowing you to express your creativity and create rugs with unique characteristics. Here, we explore different rug hooking styles that you can experiment with:
- Primitive: This style is characterized by its simplicity and rustic charm. Primitive rugs often feature bold, geometric designs with uneven loops and a muted color palette. They reflect a more primitive and folk art aesthetic.
- Fine shading: Fine shading involves using a wide range of colors and subtly transitioning shades to create a realistic and detailed image. By skillfully blending colors and varying hooking depths, you can achieve incredible depth and dimension in your rug.
- Pictorial: Pictorial rug hooking focuses on creating detailed images, often depicting landscapes, animals, or portraits. This style requires careful planning and attention to detail, as it aims to capture the essence and likeness of the subject matter.
- Abstract: Abstract rug hooking allows for more freedom and artistic expression. Using bold shapes, vibrant colors, and unconventional designs, abstract rugs offer a contemporary and visually striking aesthetic.
- Proddy or textured rugs: Proddy rugs are made by pushing strips of fabric through the foundation, creating a plush and textured surface. These rugs can feature intricate designs, floral motifs, or whimsical patterns with a three-dimensional effect.
- Traditional or heirloom: Traditional rug hooking styles draw inspiration from historical patterns and motifs. These rugs often incorporate traditional motifs such as geometric shapes, medallions, or floral patterns. The colors and designs reflect a classic and timeless appeal.
- Geometric patterns: Geometric patterns are marked by strong lines, angles, and repetitive shapes. These designs can range from simple patterns to complex tessellations, giving your rug a modern and geometrically pleasing look.
Exploring different rug hooking styles allows you to hone your skills and develop your own artistic voice. Each style offers its own distinct beauty and creative possibilities. Don’t be afraid to mix and match techniques and styles to create rugs that are uniquely yours.
Whether you’re drawn to the simplicity of primitive designs, the intricate detail of fine shading, or the abstract nature of contemporary rugs, there’s a wide variety of rug hooking styles to explore and inspire your creativity.
Tips for Finishing Your Rug
Finishing your rug is the final step in the rug hooking process, and it’s crucial to ensure that your hard work is protected and your rug looks its best. Here are some tips to help you successfully finish your rug:
- Trimming excess fabric: Carefully trim any excess fabric from the back of your rug, ensuring that the loops are not cut or damaged in the process. This will give your rug a clean and professional finish.
- Secure loose ends: If you have any loose yarn ends on the back of your rug, secure them by weaving them back into the loops or using fabric glue to adhere them to the foundation. This will prevent them from unraveling and keep your rug tidy.
- Binding the edges: Binding the edges of your rug adds a polished and finished look. You can choose to sew on fabric binding, whipstitch the edges, or use a method called “serging” to secure the edges. This will help prevent fraying and add durability to your rug.
- Blocking your rug: Blocking is the process of shaping and straightening your rug to ensure it lays flat and retains its proper dimensions. You can achieve this by dampening your rug with water, stretching it into the desired shape, and securing it in place until it dries.
- Cleaning and blocking: If your rug becomes dirty or needs refreshing, take proper care and cleaning precautions. Vacuum your rug regularly and spot clean as needed. When necessary, give your rug a gentle hand wash with mild detergent and lay it flat to air dry before re-blocking it.
- Adding a rug pad or backing: If you plan to use your rug on a hard surface, consider adding a non-slip rug pad underneath to prevent it from sliding. Alternatively, you can attach a fabric backing to your rug for added durability and stability.
- Showcasing your rug: Once your rug is finished, display it proudly! Consider framing it, hanging it on a wall, or using it as a decorative focal point in your room. Properly cared for, your rug can become a treasured heirloom or a stunning piece of functional art.
Finishing your rug is an important step that ensures the longevity and beauty of your creation. With these tips, you’ll be able to achieve a professional finish, protect your rug, and enjoy the satisfaction of seeing your rug transformed into a wonderful piece of functional and artistic craftsmanship.
Caring for Your Hooked Rug
Proper care and maintenance are essential for preserving the beauty and longevity of your hooked rug. With the right precautions and regular upkeep, you can ensure that your rug remains in great condition for years to come. Here are some tips for caring for your hooked rug:
- Vacuum regularly: Regular vacuuming is one of the most important steps in maintaining your rug. Use a vacuum with adjustable height settings or a handheld attachment to gently remove dirt and debris from the surface. Be careful not to pull on the loops or damage the yarn.
- Rotate periodically: To prevent uneven wear and sunlight fading, rotate your rug periodically. This will distribute the pressure and exposure more evenly, ensuring that no single area receives excessive use or sunlight.
- Avoid direct sunlight: Prolonged exposure to direct sunlight can cause colors to fade over time. If possible, place your rug in an area with limited exposure to sunlight, or use curtains or blinds to filter the sunlight. Alternatively, consider using a UV-protective film on windows to block harmful UV rays.
- Protect from moisture: Moisture can cause damage to your rug, leading to mold or mildew growth and potential deterioration of the fibers. Avoid placing your rug in damp areas, and promptly clean up any spills or moisture that come into contact with the rug.
- Address stains promptly: If you encounter a stain, attend to it as soon as possible. Blot the stain gently with a clean cloth, starting from the outer edges and working your way toward the center. Avoid scrubbing or rubbing the stain, as this may spread it or damage the fibers. For stubborn stains, consult with a professional rug cleaner.
- Avoid heavy furniture: Avoid placing heavy furniture directly on your hooked rug, as this can compress the pile and cause permanent damage. Consider using furniture pads or placing the furniture on a rug pad to distribute the weight more evenly.
- Professional cleaning: Over time, your rug may benefit from professional cleaning. Consult with a professional rug cleaner experienced in handling hooked rugs to ensure that it receives the appropriate care. They can provide a thorough cleaning without causing damage to the fibers or colors.
- Storage considerations: If you need to store your rug, clean it thoroughly beforehand to remove any dirt or dust. Roll the rug with the pile side facing inward to protect the fibers. Avoid storing it in areas prone to extreme temperature or humidity fluctuations.
Caring for your hooked rug is well worth the effort. By implementing these tips and giving your rug the care it deserves, you can enjoy its beauty and functionality for many years. Remember, preventive care and regular maintenance are key to preserving the quality and lifespan of your hooked rug.