
Choose the Right Wall
When it comes to hanging a heavy shelf on a wall, selecting the right wall is crucial for stability and safety. Not all walls are created equal, and not all walls can support the weight of a heavy shelf. Here are some factors to consider when choosing the right wall:
- Wall Material: Different types of walls have different weight-bearing capacities. For example, drywall may not be as sturdy as a concrete or brick wall. Before hanging a heavy shelf, assess the strength and durability of the wall material.
- Location: Consider the location of the wall in relation to the weight distribution in the room. A wall that is connected to a load-bearing beam or a solid foundation will have better weight-bearing capabilities compared to a partition wall or an exterior wall with insulation.
- Accessibility: Evaluate whether the wall is easily accessible for installation and maintenance. Walls with obstructions such as electrical outlets, plumbing pipes, or air vents might complicate the installation process and restrict the shelf’s placement.
Once you have identified a suitable wall, it’s important to ensure that it meets your requirements for aesthetics and functionality. Consider the overall layout and design of the room, and choose a wall that complements the existing decor and provides easy access to the shelf’s contents.
Locate the Studs
Before you begin hanging a heavy shelf on the wall, it’s essential to locate the studs. Studs are vertical wooden beams within the wall that provide extra support and stability. Here’s how you can locate the studs:
- Visual Inspection: Start by visually inspecting the wall for any telltale signs of studs. Look for slight variations in the texture or color of the wall, as well as any nails or screws that may indicate the presence of studs.
- Use a Stud Finder: A stud finder is a handy tool that can accurately detect the location of studs behind the wall. Simply place the stud finder against the wall and move it horizontally until it indicates the presence of a stud. Repeat this process to mark multiple stud locations.
- Tapping Technique: Another reliable method is the tapping technique. Gently tap on the wall with your knuckles or a small hammer and listen for a solid, consistent sound. This indicates that you’ve found a stud. Mark the spot and continue tapping to locate additional studs.
- Measure from Corners: Studs are typically placed approximately 16 or 24 inches apart from each other. You can use a tape measure to measure from the corners of the wall and mark the locations where the studs are likely to be found.
Once you have successfully located the studs, mark their positions with a pencil or masking tape. These marks will serve as your reference points when it comes to attaching the brackets and installing the heavy shelf securely.
Use a Stud Finder
When it comes to hanging a heavy shelf on the wall, using a stud finder can be a game-changer. A stud finder is a handheld device that helps you locate the vertical wooden beams (studs) behind the wall. Here’s how you can effectively use a stud finder:
- Select the Right Type: There are different types of stud finders available, including magnetic stud finders, electric stud finders, and multi-sensor stud finders. Choose a stud finder that suits your needs and follow the manufacturer’s instructions for proper usage.
- Calibrate the Stud Finder: Before starting, make sure to calibrate your stud finder according to the manufacturer’s instructions. This step ensures accurate detection of the studs.
- Place the Stud Finder: Position the stud finder against the wall, making sure it is flat and level. Start at a corner of the wall and slowly slide the stud finder horizontally across the surface.
- Listen for Beeps or Visual Indicators: Depending on the type of stud finder, it will either emit a sound or display a visual indicator when it detects a stud. Pay attention to these cues as you move the stud finder along the wall.
- Mark the Stud Locations: Once the stud finder indicates the presence of a stud, mark the spot using a pencil or masking tape. Repeat this process to locate and mark multiple stud locations along the desired area for hanging the heavy shelf.
Using a stud finder allows you to accurately locate the studs, which are essential for securely supporting the weight of the heavy shelf. By following these steps, you can ensure a more stable and durable installation, giving you peace of mind that your shelf is securely attached to the wall.
Measure and Mark the Desired Height
Before hanging a heavy shelf on the wall, it’s important to determine the desired height at which you want the shelf to be installed. Here’s how you can measure and mark the desired height:
- Consider Function and Accessibility: Think about the purpose of the shelf and how you plan to use it. If you’re hanging a shelf in the kitchen, for example, you may want it at a height that is easily accessible for placing and retrieving items. Take into account the height of the tallest item you plan to place on the shelf.
- Assess Room Proportions: Take a step back and visually assess the room’s proportions. Consider the height of other furniture and elements in the room to ensure that the placement of the shelf is aesthetically pleasing and harmonious with the overall design.
- Use a Measuring Tape: With a measuring tape, measure the height from the floor to the desired position of the shelf. Take note of the measurement and consider marking it on the adjacent walls for reference.
- Account for the Shelf Thickness: If the shelf has a significant thickness, take it into account when determining the height. For example, if the shelf is 2 inches thick and you want it to be at 48 inches from the floor, mark the wall at 46 inches to account for the thickness.
- Double-Check the Measurements: After marking the desired height on the wall, it’s crucial to double-check the measurements for accuracy. Use a level to ensure that the markings are perfectly horizontal.
Measuring and marking the desired height helps ensure that the shelf is installed at the right position and aligns with your functional and aesthetic preferences. Taking the time to carefully measure and mark the height will contribute to a successful and visually pleasing installation.
Mark the Stud Locations
After locating the studs, the next step in hanging a heavy shelf on the wall is to mark their locations. By marking the stud locations, you ensure that the brackets or shelf supports are securely fastened to the wall’s structural support. Here’s how you can mark the stud locations:
- Using a Pencil: Take a pencil and make a small mark at the center of each stud. This mark should be visible and easily identifiable when you’re ready to attach the brackets or shelf supports.
- Using Masking Tape: Alternatively, you can use masking tape to mark the stud locations. Cut small pieces of masking tape and place them directly on the wall, aligning them with the center of each stud. This method allows for easy visibility and removal once the brackets or shelf supports are installed.
- Labeling: To further aid in the installation process, consider labeling the marked stud locations with numbers or letters. This can be especially helpful if you have multiple studs along the wall and need to match them with corresponding brackets or shelf supports.
- Double-Check: Once the stud locations are marked, it’s important to double-check their accuracy. Use a level or straight edge to ensure that the marks are aligned vertically and provide a straight reference for attaching the brackets or shelf supports.
Properly marking the stud locations is essential for a secure and stable installation. By following these steps, you’ll have a clear visual guide when it’s time to attach the brackets or shelf supports, ensuring that your heavy shelf is effectively supported by the wall’s structure.
Pre-drill the Holes
Before attaching the brackets or shelf supports to the wall, it’s crucial to pre-drill the holes. Pre-drilling helps to ensure that the screws or anchors go into the wall smoothly and securely. Here are the steps to pre-drill the holes for your heavy shelf:
- Choose the Right Drill Bit: Select a drill bit that matches the diameter of the screws or anchors you’ll be using to attach the brackets or shelf supports. The drill bit should be slightly smaller than the screws or anchors to create a snug fit.
- Mark the Hole Locations: Using the marked stud locations as a guide, make additional small marks on the wall where you’ll be drilling the holes for the screws or anchors. Ensure that the marks align with the center of the studs.
- Secure the Drill Bit: Insert the chosen drill bit into the drill, and securely tighten it. Make sure that the drill is set to rotate in a forward direction.
- Start Pre-drilling: Position the drill bit on one of the marked hole locations. Apply gentle pressure and start drilling into the wall. Keep the drill straight and perpendicular to the wall as you create the hole.
- Control the Depth: While drilling, be mindful of the desired depth. You want the hole to be deep enough to accommodate the screw or anchor but not too deep that it compromises the wall’s integrity. Measure the depth using a depth gauge or a piece of tape wrapped around the drill bit.
- Repeat for Each Hole: Repeat the pre-drilling process for each marked hole location. Take your time and ensure that each hole is drilled accurately and to the desired depth.
Pre-drilling the holes helps prevent the wall from cracking or splitting when you insert the screws or anchors to attach the brackets or shelf supports. By following these steps, you’ll create clean and precise holes that make the installation process smoother and more secure.
Attach the Brackets to the Wall
Once the holes are pre-drilled, the next step in hanging a heavy shelf is to attach the brackets to the wall. The brackets provide the support necessary for holding the weight of the shelf. Here’s how you can attach the brackets securely to the wall:
- Position the Brackets: Place the brackets onto the wall, aligning them with the marked stud locations. Make sure they are level and evenly spaced.
- Insert the Screws or Anchors: Insert the screws or anchors into the pre-drilled holes, going through the holes in the brackets. Start by partially screwing them in, ensuring that the brackets remain aligned and level as you work.
- Tighten the Screws: Use a screwdriver or drill to fully tighten the screws, securing the brackets to the wall. Be careful not to over-tighten as this may strip the screws or damage the wall.
- Test for Stability: Give the brackets a gentle tug to check for stability. If they feel loose or wobbly, double-check the screws to ensure they are properly tightened. Adjust as needed.
It’s important to ensure that the brackets are securely attached to the wall to provide stable support for the heavy shelf. By following these steps, you can confidently proceed to the next stage of installing the shelf and be assured of its stability and durability.
Install the Shelf onto the Brackets
With the brackets securely attached to the wall, it’s time to install the shelf onto the brackets. Proper installation ensures that the shelf is level, stable, and capable of supporting the weight it’s designed for. Here’s how you can install the shelf onto the brackets:
- Position the Shelf: Carefully place the shelf onto the brackets, ensuring that it is centered and aligns properly with the brackets. Take your time to make any necessary adjustments to achieve an even and balanced placement.
- Secure the Shelf: Once in position, use a level to ensure that the shelf is perfectly horizontal. Adjust the positioning if needed. Once level, use screws or other fastening hardware provided with the shelf to secure the shelf to the brackets. Follow the manufacturer’s instructions for securing the shelf in place.
- Check Stability: Give the shelf a gentle shake to check for stability. It should feel solid and not move or wobble. If there are any stability issues, reevaluate the attachment of the brackets and ensure they are securely fastened to the wall.
- Test Weight Capacity: Slowly add weight to the shelf to test its capacity. Begin with lightweight items, gradually increasing the load. Monitor the shelf for any signs of stress, sagging, or instability. If the shelf appears to be struggling, remove weight and consider reinforcing the installation.
Properly installing the shelf onto the brackets is vital for both aesthetics and functionality. By following these steps, you can ensure that your heavy shelf is securely and safely attached to the wall, providing a stable space to display or store your items.
Check for Stability and Adjust if Necessary
After installing the shelf onto the brackets, it’s important to check for stability and make any necessary adjustments. Ensuring that the shelf is secure and stable will prevent accidents and potential damage. Here’s how you can check for stability and make adjustments if needed:
- Gently Test the Shelf: Give the shelf a gentle shake or apply light pressure to test its stability. Make sure it feels solid and doesn’t wobble or shift. If you notice any instability, move on to the next step to address the issue.
- Tighten Loose Fasteners: If you find any screws or fasteners that are loose, use a screwdriver or appropriate tool to tighten them. Check all brackets, shelf supports, and any additional hardware to ensure everything is securely fastened.
- Reposition the Brackets: If the shelf still feels unstable, consider repositioning the brackets. Carefully remove the shelf from the brackets and adjust the position of the brackets on the wall. Ensure they are properly aligned with the marked stud locations and use a level to maintain a horizontal placement.
- Reinstall the Shelf: After repositioning the brackets, carefully reinstall the shelf onto them. Ensure it is level and centered on the brackets. Secure the shelf using the provided hardware, following the manufacturer’s instructions.
- Test Again: Once the shelf is reinstalled, repeat the stability test by gently shaking or applying slight pressure. Verify that it feels stable and secure. If necessary, repeat the adjustment process until you achieve the desired stability.
Checking for stability and making adjustments if necessary is crucial for the overall safety and functionality of your heavy shelf. By following these steps, you can ensure that your shelf is securely fastened to the wall and capable of supporting the intended weight without any stability issues.
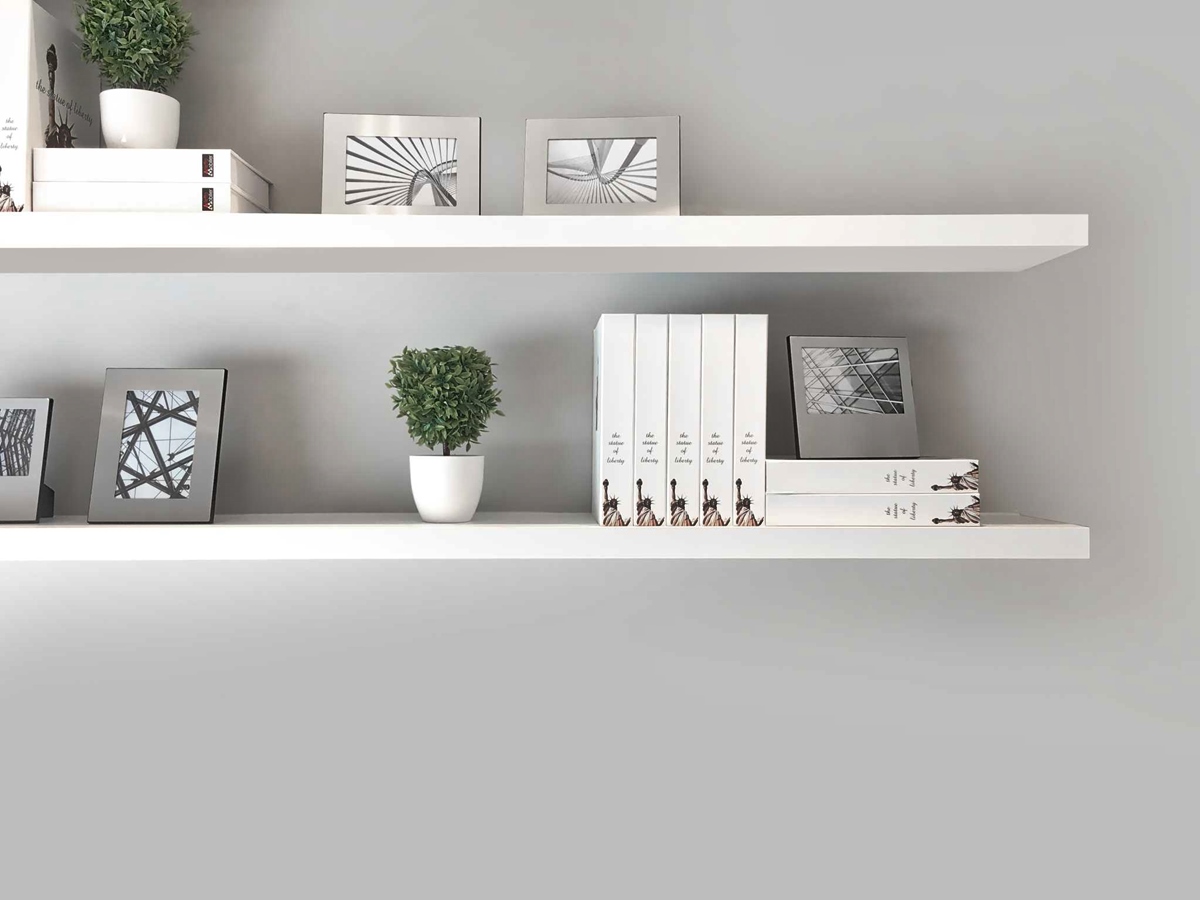
Add Decorative Touches
Once you’ve successfully hung and stabilized your heavy shelf, it’s time to add decorative touches to enhance its appearance and make it a stylish focal point in the room. Here are some ideas to add decorative touches to your shelf:
- Showcase Personal Items: Display meaningful items such as family photos, treasured mementos, or collectibles on your shelf. This not only adds a personalized touch but also sparks conversations and adds character to the space.
- Incorporate Plants: Add a touch of freshness to your shelf by incorporating potted plants or a small herb garden. Greenery brings life to the shelf and contributes to a more vibrant and inviting atmosphere.
- Arrange Books or Magazines: If your shelf has enough space, arrange your favorite books or magazines to create an organized and visually appealing display. Consider organizing them by color or size to create an aesthetically pleasing arrangement.
- Add Decorative Items: Introduce decorative objects such as sculptures, vases, or decorative bowls to add visual interest and texture. These items can complement the overall theme or style of the room and add a touch of elegance to the shelf.
- Experiment with Lighting: Consider adding lighting elements to your shelf to create ambiance and highlight specific items. Use LED strip lights or small accent lamps to illuminate the shelf and create a warm and inviting atmosphere.
Remember to regularly dust and clean your decorative items to maintain their appearance and prevent dust buildup. Arrange and rearrange the items on your shelf periodically to refresh the look and inject creativity into the display.
Adding decorative touches to your heavy shelf not only enhances its visual appeal but also allows you to showcase your personal style and enhance the overall atmosphere of the room. Have fun, get creative, and make your shelf a reflection of your unique taste and personality.