
Types of Lamp Shades for Ceiling Hanging
When it comes to choosing a lamp shade for ceiling hanging, there are various styles and materials to consider. Each type of lamp shade can bring a different ambiance and aesthetic to your space. Below are a few popular types of lamp shades for ceiling hanging:
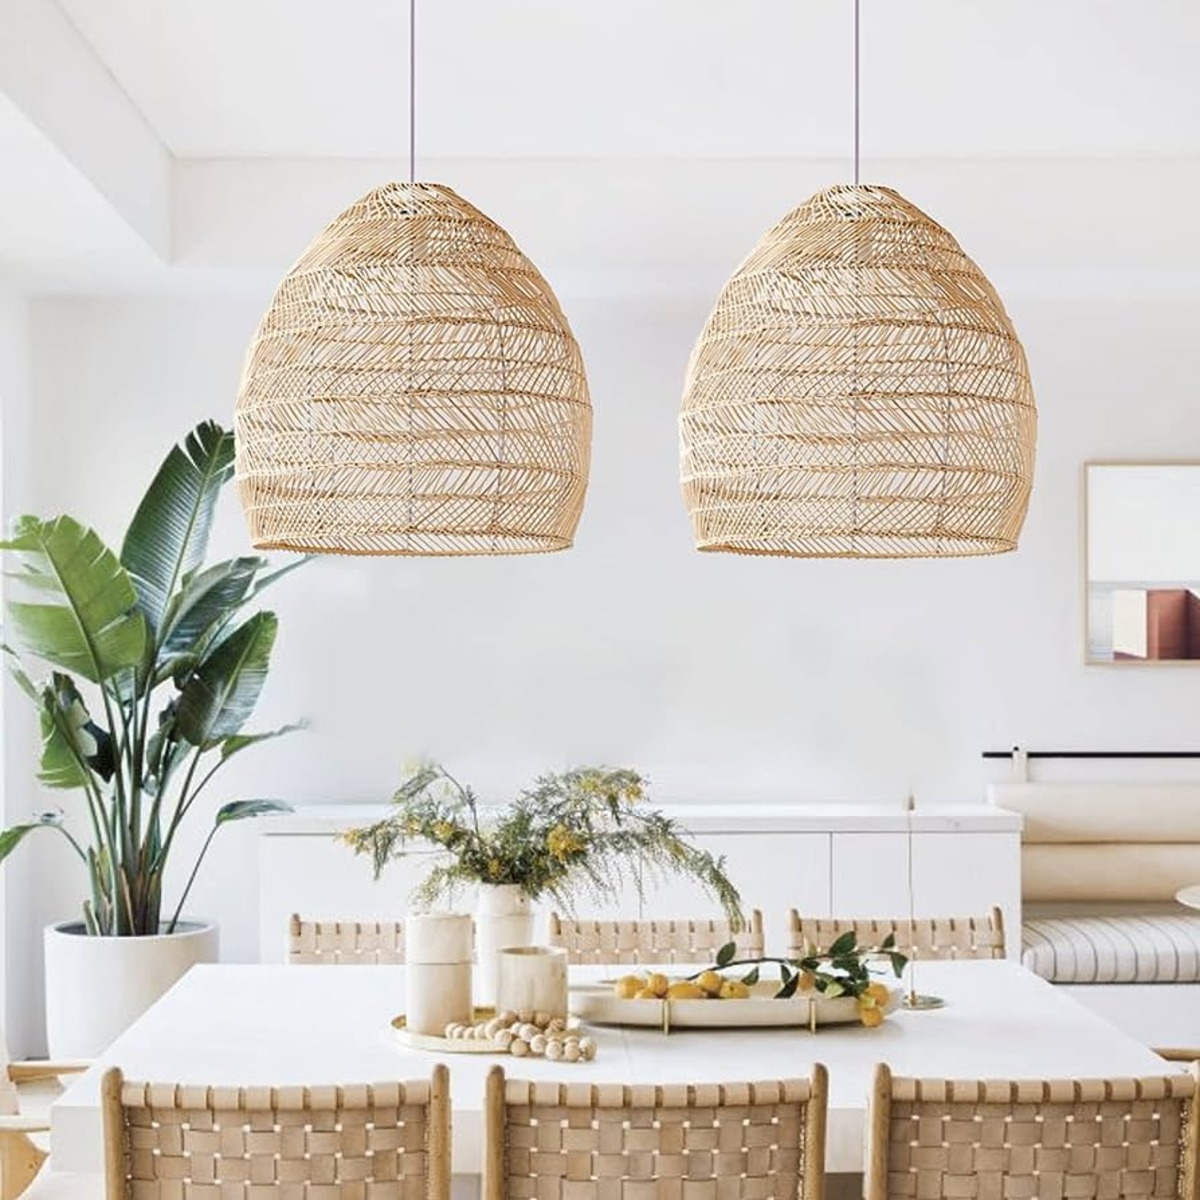
- Pendant Lamp Shades: Pendant lamp shades are versatile and come in various shapes, sizes, and materials such as glass, metal, or fabric. They usually hang from a cord or chain and provide a focal point in the room.
- Chandelier Lamp Shades: Chandelier lamp shades are often associated with elegance and sophistication. These shades are typically made of crystal, glass, or fabric, and they hang from a decorative chandelier frame. Chandelier lamp shades can add a touch of glamour to a dining room or foyer.
- Drum Lamp Shades: Drum lamp shades have a cylindrical shape with equal-sized top and bottom rings. They can be made of fabric, paper, or even metal. Drum lamp shades offer a modern and clean look, and they are suitable for different room styles.
- Empire Lamp Shades: Empire lamp shades have a classic and timeless design. They have a narrow top and a wider bottom, giving them a tapered shape resembling a cone. Empire lamp shades are commonly made of fabric and are suitable for traditional and formal settings.
- Globe Lamp Shades: Globe lamp shades are spherical or rounded in shape. They can be made of glass, plastic, or even paper. Globe lamp shades provide a soft diffused light and work well in modern or contemporary spaces.
When choosing a lamp shade for ceiling hanging, consider the style and theme of your room, as well as the level of light diffusion you desire. Additionally, take into account the size of the lamp shade to ensure it fits proportionally in the space. With the wide array of options available, you can find the perfect lamp shade that complements your decor and enhances the overall ambiance of your room.
Choosing the Right Lamp Shade
When it comes to choosing the right lamp shade for your ceiling hanging, there are several factors to consider. The lamp shade not only affects the style and ambiance of the room but also determines the quality and distribution of light. Here are some tips to help you make the right choice:
- Consider the Room’s Style: The lamp shade should complement the overall style and theme of the room. For a modern and minimalist space, opt for clean lines and neutral colors. Traditional or vintage rooms can benefit from classic and ornate lamp shades.
- Size Matters: Consider the size of the lamp shade in relation to the room and the ceiling height. A large lamp shade may overpower a small room, while a small one might get lost in a spacious area. Measure the space carefully and choose a lamp shade that fits proportionally.
- Material Selection: Lamp shades come in various materials such as fabric, paper, glass, or metal. Each material has its own unique properties and can affect the lighting effect. Fabric shades offer a softer and diffused glow, while glass or metal shades can create a more focused and dramatic lighting.
- Light Diffusion: Consider the amount of light diffusion you desire in the room. If you want more ambient lighting, choose a lamp shade with a translucent or semi-transparent material. For a more focused and direct light, opt for a shade with an opaque material.
- Color and Pattern: The color and pattern of the lamp shade can greatly impact the mood and atmosphere of the room. Neutral colors like white or cream provide a timeless and versatile look. Bold and vibrant colors can make a statement or add a pop of color to a space. Patterns and prints can add visual interest and complement the decor.
Remember to consider the functionality and purpose of the lamp shade as well. If you need task lighting, choose a shade that directs the light downwards. If you want to create a cozy and warm ambiance, opt for a shade that diffuses the light softly.
By carefully considering the style, size, material, light diffusion, and color of the lamp shade, you can find the perfect match that not only enhances the aesthetics of your room but also provides the desired lighting effect.
Determining the Height for Hanging the Lamp Shade
The height at which you hang your lamp shade from the ceiling is crucial for both functionality and aesthetics. The right height ensures proper illumination and creates a balanced visual impact in the room. Here are some steps to help you determine the ideal height to hang your lamp shade:
- Consider the Purpose: Determine the primary purpose of the lamp shade. Is it for ambient lighting, task lighting, or decorative purposes? For ambient lighting, hang the shade lower to distribute light evenly throughout the space. For task lighting, hang it closer to the area where you need focused illumination.
- Consider the Functionality: Determine the height based on the functionality of the lamp shade. For example, in a dining area, hanging the lamp shade low enough allows for better visibility and creates an intimate atmosphere. In a hallway or entryway, consider hanging the shade higher to provide general illumination without obstructing the pathway.
- Consider the Proportions: Take into account the height of the room and the furniture or objects beneath the lamp shade. You want to ensure that the lamp shade is not too high or too low, creating an unbalanced look. As a general rule, a lamp shade should hang at a height where the bottom is around eye level when seated or standing in the room.
- Consider the Clearance: Ensure that there is enough clearance between the lamp shade and any objects or obstructions in the room. Make sure it is not too close to curtains, furniture, or other hanging fixtures to prevent any accidents or damage.
- Consider the Look: Lastly, consider the visual impact and overall aesthetic of the room. Experiment with different heights and visually assess how the lamp shade looks in the space. Trust your instincts and adjust the height until you achieve a pleasing and harmonious arrangement.
Remember that these are general guidelines, and the height at which you hang your lamp shade can vary depending on personal preference and specific room requirements. Take your time to experiment and find the height that best suits your needs and enhances the overall ambiance of the room.
Finding the Center of the Room
Finding the center of the room is crucial when it comes to hanging a lamp shade from the ceiling. It ensures that the lamp shade is properly positioned and creates a balanced visual impact in the space. Here are some methods to help you find the center of the room:
- Measure the Dimensions: Measure the length and width of the room to determine the center point. Divide each measurement in half to find the midpoints along each wall. The intersection of these midpoints is the center of the room.
- Use a Measuring Tape: If you have a large room or an irregular-shaped room, you can use a measuring tape to find the center. Start at one corner of the room and measure half the distance to the opposite corner. Repeat this process for the other two corners. The point where the two measurements intersect is the center of the room.
- Visualize the Room: Stand in the room and visually assess the space. Look for any visual cues such as windows, architectural features, or furniture arrangements that can help you determine the center. Trust your instincts and use your judgment to find the point that feels most centered and balanced.
- Consider the Furniture Placement: Take into account the placement of furniture in the room. Arrange the furniture in a way that aligns with the center of the room. This can help you visually identify the center and ensure that the hanging point for the lamp shade is well-positioned.
- Mark the Center: Once you have determined the center of the room, mark it using a pencil or tape. This will serve as a reference point when installing the ceiling hook and hanging the lamp shade.
Remember that finding the exact center of the room may not always be necessary, especially in rooms with asymmetrical layouts or unique architectural features. Use these methods as a general guide to help you determine a visually pleasing placement for your lamp shade.
By finding the center of the room, you can ensure that your lamp shade is positioned in a way that creates a harmonious and balanced look in the space.
Marking the Spot for the Hanging Point
Once you have determined the center of the room, the next step is to mark the spot where you will hang the lamp shade from the ceiling. Marking the hanging point accurately ensures that the lamp shade is properly aligned and securely installed. Here are the steps to mark the spot for the hanging point:
- Measure the Distance: Measure the desired distance from the ceiling to the bottom of the lamp shade. This will depend on the height at which you want the lamp shade to hang and the length of the chain or cord attached to it. Use a measuring tape or ruler to ensure accuracy.
- Use a Pencil or Chalk: Use a pencil or chalk to mark the spot where the bottom of the lamp shade will be. Make a small dot or cross on the ceiling surface. If the ceiling is textured, you can use a piece of removable tape to mark the spot instead.
- Double-Check Alignment: Stand back and visually verify that the marked spot is aligned with the center of the room. Ensure that it is in the desired position and will not interfere with any other ceiling fixtures or furniture in the room.
- Get a Second Opinion: To ensure an accurate placement, it can be helpful to get a second opinion from someone else. They can provide an alternative perspective and confirm that the marked spot looks centered and aligned as intended.
- Adjust if Necessary: If you are not satisfied with the initial marking, feel free to make adjustments. Remove the previous mark and reposition it until you are confident with the placement. It is important to take your time during this step to ensure precision.
By marking the spot for the hanging point, you can avoid any guesswork or inaccuracies when it comes to installing the lamp shade. The marked spot serves as a reliable guide during the installation process, making it easier to attach the ceiling hook and hang the lamp shade securely.
Remember, take the necessary precautions when marking the spot on the ceiling to avoid causing any damage. If you are unsure about making permanent marks on the ceiling surface, you can consider using alternative methods such as removable hooks or adhesive hangers designed for hanging light fixtures.
Installing a Ceiling Hook
Installing a ceiling hook is an essential step in hanging a lamp shade from the ceiling. The ceiling hook provides a secure anchor point for attaching and supporting the lamp shade. Here are the steps to install a ceiling hook:
- Gather the Necessary Tools: Before you begin, ensure that you have all the necessary tools and materials. You will need a ladder, a ceiling hook, a drill, and appropriate screws or hooks based on the type of ceiling and the weight of the lamp shade.
- Choose the Placement: Decide on the exact spot where you want to install the ceiling hook. It should align with the marked spot for the hanging point and be centered in the room. Take into consideration any nearby obstructions or furniture that might affect the placement.
- Prepare the Ceiling: If your ceiling is made of drywall, locate a ceiling joist or stud to ensure a secure installation. Use a stud finder or tap lightly on the ceiling to listen for changes in sound, indicating the presence of a joist. If there is no joist, use appropriate anchors designed for drywall installations.
- Drill the Pilot Hole: Using a drill with a drill bit slightly smaller than the size of the screw or hook, carefully drill a pilot hole at the chosen spot. Be sure to drill straight and to the appropriate depth, following the instructions provided with the screws or anchors.
- Install the Ceiling Hook: Gently screw the ceiling hook into the pilot hole by hand until it is securely in place. Make sure it is straight and level. If you are using a hook with a toggle or anchor, carefully follow the instructions provided to ensure a proper installation.
- Test the Stability: Once the ceiling hook is installed, give it a gentle tug to ensure it is firmly anchored. Make sure it can support the weight of the lamp shade without any wobbling or loosening. If there is any instability, further secure the hook or consider alternative installation methods.
By following these steps, you can install a ceiling hook that provides a reliable anchor for your lamp shade. It is important to take your time and ensure a secure installation to prevent any accidents or damage to the lamp shade or ceiling.
If you are unsure about installing a ceiling hook yourself, it is always recommended to consult a professional or seek assistance from someone with experience in this type of installation to ensure safety and proper functionality.
Attaching the Lamp Shade to the Hook
Once you have installed the ceiling hook, the next step is to attach the lamp shade securely. Proper attachment ensures that the lamp shade hangs safely and remains in place. Here is how to attach the lamp shade to the hook:
- Check the Hanging Mechanism: Examine the lamp shade and its hanging mechanism. Different types of lamp shades may have different attachment methods, such as a loop, a chain, or a cord. Familiarize yourself with the specific hanging mechanism of your lamp shade.
- Attach the Hanging Hardware: If your lamp shade requires additional hardware, such as a loop or a carabiner, attach it to the lamp shade according to the manufacturer’s instructions. Make sure it is securely fastened and can support the weight of the lamp shade.
- Thread the Hanging Mechanism: If your lamp shade comes with a chain or cord, thread it through the ceiling hook. Adjust the length of the chain or cord to your desired height and make sure it is even on both sides.
- Secure the Hanging Mechanism: Once you have threaded the chain or cord through the ceiling hook, use any provided mechanism, such as a clasp or a nut, to secure it in place. This will prevent the lamp shade from slipping or falling off the hook.
- Double-Check the Stability: Test the stability of the lamp shade by giving it a gentle tug. Make sure it is securely attached to the hook and doesn’t sway or wobble. If needed, adjust the chain or cord to achieve the desired stability.
- Ensure Proper Balance: Ensure that the lamp shade hangs evenly and is balanced. If it appears lopsided, adjust the chain or cord on either side to achieve a level hanging position. This will enhance the visual appeal of the lamp shade.
By following these steps, you can securely attach the lamp shade to the hook and ensure that it hangs safely and remains in place. It is essential to check the stability and balance of the lamp shade to avoid any potential accidents or damage.
Remember to refer to the manufacturer’s instructions specific to your lamp shade to ensure proper installation and attachment. If you are unsure about the attachment method or encounter any difficulties, seek assistance from a professional or someone experienced in lamp shade installation.
Testing the Stability of the Lamp Shade
After attaching the lamp shade to the ceiling hook, it is crucial to test its stability to ensure that it is securely hung and won’t pose any risks. Testing the stability of the lamp shade involves verifying its strength and making sure it remains in position without wobbling or falling. Here’s how to test the stability of the lamp shade:
- Gentle Tugging: Give the lamp shade a gentle tug in different directions to check if it remains firmly in place. Apply slight pressure from various angles, simulating accidental bumps or movements in the room. The lamp shade should not shift or detach from the ceiling hook.
- Observe Swinging Motion: If the lamp shade swings back and forth after being tugged, check if it stabilizes reasonably quickly. A slight swinging motion is normal due to the weight and design of the lamp shade, but it should gradually come to a stop and remain steady.
- Shake Test: Gently shake the lamp shade to see if it remains secure without any shaking or rattling noises. The lamp shade should hang still and not make any loose or unstable sounds. If you notice any unsettling movements or noises, adjust the attachment to ensure a tighter fit.
- Weight Distribution: Observe the lamp shade to confirm that it hangs evenly and is balanced. If the lamp shade appears lopsided or tilts to one side, adjust the length or position of the chain or cord on either side to achieve proper balance. Ensuring a balanced weight distribution improves both aesthetics and stability.
- Strength Considerations: Take into account the weight-bearing capacity of the ceiling hook and the lamp shade itself. If the lamp shade is heavier or has a complex design, double-check the maximum weight allowance of the hook and its suitability for the specific lamp shade. If needed, consider using a sturdier or more robust hook for added stability.
By performing these stability tests, you can ensure that the lamp shade is securely attached and won’t cause any accidents or damage. It’s important to regularly check the stability of the lamp shade, especially after any adjustments or changes to the hanging mechanism or the room’s layout.
If you notice any concerns regarding stability or suspect that the lamp shade is not securely hung, seek professional assistance or consult an expert to address the issue appropriately. Prioritizing stability ensures a safe and enjoyable lighting experience in your space.
Adjusting the Height of the Lamp Shade
Adjusting the height of the lamp shade is an important step in achieving the desired lighting and aesthetic effect in your space. By making height adjustments, you can create the ideal ambiance and ensure that the lamp shade is positioned at the right level. Here’s how you can adjust the height of the lamp shade:
- Assess the Lighting: Stand back and evaluate the lighting in the room. Determine if the current height of the lamp shade provides the desired illumination. If the light is too dim or too bright, it may be necessary to adjust the height to achieve the ideal lighting level.
- Consider the Purpose: Think about the purpose of the lamp shade. If it is for general ambient lighting, consider hanging it higher to cast a wider illumination across the room. For task lighting, such as reading or working, lower the lamp shade to provide focused light in the specific area.
- Evaluate the Room’s Proportions: Take into account the size of the room and the other elements within it. If the lamp shade appears disproportionate, such as being too small in a large room or overpowering in a small space, consider adjusting the height to achieve better visual balance.
- Consider Eye Level: Adjust the height of the lamp shade so that the bottom is at or slightly below eye level when seated or standing in the room. This ensures that the light is directed at the desired level and prevents any glare or discomfort caused by a lamp shade hanging too low or too high.
- Test Different Heights: Experiment with different heights by adjusting the length of the chain or cord. Raise or lower the lamp shade gradually, assessing the lighting effect and overall aesthetics at each height. Take your time to find the sweet spot that meets your preferences.
- Get a Second Opinion: For an objective perspective, ask someone else to stand in the room and give their input on the lamp shade’s height. They may offer insights or notice things that you may have overlooked. Adjust the height accordingly based on their suggestions.
By adjusting the height of the lamp shade, you can optimize the lighting and create a visually appealing focal point in the room. Take your time during this process and consider the various factors that affect the lamp shade’s height to achieve the desired outcome.
Remember, the ideal height is subjective and may vary based on personal preferences and the specific requirements of the room. Trust your instincts and make adjustments until you achieve the perfect balance in both lighting and aesthetics.