
Materials Needed
Before you begin the process of turning a lamp into a hanging light, it’s important to gather all the necessary materials. Having everything on hand will make the process smoother and more efficient. Here’s a list of what you’ll need:
- Lamp base
- Electrical wire with plug
- Hanging kit (including chain, hooks, and screws)
- Wire strippers
- Wire connectors
- Light bulb
- Lampshade adapter or pendant light kit
- Screwdriver
- Pliers
- Step ladder or sturdy stool
Having these materials ready will ensure that you can complete the project without any interruptions or delays. It’s always a good idea to double-check that you have everything before you start working on the lamp.
Step 1: Gather Your Supplies
Before you begin the process of turning a lamp into a hanging light, it’s important to gather all the necessary supplies. Having everything on hand will make the process smoother and more efficient. Here’s what you’ll need:
- A lamp base
- An electrical wire with a plug
- A hanging kit, which includes a chain, hooks, and screws
- Wire strippers
- Wire connectors
- A light bulb
- A lampshade adapter or a pendant light kit
- A screwdriver
- A pair of pliers
- A step ladder or a sturdy stool
Make sure you have these supplies ready before you start working on your lamp. It’s a good idea to check that you have everything you need to avoid any unnecessary delays during the process.
Having a lamp base is essential, as this will serve as the foundation for your hanging light. You can choose any type of lamp base that you like, whether it’s old or new, as long as it is in good condition.
The electrical wire with a plug will allow you to connect your hanging light to a power source. Make sure the wire is long enough to reach the nearest outlet or ceiling fixture.
The hanging kit is crucial for securely suspending your lamp from the ceiling. It typically includes a chain, hooks, and screws. The chain will provide the necessary length to hang your light at the desired height, while the hooks and screws will help attach the chain to the ceiling.
Wire strippers are necessary for removing the insulation from the electrical wire, allowing you to expose the necessary wires for a proper connection. Wire connectors will be used to join the wires securely.
Choosing the right light bulb is important as it will determine the brightness and ambiance of your hanging light. Ensure that the bulb you select is compatible with the lamp base and suits your preferred lighting preferences.
If your lamp base doesn’t already have a compatible mechanism for hanging, you will need a lampshade adapter or a pendant light kit. These accessories will allow you to attach your lamp base to the hanging kit securely.
Lastly, a screwdriver and a pair of pliers will be used to disassemble the lamp, attach the hanging hardware, and make any necessary adjustments during the installation process.
Having a step ladder or a sturdy stool is essential for reaching the ceiling and safely installing your hanging light.
Now that you have gathered all your supplies, you are ready to move on to the next step: preparing your lamp for the transformation.
Step 2: Prepare the Lamp
Once you have gathered all the necessary supplies, it’s time to prepare the lamp for its transformation into a hanging light. Follow these steps to ensure a smooth and successful process:
- Unplug the lamp: Before starting any work on the lamp, make sure it is unplugged to ensure your safety.
- Remove the lampshade: Take off the lampshade by unscrewing it or detaching it from the lamp base. Set the lampshade aside as you won’t be needing it for the hanging light.
- Inspect the lamp base: Examine the lamp base for any damage or loose parts. If you notice any issues, repair or tighten the necessary components before proceeding.
- Clean the lamp base: Dust off the lamp base and wipe it clean using a soft cloth or a mild cleaning solution. This step will ensure that the lamp looks fresh and appealing once it’s hanging as a light fixture.
- Disassemble the lamp: If your lamp has a removable stem or any other parts that can be detached, unscrew or remove them carefully. This will make it easier to install the hanging hardware later on.
- Secure loose cords: If there are any loose cords or wires hanging from the lamp base, use tape or cable ties to secure them neatly. This step will prevent any accidental tugging or tangling of wires once the lamp is hanging.
Preparing the lamp is an important step as it ensures that the lamp is in good condition and ready for its new life as a hanging light. By following these steps, you will ensure a seamless installation process and a visually appealing end result.
Now that you have prepared the lamp, it’s time to move on to the next step: removing the lampshade to expose the bare bulb.
Step 3: Remove the Lampshade
Now that you have prepared the lamp base, the next step is to remove the lampshade. Follow these instructions to remove the lampshade safely:
- Ensure the lamp is unplugged: Make sure the lamp is not connected to any power source to avoid any electrical accidents.
- Locate the attachment mechanism: Examine the lampshade to identify how it is attached to the lamp base. It could be held in place by screws, clips, or a simple twist-lock mechanism.
- Unscrew or detach the lampshade: Depending on the attachment mechanism, use a screwdriver or gently twist and lift the lampshade to remove it. If there are screws, carefully unscrew them while holding the lampshade in place to prevent it from falling.
- Take off the lampshade: Once the lampshade is no longer attached, lift it off the lamp base and set it aside. You can choose to repurpose or store it for future use.
It’s important to remove the lampshade carefully to avoid any damage to the lamp base or the shade itself. Take your time and handle it gently while detaching it from the lamp base.
By removing the lampshade, you expose the bare bulb, which will be the focal point of your hanging light. This step allows for a more streamlined and modern look.
Now that the lampshade is removed, you are ready to move on to the next step: disassembling the lamp to prepare it for the hanging hardware.
Step 4: Disassemble the Lamp
Now that you have removed the lampshade, it’s time to disassemble the lamp to prepare it for the hanging hardware. Follow these steps to safely disassemble the lamp:
- Ensure the lamp is unplugged: Double-check that the lamp is not connected to any power source to avoid any accidents.
- Examine the lamp base: Take a closer look at the lamp base and identify any removable parts or components. This may include the stem, decorative elements, or any additional attachments.
- Unscrew or detach removable parts: Depending on the design of your lamp, use a screwdriver or unscrew any visible screws to detach the removable parts. Gently twist or lift the parts to separate them from the lamp base.
- Label and organize the parts: As you remove the different components, consider labeling or keeping them organized. This will make it easier to reassemble the lamp later on.
- Set aside the lamp base: Once you have disassembled the lamp and separated the parts, set aside the lamp base. This will be the main component that you will work with during the next steps.
Disassembling the lamp allows you to customize and adapt the lamp base to accommodate the hanging hardware. It also makes the installation process easier and more efficient.
Remember to handle the lamp components with care and keep track of the different parts to avoid any confusion during the reassembly process.
Now that you have disassembled the lamp, you can move on to the next step: adding the hanging hardware to transform it into a hanging light.
Step 5: Add the Hanging Hardware
With the lamp disassembled, it’s time to add the necessary hanging hardware to transform it into a hanging light. Follow these steps to successfully install the hanging hardware:
- Refer to the hanging kit: Take a look at the hanging kit you gathered earlier, which should include a chain, hooks, and screws. Familiarize yourself with the different components and their respective functions.
- Choose the desired hanging length: Decide on the desired length at which you want your hanging light to hang. This will determine the length of the chain you will cut later on.
- Attach the hanging hooks: Using the included screws, attach the hanging hooks to the ceiling or the desired location from which you want the light to hang. Make sure the hooks are securely fastened to provide proper support for the hanging lamp.
- Measure and cut the chain: Determine the length of the chain required based on your desired hanging length. Using pliers, cut the chain to the appropriate length. Remember to leave a bit of excess chain for adjustments if needed.
- Connect the chain to the lamp base: Attach one end of the chain securely to the top of the lamp base using the provided hardware or by creating loops with pliers. Ensure that the connection is strong and stable.
- Hang the lamp: Lift the lamp, holding onto the chain, and align it with the hooks installed in the ceiling. Carefully hang the lamp and adjust the height if necessary for the desired aesthetics.
- Secure the chain: Once you have hung the lamp, use pliers to secure the chain to the hanging hooks. Double-check that the chain is properly fastened and won’t accidentally detach.
Adding the hanging hardware is a crucial step in the transformation process, as it provides the necessary support and stability for the hanging light. Take your time to ensure that all connections are secure and the lamp is hanging at the desired height.
Now that the hanging hardware is in place, you are ready to proceed to the next step: installing the light bulb to bring your hanging light to life.
Step 6: Install the Light Bulb
With the hanging hardware in place, it’s time to install the light bulb and bring your hanging light to life. Follow these steps to safely and correctly install the light bulb:
- Ensure the lamp is unplugged: Before proceeding, verify that the lamp is not connected to any power source for your safety.
- Choose the appropriate light bulb: Select a light bulb that fits the specifications of your lamp base and suits your desired lighting preferences. Consider factors such as wattage, color temperature, and bulb shape.
- Remove any protective coverings: If the light bulb has any protective covers or packaging, ensure they are fully removed before installation.
- Insert the light bulb into the socket: Carefully align the base of the light bulb with the socket in the lamp base. Insert the bulb into the socket and gently twist it clockwise until it is securely in place. Avoid applying excessive force that could damage the bulb or the socket.
- Test the light bulb: Once the light bulb is installed, plug the lamp into a power source and test the light to ensure it properly illuminates. If the light bulb does not turn on, double-check the connection and try a different bulb if necessary.
It’s important to choose the appropriate light bulb for your hanging light, as it will determine the brightness and ambiance of the space it illuminates. Consider experimenting with different bulb types to achieve the desired lighting effect.
Take extra care when handling light bulbs to avoid breakage or injury. If the light bulb does break during the installation process, make sure to follow proper procedures for cleanup and disposal to ensure safety.
Now that the light bulb is installed and working, you are ready to move on to the next step: connecting the wiring to provide power to your hanging light.
Step 7: Hang the Lamp
With the light bulb installed, it’s time to hang the lamp and bring your hanging light to its final position. Follow these steps to safely hang the lamp:
- Ensure the lamp is unplugged: Before starting, make sure the lamp is not connected to any power source.
- Position the ladder or stool: Place a sturdy step ladder or stool directly beneath the hanging hooks where you attached the chain.
- Lift the lamp: Grasp the lamp base firmly, supporting the weight with both hands, and lift it off the ground.
- Hang the lamp: Lift the lamp upwards, positioning it onto the hanging hooks. Apply even pressure to prevent any sudden movements or slips.
- Secure the lamp: Once the lamp is placed on the hooks, ensure that it is stable and securely hanging in position. Gently shake the lamp to confirm that it is securely attached.
- Adjust the height if necessary: If the lamp is not at the desired height, you can adjust the chain length or reposition the hooks accordingly. This step allows you to achieve the perfect positioning and accommodate your preferences.
While hanging the lamp, it is important to prioritize safety. Ensure that the ladder or stool is stable and secure before attempting to lift the lamp. Use caution to avoid any accidents or injury during the process.
Once the lamp is securely hung, take a step back and admire your newly created hanging light. Check that it is straight and level, making any necessary adjustments before proceeding.
Now that the lamp is hanging in its designated spot, you are ready to move on to the next step: connecting the wiring to provide power to your hanging light.
Step 8: Connect the Wiring
Now that the lamp is securely hung, it’s time to connect the wiring to provide power to your hanging light. Follow these steps to safely connect the wiring:
- Ensure the lamp is unplugged: Before proceeding, make sure the lamp is not connected to any power source.
- Strip the wire ends: Use wire strippers to carefully remove the insulation from the ends of the electrical wire. Strip approximately 1 inch of insulation from each wire end to expose the underlying copper wires.
- Identify the lamp’s wiring: Locate the two wires protruding from the lamp base. One wire is typically smooth, while the other wire may have ribs or markings.
- Connect the wires: Match the smooth wire from the lamp base with the smooth wire from the electrical wire and the ribbed wire with the ribbed wire. Twist the exposed ends of the wires together in a clockwise direction.
- Secure the connection: Once the wires are twisted together, use wire connectors to join and secure the connection. Select a wire connector that fits the gauge of your wires and follows appropriate safety standards.
- Tuck the wires inside the lamp base: Gently push the connected wires into the lamp base, making sure they are neatly tucked away and not exposed.
- Check the connection: Double-check that the wiring connection is secure and the wires are properly insulated. Avoid any loose or exposed wires.
Connecting the wiring is a vital step in ensuring the functionality and safety of your hanging light. It is important to follow proper wiring techniques and guidelines to avoid any electrical hazards.
Always make sure to follow electrical safety precautions and, if needed, consult a professional electrician for assistance or guidance during the wiring process.
Now that the wiring is successfully connected, you are one step closer to enjoying your newly transformed hanging light. The next step will be to test the hanging light to ensure it functions properly.
Step 9: Test the Hanging Light
After connecting the wiring, it’s crucial to test the hanging light before considering the installation complete. Follow these steps to ensure the functionality and safety of your new hanging light:
- Ensure the lamp is securely hung: Confirm that the lamp is properly hung from the hooks and that all connections and components are secure.
- Plug in the lamp: Connect the lamp to a power source by plugging it into a nearby outlet. Check that the outlet is functioning correctly.
- Turn on the light switch: Flip the light switch to the “on” position to supply power to the hanging light.
- Observe the light bulb: Take note of whether the light bulb illuminates as expected. Check that the brightness and color temperature are satisfactory to your preferences.
- Check for any issues: Look out for any flickering, buzzing, or signs of electrical malfunctions. Ensure that the light bulb remains securely in the socket during the test.
- Test the on/off function: Toggle the light switch on and off a few times to ensure that the hanging light responds accordingly.
- Inspect the wiring connection: Examine the wiring connection inside the lamp base to ensure it remains secure and insulated during the testing process.
Testing the hanging light is essential to ensure that it functions properly and meets your expectations. By closely observing the light bulb and checking for any issues, you can identify and address any potential concerns before finalizing the installation.
If you encounter any problems during the testing phase, such as flickering lights or loose connections, it’s important to troubleshoot and resolve them promptly. In such cases, consulting an electrician may be advisable to ensure proper electrical safety.
Once you are satisfied with the functionality and performance of your hanging light, you can move on to the last step: enjoying your newly transformed space illuminated by your hanging light.
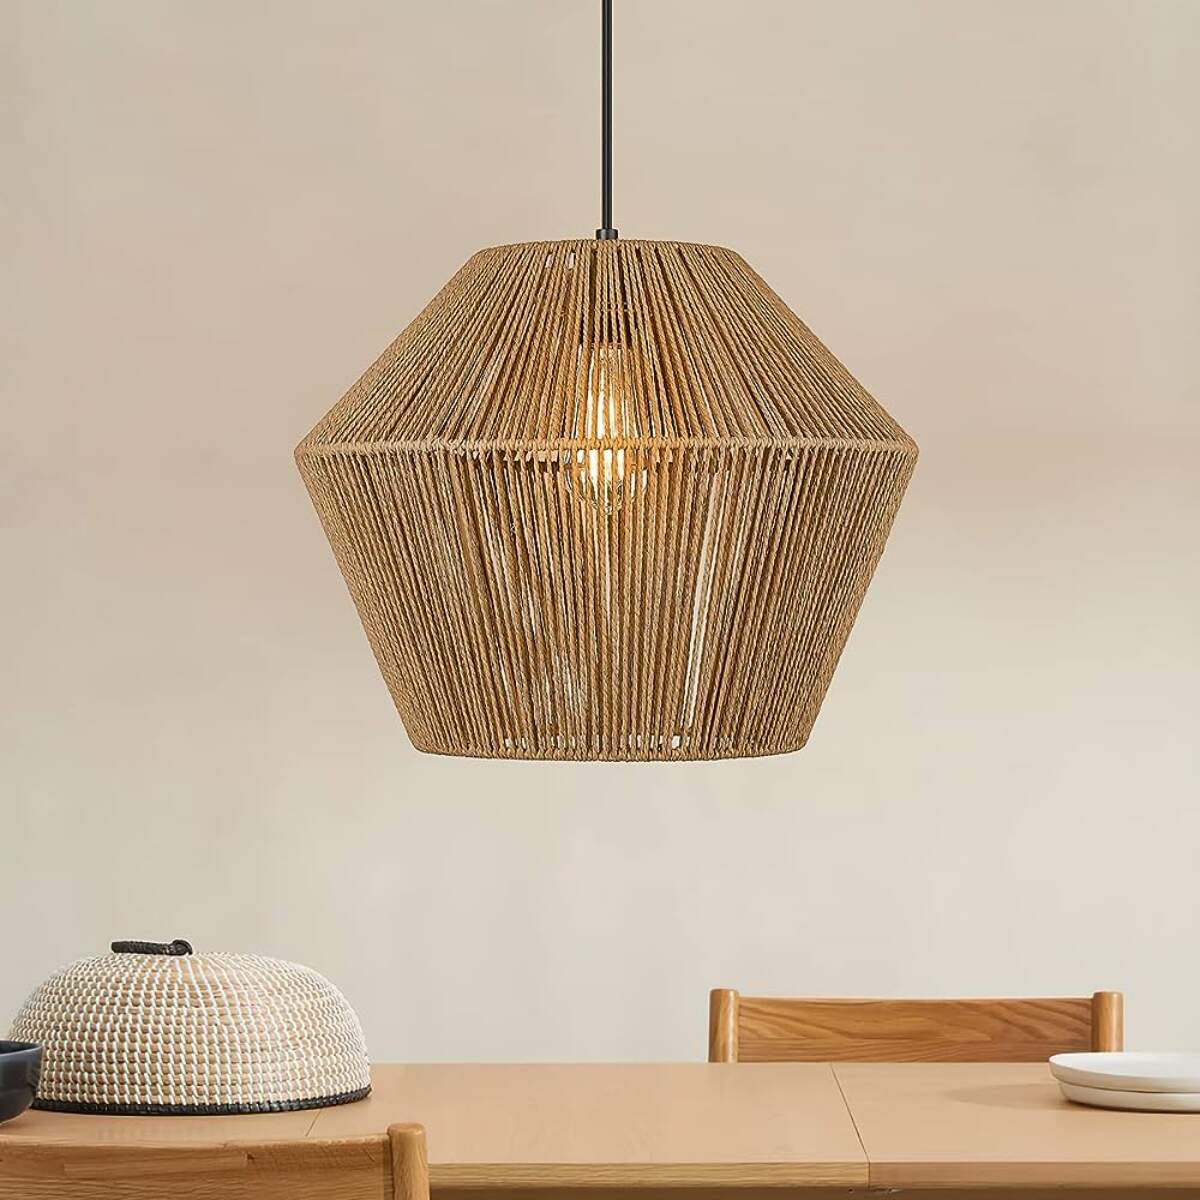
Step 10: Enjoy Your New Hanging Light
Congratulations! You have successfully transformed your lamp into a hanging light. Now it’s time to sit back, relax, and enjoy the ambiance and functionality of your new lighting fixture. Here are some ways to fully embrace and appreciate your hanging light:
- Illuminate your space: Turn on your hanging light and bask in the warm and inviting glow it provides. Notice how it enhances the atmosphere of the room and adds a touch of elegance to your decor.
- Adjust the height: If desired, you can further customize the look and feel of your hanging light by adjusting the chain to achieve your preferred height. Experiment with different heights until you find the perfect balance.
- Coordinate with your decor: Consider how your new hanging light complements the overall aesthetic of your space. Coordinate it with other design elements, such as furniture, color schemes, and textures, to create a cohesive and visually pleasing environment.
- Create focal points: Strategically position your hanging light to highlight specific areas or features in the room. It can serve as a striking focal point above a dining table, in a cozy reading nook, or as an eye-catching centerpiece in a living room.
- Experiment with dimmers: If your hanging light supports dimmable bulbs or has a compatible dimmer switch, take advantage of this feature to create different moods and levels of brightness throughout the day or for special occasions.
- Share the joy: Invite family and friends over to experience the ambiance and warmth of your new hanging light. Gather around it for memorable conversations, intimate dinners, or simply to create a welcoming and inviting atmosphere.
- Regular maintenance: To keep your hanging light looking its best, dust it regularly with a soft cloth or duster. Clean the light bulb and shade if needed, following manufacturer guidelines. This will help maintain its functionality and appearance over time.
Your new hanging light is not just a source of illumination but also a design element that can transform your living space. Embrace its presence and uniqueness, and let it elevate the overall aesthetic and ambiance of your home.
Remember, safety is paramount when enjoying your hanging light. Follow proper electrical guidelines, handle the light with care, and promptly address any maintenance or performance issues that may arise.
Now is the time to bask in the delightful glow of your newly transformed lamp, enjoy the ambiance it brings, and revel in the sense of accomplishment in creating a beautiful and functional hanging light for your space.