
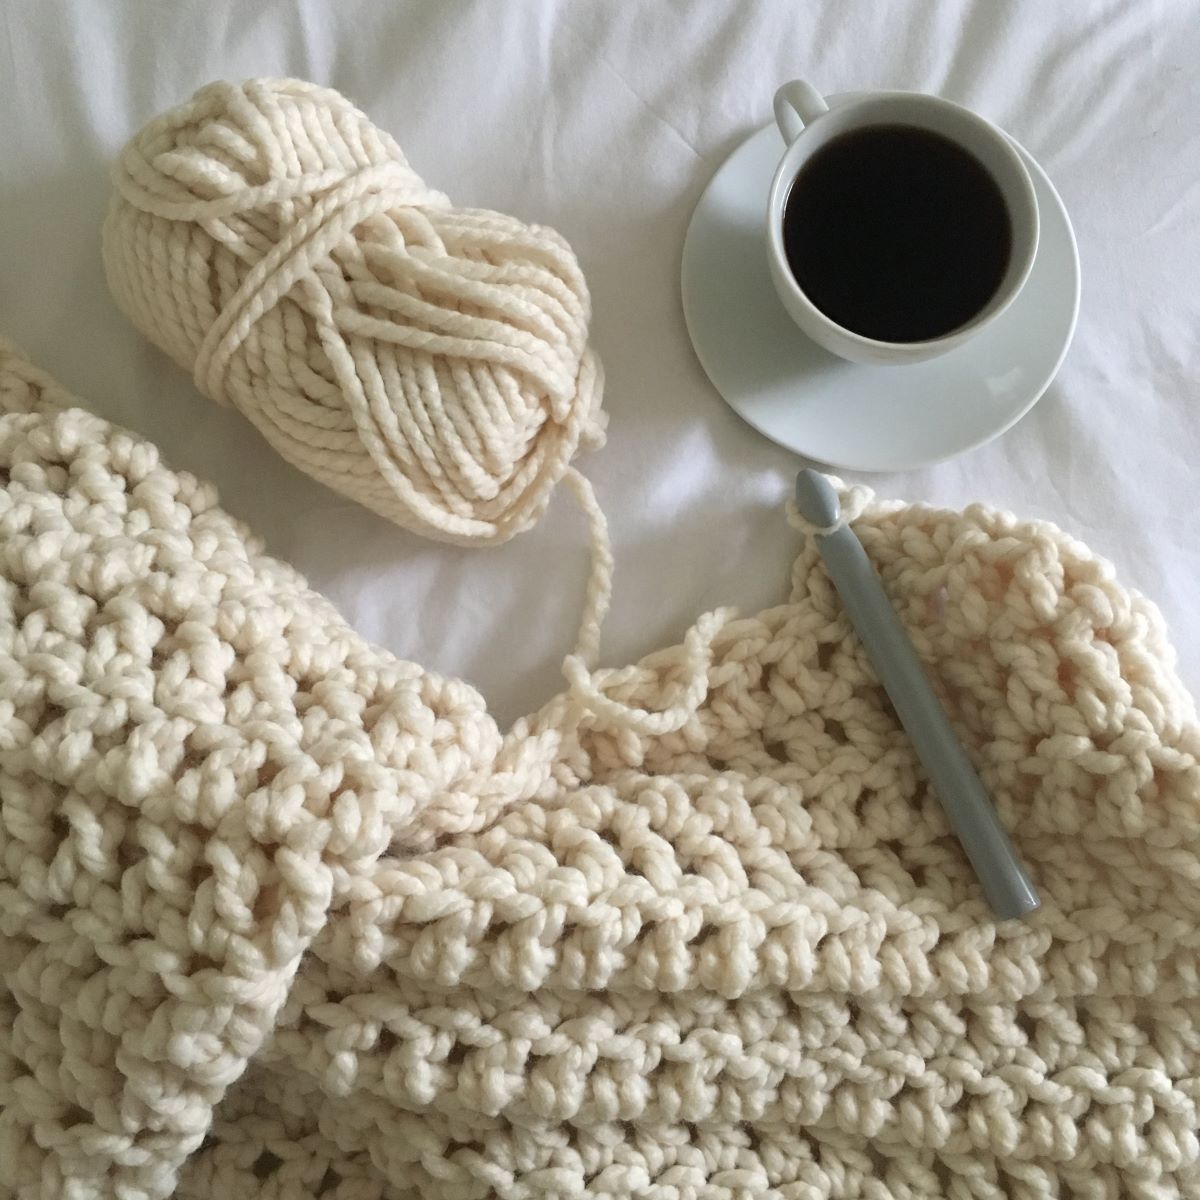
Choosing the Right Yarn and Hook Size
When it comes to hand crocheting a chunky blanket, one of the most important steps is choosing the right yarn and hook size. The yarn and hook you select will determine the final look and feel of your blanket, so it’s essential to choose wisely. Here’s how to go about it:
1. Consider the thickness: Chunky blankets are known for their cozy and warm texture, so opt for a yarn that is thick and soft. Look for yarn labeled as “super bulky” or “jumbo” weight, as these will create the desired chunky effect. The thickness of the yarn will determine the overall thickness and weight of your blanket.
2. Decide on the material: Yarn comes in various materials such as acrylic, wool, cotton, and blends. Each material has its own unique qualities and benefits. Acrylic yarn is a popular choice due to its affordability and practicality, as it is machine washable. Wool yarn offers excellent warmth and durability, but it may require more delicate care. Consider your priorities, such as ease of maintenance and personal preference, when choosing the material.
3. Select the hook size: The hook size you use will depend on the thickness of your yarn. For super bulky yarn, a larger hook size, such as a size P (11.5 mm) or Q (16 mm), is recommended. The larger hook allows for easier stitching and helps create larger gaps between stitches, resulting in a more prominent chunky appearance.
4. Experiment and swatch: Before diving straight into your blanket project, take the time to experiment and create a swatch. Use the chosen yarn and hook size to crochet a small sample square to get a sense of how it looks and feels. This step will allow you to adjust your hook size or yarn choice if needed, ensuring you achieve the desired outcome for your blanket.
Remember, choosing the right yarn and hook size is crucial for creating a chunky blanket that is stylish, cozy, and matches your personal preferences. So take your time, explore different options, and make an informed decision before you begin your hand crochet journey.
Making a Slip Knot
Before you can start crocheting your chunky blanket, you’ll need to know how to make a slip knot. This essential step forms the foundation of your crochet project and allows you to easily attach your yarn to the crochet hook. Follow these simple steps to make a slip knot:
1. Start by holding the end of your yarn between your thumb and index finger. Leave a tail of about 6 inches to secure the slip knot later.
2. Create a loop with the yarn in your hand, crossing the yarn over itself.
3. Take the end of the yarn that is attached to the ball and pass it through the loop from the bottom up.
4. Gently pull the loop to tighten it around the yarn tail.
5. Place your crochet hook through the loop of the slip knot.
6. Hold onto the tail of the yarn and pull it to tighten the slip knot around the crochet hook.
Now you have successfully made a slip knot and your crochet hook is ready to begin crocheting your chunky blanket. The slip knot creates a loop that can be easily adjusted on the hook and provides a secure starting point for your yarn.
Remember to create the slip knot with a tension that allows for smooth movement along the hook. Avoid making it too tight, as this can make it difficult to crochet the initial stitches. Practice creating slip knots until you feel comfortable and confident in your technique.
With your slip knot in place, you are now prepared to move on to the next step: starting the foundation chain for your chunky blanket.
Starting the Foundation Chain
Once you have made a slip knot, the next step in hand crocheting a chunky blanket is to create the foundation chain. The foundation chain acts as the base for your stitches and determines the width of your blanket. Follow these steps to start your foundation chain:
1. Hold the crochet hook in your dominant hand, with the slip knot loop on the hook.
2. With your other hand, grab the yarn end attached to the ball and loop it over the hook, creating a new loop around the hook.
3. Hold onto the new loop with your thumb and index finger to secure it in place.
4. With the hook, pull the new loop through the slip knot loop, creating a chain stitch.
5. Repeat steps 2 to 4 until you reach the desired number of stitches for your foundation chain. Counting the stitches can help ensure that your chain is the correct length.
The size of your foundation chain will depend on the desired width of your chunky blanket. Keep in mind that the foundation chain should be longer than the final width you want, as you will be adding rows to increase the size. Additionally, it is important to maintain a consistent tension throughout the foundation chain to ensure an even and professional finish.
As you work on your foundation chain, it is common to encounter challenges such as tension issues or accidentally twisting the chain. If you find your chain getting too tight or too loose, adjust your grip on the hook and yarn accordingly. If you accidentally twist the chain, simply unravel it and start again. Remember, practice makes perfect, so don’t be discouraged if it takes a few tries to get it just right.
Once you have completed your foundation chain, you are ready to move on to the next step: single crocheting in each chain to form the first row of your chunky blanket.
Single Crochet in Each Chain
After creating your foundation chain, it’s time to start crocheting the first row of your chunky blanket using the single crochet stitch. The single crochet stitch is one of the basic stitches in crochet and forms a tight and sturdy fabric. Follow these steps to single crochet in each chain:
1. Insert your crochet hook into the second chain from the hook. This is because the first chain from the hook does not count as a stitch.
2. Yarn over by wrapping the yarn from behind the hook to the front. The yarn should be positioned on the same side as your dominant hand.
3. Pull the yarn through the chain stitch, creating two loops on the crochet hook.
4. Yarn over again and pull the yarn through both loops on the hook. This completes one single crochet stitch.
5. Continue to insert the hook into the next chain, yarn over, pull through, and yarn over again to complete a single crochet stitch. Repeat this step for each chain across the foundation chain.
6. Once you reach the end of the row, you should have one loop remaining on your crochet hook.
7. Turn your work by rotating the blanket clockwise, so you can start working on the next row.
8. Repeat the process of single crocheting in each chain across the row, working in the top loops of the stitches from the previous row. Keep the tension consistent to ensure an even fabric.
By single crocheting in each chain, you are establishing the base row of your chunky blanket. This row will serve as the starting point for subsequent rows, where you will continue to single crochet to build the height and create the texture of your blanket.
Remember to take your time and maintain a steady rhythm as you work each stitch. Consistency and attention to detail will result in a beautifully crafted chunky blanket that you can be proud of.
Adding Rows to Increase the Size
Once you have completed the foundation chain and the first row of single crochet stitches, it’s time to add rows to your chunky blanket to increase its size. Adding rows is a straightforward process that involves repeating the single crochet stitch across each row. Follow these steps to add rows and expand the size of your blanket:
1. Turn your work at the end of each row by rotating the blanket clockwise.
2. Chain one stitch to act as a turning chain. This turning chain serves as the first stitch of the new row.
3. Insert your crochet hook into the first stitch of the previous row, which is located in the top loop of the stitch.
4. Yarn over and pull the yarn through the stitch, creating two loops on the hook.
5. Yarn over again and pull through both loops, completing a single crochet stitch.
6. Repeat step 3 to step 5 across the row, working in each stitch from the previous row.
7. Continue adding rows in this manner until your chunky blanket reaches the desired length. Remember to turn your work and chain one stitch at the beginning of each new row.
As you add more rows, you’ll notice your blanket growing in height and width, gradually taking shape. Take the time to periodically check the width and length of your blanket to ensure it matches your desired dimensions. If needed, you can add or remove rows to achieve the ideal size.
It’s important to maintain a consistent tension throughout each row to ensure an even and cohesive blanket. Pay attention to the height of your stitches and adjust your tension if necessary. Consistency in stitch height will help create a neat and polished finished product.
Adding rows to increase the size of your chunky blanket allows you to customize it to your preference. Whether you want a small lap blanket or a large throw, the process of adding rows is simple and allows for flexibility and creativity in your project.
Continue adding rows until your chunky blanket reaches its desired size, and get ready to enjoy the cozy comfort of your beautiful handmade creation.
Checking the Width and Length
As you continue to add rows to your chunky blanket, it’s essential to periodically check the width and length to ensure it is progressing according to your desired dimensions. Checking the width and length allows you to make any necessary adjustments and ensures that your finished blanket meets your expectations. Here’s how to check the width and length of your chunky blanket:
1. Lay your blanket on a flat surface, such as a table or the floor. Smooth out any wrinkles or folds to get an accurate measurement.
2. Using a measuring tape, measure the width of your blanket from one end to the other. This measurement will represent the horizontal dimension of your blanket.
3. If the width is too narrow and doesn’t match your desired size, you can add more rows to increase it. Conversely, if the width is too wide, you can remove rows to achieve the desired width.
4. Next, measure the length of your blanket from the top to the bottom. This measurement represents the vertical dimension of your blanket, determining how long it will be.
5. Similar to the width, if the length is too short, you can add more rows to increase it. If it’s too long, you can remove rows to achieve the desired length.
6. Compare the measurements of your blanket to the desired dimensions you had in mind. If it matches, congratulations! You’re right on track. If not, make the necessary adjustments by adding or removing rows as needed.
Remember that the width and length of your blanket can be customized to suit your preferences. Some people prefer larger blankets for snuggling, while others may prefer smaller ones for decorative purposes. The choice is entirely up to you.
By checking the width and length of your chunky blanket throughout the crocheting process, you ensure that it meets your expectations in terms of size and dimensions. Taking the time to make these measurements helps avoid any surprises when you finish your project and allows you to create a blanket tailored to your liking.
Continue to crochet and periodically check the width and length until your chunky blanket reaches the perfect size, ensuring a cozy and satisfying end result.
Adding Edges to the Blanket
Once you have completed the main body of your chunky blanket, adding edges can provide a finished and polished look. Edging is a decorative technique that adds a border to the outer edges of the blanket, enhancing its overall appearance. Here are a few options for adding edges to your chunky blanket:
1. Single Crochet Border: One simple way to add an edge is by working a single crochet border around the entire perimeter of the blanket. Start in one corner and single crochet evenly along each side, placing one single crochet stitch into each stitch or space. This border can be as wide or narrow as you desire, and it provides a clean and neat finish.
2. Shell Border: A shell border is a more intricate option that creates a scalloped or rounded edge along the blanket. To crochet a shell border, start in one corner and work a set number of double crochet stitches, typically 5 or 7, into the same stitch or space. Then, skip a few stitches or spaces and repeat the set of double crochet stitches. This pattern creates a beautiful wave-like effect around the edge of the blanket.
3. Picot Border: A picot border adds a delicate and decorative touch to the blanket. To create a picot border, single crochet a few stitches along the edge, then chain 3 or 4 stitches, and slip stitch back into the first chain to create a small loop. Repeat this process along the entire edge of the blanket. The picot loops add a lovely texture and can be spaced closer together or further apart, depending on your preference.
4. Ribbed Border: For a more textured and structured edge, you can crochet a ribbed border using a combination of single crochet and double crochet stitches. This border adds depth and interest to the blanket, giving it a unique and defined look.
Consider the style and purpose of your chunky blanket when choosing an edge. Some edges may be more suitable for a cozy throw blanket, while others may be appropriate for a decorative accent or baby blanket.
Before adding the edge, it’s a good idea to practice the chosen border on a small swatch of fabric to ensure you are comfortable with the stitch pattern and gauge. This way, you can make any necessary adjustments before applying the border to your blanket.
The choice of color for the edge is also important. You can either use the same yarn color as your main body, choose a complementary color, or opt for a contrasting color to make the edge stand out.
Adding edges to your chunky blanket is a creative way to add a finishing touch and showcase your personal style. Select a border that complements your design and enjoy the final result of your beautifully edged chunky blanket.
Tying Off the Yarn
Once you have completed all the desired rows and added edges to your chunky blanket, it’s time to tie off the yarn to secure your work and prevent unravelling. Tying off the yarn is the final step in your crocheting journey, ensuring that your blanket remains intact and ready to be enjoyed. Follow these steps to tie off the yarn:
1. Cut the working yarn, leaving a tail of about 6 inches. This tail will be used to secure the end of the yarn.
2. Thread the tail of the yarn through a yarn needle. If you don’t have a yarn needle, you can also use a crochet hook or your fingers for this step.
3. Weave the needle or hook through the final stitch of your blanket, going under the top loops of the stitch.
4. Pull the yarn tail through the stitch, leaving a loop on the backside of your blanket.
5. Thread the needle or hook through the loop on the backside of the blanket, creating a small knot. This ensures the yarn is secure and won’t come undone.
6. Gently pull the yarn to tighten the knot, but be careful not to pull too tightly to avoid distorting the stitch or fabric.
7. Trim any excess yarn close to the knot, leaving a small tail. Be cautious not to cut the blanket or any other stitches in the process.
By tying off the yarn in this manner, you secure the loose end and prevent the blanket from unraveling or coming apart. Taking the time to tie off the yarn ensures the longevity and durability of your chunky blanket.
If desired, you can repeat the tying-off process on any other loose ends or yarn tails that remain from changing colors or joining new skeins during the crocheting process. This ensures that all ends are neatly secured, providing a clean and professional finish.
Remember, tying off the yarn is a crucial step in completing your chunky blanket. It’s an opportunity to admire your hard work and appreciate the beautiful creation you’ve brought to life.
Congratulations! Your chunky blanket is now ready to be used, displayed, or gifted. Wrap yourself in its warmth and enjoy the cozy comfort of your handmade masterpiece.
Weaving in Loose Ends
Weaving in loose ends is an important step in the finishing process of your chunky blanket. It involves securing any loose yarn tails or ends left behind from changing colors or joining new skeins. By properly weaving in these loose ends, you ensure a clean and professional-looking final product. Here’s how to weave in loose ends:
1. Thread the loose end onto a yarn needle, ensuring that the needle has a large enough eye to accommodate the yarn.
2. Insert the needle into the back of your work, following the path of the stitches. This helps to hide the loose end and prevent it from being visible on the front side of the blanket.
3. Weave the needle through the stitches in a zigzag or back-and-forth motion. This helps to distribute the yarn evenly and creates a secure weave.
4. After weaving for a few inches, gently pull the needle and yarn to tighten the weave. Be careful not to pull too tightly, as this could cause the fabric to pucker or distort.
5. Continue weaving and zigzagging for several inches, making sure the loose end is completely hidden within the stitches.
6. To secure the loose end, thread the needle through the woven yarn, creating a small loop or knot. This helps to prevent the end from coming loose over time.
7. Trim any excess yarn close to the secured end, being careful not to cut any surrounding stitches.
Repeat the above steps for each loose end or yarn tail that needs to be woven in. This includes any ends from changing colors, joining new skeins, or making adjustments during the crocheting process.
By taking the time to weave in loose ends, you ensure that your chunky blanket maintains its structural integrity and withstands regular use. It also gives your blanket a polished and professional appearance.
Remember to weave in the loose ends as you go to avoid a daunting task at the end. It’s easier to weave in a few ends as you work on your blanket instead of dealing with a bunch of loose ends when you’re done.
Now that you have successfully woven in all the loose ends, your chunky blanket is complete and ready for use. Take a moment to appreciate your hard work and enjoy the cozy comfort of your beautifully finished handmade creation.
Care and Maintenance of the Blanket
To keep your chunky blanket looking its best and to ensure its longevity, proper care and maintenance are essential. Follow these guidelines to keep your blanket in great condition:
1. Read the Care Instructions: Check the yarn label for any specific care instructions provided by the manufacturer. Different yarn materials may require different care methods, such as hand washing or machine washing on a gentle cycle. Follow these instructions to avoid damaging your blanket.
2. Hand Wash or Machine Wash: If hand washing is recommended, fill a basin or sink with lukewarm water and a gentle wool or delicate detergent. Gently submerge the blanket, swish it around, and let it soak for a few minutes. Rinse thoroughly with clean water, being careful not to wring or twist the blanket. For machine washing, place the blanket in a laundry bag or pillowcase to protect it and use a delicate or gentle cycle.
3. Dry Flat or Tumble Dry: After washing, carefully remove excess water by gently pressing the blanket between absorbent towels. Lay the blanket flat on a clean surface, preferably on a towel or a drying rack, to air dry. If machine drying is allowed, use a low heat or delicate setting to prevent shrinkage or damage. Make sure the blanket is completely dry before storing or using it.
4. Avoid Excessive Sunlight: Prolonged exposure to direct sunlight can cause the colors of your blanket to fade over time. To preserve the vibrancy, place your blanket away from direct sunlight or use UV-blocking curtains or blinds to protect it when not in use.
5. Protect from Pets and Rough Surfaces: Keep your blanket away from pets with sharp claws that could potentially snag or damage the yarn fibers. Additionally, avoid placing the blanket on rough surfaces to prevent unnecessary wear and tear.
6. Regularly Refresh and Air Out: To keep your blanket fresh, periodically shake it out or fluff it gently. This helps to remove any dust or debris that may have accumulated. If your blanket has a specific odor, you can air it out outdoors on a sunny day or use a fabric refresher spray to give it a pleasant scent.
7. Store Properly: When not in use, store your chunky blanket in a clean, dry, and well-ventilated area. Avoid storing it in damp or humid conditions, as this can lead to mold or mildew growth. Fold the blanket neatly or roll it up to prevent creases or wrinkles.
By following these care and maintenance tips, your chunky blanket will remain soft, cozy, and beautiful for years to come. Regular care ensures that your handmade creation continues to bring warmth and comfort into your life.
Enjoy the luxuriousness of your well-cared-for chunky blanket and keep it as a cherished item or a thoughtful gift to be treasured.