
Choose the Right Size Wick
When it comes to achieving an even burn with your candles, one crucial factor to consider is choosing the right size wick. The wick plays a vital role in how your candle burns, affecting the flame’s size, intensity, and overall performance.
Why is the wick size important?
The wick size determines how much fuel the flame consumes and how quickly it can melt the surrounding wax. An improperly sized wick can result in uneven burning, tunneling, or a weak flame that struggles to reach the edges of the container.
How to choose the right size wick?
First, consider the diameter of your candle. A general rule of thumb is to select a wick that is approximately the same width as your candle. For example, if your candle has a 2-inch diameter, start with a wick labeled for 2-inch diameter candles.
However, it’s also essential to consider the specific characteristics of your candle’s wax. Different waxes have different burn properties. Some waxes may require a larger wick to achieve a full melt pool, while others may need a smaller wick to prevent overheating.
To determine the ideal wick size, it’s helpful to consult the guidelines provided by the candle-making supply company or the wick manufacturer. These resources often offer recommendations based on specific wax types and candle sizes.
Experimentation and testing
In some cases, you may need to engage in a bit of trial and error to find the perfect wick size for your candle. It’s a good practice to test different wick sizes by making small test candles or purchasing sample wick packs to see how they perform.
During the testing phase, pay attention to how the wick burns. You want a steady, teardrop-shaped flame that doesn’t flicker excessively or create significant soot. If your candle exhibits any of these issues, it may be a sign that you need to adjust to a different wick size.
Choosing the correct wick size is an essential step in getting your candle to burn evenly. By selecting a suitable wick size for your candle’s diameter and wax type, you can help ensure a consistent burn from start to finish, creating a beautiful and enjoyable candle experience.
Trim the Wick Before Lighting
To promote an even burn and prevent potential issues, it’s crucial to trim the wick before lighting your candle. Trimming the wick helps control the flame’s size and prevents excessive soot and mushrooming.
Why is trimming the wick important?
When a candle burns, the wick gradually becomes longer due to the combustion process. If the wick is too long, it can produce a larger flame, leading to a faster rate of wax consumption and increased heat. This can cause your candle to burn unevenly, create excessive smoke, and even pose a fire hazard.
When should you trim the wick?
Before each lighting session, it’s best to trim the wick to a length of about 1/4 inch. This will help ensure a controlled flame and prevent any potential issues associated with a long wick.
How to trim the wick effectively?
Here’s a simple step-by-step guide to trimming your candle’s wick:
- Ensure that your candle is extinguished and has cooled down.
- Gently remove any debris or ashes from the wax if present.
- Using a pair of scissors or a wick trimmer, trim the wick to about 1/4 inch in length. Be careful not to cut it too short, as an excessively short wick may not create a stable flame.
- Dispose of the trimmed wick in a safe manner, such as placing it in the trash.
Benefits of trimming the wick
Trimming the wick has several advantages. It helps prevent excessive smoke, reduces the chances of black soot accumulating on the container walls, and allows for a cleaner burn. Additionally, a properly trimmed wick promotes longer candle life by slowing down the rate at which the wax is consumed.
By taking a few moments to trim the wick before each use, you can optimize your candle’s performance, ensuring a consistent and even burn throughout its lifespan.
Allow the Wax to Melt Fully Before Extinguishing
One of the key factors in achieving an even burn with your candle is allowing the wax to melt fully across the surface before extinguishing it. This step is crucial for maintaining a consistent burn each time you light your candle.
Why is it important to let the wax melt fully?
When you burn a candle, it forms a melt pool – the liquid wax that forms around the wick as it melts. Allowing the wax to melt across the entire surface of the candle ensures that the subsequent burn is even and prevents tunneling or uneven wax distribution.
How long should you let the wax melt?
The time it takes for the wax to melt completely varies depending on factors such as the candle’s size, wax type, and environmental conditions. As a general guideline, it’s recommended to burn your candle for at least one hour for every inch in diameter.
Why is patience important?
Rushing the burning process and extinguishing the candle before the wax has fully melted can lead to uneven burning. This can result in wasted wax on the sides of the container, limiting the lifespan of your candle and diminishing its aesthetic appeal.
The benefits of allowing the wax to melt
By exercising patience and allowing the wax to melt fully, you can maximize the longevity and performance of your candle. Allowing the wax to reach a complete melt pool helps ensure an even burn each time, avoiding issues like tunneling and leaving you with a clean, professional-looking finish.
What to consider when melting the wax
It’s important to take safety precautions when letting the wax melt fully. Ensure that you place your candle on a stable, heat-resistant surface away from flammable objects. Never leave a burning candle unattended, and always follow the manufacturer’s instructions for safe usage.
Patience is key when it comes to achieving an even burn with your candles. By allowing the wax to melt fully before extinguishing, you can enhance the performance and longevity of your candles, providing you with a delightful and visually appealing candle experience.
Avoid Drafts and Air Currents
When you light a candle, it’s essential to ensure that it’s placed in a draft-free environment. Drafts and air currents can significantly impact the burn quality of your candle and lead to an uneven and erratic flame.
Why are drafts problematic?
Drafts create air movements that alter the way a flame burns. When a candle is exposed to drafts, the airflow causes the flame to flicker and dance, which can result in an uneven burn. In extreme cases, a strong draft may even extinguish the flame altogether.
Where can drafts come from?
Drafts can originate from various sources, such as open windows, doors, ceiling fans, air vents, or even movement within the room. Even a slight breeze can affect the flame’s stability and disrupt the burn pattern.
Tips to avoid drafts and air currents
Here are some tips to help you create an environment free from drafts:
- Close all windows and doors in the room before lighting your candle. This helps minimize the chances of outside drafts entering the space.
- Avoid placing candles near air vents, fans, or any objects that may create air movement. It’s best to keep them away from high-traffic areas where people are continuously moving.
- If you have a ceiling fan, make sure it’s turned off while the candle is burning. The circulating air from the fan can disturb the flame and hinder an even burn.
- Consider using candle holders or containers with lids. These can provide some protection against drafts and help maintain a more controlled burn environment.
Benefits of avoiding drafts
By ensuring your candle is placed in a draft-free area, you can enjoy a more consistent and even burn. This enhances the overall aesthetic of the candle and prolongs its lifespan. Additionally, avoiding drafts can help prevent accidents related to unstable flames and reduce the risk of fire hazards.
Creating a calm and draft-free setting for your candle is essential for achieving optimal burning conditions. By following these tips, you can maintain a steady flame and enjoy the full potential of your candle’s burn time.
Rotate the Candle Periodically
Rotating your candle periodically is a simple yet effective technique to promote an even burn and prolong its overall lifespan. By rotating the candle, you ensure that the wax melts evenly and prevent tunneling or uneven wax distribution.
Why is rotating the candle important?
As candles burn, the heat from the flame melts the wax, creating a melt pool around the wick. If the candle is not rotated, the wax may only melt on one side, leading to a tunneling effect. Tunneling refers to when the wax burns straight down in a small hole, leaving a thick wall of unmelted wax along the sides of the container.
How often should you rotate the candle?
Rotate the candle every 2-4 hours of burning time or whenever you notice a significant wax buildup on one side. By doing so, you allow the wax to pool evenly and prevent any unused wax from going to waste.
How to rotate the candle effectively?
Follow these steps to rotate your candle properly:
- Ensure that the candle has completely cooled down before attempting to rotate it to avoid any potential burns.
- Gently twist the container or use a heat-resistant glove to hold the sides as you rotate the candle clockwise or counterclockwise.
- Rotate the candle until the melt pool is even across the entire surface or until you have achieved your desired burn depth.
Benefits of rotating the candle
By rotating the candle, you encourage an even burn, prevent tunneling, and maximize the lifespan of your candle. It ensures that you get the most out of your candle, with all the wax being utilized and ensuring a longer and more enjoyable burn time.
Additionally, rotating the candle can also help maintain a visually pleasing appearance, with no excessive wax buildup on one side of the container. This results in a clean, professional, and aesthetically pleasing candle experience.
Take a moment to rotate your candle periodically during each burn session. This simple practice will help you achieve a more even burn, prolong the life of your candle, and enhance your overall candle enjoyment.
Keep the Wick Centered
Maintaining a centered wick is essential for achieving an even burn and optimal performance from your candle. When the wick is properly centered, it ensures that the flame burns consistently and allows for efficient wax consumption.
Why is a centered wick important?
A wick that is off-center can lead to uneven burning and an inefficient use of wax. When the flame is not centered, it may burn unevenly, causing the excess wax on one side to melt faster than the rest. This can result in tunneling, where a hole forms in the center of the candle, leaving unburnt wax along the sides.
How to keep the wick centered?
Here are some tips to help you maintain a centered wick:
- Before lighting the candle, ensure that the wick is centered in the container. You can gently adjust the position using a wick dipper or a pair of tweezers.
- Make it a habit to check the wick’s position each time you light the candle. If you notice it starting to drift off-center while burning, use a wick dipper to gently guide it back to the middle.
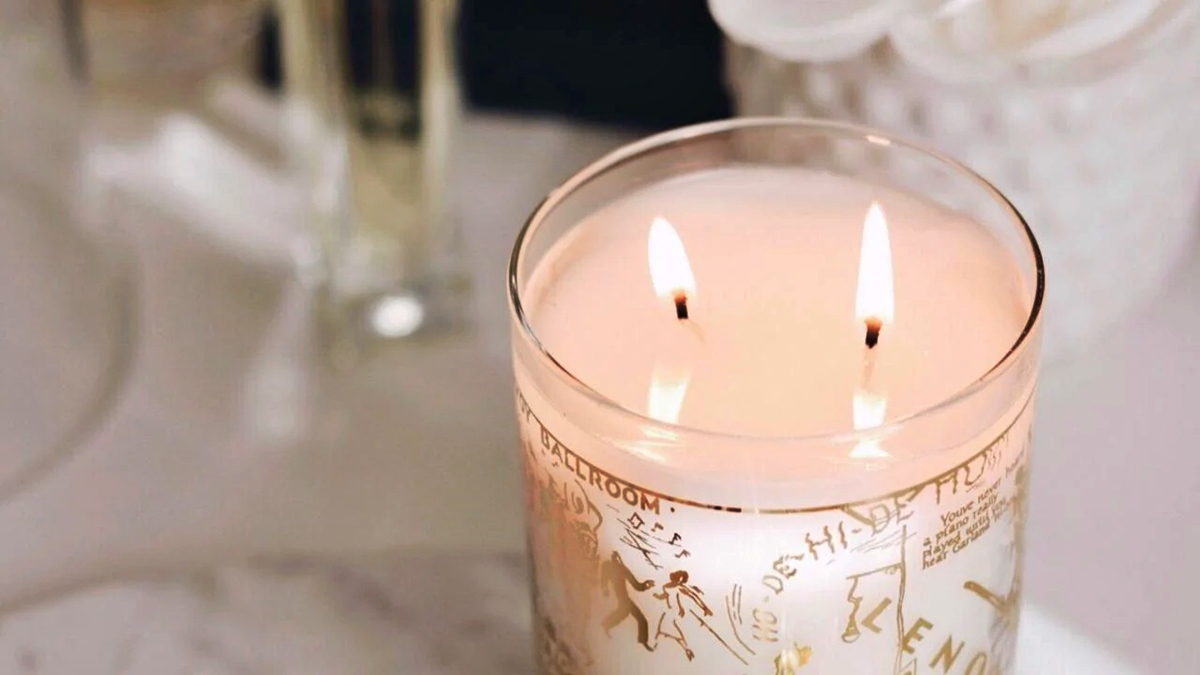
- For larger candles or those with multiple wicks, it’s essential to keep each wick centered. You can use a wick holder or a wick centering tool to ensure all the wicks remain in the middle throughout the burn.
Benefits of a centered wick
Maintaining a centered wick offers several benefits. Firstly, it ensures an even burn, preventing tunneling and maximizing the candle’s burn time. Secondly, a centered wick allows for better fragrance distribution, as the heat is evenly dispersed across the wax pool. Lastly, it helps minimize the risk of the flame coming into contact with the container’s sides, reducing the likelihood of cracking or damaging the container.
By making it a habit to keep the wick centered, you can enjoy a more consistent burn, make the most out of your candle’s lifespan, and ensure a visually appealing and satisfying candle experience.