
Common Problems with Solar String Lights
Solar string lights are a popular choice for adding ambiance and lighting to outdoor spaces. However, like any electronic device, they can encounter issues that affect their functioning. Here are some common problems you might face with solar string lights:
- Dim or flickering lights: If your solar string lights are not providing sufficient brightness or are flickering, it could be due to a few reasons. First, check if the solar panel is receiving enough sunlight throughout the day. Insufficient sunlight can result in the battery not charging fully, leading to dim lights. Additionally, make sure that there is no shading or obstructions blocking the solar panel. Finally, inspect the wiring connections to ensure there are no loose or damaged wires causing the issue.
- Lights not turning on: If your solar string lights are not turning on at all, there are a few possible causes. First, check if the switch is in the correct position and not turned off. Additionally, inspect the battery to see if it needs to be replaced. Over time, the battery capacity may diminish, resulting in the lights not turning on. Lastly, check the wiring connections to ensure everything is securely connected.
- Water damage: Solar string lights are designed to be weather-resistant, but excessive exposure to water can damage them. If you notice any water damage, such as rusted wires or sockets, it’s crucial to address the issue promptly. Water damage can affect the overall functionality of the lights and may require repairing or replacing the damaged components.
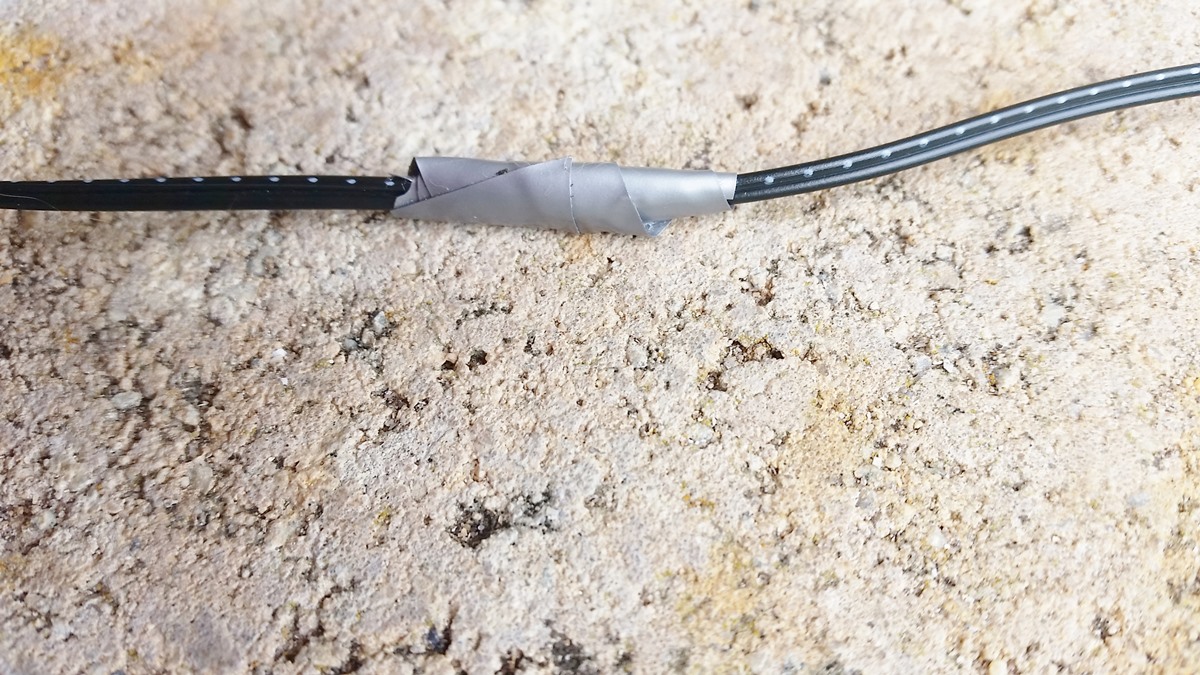
- Wire breakage: The wires in solar string lights can sometimes break due to weather conditions or accidental damage. If you experience partial or complete loss of lighting in certain sections, it’s likely due to wire breakage. Carefully inspect the wiring and repair any damaged sections or replace the entire wire if necessary.
- Battery drain: Over time, the battery in solar string lights can experience drain issues. If you notice that the lights are not staying illuminated for as long as they used to, it could be a sign of a deteriorating battery. In this case, replacing the battery will help restore the lights’ performance and longevity.
By identifying and addressing these common problems, you can ensure that your solar string lights continue to illuminate your outdoor space. Now, let’s move on to the tools and materials you’ll need to fix these issues!
Tools and Materials Needed
Before you begin fixing your solar string lights, gather the following tools and materials:
- Small screwdriver: This will be useful for opening up the battery compartment or accessing the wiring connections.
- Wire strippers: Use these to remove the outer casing from wires and expose the bare wire for reliable connections.
- Electrical tape: A roll of electrical tape will come in handy for securely sealing any exposed wires or making temporary repairs.
- Replacement bulbs: If you have identified any faulty bulbs, make sure you have the appropriate replacement bulbs on hand.
- Replacement battery: If you determine that the battery is the issue, have a replacement battery ready to swap out the old one.
- Replacement wiring: In case you encounter extensive wire breakage or damage, having spare wiring on hand will allow you to replace the entire wire if necessary.
- Cleaning supplies: Depending on the condition of your solar string lights, you may need a soft cloth, mild detergent, or cleaning solution to remove any dirt or debris that could be affecting their performance.
Having these tools and materials ready will streamline the troubleshooting and repair process, ensuring that you can tackle the issues with your solar string lights efficiently. Now, let’s move on to the step-by-step instructions for fixing common problems!
Step 1: Check the Solar Panel
The solar panel is a crucial component of your solar string lights, as it is responsible for harnessing the sun’s energy to charge the battery. If the solar panel is not functioning correctly, it can affect the overall performance of the lights. Follow these steps to check the solar panel:
- Inspect the solar panel: Examine the solar panel for any visible damage, such as cracks or scratches. These damages can impair the panel’s ability to generate power effectively.
- Ensure proper placement: Make sure that the solar panel is positioned in an area that receives ample sunlight throughout the day. The panel should be facing the sun directly and free from any obstructions or shading.
- Clean the solar panel: If the solar panel appears dirty or covered in dust, gently clean it with a soft cloth or sponge dampened with mild detergent or a specialized solar panel cleaning solution. Be gentle to avoid causing any damage to the panel.
- Check wiring connections: Inspect the wiring connections between the solar panel and the rest of the lights. Ensure that there are no loose or disconnected wires. If you spot any issues, reattach or tighten the connections as needed.
- Test the solar panel: With the lights turned off, expose the solar panel to direct sunlight and monitor its behavior. If the panel is functioning correctly, you should see a noticeable increase in the brightness of the lights after a few moments.
If you identify any issues with the solar panel during this inspection, such as severe damage or poor performance, you may need to replace it entirely. Alternatively, you can contact the manufacturer for assistance or information on obtaining a replacement panel. Once you have assessed the solar panel, move on to the next step to continue troubleshooting your solar string lights.
Step 2: Inspect the Wiring
The wiring of your solar string lights plays a crucial role in transmitting power from the solar panel to the lights themselves. If there are any issues with the wiring, it can result in dim or non-functional lights. Follow these steps to inspect the wiring:
- Turn off the lights: Before inspecting the wiring, make sure to turn off the solar string lights to avoid any risk of electric shock.
- Examine the wiring connections: Carefully inspect the wiring connections between the solar panel, bulbs, and battery. Look for any signs of loose or damaged wires, such as frayed insulation or exposed copper.
- Repair or replace damaged wires: If you spot any damaged or broken wires during your inspection, use wire strippers to remove the damaged section. Cut a fresh piece of wire, strip the ends, and securely reconnect it to the existing wiring using electrical tape or wire connectors.
- Check for disconnection: Sometimes, wiring can become disconnected due to weather conditions or accidental tugs. Ensure that all wiring connections are securely attached and properly aligned.
- Test the wiring: After inspecting and repairing any wiring issues, turn the lights back on and observe if the problem persists. If the lights are still not working correctly, move on to the next step for further troubleshooting.
By thoroughly inspecting the wiring and addressing any issues, you can eliminate potential causes of malfunctioning solar string lights. Properly connected and intact wiring helps ensure a smooth flow of power to illuminate the bulbs. Now that you have inspected the wiring, let’s proceed to the next step to continue troubleshooting your solar string lights.
Step 3: Assess the Bulbs and Sockets
The bulbs and sockets of your solar string lights are responsible for the actual illumination. If the lights are dim, flickering, or not working at all, it’s important to assess the bulbs and sockets for any issues. Follow these steps to properly assess them:
- Inspect the bulbs: Carefully examine each bulb to check for any signs of damage, such as cracks or blackened areas. Damaged bulbs may need to be replaced to restore proper functionality.
- Replace faulty bulbs: If you identify any bulbs that are not working, flickering, or dimmer than the rest, replace them with new bulbs of the same type and wattage. Make sure to follow the manufacturer’s guidelines for bulb replacement.
- Check the sockets: Inspect the sockets where the bulbs are inserted for any signs of damage, such as corrosion or loose connections. If any sockets are damaged, they may need to be replaced.
- Clean the sockets: If the sockets appear dirty or corroded, gently clean them using a soft cloth or cotton swab. Ensure that the sockets are dry before reinserting the bulbs to avoid any short-circuiting.
- Test the bulbs: Once the bulbs are replaced or cleaned, turn on the lights to see if the issue has been resolved. Verify that all bulbs are working properly and emitting the desired brightness.
By carefully assessing the bulbs and sockets, you can identify any faulty components that may be affecting the performance of your solar string lights. Sometimes, a simple bulb replacement or socket cleaning can resolve the problem. Proceed to the next step if the issue persists or if there are no apparent problems with the bulbs and sockets.
Step 4: Examine the Battery
The battery in your solar string lights is responsible for storing the energy captured from the solar panel and supplying power to the lights during nighttime or low-light conditions. If the lights are not turning on or are not staying illuminated for long, it’s important to examine the battery. Follow these steps to properly examine the battery:
- Locate the battery compartment: Depending on the design of your solar string lights, the battery compartment may be located near the solar panel or inside the control box. Consult the manufacturer’s instructions to find the battery compartment.
- Inspect the battery: Carefully examine the battery for any visible signs of damage, such as leaks, swelling, or corrosion around the terminals. Damaged batteries may need to be replaced to ensure optimal performance.
- Check the battery capacity: If the lights are not staying illuminated for as long as they used to, it may indicate a decrease in the battery capacity. Use a voltmeter or a battery tester to measure the voltage of the battery. Compare the reading to the manufacturer’s specifications to determine if the battery needs to be replaced.
- Replace the battery: If you determine that the battery is faulty or has a significantly reduced capacity, replace it with a new battery of the same type and specifications. Follow the correct polarity when inserting the new battery, ensuring that the positive and negative terminals align correctly.
- Test the lights: After replacing the battery, turn on the lights and monitor their performance. The lights should remain illuminated for an appropriate duration, indicating that the new battery is functioning properly.
By examining the battery and addressing any issues, you can restore the functionality and longevity of your solar string lights. A well-functioning battery is essential for storing and delivering power to the lights, ensuring that they illuminate your outdoor space effectively. Proceed to the next step if the battery examination does not resolve the problem or if there are no issues with the battery.
Step 5: Repair or Replace Faulty Components
If you have gone through the previous steps and are still experiencing issues with your solar string lights, it’s time to focus on repairing or replacing any faulty components that may be causing the problem. Here’s what you can do:
- Identify the faulty component: Carefully analyze the symptoms and behavior of the lights to identify the specific component that may be causing the issue. It could be a malfunctioning control box, a damaged wire, or a defective sensor.
- Attempt repairs: If you have identified a specific component that can be repaired, such as a loose wire or a damaged socket, try to fix it. Secure loose connections, replace damaged parts, or mend any visible issues using appropriate techniques and tools.
- Replace irreparable components: If you are unable to repair a faulty component, it may be necessary to replace it entirely. Consult the manufacturer’s guidelines or seek professional assistance to ensure that you select compatible replacement parts.
- Contact the manufacturer: If you are uncertain about which component needs to be replaced or if you need assistance with repairs, don’t hesitate to reach out to the manufacturer. They can provide guidance, troubleshooting steps, or information on obtaining replacement parts.
- Test the lights: Once you have repaired or replaced the faulty components, test the lights to see if the issue has been resolved. Monitor their performance and ensure that they are functioning as expected.
By systematically addressing and resolving any faults or malfunctions in the components, you can restore your solar string lights to their optimal working condition. Remember to take appropriate safety precautions when performing repairs, especially when dealing with electrical components. Let’s move on to the next step to complete the troubleshooting process!
Step 6: Reassemble and Test
After going through the previous steps and addressing any issues with the solar panel, wiring, bulbs, sockets, battery, and other components, it’s time to reassemble your solar string lights and test their functionality. Follow these steps to complete the troubleshooting process:
- Secure connections: Ensure that all the connections, including the wiring, bulbs, and sockets, are securely connected. Double-check that there are no loose or disconnected components.
- Reattach components: If you had to disassemble any parts while troubleshooting, make sure to reattach them properly. This includes reconnecting the solar panel, control box, and any other relevant components.
- Seal any exposed wiring: Use electrical tape to seal any exposed wires and ensure they are protected against moisture and potential damage.
- Place the solar panel: Position the solar panel in a location that receives ample sunlight, ensuring there are no obstructions or shading that may hinder its performance.
- Turn on the lights: Switch on the solar string lights and observe their performance. Check if all the bulbs are illuminated, and if they emit the desired brightness.
- Monitor the lights: Allow the lights to operate for a reasonable period and monitor their behavior. Ensure that they remain illuminated throughout the night, signaling that the solar panel has successfully charged the battery.
- Make adjustments if needed: If you notice any issues during the testing phase, such as dim light output or inconsistent performance, revisit the previous steps and recheck the associated components for any missed problems.
By reassembling your solar string lights and conducting a thorough test, you can confirm that the troubleshooting efforts have been successful. Enjoy the radiant illumination provided by your fully functional lights!
Additional Tips for Maintaining Solar String Lights
Maintaining your solar string lights is essential to ensure their longevity and optimal performance. Here are some additional tips to help you keep them in excellent condition:
- Regularly clean the solar panels: Dust, dirt, and debris can accumulate on the solar panels over time, reducing their efficiency. Clean the panels periodically using a soft cloth or sponge dampened with water or a mild detergent. Avoid using abrasive materials or harsh chemicals.
- Remove snow or ice: If you live in an area that experiences snowy or icy conditions, make sure to clear any snow or ice that accumulates on the solar panels. This allows them to receive maximum sunlight and continue charging the battery effectively.
- Replace bulbs as needed: Over time, bulbs may wear out or become less bright. Keep an eye on the brightness and performance of the bulbs and replace any dim or non-functioning bulbs promptly. Follow the manufacturer’s specifications for the appropriate bulb replacements.
- Protect from extreme weather: While solar string lights are designed to be weather-resistant, extreme weather conditions like strong winds and storms can still cause damage. During severe weather, it’s recommended to temporarily remove or secure the lights to prevent any potential harm.
- Store lights properly in the off-season: If you live in an area with harsh winters or if you don’t plan on using the lights for an extended period, store them properly. Disconnect the batteries, wrap the lights in a protective covering, and store them in a dry and cool place to prevent damage.
- Perform regular inspections: Regularly inspect your solar string lights for any signs of damage, loose connections, or wear and tear. Address any issues promptly to prevent further damage and maintain optimal performance.
- Read the manufacturer’s instructions: Each solar string light set may have specific maintenance requirements or guidelines provided by the manufacturer. Make sure to read and follow these instructions for the best results and to avoid any potential damage.
By following these additional tips, you can ensure that your solar string lights remain in great condition, providing beautiful illumination to enhance your outdoor space for years to come. Enjoy the benefits of eco-friendly and cost-effective lighting all year round!