
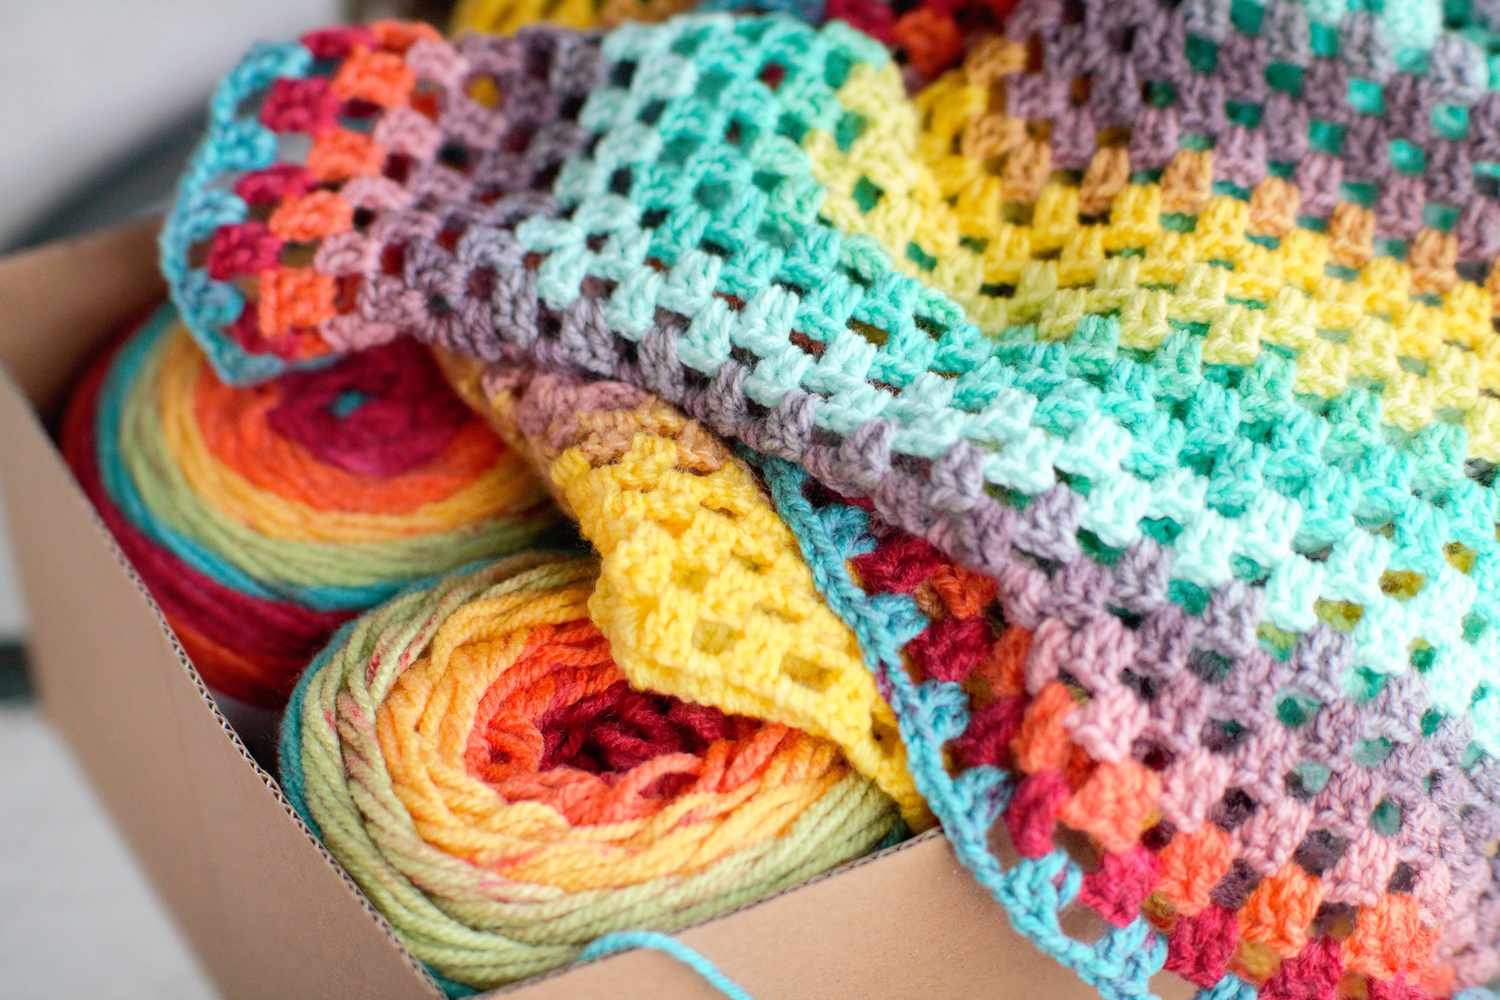
Supplies Needed
Before you embark on crocheting letters into a blanket, gather the following supplies:
- Yarn: Choose yarns in different colors to represent the letters. Opt for medium weight (worsted) yarn for a balanced and cozy blanket.
- Crochet Hook: Select a hook size appropriate for your chosen yarn. Check the yarn label for recommended hook sizes.
- Tapestry Needle: This needle will come in handy for weaving in yarn tails and joining the letters later.
- Scissors: Make sure to have a sharp pair of scissors for cutting yarn cleanly and precisely.
- Stitch Markers: These markers will help you keep track of your stitches and rounds as you crochet.
- Graph Paper or Software: To create a pattern or template for your letters, have graph paper or a digital software ready.
Having these supplies at hand ensures a smooth crocheting experience as you work on your letter-embellished blanket.
Choosing a Yarn and Hook Size
When it comes to crocheting letters into a blanket, selecting the right yarn and hook size is crucial for achieving the desired outcome. Here are a few considerations to keep in mind:
Yarn Thickness: Opt for medium weight (worsted) yarn as it strikes a good balance between thickness and flexibility. This type of yarn will create letters that stand out without being too bulky.
Color Selection: Choose yarn colors that complement each other and provide good contrast. This will make your letters pop and enhance their visibility on the blanket. Consider using a lighter color for the main part of the blanket and darker colors for the letters.
Hook Size: Refer to the recommended crochet hook sizes listed on the yarn label. Typically, you’ll want to choose a hook size that allows you to achieve the desired tension and stitch definition. If you’re unsure, start with a medium-sized hook and adjust as needed.
Tension: Pay attention to your tension while crocheting. Tension refers to how tightly or loosely you hold the yarn while making stitches. Consistent tension is essential for creating uniform letters and maintaining the overall appearance of the blanket.
Take the time to experiment with different yarns and hook sizes before starting your project. Crocheting a sample swatch can help you determine if the chosen yarn and hook size will yield the desired results. Remember, the goal is to achieve clear and well-defined letters that beautifully adorn your blanket.
Creating a Pattern or Template
Before you begin crocheting letters into your blanket, it’s important to create a pattern or template. This will serve as your guide, ensuring that your letters are evenly sized and spaced. Here’s how you can create a pattern or template:
Graph Paper: If you prefer a traditional approach, gather graph paper and colored pencils. Each square on the paper will represent a crochet stitch. Use different colors to fill in the squares, representing the letters you want to include in your blanket. This will give you a visual representation of how the letters will look when crocheted.
Software: If you’re more comfortable with digital tools, consider using crochet pattern software or designing software that includes graphing features. This will allow you to create the pattern or template on your computer, adjusting the size and appearance of the letters as needed. You can also find online tools or apps specifically designed for creating crochet letter patterns.
Adjusting Letter Size: Depending on the size of your blanket and the desired letter size, you may need to adjust the number of stitches and rows designated for each letter. Take into account the stitch size and gauge you achieve with your chosen yarn and hook size to determine the appropriate measurements for each letter.
Spacing: Consider the desired spacing between the letters. Leave enough space so that each letter stands out and is clearly visible. You may also want to add borders or additional decorative elements between the letters to enhance the overall design of the blanket.
Once your pattern or template is complete, use it as a reference as you crochet each letter. It will ensure consistency and help you achieve a professional-looking result.
Starting the Blanket
Now that you have your supplies ready and a pattern or template in hand, it’s time to start crocheting your letter-embellished blanket. Follow these steps to get started:
Crochet Foundation: Begin by creating a foundation chain in the desired length of your blanket. This will serve as the base for your blanket and provide a starting point for crocheting the letters.
Choose a Starting Point: Decide where you want to place the first letter on your blanket. This could be in the center, one corner, or along the border. Mark this spot with a stitch marker or a contrasting piece of yarn to keep track of where the letter will be crocheted.
Letter Placement: Refer to your pattern or template to determine the number of stitches and rows required for each letter. Count the necessary stitches from your starting point and begin crocheting the first letter.
Letter Construction: Implement the appropriate crochet stitches to form each letter. Some letters may require single crochet, double crochet, or even more intricate stitches like front post and back post crochet. Follow your pattern or template closely to ensure accuracy and consistency.
Constant Review: Continually refer to your pattern or template as you crochet each letter. This will ensure that you are on track and maintain the correct stitch placement and letter proportions.
Adjustments: If you find that the letters are not aligning as desired, or if you need to make minor adjustments to maintain symmetry, don’t be afraid to make small modifications. Crocheting is a flexible art form, and some adjustments may be necessary to achieve the desired aesthetic.
Once you have completed the first letter, you can proceed to the next letter in the pattern. Follow the same steps for each letter until you have crocheted all the desired letters onto your blanket.
Basic Crochet Stitches Refresher
Before diving into crocheting letters into your blanket, it’s beneficial to have a refresher on some basic crochet stitches. Familiarize yourself with these essential stitches to ensure success in your letter-embellishment project:
Chain Stitch (CH): The chain stitch is the foundation of most crochet projects. It creates a series of interlocking loops and serves as a starting point for your stitches. To create a chain stitch, yarn over, then pull the yarn through the loop on your hook.
Single Crochet (SC): The single crochet stitch is commonly used and creates a tight and compact fabric. Insert your hook into the designated stitch, yarn over, pull the yarn through, yarn over again, and pull through both loops on your hook.
Double Crochet (DC): The double crochet stitch is taller than the single crochet, creating a looser and more open fabric. Yarn over, insert your hook into the designated stitch, yarn over again, pull the yarn through, yarn over once more, and pull through two loops on your hook. Yarn over again and pull through the remaining two loops.
Front Post Double Crochet (FPDC) and Back Post Double Crochet (BPDC): These stitches are commonly used to create textured patterns and add depth to your crochet work. For the front post double crochet, insert your hook from front to back around the post of the designated stitch, yarn over, pull up a loop, complete the double crochet as normal. For the back post double crochet, insert your hook from back to front around the post of the designated stitch, yarn over, pull up a loop, complete the double crochet as normal.
Slip Stitch (SL ST): The slip stitch is used to join stitches together or create a finished edge. Insert your hook into the designated stitch, yarn over, and pull the yarn through both the stitch and the loop on your hook.
These are just a few fundamental crochet stitches that you may encounter while crocheting letters onto your blanket. Remember to practice each stitch individually before incorporating them into your project. This will help you achieve consistent and precise stitches as you work on your letter-embellished blanket.
Crocheting the First Letter
With your pattern or template in hand and a refresher on basic crochet stitches, it’s time to crochet the first letter onto your blanket. Follow these steps to create the initial letter:
1. Letter Placement: Begin by identifying the starting point of the first letter on your blanket. Use stitch markers or contrasting yarn to mark its position to ensure accuracy and consistency.
2. Yarn Change: If your first letter requires a different color, now is the time to switch yarns. Cut the previous yarn, leaving a small tail to weave in later. Attach the new yarn by creating a slip knot and inserting your hook into the marked stitch.
3. Refer to the Pattern: Consult your pattern or template to determine the specific stitches required for the first letter. It may include a combination of single crochet (SC), double crochet (DC), or even front post double crochet (FPDC) and back post double crochet (BPDC) stitches to create the desired shape.
4. Follow the Instructions: Work each stitch according to the pattern or template instructions. Pay attention to stitch counts and any special instructions, such as skipping stitches or working stitches in previous rows. Maintain tension and stitch size consistency for uniformity.
5. Weave in Ends: As you go along, make sure to weave in loose ends from yarn changes or the starting tail to keep your work neat and tidy. Use a tapestry needle to thread the yarn through the stitches on the backside of the work to secure it.
6. Review Your Work: After completing the first letter, step back and review your work. Ensure that the letter is the desired size, shape, and position. Adjust if necessary before moving on to the next letter.
Remember, practice and patience are key when crocheting letters onto a blanket. Take your time and refer to the pattern or template throughout the process to maintain consistency and achieve the desired outcome. With each letter, you’ll gain confidence and enhance your crocheting skills.
Switching Colors and Yarn Tails
When crocheting letters into a blanket, one of the essential steps is switching colors and managing yarn tails. Here’s a step-by-step guide on how to seamlessly switch colors and handle yarn tails:
1. Preparing for Color Change: Before reaching the end of the row or round, prep for the color change by completing the last stitch of the row or round with the new color. Leave a yarn tail of about 6 inches (15 cm) for weaving in later.
2. Joining the New Color: To join the new color, complete the final stitch of the old color, leaving two loops on the hook. Drop the old color and take the new color, making a slipknot and placing it on the hook. Yarn over with the new color and pull through both loops on the hook to complete the stitch.
3. Switching Yarns for Individual Stitches: If you need to switch colors for individual stitches within a row or round, complete all the steps for joining the new color for each stitch, making sure to drop the previous color and pick up the new color as you go along.
4. Handling Yarn Tails: As you work, keep the yarn tails from color changes along the backside of the blanket, making sure not to crochet over them to avoid visible knots on the front side. Remember to leave a tail of each color long enough (around 6 inches or 15 cm) to weave in later.
5. Weaving in Yarn Tails: Once you’ve finished crocheting the letters and completed the blanket, use a tapestry needle to weave in the yarn tails. Thread the yarn through the tapestry needle and sew it through the back loops of the stitches along the backside of the work. Trim any excess yarn closely to ensure a neat and finished appearance.
By following these steps, you can switch colors smoothly and manage yarn tails effectively while crocheting letters into your blanket. This will result in clean color changes and a professionally finished project.
The Importance of Tension
When crocheting letters into a blanket, maintaining consistent tension is crucial for achieving a professional-looking result. Tension refers to how tightly or loosely you hold the yarn while making stitches. Here’s why tension is so important:
Uniform Appearance: Consistent tension ensures that your stitches are the same size and shape throughout your work. This is especially important when crocheting letters, as you want each letter to have the same dimensions and look balanced and symmetrical.
Letter Proportions: Tension plays a significant role in determining the proportions of your letters. If your tension is too tight, the stitches will be smaller, resulting in smaller letters. Conversely, if your tension is too loose, the stitches will be larger, resulting in larger letters. Consistent tension is key to achieving the desired letter size.
Fabric Stability: The tension of your stitches also affects the overall stability of the blanket. If the tension is too loose, the fabric may become too floppy and lack structure. If the tension is too tight, the fabric may become stiff and inflexible. Strive for a tension that provides a balance between stability and flexibility.
Yarn Usage: Maintaining consistent tension ensures that you use an appropriate amount of yarn for your project. If your tension varies significantly throughout the blanket, you may end up using more or less yarn than anticipated, resulting in inconsistent letter sizes or running out of yarn before completion.
Personal Comfort: Tension is also a personal preference that determines how comfortable and relaxed you are while crocheting. Finding a tension that feels natural to you will make the process more enjoyable and reduce strain on your hands and wrists.
To achieve consistent tension, practice crocheting a few rows or swatches before starting your letter-embellished blanket. Pay attention to how firmly you hold the yarn and adjust your grip if necessary. Keep in mind that some stitches may require slightly different tension than others, so be mindful of the specific requirements for each stitch in your pattern.
By maintaining the right tension throughout your work, you’ll create beautifully shaped letters that seamlessly integrate into your blanket and result in a visually appealing and skillfully executed project.
Charting the Remaining Letters
After you’ve completed crocheting the first letter of your blanket, the next step is to chart the remaining letters. Charting helps you visualize the position, size, and shape of each letter, ensuring a cohesive and balanced design. Here’s how you can chart the remaining letters:
1. Refer to Your Pattern or Template: Use your pattern or template as a reference for the remaining letters. Identify the placement of each letter on the chart and note any special instructions or stitch variations needed for each letter.
2. Mark the Starting Point: Determine the starting point for each letter according to the chart. Use stitch markers or contrasting yarn to mark these positions on your blanket. This will keep you on track as you crochet and prevent any misalignment of the letters.
3. Count Stitches and Rows: Use the chart to count the number of stitches and rows needed for each letter. This will help you ensure that the letters are proportionate and evenly spaced. Double-check your counts to avoid any errors that may affect the overall design.
4. Use Graph Paper: If you prefer a traditional approach, use graph paper to hand-draw each letter. Each square on the paper represents a stitch, allowing you to create an accurate depiction of the letter’s shape and size. Color code the squares to represent different colors of yarn if needed.
5. Digital Charting: Alternatively, you can use digital software or online tools specifically designed for crochet charting. These tools provide a convenient way to create and edit charts, allowing you to easily adjust letter size, stitch count, and color representations as needed.
6. Note Letter Overlaps: If your letters overlap or touch each other, mark these areas on the chart. This will help you crochet the letters seamlessly and ensure that they appear connected and cohesive on your blanket.
7. Review and Adjust: Once you’ve completed charting all the remaining letters, take a moment to review the overall design. Check for any inconsistencies, such as irregular spacing or misshapen letters. Make any necessary adjustments to ensure a visually pleasing arrangement.
Charting the remaining letters allows you to visualize the placement and appearance of each letter before you crochet it onto your blanket. This careful planning and attention to detail will help you create a beautiful, balanced, and harmonious letter-embellished blanket.
Joining the Letters
After crocheting each letter individually, the next step is to join them together on your blanket. Joining the letters gives your blanket a cohesive and seamless look. Here’s how you can effectively join the letters:
1. Plan the Placement: Before you start joining, plan out the arrangement of the letters on your blanket. Lay them out in the desired position and make any necessary adjustments to ensure they are evenly spaced and aligned.
2. Choose a Joining Method: There are several methods you can use to join the letters, such as slip stitching, single crochet, or whipstitching. Consider the look you want to achieve and choose a joining method that best suits your preference.
3. Prepare the First Letter: Begin by attaching the yarn to the corner of the first letter you want to join. Follow the joining method you have chosen for connecting the letters, making sure to insert your hook or needle through both loops of the corresponding stitches to create a secure connection.
4. Joining the Letters: To connect the remaining letters, insert your hook or needle through the corresponding stitches on both letters, joining them together. Continue with the chosen joining method along the edges where the letters meet, ensuring a neat and even join.
5. Weave in Yarn Tails: As you go along, remember to weave in any loose yarn tails from joining the letters. Use a tapestry needle to thread the tail through the stitches on the backside of the work, securing them in place for a clean and finished appearance.
6. Check Alignment: Regularly step back and check the alignment of the joined letters. Adjust any letters that may have shifted or become misaligned during the joining process. Taking the time to ensure even spacing and proper alignment will enhance the overall look of your blanket.
7. Secure and Finish: Once all the letters are joined, secure the yarn and finish any remaining loose ends. Trim any excess yarn closely, ensuring all connections are secure and there are no visible loose ends.
By effectively joining the letters, you’ll create a striking and unified design on your blanket. Take your time, double-check your connections, and make any necessary adjustments to achieve a flawless joining of the letters.
Finishing Touches
As you near the completion of your letter-embellished blanket, it’s important to pay attention to the finishing touches. These final steps add polish and refinement to your project, ensuring that it is ready to be enjoyed. Here are some finishing touches to consider:
1. Edging: Adding an edging is a beautiful way to frame your blanket and provide a clean and polished finish. Choose a stitch pattern or border that complements your letters and overall design. Options include a simple single crochet or a more intricate shell or picot stitch edging.
2. Blocking: Blocking your finished blanket can help even out the stitches and create a more professional look. Wet blocking involves dampening the blanket, gently shaping it, and allowing it to dry flat. Alternatively, you can use a steam iron to lightly steam the blanket while shaping it. Always follow the specific blocking instructions for your chosen yarn.
3. Cleaning and Care Instructions: Consider attaching a label or including a note with cleaning and care instructions for the recipient of the blanket. This ensures that the blanket remains in good condition over time and can be enjoyed for years to come.
4. Personalization: If desired, you can add a personal touch to the blanket by incorporating the recipient’s name or initials into the design. This can be done using duplicate stitch, surface crochet, or by crocheting additional letters into the fabric.
5. Review and Revision: Before considering your blanket complete, take a step back and review it as a whole. Look for any loose stitches, uneven tension, or areas that may need additional attention. Make any necessary revisions to ensure a polished and well-crafted final product.
6. Ironing and Storage: Once your blanket is complete, you may choose to give it a light steam ironing to remove any remaining wrinkles and ensure it looks its best. Afterward, carefully fold or roll the blanket and store it in a clean, dry space to protect it from dust and potential damage.
Remember, the finishing touches can elevate your letter-embellished blanket from being simply functional to being a cherished keepsake. Take the time to complete these final steps, and your blanket will be a stunning work of art that brings joy and comfort to its recipient.
Blocking the Blanket
Blocking is a crucial step in the finishing process of crocheted blankets, including those embellished with letters. By blocking your blanket, you can achieve a more professional and polished look. Here’s how to block your blanket effectively:
1. Determine the Blocking Method: There are different methods for blocking, such as wet blocking and steam blocking. Choose the method that is most suitable for the type of yarn you used and any specific instructions provided by the yarn manufacturer.
2. Prepare the Blanket: Before blocking, ensure that your blanket is clean and free from any loose threads or debris. Give it a gentle wash according to the recommended care instructions, allowing it to dry completely before proceeding.
3. Wet Blocking: Wet blocking involves soaking your blanket in lukewarm water for approximately 15-20 minutes. Gently squeeze out the excess water, being careful not to wring or twist the fabric. Lay the blanket flat on a clean towel and carefully shape it to the desired dimensions, ensuring that the letters and overall design are evenly spaced and aligned. Let the blanket dry completely before moving or removing it.
4. Steam Blocking: If your yarn or pattern allows for steam blocking, this method can be effective and less time-consuming. Use a steamer or a steam iron set on low heat with no direct contact to create steam. Hold the iron or steamer a few inches away from the blanket, hovering it over the fabric, and gently pat the steam onto the blanket. Then, reshape the blanket as needed while it is still warm and pliable.
5. Pin the Blanket: Depending on the blocking method you choose, you may need to use rust-resistant blocking pins to secure the edges of the blanket in place while it dries or cools. Pin the edges evenly, making sure not to stretch or distort the fabric. This helps maintain the shape and size of the blanket during the blocking process.
6. Allow to Dry or Cool: Whether you opted for wet blocking or steam blocking, it is essential to let the blanket air dry or cool fully before handling or removing the pins. The drying time will vary depending on factors such as yarn type and humidity levels, so be patient and ensure the blanket is completely dry or has cooled down before continuing.
7. Evaluate the Results: Once the blanket is dry or cool, carefully remove the pins and assess the blocked appearance. The stitches should be more even and the letters should appear crisper and more defined. Take a moment to appreciate your beautifully blocked blanket and the results of your hard work.
Blocking your crocheted letter-embellished blanket not only enhances its overall appearance but also ensures that the stitches and letters are showcased in their best form. It adds that final touch of professionalism and transforms your blanket into a true work of art.