
Selecting the Right Broom for Your Cleaning Needs
When it comes to keeping your home clean, choosing the right broom can make all the difference. With the wide variety of brooms available on the market, it’s important to select one that suits your specific cleaning needs. From brooms designed for sweeping large areas to brooms specialized for tackling different types of surfaces, here’s a guide to help you make the right choice.
First, consider the type of floor or surface you’ll be cleaning. For hardwood floors, a broom with soft bristles is ideal to avoid scratching the surface. Look for brooms labeled “indoor” or “hardwood floor” for this purpose. If you have carpeted areas, opt for a broom with stiffer bristles to effectively reach deep into the fibers and remove dirt and debris.
If you have outdoor cleaning tasks, such as sweeping patios or clearing leaves from your driveway, consider a broom with sturdy, weather-resistant bristles. These brooms are designed to withstand outdoor conditions and are often equipped with longer handles for added reach.
Another important factor to consider is the size of the broom head. Smaller broom heads are great for maneuvering in tight spaces, while larger broom heads cover more ground in one sweep. Think about the layout of your home and the spaces you’ll be cleaning to determine which size is best suited for your needs.
Additionally, take into account the handle length of the broom. Longer handles provide greater reach, making it easier to clean high ceilings, ceiling fans, or cobwebs in corners. Conversely, shorter handles offer better control for more precise cleaning, such as sweeping around furniture or in small areas.
Lastly, consider the materials used in the construction of the broom. Look for brooms with durable bristles that won’t easily wear out or deform over time. Sturdy handles made from materials like metal or fiberglass are more likely to withstand heavy use compared to those made from plastic.
By taking the time to consider your specific cleaning needs and selecting a broom accordingly, you can ensure that your cleaning tasks are more effective and efficient. Remember, the right broom can make a world of difference in keeping your home spick and span.
Removing Loose Debris from Your Broom
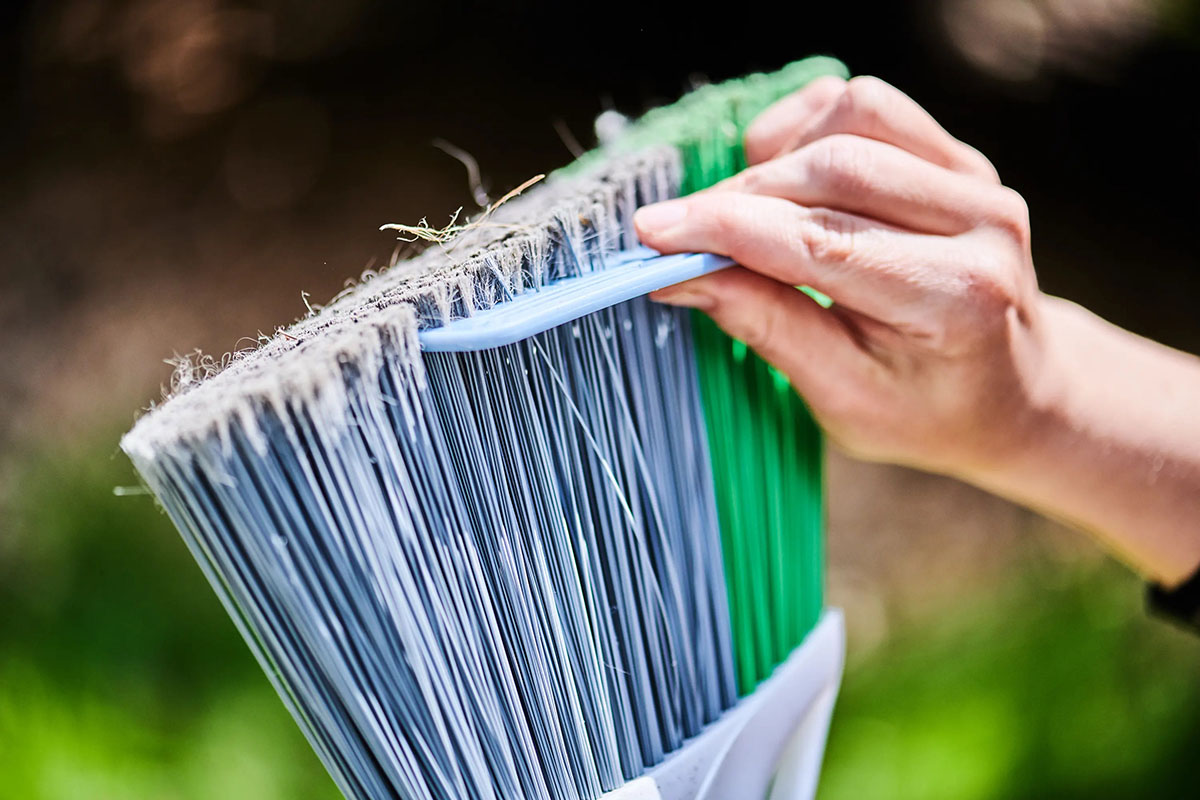
Over time, your broom can accumulate loose debris, such as hair, dust, and small particles that it picks up while sweeping. To maintain the effectiveness of your broom and prevent the spread of dirt and debris, it’s important to regularly remove these loose materials. Follow these steps to effectively clean your broom:
- Begin by tapping the broom against a hard surface, such as the edge of a trash bin or a wall. This will help dislodge any loose debris stuck in the bristles.
- If there are any stubborn particles still caught in the bristles, use your fingers or a comb to gently remove them. Be careful not to damage or break the bristles in the process.
- For brooms with detachable heads, remove the head and shake it vigorously to dislodge any trapped debris. Use your fingers or a brush to clean the head further if necessary.
- Consider using a vacuum cleaner or a handheld brush to effectively remove any remaining debris from the bristles. This can be particularly useful for brooms with tightly packed bristles.
Once you’ve removed all the loose debris from your broom, take a moment to inspect the bristles for any signs of damage or wear. If you notice that the bristles are bent, frayed, or broken, it may be time to consider replacing your broom head or the entire broom if needed.
Regularly cleaning the debris from your broom will not only improve its efficiency but also prevent the spread of dirt and allergens throughout your home. Take the time to clean your broom after each use or whenever you notice a significant buildup of debris to ensure optimal cleaning results.
Washing Your Broom Bristles
Keeping your broom bristles clean is essential for maintaining their effectiveness and prolonging the lifespan of your broom. Over time, dirt, dust, and other particles can accumulate in the bristles, hindering their ability to sweep efficiently. Follow these steps to wash your broom bristles effectively:
- Start by removing any loose debris from the broom bristles using the method mentioned earlier. This will make the washing process more effective.
- Fill a bucket or sink with warm water and add a few drops of mild detergent. Swirl the water to create a soapy solution.
- Submerge the broom bristles in the soapy water and gently agitate them, ensuring that the bristles are thoroughly coated with the soap mixture. You can also use a soft brush or your hands to carefully scrub the bristles.
- Rinse the broom bristles under running water until all traces of soap and dirt have been removed. Make sure to thoroughly rinse both the bristles and the broom head.
- After rinsing, shake off any excess water from the broom. If possible, hang the broom upside down or place it in a well-ventilated area to dry completely.
It’s important to note that not all brooms are suitable for washing, especially those with wooden handles or bristles that are prone to damage. Check the manufacturer’s instructions or consult the product packaging to verify if your broom can be washed. If washing is not recommended, stick to the method mentioned earlier for removing loose debris.
In addition to regular cleaning, it’s beneficial to establish a routine for washing your broom bristles, especially if you use your broom frequently or in particularly dirty areas. By keeping your broom bristles clean, you’ll ensure optimal performance and maintain a hygienic cleaning tool.
Sanitizing Your Broom Handle
While we often focus on cleaning the bristles of our brooms, we may overlook the importance of sanitizing the handle. The handle of your broom can harbor bacteria, germs, and other contaminants, especially if it comes into contact with dirty surfaces or is handled by multiple people. To ensure a clean and hygienic broom handle, follow these steps to effectively sanitize it:
- Start by removing any loose debris or dirt from the handle using a soft cloth or paper towel. This will make the sanitizing process more effective.
- Prepare a sanitizing solution by mixing equal parts water and rubbing alcohol or an antibacterial cleaner in a spray bottle. Shake the bottle gently to ensure the ingredients are well combined.
- Spray the sanitizing solution directly onto the broom handle, covering its entire surface. Pay special attention to any areas that may have come into contact with dirt or germs.
- Use a clean cloth or sponge to wipe and scrub the handle, ensuring that the sanitizing solution is evenly distributed and in contact with the handle surface. Focus on removing any stains or grime that may be present.
- Allow the sanitizing solution to sit on the broom handle for a few minutes to effectively kill any bacteria or germs. During this time, you can also sanitize other cleaning tools or surfaces.
- Rinse the broom handle with clean water to remove any residue from the sanitizing solution. Ensure that all traces of the solution are thoroughly removed.
- After rinsing, dry the broom handle with a clean cloth or allow it to air dry completely before using it again. This will prevent the growth of mold or mildew.
Regularly sanitizing your broom handle is particularly important if you use the broom in high-traffic areas, such as public spaces or shared living spaces. By maintaining a clean handle, you’ll reduce the chances of transferring dirt, bacteria, and germs from one surface to another during your cleaning routine.
Remember, a clean broom handle not only ensures a more sanitary cleaning process but also contributes to a healthier living environment for you and your family.
Drying and Storing Your Broom Properly
Properly drying and storing your broom is crucial to maintain its effectiveness and extend its lifespan. Neglecting to do so can lead to mold, mildew, and damage to the bristles. Follow these tips to ensure your broom is properly dried and stored after use:
- After cleaning your broom, shake off any excess water or moisture from the bristles. Gently tap the broom against a hard surface to remove as much water as possible.
- If your broom has detachable parts, such as a removable head or extendable handle, separate them for easier drying and storage.
- Find a well-ventilated area, preferably outdoors or near an open window, to allow your broom to air dry completely. Hanging the broom upside down or placing it with the bristles facing downward can help prevent water from collecting in the bristles.
- Avoid drying your broom in an enclosed space or near a direct source of heat, such as a radiator or heater, as this can accelerate the drying process and potentially damage the bristles.
- Ensure that your broom is completely dry before storing it. Damp bristles can trap moisture and lead to the growth of mold and mildew.
- Choose an appropriate storage location for your broom. Ideally, hang it on a hook or store it upright with the bristles facing upward to help maintain the shape of the bristles.
- Avoid storing your broom in areas with high humidity or extreme temperature fluctuations, as these conditions can have a detrimental effect on the broom’s performance and durability.
- Keep your broom away from direct sunlight to prevent any discoloration or degradation of the bristles.
By following these drying and storage tips, you’ll help maintain the quality and functionality of your broom. A properly dried and stored broom will be ready for use whenever you need it, ensuring that your cleaning tasks are efficient and effective.
Eliminating Lingering Odors from Your Broom
Over time, brooms can develop unpleasant odors due to the accumulation of dirt, dust, and debris in the bristles. These odors can make cleaning tasks less enjoyable and may even cause your living space to smell less fresh. Fortunately, there are several effective methods to eliminate lingering odors from your broom:
- Start by cleaning the bristles of your broom following the steps mentioned earlier. Removing any trapped dirt and debris can already help alleviate unpleasant odors.
- Once the broom is clean, fill a bucket or sink with warm water and add a few tablespoons of baking soda or a small amount of mild detergent. Mix well to create a cleaning solution.
- Submerge the broom bristles in the solution and allow them to soak for about 30 minutes. This will help break down any remaining odors and freshen up the bristles.
- After soaking, rinse the broom bristles thoroughly under running water to remove any traces of baking soda or detergent. Ensure that all residue is completely rinsed away.
- Another effective method to eliminate odors is by using vinegar. Fill a spray bottle with equal parts of water and white vinegar. Spray the solution generously onto the broom bristles and allow it to sit for a few minutes.
- Rinse the broom bristles under running water again to remove the vinegar solution. This will help eliminate any lingering vinegar scent that may be present.
- After rinsing, shake off any excess water from the bristles and allow the broom to air dry completely in a well-ventilated area. This will help prevent any remaining moisture from causing odors to develop.
- For added freshness, consider placing a few drops of essential oil on a cloth or cotton ball and tuck it into the bristles of your broom. This will leave a pleasant scent behind as you clean.
By following these methods, you can effectively eliminate lingering odors from your broom. Remember to regularly clean your broom to prevent odors from building up and ensure a pleasant cleaning experience.
Extending the Lifespan of Your Broom with Regular Maintenance
A well-maintained broom not only ensures effective cleaning but also extends its overall lifespan. With proper care and regular maintenance, you can keep your broom in optimal condition for longer. Follow these maintenance tips to maximize the lifespan of your broom:
- After each use, remove any loose debris from the broom bristles using the tapping or combing method mentioned earlier. This prevents build-up and maintains the effectiveness of the bristles.
- Inspect the broom bristles regularly for signs of wear or damage. If you notice any bent, frayed, or broken bristles, consider replacing the broom head or the entire broom if needed.
- Store your broom in a dry, well-ventilated area to prevent the growth of mold or mildew. Avoid storing it in damp or humid places, such as basements or bathrooms.
- Protect the broom bristles by placing a broom cover or a cloth bag over them when not in use. This helps prevent the bristles from getting crushed or bent.
- Avoid using excessive force or applying too much pressure while sweeping. Gentle and controlled sweeping motions are often sufficient for effective cleaning and put less strain on the broom bristles.
- Avoid using your broom for purposes it wasn’t intended for, such as scrubbing or scraping hard surfaces. Using the broom beyond its intended use can cause damage to the bristles and handle.
- Clean the handle of your broom regularly to remove any dirt or grime. Follow the sanitizing method mentioned earlier to keep the handle clean and hygienic.
- Consider rotating multiple brooms for different cleaning tasks. Having specific brooms for indoor and outdoor use, or for different floor surfaces, helps distribute the workload and prevents excessive wear on a single broom.
- Ensure that the broom is stored in a way that prevents it from leaning against walls or other objects for prolonged periods. Leaning can cause the bristles to bend or lose their shape.
- Replace your broom as needed. Even with proper maintenance, brooms have a limited lifespan. If you notice a decline in performance or significant wear and tear, it may be time to invest in a new broom.
By following these maintenance tips, you can extend the lifespan of your broom and ensure that it continues to serve you well in your cleaning endeavors.
Tips for Cleaning Different Types of Brooms
Not all brooms are created equal, and different types of brooms require specific cleaning methods to maintain their effectiveness. Whether you have a traditional broom, a push broom, or a specialty broom, here are some tips for cleaning various types of brooms:
Traditional Brooms:
Traditional brooms with natural or synthetic bristles are commonly used for indoor sweeping. To clean these brooms:
- Remove loose debris from the bristles by tapping or combing them.
- Place the broom head in warm soapy water and gently scrub the bristles with a brush or your hands.
- Rinse the bristles thoroughly under running water to remove any soap residue.
- Shake off excess water and allow the broom to air dry completely before storing.
Push Brooms:
Push brooms are designed with wider heads and stiffer bristles, making them ideal for sweeping larger areas. Follow these steps to clean push brooms:
- Remove any loose debris by tapping the broom head against a hard surface.
- Use a stiff brush or a cloth soaked in warm soapy water to scrub the bristles, paying special attention to the center area where debris tends to accumulate.
- Rinse the bristles thoroughly to remove any soap residue.
- Hang the push broom or lay it flat to dry completely before storing.
Specialty Brooms:
Specialty brooms, such as rubber brooms or microfiber brooms, require specific cleaning methods for optimal maintenance:
- Remove loose debris and hair from the broom by using your hands or a brush.
- For rubber brooms, rinse them under warm running water to remove dirt and debris. Pat dry with a towel before storage.
- For microfiber brooms, follow the manufacturer’s instructions for cleaning, which may involve either hand washing or machine washing in cold water.
- Check for any specific care instructions for your specialty broom to ensure proper cleaning and maintenance.
Remember to clean your brooms regularly and practice proper maintenance to ensure their longevity and efficiency. By following these tips, you can keep your broom in excellent condition and ensure effective cleaning results.