
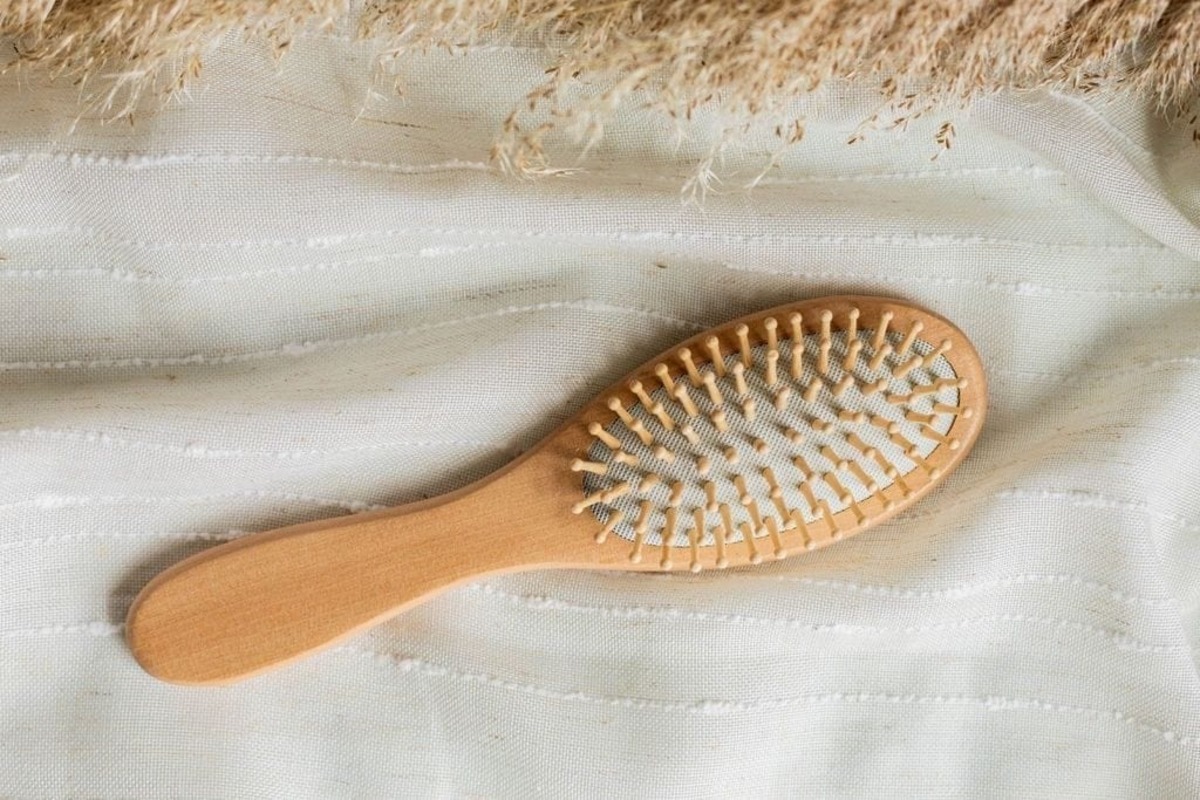
Importance of Cleaning Wooden Brushes Regularly
Wooden brushes are not only a stylish accessory for grooming, but they also offer several benefits for your hair. However, it is essential to maintain their cleanliness to ensure optimal performance and longevity. Regularly cleaning your wooden brush not only removes dirt, oil, and product buildup but also prevents the accumulation of bacteria that can lead to scalp issues.
One of the primary reasons for cleaning your wooden brush is to remove excess hair and debris. As you use your brush, loose hairs and lint can get trapped between the bristles and affect its functionality. Regular cleaning helps to prevent tangles and ensures that the bristles can glide smoothly through your hair.
Another important reason to clean your wooden brush is to eliminate the buildup of oils and styling products. Over time, these substances can accumulate on the bristles, making them less effective at distributing the natural oils from your scalp to the rest of your hair. This can result in greasy roots and dry ends. By regularly cleaning your brush, you can maintain a healthier balance of oils in your hair.
In addition to removing dirt and oil, cleaning your wooden brush also helps to prevent the growth of bacteria. Brushes that are not cleaned can become a breeding ground for bacteria, which can lead to scalp issues such as dandruff, itchiness, and even infections. Regular cleaning of your wooden brush helps to keep your scalp clean and healthy, promoting better overall hair health.
Moreover, regularly cleaning your wooden brush can contribute to its longevity. The buildup of hair, oil, and product can cause the bristles to become stiff and brittle over time. This can lead to breakage and damage to your hair. By cleaning your brush regularly, you can maintain its functionality, ensuring that it continues to provide gentle and effective brushing for years to come.
Overall, cleaning your wooden brush regularly is vital to ensure its optimal performance, prevent scalp issues, and maintain healthier hair. By taking the time to clean your brush, you can enjoy the benefits of a clean and well-maintained wooden brush, promoting the overall health and beauty of your hair.
Gathering the Necessary Materials
Before starting the cleaning process for your wooden brush, it’s essential to gather the necessary materials. Having everything prepared will make the cleaning process more efficient and ensure that you have everything you need within reach. Here are the materials you’ll need:
- A toothpick or small comb: This will help you remove any excess hair or debris that may be stuck between the bristles.
- A shallow bowl or basin: This will be used for soaking the brush.
- Warm water: It’s important to use warm water as it helps to loosen dirt and oil more effectively.
- Mild shampoo: Choose a gentle shampoo that is suitable for your hair type. Avoid using harsh chemicals or strong detergents that can damage the wooden brush.
- A toothbrush or soft bristle brush: This will be used to scrub the bristles and remove any remaining residue.
- A clean towel or paper towels: These will be used for drying the brush after cleaning.
- A conditioner (optional): Using a small amount of conditioner can help soften the bristles and keep them in good condition.
Having these materials ready will ensure that you have a smooth and hassle-free cleaning experience. Additionally, it is important to note that choosing the right materials, such as a mild shampoo and soft-bristle brush, is crucial to prevent any damage to the wooden brush and maintain its longevity.
Removing Excess Hair and Debris from the Brush
Before you begin cleaning your wooden brush, it is important to remove any excess hair and debris that may have accumulated between the bristles. This step will make the cleaning process more effective and ensure that your brush is thoroughly cleaned. Here’s how to remove hair and debris from your wooden brush:
- Start by using a toothpick or small comb to gently loosen and remove any hair that is stuck between the bristles. Carefully insert the toothpick or comb at the base of the bristles and pull upwards to lift the hair out. Be gentle to avoid damaging the bristles or the base of the brush.
- If there is a significant amount of hair trapped in the brush, you can use your fingers to pull it out. Grip the hair near its base and gently pull it away from the bristles. Repeat this process until you have removed all visible hair.
- Once the hair has been removed, use the toothpick or comb to clean out any remaining debris or lint that may be stuck in the bristles. Pay attention to the crevices and corners of the brush to ensure that all debris is removed.
- If you are struggling to remove some stubborn debris, you can use a soft-bristle brush or an old toothbrush to gently scrub the bristles. Be careful not to apply too much pressure, as this could damage the bristles or the base of the brush.
By following these steps, you can effectively remove excess hair and debris from your wooden brush, ensuring that it is clean and ready for the next step of the cleaning process. It is important to note that regular removal of hair and debris from your brush will not only improve its performance but also prevent the buildup of dirt and bacteria.
Soaking the Wooden Brush in Warm Water and Shampoo Mixture
After removing excess hair and debris from your wooden brush, the next step is to soak it in a mixture of warm water and shampoo. This step helps to further loosen dirt, oils, and product buildup, making it easier to clean the brush. Here’s how to soak your wooden brush:
- Fill a shallow bowl or basin with warm water. The water should be warm, but not too hot, as extreme temperatures can damage the wooden brush.
- Add a small amount of mild shampoo to the warm water. Swirl the water gently to create a soapy mixture. Avoid using too much shampoo, as it can be difficult to rinse out completely.
- Place the wooden brush in the soapy water, ensuring that the bristles are fully submerged. You can use your hands or a gentle swirling motion to ensure that the bristles are thoroughly covered by the shampoo mixture.
- Let the brush soak for about 10-15 minutes. This allows the warm water and shampoo mixture to penetrate the bristles and loosen any dirt or buildup.
During the soaking process, the warm water and shampoo will work together to break down and remove any residue on the brush. This step is particularly effective in removing oils and product buildup that may have accumulated over time. It is important to note that using a mild shampoo is crucial to avoid damaging the wooden brush. Harsh chemicals or strong detergents can strip the natural oils from the bristles and cause them to become brittle.
Once the brush has soaked for the recommended time, you can proceed to the next step of gently scrubbing the bristles to remove any remaining residue.
Gently Scrubbing the Bristles with a Toothbrush
After soaking the wooden brush in a warm water and shampoo mixture, the next step is to gently scrub the bristles to remove any remaining residue. This step helps to ensure that your wooden brush is thoroughly cleaned and ready for use. Here’s how to scrub the bristles:
- Take a clean toothbrush or a soft-bristle brush designated for this purpose.
- Dip the toothbrush into the warm water and shampoo mixture that you used to soak the brush.
- Gently scrub the bristles of the wooden brush in a back-and-forth motion. Pay attention to each bristle and make sure to cover the entire brush surface.
- Continue scrubbing for a few minutes, or until you feel that the bristles are clean and free from any remaining residue.
- If there are stubborn spots or hard-to-reach areas, you can use the toothbrush to carefully scrub those areas with a bit more pressure. However, be cautious not to apply excessive pressure, as it may cause damage to the bristles or the brush.
While scrubbing, keep in mind that wooden brushes are delicate and should be handled gently. The goal is to remove any buildup, dirt, or oils without causing damage. Using a toothbrush or soft-bristle brush allows you to have better control and clean the bristles thoroughly.
After scrubbing, rinse the brush under running water to remove any lingering shampoo residue. Ensure that all the soap is washed away, as any remaining residue can make the bristles feel sticky or greasy when you use the brush on your hair.
Next, proceed to the rinsing step to remove any remaining shampoo and excess water from the brush.
Rinsing the Brush Thoroughly and Removing Excess Water
Once you have finished scrubbing the bristles of your wooden brush, the next step is to rinse it thoroughly to remove any remaining shampoo and excess water. This step ensures that your brush is clean and ready for use. Here’s how to rinse the brush:
- Hold the wooden brush under running water, ensuring that the water is not too hot or too cold. Use your fingers to gently comb through the bristles while rinsing to help dislodge any leftover residue.
- Continue rinsing the brush until the water runs clear, indicating that all the shampoo has been thoroughly removed from the bristles.
- After rinsing, gently shake off the excess water from the brush. Avoid using excessive force, as it may damage the bristles.
- Place the brush on a clean towel or a stack of paper towels with the bristles facing down. Allow it to air dry naturally. You can also use a soft cloth to gently pat the bristles to remove any remaining moisture.
Keep in mind that wooden brushes should not be soaked in water for extended periods or submerged in water completely. This can cause the wood to warp or deteriorate and affect the overall lifespan of the brush.
Ensure that the brush is completely dry before you use it again. This helps to prevent the growth of mold or mildew on the wooden handle and keeps the bristles in good condition.
Once the brush is dry, you can proceed to the next step of applying a small amount of conditioner to the bristles to help keep them soft and smooth.
Drying the Wooden Brush Properly to Prevent Damage
Properly drying your wooden brush after cleaning is crucial to prevent any damage and maintain its longevity. Damp or wet wooden brushes can be susceptible to mold or mildew growth, which can affect both the bristles and the wooden handle. Follow these steps to ensure your wooden brush is dried properly:
- After rinsing the brush, gently shake off any excess water. Avoid using excessive force, as it may damage the bristles.
- Place the brush on a clean towel or a stack of paper towels with the bristles facing down. This allows any remaining water to drip off naturally.
- Leave the brush in a well-ventilated area and allow it to air dry completely. Avoid drying it near direct heat sources, such as radiators or hair dryers, as excessive heat can cause the wood to warp or crack.
- Periodically check the brush during the drying process to ensure that no moisture remains. If you notice any dampness, gently pat the bristles with a soft cloth or towel to absorb the moisture.
It is important to note that wooden brushes should never be left to dry in an upright position with the bristles facing up. This can cause water to collect at the base of the bristles, leading to potential damage and deformation of the wooden handle.
By allowing your wooden brush to dry naturally and completely, you are ensuring that no moisture lingers, reducing the risk of mold or mildew growth. This proper drying method helps to maintain the integrity of the brush and prolong its lifespan.
Once your wooden brush is thoroughly dried, it is time to apply a small amount of conditioner to the bristles to keep them soft and smooth.
Applying a Small Amount of Conditioner to the Bristles
After thoroughly drying your wooden brush, the next step is to apply a small amount of conditioner to the bristles. Conditioning the bristles helps to keep them soft, smooth, and in good condition. Here’s how to apply conditioner to your wooden brush:
- Choose a lightweight, leave-in conditioner that is suitable for your hair type. Avoid using heavy or greasy formulas that could weigh down the bristles.
- Squeeze a pea-sized amount of conditioner onto your fingertips.
- Apply the conditioner to the bristles of the wooden brush. Start at the base of the bristles and gently run your fingers through the bristles, evenly distributing the conditioner from base to tip.
- Once the conditioner has been applied, use your fingertips or a wide-toothed comb to gently comb through the bristles, ensuring that the conditioner is evenly spread.
- Leave the conditioner on the bristles and allow it to absorb for a few minutes.
- After the conditioning time has elapsed, gently wipe off any excess conditioner with a clean cloth or towel.
Applying conditioner to the bristles of your wooden brush helps to keep them moisturized, preventing them from becoming dry, brittle, or prone to breakage. A well-conditioned brush glides through your hair smoothly, promoting healthy and tangle-free locks.
It’s important to note that you should only apply a small amount of conditioner to the bristles. Excessive conditioner can make the bristles greasy and attract more dirt and buildup, subsequently affecting the brush’s performance. Therefore, a pea-sized amount is usually sufficient for conditioning the bristles.
Once you have finished applying conditioner, you can proceed to the final step of storing the brush in a clean and dry area.
Storing the Brush in a Clean and Dry Area
After you have cleaned and conditioned your wooden brush, it is important to store it properly in order to maintain its cleanliness and prolong its lifespan. Storing the brush in a clean and dry area helps to prevent dirt, dust, and moisture from compromising its overall condition. Here are some tips for storing your wooden brush:
- Choose a designated spot for your brush that is clean and free from dust and moisture. Avoid storing it in areas prone to humidity, such as the bathroom, as excessive moisture can warp the wooden handle.
- Ensure that the bristles are facing upwards to prevent them from being crushed or deformed. Placing the brush in an upright position also allows proper air circulation, aiding in the drying process if any residual moisture remains.
- If possible, store the brush in a soft cloth or a brush holder to protect it from dust and other environmental factors. This helps to keep the bristles clean and prevents them from coming into contact with potentially dirty surfaces.
- Avoid storing the brush with other hair tools or products, as they can transfer oils or other residues onto the bristles. Keep the brush separate to maintain its cleanliness.
- Regularly inspect the storage area for any signs of dust or dirt accumulation. Clean the area if necessary to ensure that your brush remains in a clean environment.
By storing your wooden brush in a clean and dry area, you are preserving its hygiene and protecting it from potential damage. A properly stored brush ensures that it remains ready for use whenever you need it.
Following these storage tips will help to maintain the cleanliness of your brush and extend its lifespan, allowing you to enjoy its benefits for a long time.
Tips for Maintaining the Cleanliness of Wooden Brushes
To ensure that your wooden brush remains clean and in optimal condition, it is important to establish a regular maintenance routine. By following these tips, you can prolong the cleanliness and longevity of your wooden brush:
- Clean your wooden brush regularly: Aim to clean your brush at least once a month, or more frequently if you use styling products or have particularly oily hair. Regular cleaning prevents the buildup of dirt, oils, and product residue.
- Remove excess hair after each use: Make it a habit to remove any loose hair from the bristles after each use. This prevents the accumulation of hair, making the cleaning process easier and more effective.
- Avoid using excessive heat: High temperatures can cause damage to both the wooden handle and the bristles of the brush. Avoid exposing your wooden brush to direct sunlight or using heat styling tools near it.
- Do not submerge the brush in water: Wooden brushes should not be soaked or submerged in water for long periods. This can cause the wood to warp or deteriorate. Instead, use a gentle cleaning method that involves minimal water exposure.
- Use a dedicated wooden brush for each individual: Sharing brushes can transfer oils or bacteria between people. To maintain hygiene, each person should have their own brush.
- Avoid storing the brush in a damp environment: Moisture can damage the wooden handle and create a breeding ground for mold or mildew. Ensure that your brush is stored in a clean and dry area away from excessive humidity.
- Regularly inspect the brush for any signs of damage: Check the bristles, handle, and overall condition of the brush regularly. If you notice any signs of damage, such as loose bristles or cracks in the handle, it may be time to replace the brush.
- Avoid using harsh chemicals or abrasive cleaners: Stick to mild shampoos and gentle cleaners when cleaning your wooden brush. Harsh chemicals or abrasive cleaners can damage the bristles or the wooden handle.
- Be cautious when using the brush on wet hair: Wooden brushes can be more prone to damage when used on wet or damp hair. To minimize the risk, gently detangle your hair with a wide-toothed comb before using the brush.
- Store the brush with care: Always store the brush in a clean and dry area, preferably with the bristles facing upwards. This prevents dust and other particles from settling on the bristles.
By following these tips, you can maintain the cleanliness and overall condition of your wooden brush for years to come. A well-maintained brush ensures effective hairstyling and contributes to the health and appearance of your hair.