
Why cleaning your cleaning brushes is important
Cleaning brushes are essential tools in maintaining a clean and hygienic environment. Whether you use them for washing dishes, scrubbing floors, or cleaning surfaces, it is crucial to understand the importance of regularly cleaning your cleaning brushes. Here are several reasons why this practice should not be overlooked:
- Preventing cross-contamination: When you clean various surfaces with a dirty brush, you introduce the risk of cross-contamination. Bacteria, germs, and other harmful substances can linger on the bristles and transfer onto other objects, leading to potential health hazards. Regularly cleaning your cleaning brushes helps minimize this risk.
- Improving cleaning efficiency: Over time, cleaning brushes can accumulate debris, residue, and product build-up. This can significantly reduce their effectiveness and hinder your cleaning efforts. By regularly cleaning your brushes, you ensure that they are free from any hindrances and can perform optimally, allowing you to clean more efficiently.
- Extending the lifespan of brushes: Proper maintenance and cleaning can help prolong the lifespan of your cleaning brushes. When dirt and grime build up on the bristles, they can become matted and damaged, leading to a shorter lifespan. Regular cleaning removes these particles, helping to preserve the integrity of the bristles and extending the usefulness of the brush.
- Eliminating unpleasant odors: Cleaning brushes that aren’t regularly cleaned can develop unpleasant odors due to trapped bacteria and residue. The lingering smells can be transferred to the surfaces you clean, leaving behind an unpleasant scent. By cleaning your brushes regularly, you can eliminate these odors and ensure a fresh and clean environment.
- Maintaining hygiene standards: Whether you are cleaning your home or a commercial space, maintaining high hygiene standards is crucial. Dirty cleaning brushes can compromise the cleanliness of the areas you clean and contribute to an unsanitary environment. Regularly cleaning your cleaning brushes is vital in upholding hygiene standards and promoting a healthy living or working space.
Now that you understand why it is important to clean your cleaning brushes regularly, let’s dive into the different types of cleaning brushes and how to properly clean them.
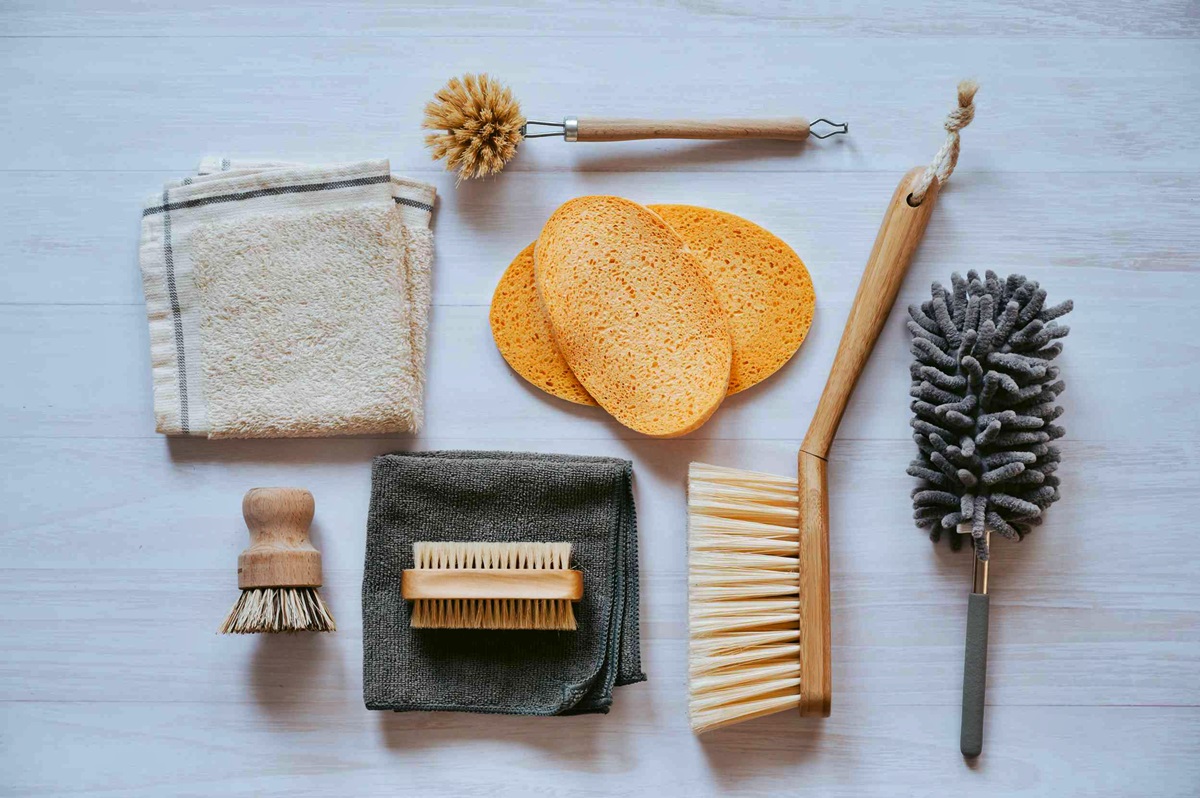
Common types of cleaning brushes
Cleaning brushes come in various shapes and sizes, each designed for specific cleaning tasks. Understanding the different types of cleaning brushes available can help you choose the most suitable one for your cleaning needs. Here are some commonly used cleaning brushes:
- Scrub brush: This is a versatile brush with stiff bristles, perfect for scrubbing away tough stains and grime on surfaces like tiles, grout, and countertops. It is commonly used in bathrooms and kitchens.
- Dish brush: Designed specifically for washing dishes, a dish brush typically has soft bristles and a long handle for easy maneuvering. It is ideal for scrubbing pots, pans, and other kitchen utensils.
- Toilet brush: The toilet brush is specifically designed for cleaning the toilet bowl. It usually has durable bristles that can effectively scrub away stubborn stains while reaching under the rim.
- Dusting brush: A dusting brush is characterized by soft, fine bristles that are ideal for collecting dust particles off surfaces such as furniture, shelves, and electronics without causing any scratches.
- Broom brush: Broom brushes typically have long, stiff bristles that are perfect for sweeping large areas. They are commonly used for outdoor cleaning tasks, such as sweeping sidewalks and driveways.
- Carpet brush: This brush has firm bristles that can effectively lift and remove dirt and debris from carpets and rugs. It helps to revive and fluff up the fibers, keeping your carpets looking fresh and clean.
- Grill brush: A grill brush is specifically designed to clean the grates of grills or barbecues. It usually has tough bristles or wire brushes that can remove grease, food particles, and residue.
- Window brush: Window brushes have soft bristles that are gentle on glass surfaces. They are designed to effectively clean windows, removing smudges, dirt, and streaks.
These are just a few examples of the common types of cleaning brushes available. It’s important to choose the right brush for the task at hand to ensure effective and efficient cleaning. Now, let’s move on to the materials needed for cleaning your cleaning brushes.
Materials needed for cleaning your cleaning brushes
When it comes to cleaning your cleaning brushes, having the right materials on hand can make the process much easier and more effective. Here are some essential materials you will need:
- Mild dish soap or detergent: Using a mild dish soap or detergent is an effective and safe way to clean your cleaning brushes. Look for a gentle formula that can effectively remove dirt and grime without damaging the bristles.
- Warm water: Warm water is ideal for cleaning brushes as it helps to soften any hardened debris or residue, making it easier to remove. Fill a sink or basin with warm water for the cleaning process.
- Brush comb or toothbrush: A brush comb or an old toothbrush can be handy for gently loosening any stubborn residue trapped in the bristles. It allows you to effectively clean the bristles without causing damage.
- Container or basin: You will need a container or basin to hold the warm water and soap mixture for cleaning your brushes. Make sure it’s large enough to accommodate the size of your brushes.
- Clean towel or paper towels: After cleaning your brushes, you’ll need a clean towel or paper towels to dry them thoroughly. Absorbent materials like microfiber towels work well for this purpose.
- Vinegar or baking soda (optional): For stubborn stains or odors, you may use vinegar or baking soda as natural cleaning agents. They can help remove residue and eliminate unpleasant smells. However, be cautious when using these substances on certain types of brushes, as they may cause damage.
- Latex gloves (optional): If you have sensitive skin or prefer to avoid direct contact with cleaning solutions, wearing latex gloves can provide protection for your hands while cleaning your brushes.
Having these materials ready before you begin cleaning will ensure a smooth and efficient process. Now, let’s move on to the step-by-step guide on how to clean your cleaning brushes.
Step-by-step guide to cleaning your cleaning brushes
Cleaning your cleaning brushes is a simple process that requires a few steps to ensure thorough and effective cleaning. Follow this step-by-step guide to keep your brushes in top condition:
- Prepare the cleaning solution: Fill a container or basin with warm water and add a small amount of mild dish soap or detergent. Mix the solution until it becomes soapy.
- Rinse the brushes: Start by rinsing the brushes under running water to remove any loose dirt or debris. Gently shake off any excess water.
- Soak the brushes: Place the brushes in the container with the cleaning solution. Allow them to soak for about 10-15 minutes. This helps to loosen any stubborn residue.
- Scrub the bristles: Using your fingers or a brush comb/toothbrush, gently scrub the bristles to remove any remaining dirt or residue. Make sure to pay attention to the base and edges of the bristles where dirt can accumulate.
- Rinse thoroughly: Rinse the brushes under running water to remove the soap and any residual debris. Continue rinsing until the water runs clear and no soap suds are visible.
- Dry the brushes: Gently squeeze out any excess water from the brushes. Place them on a clean towel or paper towels and pat them dry. If you have multiple brushes, make sure to lay them flat or hang them with the bristles facing down to maintain their shape.
- Optional extra step: For brushes with stubborn stains or odors, you can create a paste using baking soda and water or soak them in a solution of vinegar and water for a few minutes. Rinse thoroughly afterward.
- Inspect and store: Before storing the brushes, inspect them to ensure they are completely dry. Check for any remaining debris or soap residue. Store the brushes in a clean and dry area, preferably upright or in a brush holder to maintain their shape.
By following these steps, you can effectively clean your cleaning brushes and maintain their performance for a longer period. Next, let’s explore some tips for maintaining your cleaning brushes.
Tips for maintaining your cleaning brushes
Proper maintenance and care can extend the life of your cleaning brushes and ensure their continued effectiveness. Here are some helpful tips for maintaining your cleaning brushes:
- Clean brushes regularly: Make it a habit to clean your cleaning brushes after each use or at regular intervals, especially for brushes used for heavy-duty tasks. This prevents the accumulation of dirt, grime, and bacteria.
- Inspect for damage: Regularly inspect your brushes for any signs of wear or damage. Check for loose bristles, cracks, or other issues that may affect their performance. Replace damaged brushes promptly to maintain optimal cleaning results.
- Store properly: Store your cleaning brushes in a clean and dry area, away from any moisture or humidity. Consider hanging them with the bristles facing down or storing them upright to maintain their shape and prevent deformation.
- Avoid using harsh chemicals: Avoid using harsh chemicals or solvents on your cleaning brushes, as they can damage the bristles or handles. Stick to gentle cleaning agents like mild dish soap or detergent to ensure the longevity of your brushes.
- Remove hair and debris: Regularly remove any hair, lint, or other debris that may get stuck in the bristles. Use a comb, your fingers, or a toothpick to gently remove these particles to prevent clogging or reduced cleaning efficiency.
- Allow brushes to dry thoroughly: After cleaning, make sure to allow your brushes to air dry completely before storing them. This prevents the growth of bacteria or mold and helps maintain the integrity of the bristles.
- Replace worn-out bristles: If you notice that the bristles of your cleaning brushes are frayed or worn out, it’s time to replace them. Using brushes with worn-out bristles not only reduces their effectiveness but can also cause scratches or damage to the surfaces you clean.
- Label your brushes: If you have multiple cleaning brushes for different tasks, consider labeling them to avoid cross-contamination. Use permanent markers or color-coded labels to designate specific brushes for certain cleaning jobs.
By following these maintenance tips, you can ensure that your cleaning brushes remain in excellent condition and continue to deliver effective cleaning results. Now, let’s address some frequently asked questions about cleaning brushes.
FAQs about cleaning brushes
Here are some frequently asked questions about cleaning brushes:
- How often should I clean my cleaning brushes?
- Can I clean all types of cleaning brushes using the same method?
- Can I use bleach or disinfectants to clean my cleaning brushes?
- Should I replace my cleaning brushes regularly?
- How can I remove stubborn stains or odors from my cleaning brushes?
- Can I wash my cleaning brushes in the dishwasher?
The frequency of cleaning depends on the frequency of use and the type of cleaning tasks. As a general guideline, it is recommended to clean your cleaning brushes after each use or at least once a week for regular maintenance.
While most cleaning brushes can be cleaned using a similar method, it’s essential to consider the specific material, bristle type, and cleaning requirements of each brush. Some brushes may require extra care or specific cleaning products to avoid damage.
It is generally not recommended to use bleach or strong disinfectants on cleaning brushes, as they can damage the bristles or handles. Stick to mild dish soap or detergent for regular cleaning. However, if you need to disinfect your brushes, opt for a gentle disinfectant suitable for the specific brush type.
Yes, cleaning brushes should be replaced periodically, especially when they show signs of wear or damage. Worn-out bristles or cracks in the handle can compromise their effectiveness and potentially damage the surfaces you clean. It is recommended to replace your cleaning brushes every few months or as needed.
You can try soaking the brushes in a solution of vinegar and water for a few minutes or creating a paste with baking soda and water. Gently scrub the bristles and rinse thoroughly. However, be cautious when using these solutions as they may not be suitable for all types of brushes.
While some cleaning brushes may be dishwasher-safe, it’s best to consult the manufacturer’s instructions for specific guidance. Not all brushes can withstand the high heat and strong water pressure of a dishwasher, which can lead to damage or deformation.
These are just a few commonly asked questions about cleaning brushes. If you have any specific concerns or doubts, it’s always a good idea to refer to the manufacturer’s recommendations or seek professional advice.