Materials Needed
Before you begin cleaning and disinfecting your rug, gather the necessary materials to ensure a thorough and effective process. Here are the key items you’ll need:
- Vacuum cleaner: Invest in a reliable vacuum cleaner with a brush and upholstery attachment.
- Broom: A broom with stiff bristles will come in handy for larger rugs or outdoor rugs.
- Cleaning solution: Choose a rug-specific cleaner or create a DIY solution using mild dish soap and warm water.
- Stain remover: Have a stain remover suitable for your rug’s fabric on hand to treat any stubborn stains.
- White vinegar: This natural disinfectant can be used to remove odors and kill bacteria.
- Soft cloths or towels: Use these to blot stains and for gentle cleaning.
- Rubber gloves: Protect your hands from chemicals and dirt with a pair of rubber gloves.
- Bucket: A bucket will come in handy for mixing cleaning solutions and carrying water.
- Scrub brush: Choose a brush with medium bristles to gently scrub the rug without causing damage.
- Spray bottle: Fill a spray bottle with water and cleaning solution for spot treating.
- Blotting paper or newspaper: These absorbent materials will help in the drying process.
- Outdoor space: If possible, choose a well-ventilated outdoor space for cleaning and drying the rug.
Having these materials ready will ensure you can tackle cleaning and disinfecting your rug effectively and efficiently. Remember to read and follow the product instructions for any specific cleaning solutions or stain removers you use.
Removing Dirt and Debris
Before deep cleaning and disinfecting your rug, it’s crucial to remove any loose dirt and debris. This initial step will prevent these particles from getting ground into the fibers during the cleaning process. Here’s how to effectively remove dirt and debris from your rug:
- Shaking or Beating the Rug: If your rug is small enough and suitable for outdoor cleaning, take it outside and give it a good shake or beat it with a broom or a rug beater. This will help loosen and dislodge dirt from the fibers. Be sure to do this in a well-ventilated area to avoid inhaling dust particles.
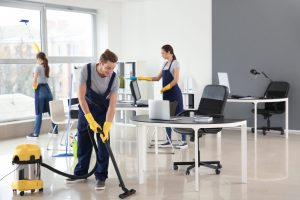
- Vacuuming the Rug: For larger rugs or if shaking is not an option, use a vacuum cleaner with a brush attachment to thoroughly vacuum the rug. Start by vacuuming the front side, then flip it over and vacuum the backside as well. Pay extra attention to high-traffic areas and those prone to accumulation, like near entrances or under furniture.
Remember to take your time and go over the rug multiple times in different directions to ensure you remove as much dirt and debris as possible. If you notice any loose threads or fringes, avoid vacuuming over them to prevent damage.
If you have a shaggy or long-pile rug, use a vacuum cleaner with a rotating brush or a powerhead attachment specifically designed for these types of rugs. This will help loosen and lift dirt from the deeper layers of the fibers.
By thoroughly removing dirt and debris from your rug, you’re setting the foundation for a more effective deep cleaning and disinfection process. Plus, it will help keep your rug looking its best and extend its lifespan.
Shaking or Beating the Rug
Shaking or beating your rug is an effective method to remove dirt, dust, and debris that may have accumulated over time. It’s an essential step before deep cleaning and disinfecting your rug. Here’s how to shake or beat your rug:
If your rug is small enough and suitable for outdoor cleaning, take it outside to an open area, such as your backyard or balcony. Hang the rug over a sturdy clothesline or a railing, ensuring it’s fully supported and doesn’t touch the ground. Alternatively, you can use a rug beater or a broom to beat the rug.
Grab the rug firmly at one corner and give it a vigorous shake to loosen the dirt and debris trapped within the fibers. Continue shaking the rug from different corners to ensure you dislodge as much dirt as possible. Be careful not to strain yourself or shake the rug too forcefully, especially if it’s large or heavy.
If you’re using a rug beater or a broom, hold it firmly and strike the rug with moderate force. Start from one corner and work your way across the entire surface of the rug, focusing on areas that appear especially dirty or dusty. This method helps to loosen and release embedded dirt from the rug’s fibers.
It’s important to note that not all rugs can be easily shaken or beaten. Delicate or antique rugs with fragile fibers may not withstand this process, and it’s best to consult a professional for cleaning recommendations.
Shaking or beating the rug helps to eliminate loose dirt and debris, making the subsequent cleaning and disinfection steps more effective. By starting with this step, you’re already on your way to a cleaner and healthier rug.
Vacuuming the Rug
Vacuuming is an essential step in maintaining the cleanliness and longevity of your rug. Regular vacuuming not only helps remove dirt and debris but also prevents them from settling deep into the fibers. To effectively vacuum your rug, follow these steps:
1. Select the Right Attachment: Use a vacuum cleaner with a brush or upholstery attachment suitable for rugs. This attachment helps loosen dirt and enables thorough cleaning without causing damage to the rug’s fibers.
2. Prepare the Rug: Before you begin vacuuming, remove any small objects, like loose threads or toys, from the rug’s surface. Check for loose fringes or tassels and avoid vacuuming over them to prevent tangling or damaging them.
3. Adjust the Height: Most vacuum cleaners have height adjustment settings. Set the height according to the rug’s pile – higher for thicker rugs and lower for thinner rugs. This ensures optimal suction and thorough cleaning.
4. Start Vacuuming: Begin vacuuming the front side of the rug, moving in the direction of the pile. Slowly and evenly go over the entire surface, using overlapping strokes. Pay extra attention to high-traffic areas and spots prone to dirt accumulation.
5. Flip and Repeat: Flip the rug over and vacuum the backside as well. This step helps remove hidden dirt and dust that may have settled at the bottom of the fibers.
6. Edges and Corners: Use the vacuum’s crevice tool or a small brush attachment to clean the edges and corners of the rug, where dirt often tends to accumulate. Be gentle to avoid damaging the rug or its fringe.
7. Frequency of Vacuuming: How often you vacuum your rug depends on factors like foot traffic, presence of pets, and indoor air quality. As a general guideline, vacuum high-traffic areas at least once a week and less-used areas once every two weeks to prevent dust and dirt from settling in.
Vacuuming your rug regularly helps maintain its cleanliness and appearance. It removes loose dirt, dust, and allergens, keeping your living space fresh and reducing the risk of allergies or respiratory issues. Incorporate vacuuming into your cleaning routine to keep your rug in great condition.
Spot Treating Stains
Accidents happen, and stains on your rug are inevitable. The key is to tackle them as soon as possible to prevent them from setting permanently. Spot treating stains requires a specific approach based on the type of stain and your rug’s fabric. Follow these steps to effectively treat stains on your rug:
1. Act Quickly: The sooner you address a stain, the easier it will be to remove. As soon as you notice a stain, blot the area gently with a clean cloth or paper towel to absorb any excess liquid.
2. Identify the Stain: Determine the type of stain you’re dealing with. Common types include food or beverage stains, pet stains, oil or grease stains, and ink stains. Each stain may require a different treatment method.
3. Test on a Small Area: Before applying any cleaning solution to the stain, test it on a small, inconspicuous area of the rug to ensure it doesn’t cause discoloration or damage the fibers.
4. Choose the Right Cleaner: Use a rug-specific stain remover or create a DIY solution using mild dish soap and warm water. Avoid using bleach or harsh chemicals unless specifically recommended by the rug manufacturer.
5. Blot, Don’t Rub: Moisten a clean cloth or sponge with the cleaning solution and gently blot the stain starting from the outer edges and moving inward. Avoid rubbing the stain, as this can make it spread and penetrate deeper into the fibers.
6. Patience and Persistence: Depending on the stain, it may take several applications and blotting sessions to completely remove it. Continue applying the cleaning solution and blotting until the stain fades or is eliminated. Be patient and persistent.
7. Rinse Thoroughly: Once the stain is removed, rinse the area with clean water to remove any residue from the cleaning solution. Blot the area with a clean cloth or sponge to absorb the moisture.
8. Dry the Area: Allow the treated area to air dry completely before using the rug. Avoid stepping on or placing any objects on the damp area to prevent further staining or damage.
Remember, for tough or stubborn stains, it’s always best to consult a professional rug cleaner who can provide specialized stain removal techniques and advice.
By spot treating stains promptly and with the appropriate methods, you can preserve the appearance and condition of your rug, ensuring it stays clean and beautiful for years to come.
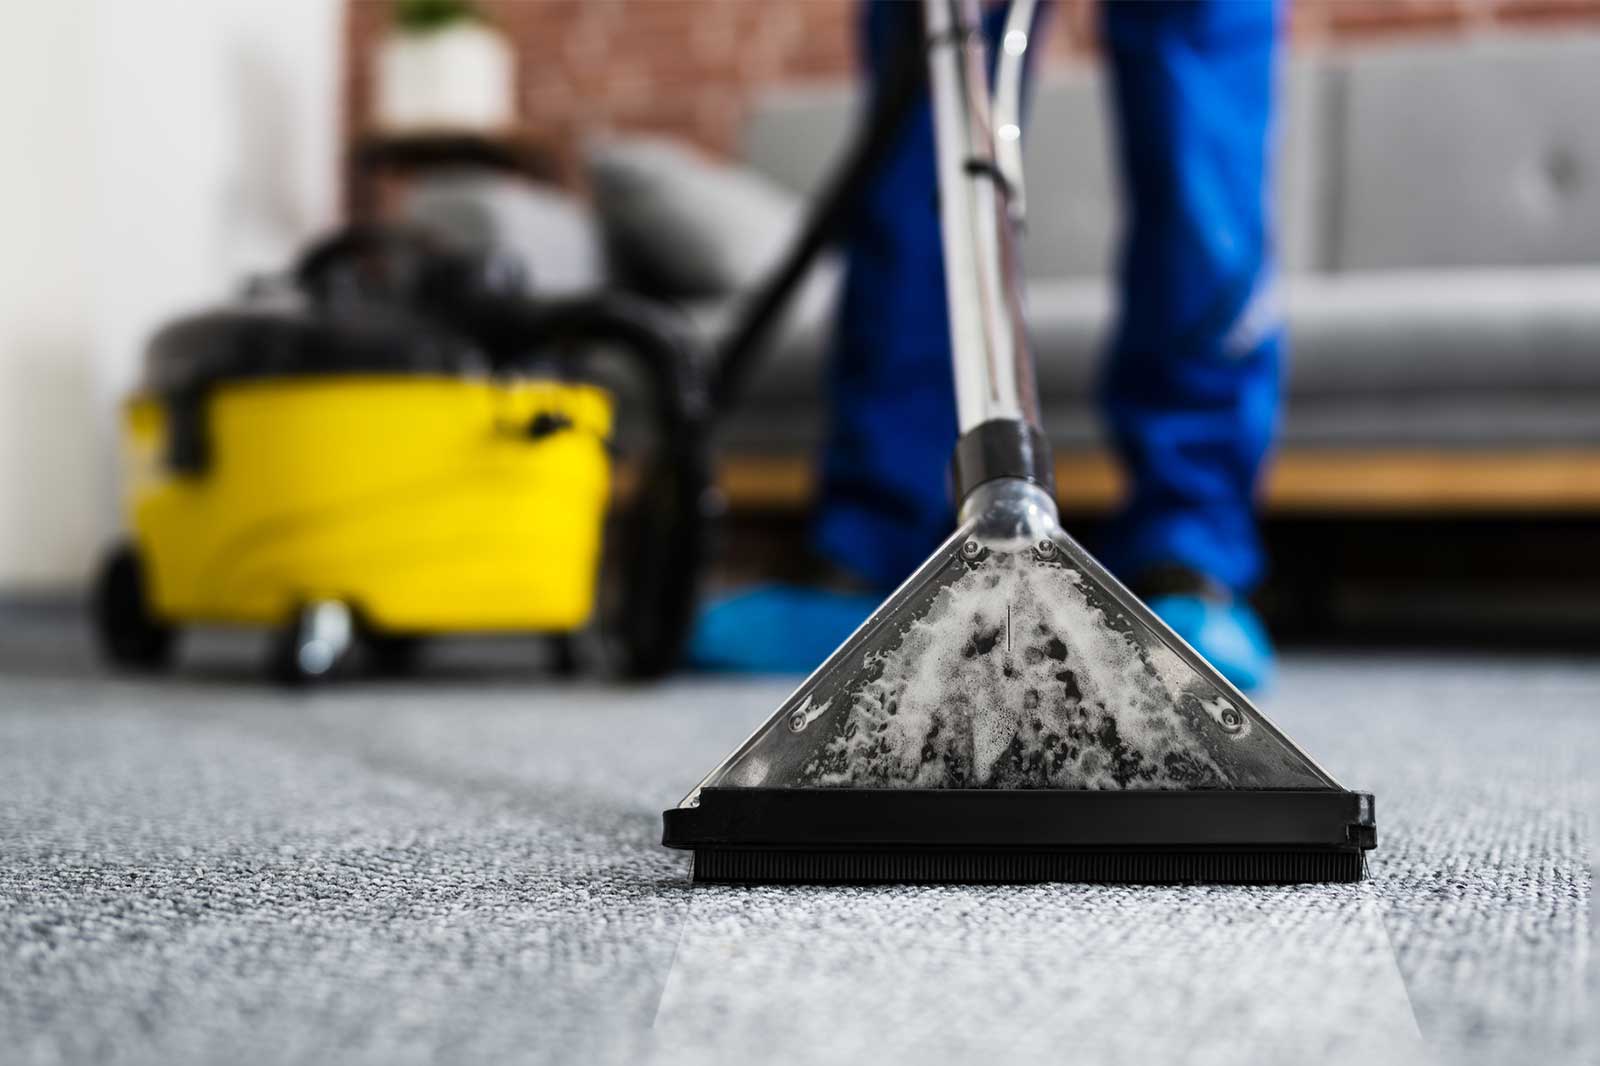
Using a Carpet Cleaner
For deep cleaning your rug and removing embedded dirt and stains, using a carpet cleaner can be an effective solution. Carpet cleaners are designed to penetrate deep into the fibers, lifting dirt and grime for a thorough cleaning. Here’s how to use a carpet cleaner on your rug:
1. Read the Instructions: Familiarize yourself with the manufacturer’s instructions and guidelines for using the carpet cleaner. Different models may have specific instructions or recommended cleaning solutions.
2. Prepare the Cleaning Solution: Depending on your carpet cleaner, you may need to mix a cleaning solution with water. Follow the recommended dilution ratios provided by the manufacturer or use a rug-specific cleaning solution.
3. Prepare the Rug: Vacuum the rug thoroughly to remove any loose dirt and debris. If there are any visible stains, treat them using spot cleaning techniques before using the carpet cleaner.
4. Fill the Tank: Fill the carpet cleaner’s tank with the prepared cleaning solution. Ensure that the tank is securely attached to the machine and follow any additional instructions provided by the manufacturer.
5. Start Cleaning: Begin cleaning the rug by slowly pushing the carpet cleaner over the surface, going in straight lines. Work in small sections, overlapping each pass to ensure thorough coverage. Avoid excessive saturation, as over-wetting the rug can lead to damage.
6. Persistent Stains: If you encounter stubborn stains during the cleaning process, pause and use the carpet cleaner’s handheld attachment or a spot treatment method to treat those specific areas.
7. Allow Drying Time: After cleaning, allow the rug to dry completely before placing furniture back on it or walking over it. Ventilate the room and use fans to expedite the drying process if necessary.
8. Clean the Carpet Cleaner: Once you’ve finished cleaning your rug, empty and rinse the carpet cleaner’s tank, and clean any brushes or attachments as per the manufacturer’s instructions. This helps maintain the effectiveness and longevity of the machine.
Using a carpet cleaner allows you to deeply clean and refresh your rug, extracting embedded dirt, allergens, and odors. Regular deep cleaning with a carpet cleaner helps extend the life of your rug and keeps it looking its best.
Steam Cleaning the Rug
Steam cleaning is a highly effective method for deep cleaning and sanitizing your rug. The hot steam penetrates deep into the rug’s fibers, effectively removing dirt, allergens, and bacteria. Here’s how to steam clean your rug:
1. Prepare the Steam Cleaner: Read the manufacturer’s instructions for your steam cleaner and ensure it is in proper working condition. Fill the steam cleaner with water according to the instructions, and add any recommended cleaning solution if necessary.
2. Prepare the Rug: Vacuum the rug thoroughly to remove loose dirt and debris. Treat any visible stains using spot cleaning techniques before steam cleaning.
3. Test on a Small Area: Before steam cleaning the entire rug, test a small section in an inconspicuous area to ensure that the steam and cleaning solution do not cause any discoloration or damage to the fibers.
4. Start Steam Cleaning: Begin steam cleaning the rug by starting at one corner and working your way across the entire surface. Move the steam cleaner slowly, allowing the steam and suction to extract dirt and moisture from the rug. Overlap each pass to ensure complete coverage.
5. Focus on Stubborn Stains: For stubborn stains, use the steam cleaner’s spot cleaning attachment or handheld nozzle to target those areas specifically. Apply steam and gently agitate the stain using a soft brush, then extract the moisture with the steam cleaner.
6. Drying Time: After steam cleaning, allow the rug to dry completely. Open windows or turn on fans to promote air circulation and expedite the drying process. Avoid placing furniture or walking on the rug until it is completely dry.
7. Regular Maintenance: To keep your rug fresh and clean, incorporate steam cleaning into your routine at least once or twice a year, depending on the level of foot traffic and use the rug receives.
Steam cleaning your rug not only removes dirt and stains but also eliminates allergens and bacteria, providing a deep and thorough cleaning. It’s a highly effective method for reviving and maintaining the overall cleanliness and hygiene of your rug.
Drying the Rug
Properly drying your rug after cleaning is essential to prevent mold and mildew growth and maintain its integrity. Here’s how to effectively dry your rug:
1. Remove Excess Moisture: After cleaning, use a clean towel or absorbent paper to blot the rug and remove as much moisture as possible. Press down gently and repeat the process until the towel no longer absorbs moisture.
2. Hang or Lay the Rug: If the weather permits and the rug is small enough, hang it outdoors in a well-ventilated area. Make sure the rug is properly supported to avoid stretching or damage. Alternatively, you can lay the rug flat on a clean surface, preferably one that allows air circulation.
3. Avoid Direct Sunlight: If drying the rug outdoors, ensure it is not exposed to direct sunlight, as this can cause fading or discoloration. Instead, place the rug in a shaded area where it can dry naturally.
4. Air Circulation: Improve airflow around the rug by using fans or opening windows. This will help speed up the drying process by promoting evaporation and preventing moisture buildup.
5. Flip and Rotate: To ensure even drying, flip the rug periodically. This helps prevent moisture from being trapped within the fibers and promotes thorough drying on both sides.
6. Patience: Drying a rug can take time, especially if it is thick or densely woven. Be patient and avoid rushing the process to prevent any residual moisture from causing damage or odors.
7. Check for Dryness: Check the rug periodically by touching the fibers. If they feel cool or damp, continue the drying process. Avoid using the rug until it is completely dry to prevent any potential issues.
By following these steps, you can ensure that your rug dries properly and remains in optimal condition. Proper drying not only prevents potential damage but also helps maintain the appearance and prolong the lifespan of your rug.
Preventing Future Stains and Dirt
While regular cleaning is important, preventing stains and dirt from accumulating on your rug in the first place is key to maintaining its cleanliness and appearance. Here are some tips to help prevent future stains and dirt:
1. Implement a “Shoes Off” Policy: Encourage family members and guests to remove their shoes before entering the house or stepping onto the rug. This simple step can significantly reduce the amount of dirt and debris brought indoors.
2. Use Doormats: Place doormats at all entrances, both inside and outside, to capture dirt and moisture from shoes. Encourage everyone to wipe their feet thoroughly on the doormats before stepping onto the rug.
3. Spot Clean Spills Promptly: Accidents are bound to happen, so be proactive in dealing with spills and messes. Quickly blot any spills using a clean cloth or paper towel to prevent them from seeping into the rug’s fibers and causing stains.
4. Avoid Eating or Drinking Over the Rug: Keep food and beverages away from the rug to minimize the risk of spills and stains. If you must eat or drink near the rug, use trays or placemats to catch any potential spills or crumbs.
5. Place Rug Pads: Use rug pads under your rugs to provide cushioning and prevent them from slipping. Rug pads also create a barrier between the rug and the floor, reducing the likelihood of dirt or liquids seeping through.
6. Regularly Vacuum: Maintain a consistent vacuuming routine to remove loose dirt, dust, and allergens from the rug’s surface. Regular vacuuming prevents these particles from settling deep into the fibers and becoming harder to remove.
7. Rotate the Rug: Rotate the rug periodically to even out wear and tear. This helps prevent specific areas from being subjected to excessive foot traffic and reduces the chance of stains and dirt accumulating in one spot.
8. Consider Professional Rug Cleaning: Schedule professional rug cleaning at least once a year or as recommended by rug experts. Professional cleaning can effectively remove embedded dirt, stains, and odors, keeping your rug in optimal condition.
By taking preventive measures and implementing these tips, you can significantly reduce the chances of future stains and dirt buildup on your rug. This proactive approach will help preserve the cleanliness and beauty of your rug for years to come.
Final Thoughts
Cleaning and maintaining your rug not only improves its appearance but also extends its lifespan. By following the proper cleaning techniques and implementing preventive measures, you can keep your rug looking fresh, clean, and beautiful for years to come. Here are some key points to remember:
1. Regular Cleaning: Vacuum your rug regularly to remove loose dirt and debris. Incorporate deep cleaning methods, such as steam cleaning or using a carpet cleaner, to thoroughly refresh and sanitize your rug.
2. Spot Treating Stains: Address stains promptly using appropriate spot cleaning techniques. Blot the stain rather than rubbing it, and use suitable cleaning solutions to minimize damage to the rug’s fibers.
3. Drying Properly: Ensure your rug dries completely after cleaning to avoid mold and mildew growth. Proper drying methods include blotting excess moisture and allowing air circulation during the drying process.
4. Preventive Measures: Implement strategies to prevent future stains and dirt accumulation. Encourage a “shoes off” policy, use doormats, and promptly spot clean spills to minimize potential damage to your rug.
5. Professional Maintenance: Consider professional rug cleaning at least once a year or as recommended. Professional cleaners have the expertise and specialized tools to effectively remove deep-seated dirt and revitalize your rug.
Remember, each rug is unique, so it’s essential to check the manufacturer’s guidelines or consult a professional if you have any specific concerns or questions about cleaning and maintaining your rug.
By taking care of your rug and establishing a regular cleaning routine, you can enjoy a beautiful, clean, and long-lasting rug that adds warmth and style to your space. So, roll up your sleeves, gather your cleaning tools, and give your rug the attention it deserves. Your efforts will be rewarded with a rug that looks and feels its best.