
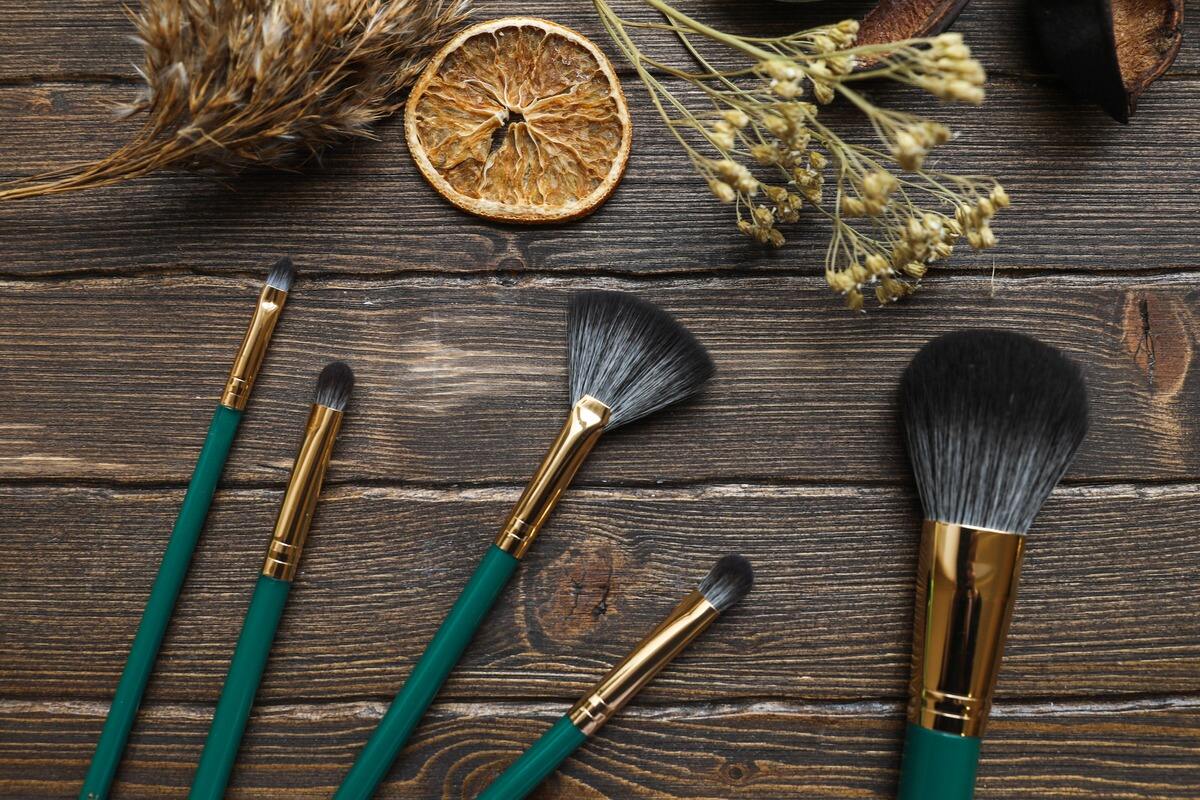
Why Clean Your Kabuki Brush?
Regularly cleaning your kabuki brush is essential to maintain its performance and ensure the longevity of the brush. Here are a few reasons why cleaning your kabuki brush is crucial:
1. Hygiene: Makeup brushes accumulate bacteria, oils, and dead skin cells over time. These build-ups can lead to clogged pores, breakouts, and skin irritation. By cleaning your kabuki brush regularly, you can prevent the transfer of these impurities to your skin and ensure a healthier makeup application.
2. Better Makeup Application: A clean kabuki brush distributes makeup products more evenly and smoothly on your skin. When the brush is dirty, it can become clumpy and leave streaks or patches on your face, affecting the overall appearance of your makeup. By cleaning your kabuki brush, you can ensure a flawless and seamless makeup application.
3. Maintaining Brush Quality: Proper cleaning helps maintain the quality and performance of your kabuki brush. Over time, dirt, oil, and dried makeup residue can build up on the bristles, causing them to become stiff and less effective. Regular cleaning removes these residues and keeps the bristles soft and flexible, ensuring optimal performance every time you use the brush.
4. Prolonging Brush Lifespan: Cleaning your kabuki brush regularly can significantly extend its lifespan. The accumulation of product residue can cause the bristles to break or shed more easily, leading to a shorter lifespan for the brush. By maintaining cleanliness, you can keep your kabuki brush in excellent condition, allowing it to serve you for a longer period.
5. Preventing Cross-Contamination: If you use your kabuki brush with different makeup products, failure to clean it regularly can result in cross-contamination. This can alter the colors and textures of the makeup products, leading to undesirable results. Cleaning your kabuki brush between uses ensures that each product you apply is free from any traces of previous makeup.
Now that you understand the importance of cleaning your kabuki brush, let’s move on to the next section to learn what you will need for the cleaning process.
What You Will Need
Before you start cleaning your kabuki brush, gather the following items:
1. Mild Soap or Brush Cleanser: Choose a gentle soap or specifically designed brush cleanser that is suitable for cleaning makeup brushes. Avoid using harsh detergents or cleansers that can damage the bristles.
2. Warm Water: You’ll need warm water to rinse the brush thoroughly. Make sure the water is not too hot, as it can damage the bristles.
3. Clean Towel or Paper Towels: Prepare a clean towel or a few paper towels to gently squeeze out excess water from the brush and to lay it flat on during the drying process.
4. Brush Cleaning Pad or Brush Cleaning Mat (optional): If you have a brush cleaning pad or mat, it can be useful for agitating the bristles and removing stubborn makeup residue. However, it is not necessary for cleaning your kabuki brush.
5. Your Kabuki Brush: Of course, you’ll need the kabuki brush that you are looking to clean!
Once you have these items ready, you can proceed to the next section where we will guide you through the step-by-step process of cleaning your kabuki brush.
Step 1: Prepare Your Brush
Before diving into the cleaning process, it’s essential to prepare your kabuki brush properly. Here’s what you need to do:
1. Gather Your Materials: Make sure you have all the necessary items mentioned in the previous section, such as mild soap or brush cleanser, warm water, clean towel or paper towels, and your kabuki brush.
2. Check the Condition: Inspect your kabuki brush for any signs of damage or loose bristles. If you notice any significant damage, it may be time to replace the brush. Also, if you find any loose bristles, gently tug them out to prevent them from shedding during the cleaning process.
3. Remove Excess Makeup: Use your fingers or a clean cloth to remove any excess makeup from the bristles. Gently swipe the brush back and forth on the cloth to dislodge the loose particles. Be careful not to rub harshly or pull on the bristles to avoid damaging them.
4. Wet the Bristles: Moisten the bristles of your kabuki brush under lukewarm running water. Make sure to hold the brush upright, with the bristles pointing downwards, to prevent water from seeping into the ferrule or handle. Avoid fully submerging the brush in water, as this can lead to damage.
By following these preparation steps, you set the stage for an effective and safe cleaning process. Once your kabuki brush is ready, we can move on to the next step – removing excess makeup.
Step 2: Remove Excess Makeup
Now that your kabuki brush is prepared, let’s move on to removing the excess makeup that may be lingering on the bristles. Follow these steps:
1. Gently Tap or Swirl: Take your kabuki brush and lightly tap it against a clean towel or tissue. This will help dislodge any loose powder or excess product. Alternatively, you can gently swirl the brush on the towel in circular motions.
2. Repeat as Needed: Continue tapping or swirling the brush until you no longer see any makeup residue transferring onto the towel. Be patient and thorough to ensure that you remove as much buildup as possible.
3. Pay Attention to the Tips: Take extra care to remove any product buildup at the tips of the bristles. This area often accumulates more makeup, so ensure that you tap or swirl the brush’s tips against the towel or tissue.
4. Check for Residue: After tapping or swirling, inspect the brush to see if there is any visible residue still present. If you notice any remaining makeup, gently rub the bristles between your fingers or use a brush cleaning pad/mat to further remove the residue.
5. Repeat the Process if Necessary: If your kabuki brush is heavily coated with makeup, you may need to repeat this step a few times to ensure complete removal. It’s better to be thorough and take the time to remove all the excess makeup.
By following these steps, you effectively remove excess makeup from your kabuki brush, ensuring a clean starting point for the next stage – washing the brush with mild soap or brush cleanser.
Step 3: Wash with Mild Soap
After removing the excess makeup from your kabuki brush, it’s time to thoroughly clean the bristles. Follow these steps to wash the brush with a mild soap or brush cleanser:
1. Wet the Bristles: Moisten the bristles under warm running water. Make sure to hold the brush with the bristles facing downwards to avoid water flowing into the ferrule or handle, as it can cause damage.
2. Apply the Soap: Take a small amount of mild soap or brush cleanser onto your palm or directly onto the bristles of the kabuki brush.
3. Create a Lather: Gently swirl the bristles of the brush in your palm or against a brush cleaning pad/mat to create a lather. Make sure to distribute the soap or cleanser evenly throughout the bristles.
4. Cleanse the Bristles: Using your fingers, work the soap or cleanser into the bristles, making sure to reach all areas, including the base and tips. Gently massage the bristles in a circular motion to dislodge any trapped dirt or makeup residue.
5. Rinse the Bristles: Rinse the kabuki brush under warm running water, ensuring that you thoroughly remove all traces of soap or cleanser from the bristles. Continue rinsing until the water runs clear.
6. Repeat if Necessary: If the bristles still appear dirty or if you used a heavily pigmented makeup product, you may need to repeat the washing process with soap or cleanser to ensure the brush is thoroughly cleansed.
7. Avoid Soaking: It’s important to note that you should not fully submerge your kabuki brush in water or let it soak for an extended period. This can cause damage to the bristles and weaken the brush over time.
By following these steps, you effectively wash away any remaining residues and ensure that your kabuki brush is clean and ready for use. In the next section, we’ll move on to rinsing the brush thoroughly to remove any soap or cleanser residue.
Step 4: Rinse Thoroughly
After washing your kabuki brush with mild soap or brush cleanser, it’s crucial to rinse it thoroughly to remove any remaining soap or cleanser residue. Follow these steps for a thorough rinse:
1. Warm Water Rinse: Hold the brush under warm running water, ensuring that the water flows through the bristles from the base to the tips. Continue rinsing until the water runs clear, indicating that all traces of soap or cleanser have been removed.
2. Squeeze Out Excess Water: Gently squeeze the bristles from the base to the tips to remove excess water. Be careful not to twist or wring the bristles, as this can damage or misshape them.
3. Repeat if Necessary: If you notice any soap or cleanser residue during the rinsing process or if the water is not running clear, repeat the rinsing step again until the bristles are thoroughly clean.
4. Test for Residue: To ensure that all soap or cleanser residue has been removed, you can perform a simple test. Take a clean, white tissue or towel and gently swipe the bristles against it. If you see any residue transferring onto the tissue, it indicates that there is still soap or cleanser left in the brush.
5. Continue Rinsing: If you find any residue, continue rinsing the kabuki brush under warm running water until the bristles are completely clean and no residue transfers onto the tissue or towel.
By thoroughly rinsing your kabuki brush, you remove any remaining soap or cleanser, ensuring that it is free from any residue that could potentially affect your makeup application. Next, we’ll move on to the next step – squeezing out excess water from the bristles.
Step 5: Squeeze Out Excess Water
Once you have rinsed your kabuki brush thoroughly, it’s important to remove excess water from the bristles before proceeding to dry it. Follow these steps to squeeze out the excess water:
1. Gently Squeeze from Base to Tips: Hold the brush with the bristles facing downwards and gently squeeze the bristles from the base to the tips using your thumb and forefinger. Be cautious not to apply too much pressure, as it can damage or misshape the bristles.
2. Repeat Squeezing if Necessary: If the bristles still feel wet or water continues to come out, repeat the squeezing process until you no longer observe excess water being released from the brush.
3. Avoid Twisting or Wringing: It’s important to note that you should never twist or wring your kabuki brush to remove water. This can cause the bristles to become misshapen or even fall out. Stick to gently squeezing to protect the integrity of the brush.
4. Test for Dampness: To ensure that you have removed as much water as possible, lightly touch the bristles with your finger. They should feel slightly damp but not dripping wet. You should be able to gently touch the bristles without transferring water onto your skin.
5. Be Patient: Remember that fully drying your kabuki brush is essential to prevent moisture from lingering and potentially causing mildew or bacterial growth. Take your time to properly squeeze out the excess water before moving on to the next steps.
By effectively squeezing out excess water from your kabuki brush, you set the stage for proper drying. In the following section, we’ll discuss how to shape the bristles to maintain the brush’s form and performance.
Step 6: Shape the Bristles
After removing the excess water from your kabuki brush, it’s important to shape the bristles to maintain the brush’s form and performance. Follow these steps to shape the bristles:
1. Gently Pat the Bristles: Use a clean towel or paper towels to gently pat the bristles of the kabuki brush. This helps in further removing excess moisture and promoting faster drying.
2. Reshape the Brush: Using your fingers, gently reshape the bristles back to their original form. Run your fingers through the bristles from the base to the tips, ensuring that they are aligned and not tangled or bent.
3. Finger Comb the Bristles: If the bristles appear slightly misshapen or tangled, you can use your fingers to comb through them. Starting from the base, run your fingers through the bristles, gently straightening and aligning them.
4. Check for Evenness: Ensure that the bristles are distributed evenly and there are no clumps or bends. This step is important for optimal makeup application, as it ensures that the brush maintains its desired shape and function.
5. Avoid Using Excessive Force: Be gentle when reshaping the bristles and avoid applying excessive force, as this can lead to damage or breakage. Treat your kabuki brush with care to prolong its lifespan.
6. Allow the Brush to Air Dry: Place the kabuki brush on a clean towel or flat surface and let it air dry. Make sure to lay it flat or prop it up with the bristles facing downwards to allow any remaining moisture to evaporate. Avoid using a hairdryer or any other direct heat source, as this can damage the brush or cause the bristles to become brittle.
By taking the time to shape the bristles of your kabuki brush, you ensure that it maintains its form and performance. In the next section, we’ll discuss the importance of drying the brush properly to prevent damage and maintain its quality.
Step 7: Dry Properly
Drying your kabuki brush properly is crucial to maintain its quality and prevent damage. Follow these steps to ensure proper drying:
1. Air Dry in a Well-Ventilated Area: Place your kabuki brush in a well-ventilated area with good air circulation. This helps to expedite the drying process and prevent moisture from lingering on the bristles.
2. Lay Flat or Prop with Bristles Down: It’s important to lay the brush flat or prop it up with the bristles facing downwards. This allows any remaining water to drip away from the ferrule and prevent it from seeping into the handle or causing damage to the brush.
3. Avoid Heat or Direct Sunlight: Never use a hairdryer or expose your kabuki brush to direct heat or sunlight to speed up the drying process. Excessive heat can cause the bristles to become damaged or misshapen. Stick to air drying to ensure the longevity of your brush.
4. Patience is Key: Give your kabuki brush ample time to completely dry before using or storing it. Depending on the brush size and density, it may take several hours or overnight for the bristles to dry thoroughly.
5. Check for Dryness: To ensure that your kabuki brush is completely dry, lightly touch the bristles with your finger. They should feel completely dry and cool to the touch. If you feel any moisture, give the brush more time to dry.
6. Keep the Brush in an Upright Position: Once your kabuki brush is dry, store it in an upright position to help retain its shape. A brush holder or a cup with the bristles facing upwards is ideal for storing your brush and protecting it from damage.
By allowing your kabuki brush to dry properly, you ensure that it remains in excellent condition for future use and protects the integrity of the bristles. In the next section, we’ll discuss how to store your kabuki brush correctly to optimize its lifespan.
Step 8: Store Your Brush Correctly
Properly storing your kabuki brush is essential to maintain its shape and protect it from damage. Follow these steps to store your brush correctly:
1. Keep It in a Clean and Dry Place: Store your kabuki brush in a clean and dry environment to prevent dust, dirt, or moisture from accumulating on the bristles. Avoid storing it in the bathroom or any area prone to humidity.
2. Use a Brush Holder or Cup: Invest in a brush holder or use a cup to keep your kabuki brush upright. This not only helps maintain the shape of the bristles but also prevents them from being bent or misshapen in storage.
3. Separate from Other Brushes: If you have multiple makeup brushes, it’s important to store your kabuki brush separately. This prevents the bristles from rubbing against other brushes, which can cause damage or fray the bristles.
4. Avoid Contact with Moisture: Keep your kabuki brush away from water or any liquids to prevent the bristles from getting wet or molding. Also, avoid storing it near a sink or any area where it can accidentally come into contact with water.
5. Protect the Bristles: Consider using a brush guard or plastic cap to protect the bristles of your kabuki brush. This helps maintain their shape and prevents them from being squished or bent when stored in a tight space or during travel.
6. Keep Away from Direct Sunlight: Avoid exposing your kabuki brush to direct sunlight for prolonged periods. Sunlight can fade the bristles or degrade the glue that holds them in place. Opt for a shaded area or a drawer for storage.
7. Clean Before Storing: Before storing your kabuki brush, make sure it is thoroughly cleaned and completely dry. This prevents any leftover makeup residue or moisture from causing bacterial growth or compromising the quality of the brush.
By following these steps, you can store your kabuki brush correctly, ensuring its longevity and preserving its performance. Proper storage is just as important as proper cleaning and care. Now that you know how to store your brush, let’s move on to some tips to help you maintain your kabuki brush in excellent condition.
Tips for Maintaining Your Kabuki Brush
To keep your kabuki brush in excellent condition and extend its lifespan, consider the following tips:
1. Clean Regularly: Make a habit of cleaning your kabuki brush regularly, ideally after every few uses or at least once a week, to prevent buildup of makeup, dirt, and bacteria.
2. Be Gentle: Treat your kabuki brush with care. Avoid harsh rubbing, twisting, or pulling on the bristles, as this can lead to shedding or damage. Use gentle, circular motions when applying and blending makeup.
3. Deep Clean Periodically: In addition to regular cleaning, give your kabuki brush a deep cleanse every few weeks by using a brush cleaning solution or a mixture of mild soap and warm water.
4. Avoid Sharing: It’s best to avoid sharing your kabuki brush with others to prevent cross-contamination of makeup products and bacteria. Keep your brush for personal use only.
5. Trim Loose Bristles: If you notice any loose or stray bristles, trim them with a clean pair of scissors. This will help maintain the brush’s shape and prevent shedding.
6. Avoid Excessive Product Buildup: Try to remove excess product from your brush before each use. This will not only keep your kabuki brush cleaner, but it will also allow for better application and blending of your makeup.
7. Store Properly When Traveling: When traveling, protect your kabuki brush by using a brush guard or storing it in a pouch or case to prevent the bristles from getting damaged or bent.
8. Replace When Necessary: Keep an eye on the condition of your kabuki brush. If you notice significant shedding, bristle breakage, or a decrease in performance, it’s time to replace the brush to maintain optimal makeup application.
By following these tips, you can ensure that your kabuki brush remains clean, functional, and in excellent condition for a long time to come. Taking care of your brush will result in better makeup application and a smoother, more enjoyable beauty routine.