
Choosing the Right Material and Size for Your Outdoor Rug
When it comes to building a blue outdoor rug that will withstand the elements and add style to your outdoor space, choosing the right material and size is crucial. Here are some essential considerations to guide you in selecting the perfect outdoor rug:
- Material: Opt for materials that are specifically designed for outdoor use, such as polypropylene, synthetic fibers, or natural fibers like bamboo or sisal. These materials are durable, weather-resistant, and easy to clean. Avoid using materials that are prone to mold or fading.
- Size: Measure the area where you plan to place the rug to determine the appropriate size. Consider the layout and furniture placement in your outdoor space. Ideally, the rug should be large enough to accommodate your furniture while providing a comfortable walking area around it.
- Texture: Decide on the type of texture you desire for your outdoor rug. Smooth and flat textures are easier to clean, while textured rugs can add depth and dimension to your outdoor space. Consider the overall aesthetic and functionality you want to achieve.
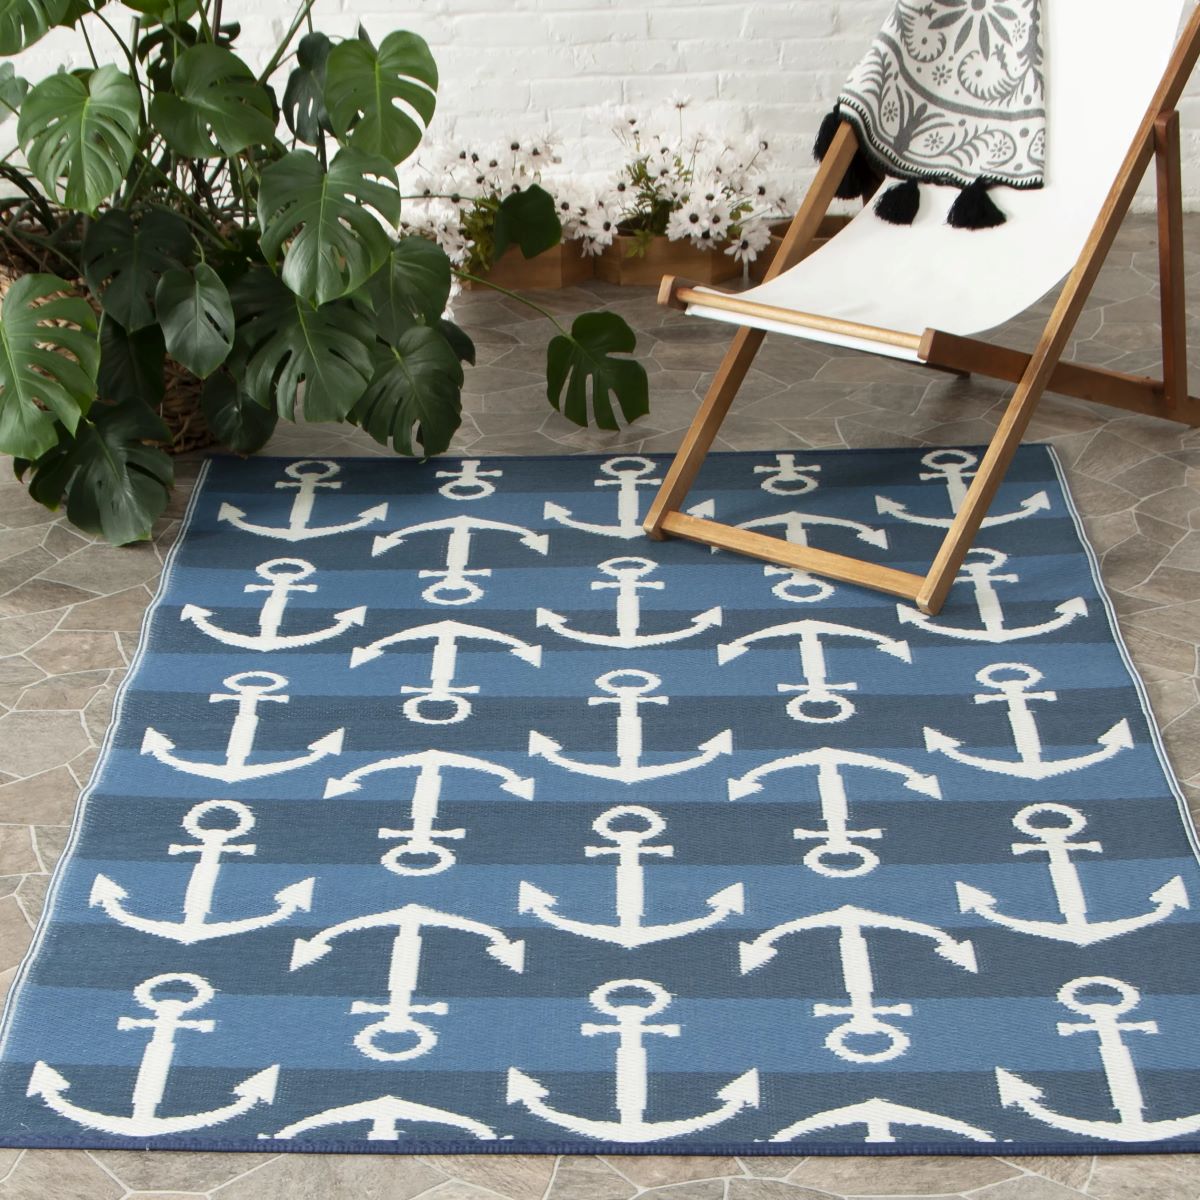
- Color and Pattern: Blue outdoor rugs can add a touch of serenity and elegance to your outdoor space. Choose a shade of blue that complements your existing outdoor decor or creates a pleasing contrast. Additionally, consider patterns or designs that will enhance the overall aesthetic appeal of your outdoor area.
- Maintenance: Consider how much maintenance you are willing to invest in your outdoor rug. Some materials require regular cleaning, while others are resistant to stains and can be easily hosed down. Determine the level of upkeep that aligns with your lifestyle.
By carefully considering the material, size, texture, color, and maintenance requirements of your outdoor rug, you can ensure that it not only fits aesthetically but also stands the test of time. Remember to clean and store your rug properly during harsh weather conditions to prolong its lifespan. Now that you have selected the perfect materials and size, it’s time to move on to the next steps in building your blue outdoor rug.
Preparing Your Work Area and Materials
Before you start building your blue outdoor rug, it’s important to prepare your work area and gather all the necessary materials. Here are the steps to get started:
- Clean and Clear the Area: Begin by clearing the designated area where you plan to paint your rug. Remove any debris, furniture, or items that might hinder your work. Make sure the surface is clean and smooth for better paint application.
- Gather Your Materials: Collect all the materials you will need to build your outdoor rug. This includes a drop cloth or plastic sheet to protect the ground, masking tape, a measuring tape, a stencil or design template, outdoor-friendly paint in various shades of blue, a paint roller or brush, and a sealer or clear coat for added durability.
- Protective Gear: As you’ll be working with paint, it’s essential to protect yourself. Wear old clothes or an apron to prevent staining and use gloves to keep your hands clean. If you’re working in a well-ventilated area, consider wearing a mask to avoid inhaling paint fumes.
- Set up Your Work Area: Lay down the drop cloth or plastic sheet to protect the ground from any spills or drips. Organize your materials and place them within easy reach. Depending on the size of your rug, you may need to work in sections, so plan accordingly.
- Ensure Proper Ventilation: If you are working indoors or in a partially covered area, make sure there is adequate ventilation. Open windows or use fans to keep the space well-ventilated and to help the paint dry faster.
By taking the time to properly prepare your work area and gather all the necessary materials, you can create a smooth and efficient process for building your blue outdoor rug. Once you have everything in place, you’re ready to move on to creating a stencil design for your rug.
Creating a Stencil Design for Your Rug
Creating a stencil design for your blue outdoor rug is a fun and creative step in the building process. It allows you to add personalized patterns or designs to make your rug unique. Follow these steps to create your stencil design:
- Choose a Design: Decide on the design or pattern you want to incorporate into your outdoor rug. This can be geometric shapes, floral motifs, or even simple lines and stripes. Consider the overall style and theme of your outdoor space, as well as your personal preferences.
- Size and Scale: Determine the size and scale of your stencil design based on the dimensions of your rug. Measure and mark the appropriate areas where you want the design to be placed. Keep in mind that larger patterns may require additional time and precision during the painting process.
- Create or Purchase a Stencil: You have the option to create your own stencil using stencil sheets, cardboard, or acetate, or you can purchase pre-made stencils from craft stores or online. Make sure the stencil is sturdy and can withstand multiple uses.
- Secure the Stencil: Position your stencil on the designated area of your rug. Use masking tape or painter’s tape to secure the stencil in place, ensuring that it doesn’t shift or move during the painting process. This will help you achieve clean and precise lines in your design.
- Painting the Stencil: Dip your paintbrush or roller into the outdoor-friendly blue paint and apply it evenly over the stencil. Be careful not to apply too much paint at once, as it can lead to smudging or bleeding. Use multiple layers if necessary to achieve the desired color intensity.
- Remove the Stencil: After painting the stencil, carefully remove it from the rug while ensuring that the paint doesn’t smudge. Lift the stencil slowly and evenly to reveal your stencil design underneath. Let the paint dry before moving on to the next section or adding additional patterns.
Creating a stencil design allows you to personalize your blue outdoor rug and add a touch of creativity to your outdoor space. Take your time and enjoy the process of bringing your vision to life. Once you’ve completed the stencil design, it’s time to move on to the exciting step of painting your rug with outdoor-friendly paint.
Painting Your Rug with Outdoor-Friendly Paint
Now that you have your stencil design ready, it’s time to paint your blue outdoor rug using outdoor-friendly paint. Follow these steps to achieve a vibrant and long-lasting result:
- Choose Outdoor-Friendly Paint: Select paint specifically designed for outdoor use. Look for paint labeled as weather-resistant, fade-resistant, and suitable for use on the material of your rug. Acrylic or latex paint is often a good choice. Consider using multiple shades of blue for a more dynamic and visually appealing rug.
- Prepare Your Paint: If necessary, dilute the paint with water according to the instructions provided. Stir the paint thoroughly to ensure a smooth and consistent color. Pour the paint into a tray or use a paint palette to make it easier to dip your brush or roller.
- Begin Painting: Start painting over your stencil design using a brush or roller. Apply the paint evenly and smoothly, following the lines and contours of the design. For larger areas, a roller provides efficient coverage, while a brush allows for more precise details. Allow the paint to dry between coats if you want to achieve a deeper color.
- Tidy Up Edges: After removing the stencil, it’s common to have some edges that need to be tidied up. Use a small, fine-tipped brush to carefully touch up areas where the paint may have bled or smudged. This will ensure crisp and clean lines in your design.
- Add Fine Details: If desired, you can enhance your stencil design by adding fine details or accents. Use a smaller brush to incorporate complementary shades of blue or other colors to create depth or add texture to your rug.
- Let the Paint Dry: Allow the paint to dry completely according to the instructions on the paint can. It’s important to give it enough time to fully dry and cure to prevent smudging or damage during the next steps. Avoid stepping on the painted areas until they are fully dry.
By using outdoor-friendly paint and following these steps, you’ll be able to paint your blue outdoor rug with precision and achieve a beautiful and durable finish. Once the paint has dried, it’s time to move on to the next step – adding patterns and texture to your rug.
Adding Patterns and Texture to Your Rug
Now that you have painted your blue outdoor rug with a stencil design, it’s time to add additional patterns and texture to enhance its visual appeal. Follow these steps to create depth and interest in your rug:
- Masking Tape Method: One way to add patterns is by using masking tape. Apply strips of masking tape in desired patterns or geometric shapes onto the painted rug. You can create stripes, chevron patterns, or even a checkerboard effect. Ensure the tape is firmly pressed down to prevent paint bleeding.
- Painting the Patterns: Once you have applied the masking tape, use a different shade of blue to paint over the exposed areas. Consider using a complementary color to create contrast. Apply the paint evenly and allow it to dry before carefully removing the masking tape.
- Stencil Overlapping: If you want to create more intricate designs, consider overlapping stencils. Use a different stencil or the same stencil in a different orientation to add layers of patterns. This will add depth and complexity to your rug, creating a visually appealing focal point in your outdoor space.
- Texture Techniques: To add texture to your outdoor rug, you can use various techniques such as sponge painting, stippling, or even creating a distressed effect. Experiment with different brushes, sponges, or tools to achieve the desired texture and visual effect. Remember to choose outdoor-friendly paints and let the paint dry between each layer.
- Sealing the Design: Once you are satisfied with the added patterns and texture, protect your hard work by applying a clear sealant or outdoor-grade varnish. This will enhance durability, prevent fading, and ensure your rug stands up to weather conditions. Follow the manufacturer’s instructions for application and drying time.
By adding patterns and texture to your blue outdoor rug, you can elevate its visual appeal and make it a standout feature in your outdoor living space. Play around with different techniques and colors to create a design that matches your personal style and complements your outdoor decor. After completing this step, it’s time to apply a protective coating to enhance its durability.
Applying a Protective Coating for Durability
To ensure the longevity and durability of your blue outdoor rug, it’s essential to apply a protective coating. The protective coating will help safeguard the paint and prevent it from fading or peeling due to exposure to the elements. Follow these steps to apply a protective coating:
- Choose the Right Finish: Select a clear outdoor sealant or varnish suitable for the material of your rug. Look for one that offers UV protection and is specifically designed for outdoor use. Test the sealant on a small, inconspicuous area of the rug to ensure compatibility and desired results.
- Prepare the Rug: Ensure that your rug is clean, dry, and free from any dust or debris. If necessary, lightly sand the surface to create a smooth texture and remove any imperfections. Remove any loose particles using a soft brush or cloth.
- Apply the Protective Coating: Follow the manufacturer’s instructions for applying the sealant or varnish. Use a paintbrush or roller to evenly coat the entire surface of the rug. Apply the sealant in thin layers to avoid drips or pooling. Pay extra attention to the edges and corners to ensure full coverage.
- Allow for Drying Time: After applying the first coat, allow sufficient drying time as specified by the manufacturer. This usually ranges from a few hours to overnight, depending on the product. Avoid placing any objects on the rug or exposing it to heavy foot traffic during this time.
- Apply Additional Coats: If recommended by the manufacturer, apply additional coats of the protective coating to ensure maximum durability. This will provide an extra layer of protection against moisture, dirt, and UV rays.
- Clean Up: Clean your brushes or rollers according to the instructions provided with the sealant or varnish. Dispose of any leftover materials properly, following local regulations for disposal.
Applying a protective coating is a crucial step in ensuring the long-term durability and vibrancy of your blue outdoor rug. It helps to shield the paint from the elements, prolonging its lifespan and maintaining its visual appeal. Once the protective coating has dried and cured, your rug will be ready to withstand the outdoor environment. Now, let’s move on to the next step – allowing your outdoor rug to dry and cure completely before placing it in your outdoor space.
Allowing Your Outdoor Rug to Dry and Cure
After applying the protective coating to your blue outdoor rug, it’s crucial to allow sufficient time for it to dry and cure fully. This will ensure that the rug is ready for placement in your outdoor space and can withstand regular use. Follow these steps to allow your outdoor rug to dry and cure properly:
- Read the Drying Instructions: Refer to the manufacturer’s instructions on the sealant or varnish you used. They will provide specific information on the recommended drying time required for the product to set and cure effectively. This typically ranges from 24 to 48 hours.
- Choose an Ideal Drying Location: Find a well-ventilated area where you can place the rug to dry. It should be out of direct sunlight, as prolonged exposure to sunlight can alter the color or cause the paint to fade. Ensure that the drying area is clean and free from any debris that could transfer onto the rug’s surface.
- Avoid Foot Traffic: During the drying and curing process, refrain from walking on or placing objects on the rug. This can disturb the drying process and potentially damage the paint or the protective coating. Keep pets and children away from the rug as well to prevent any accidental tampering.
- Monitor the Drying Progress: Check the rug periodically to ensure it is drying properly and that the protective coating is setting as intended. If you notice any issues, such as uneven drying or pooling of the coating, address them promptly to prevent any potential damage to the paint or the rug itself.
- Allow Sufficient Cure Time: Drying time is different from cure time. While the rug may feel dry to the touch after the recommended drying period, it is important to allow sufficient cure time before placing it in your outdoor space. This will ensure that the paint and protective coating have fully cured and are ready to withstand exposure to the elements.
- Follow Additional Instructions: Some manufacturer’s recommendations may include additional steps or precautions to take during the drying and curing process. Make sure to read and follow these instructions to optimize the longevity and durability of your outdoor rug.
By allowing your blue outdoor rug to dry and cure properly, you are ensuring that the paint and protective coating bond effectively, resulting in a rug that can withstand outdoor conditions. Once it has fully cured, you’ll be ready to place and secure your rug in your outdoor space.
Placing and Securing Your Rug in the Outdoor Space
Now that your blue outdoor rug has dried and cured, it’s time to place and secure it in your outdoor space. Follow these steps to ensure proper placement and stability:
- Select an Appropriate Area: Choose a suitable location for your rug in your outdoor space. Consider the layout and design of the area, as well as the purpose of the rug. Ensure that the surface is clean, dry, and free from any debris that could damage or stain the rug.
- Measure and Position: Measure the dimensions of the rug and mark out the designated area where you want to place it. Align the edges of the rug with the marking and adjust its position until you are satisfied with the placement.
- Secure the Rug: Depending on the size and weight of your outdoor rug, it may be necessary to secure it to the ground to prevent it from shifting or sliding. Depending on the surface, you can use outdoor-rated double-sided tape, rug anchors, or adhesive hook and loop fasteners. Apply these securements to the corners or along the edges of the rug, following the manufacturer’s instructions.
- Consider Rug Pads: If desired, place a rug pad underneath your outdoor rug to provide additional cushioning and prevent slipping. Look for outdoor-friendly rug pads that are specifically designed for outdoor use and won’t trap moisture.
- Ensure Safe Pathways: If the rug is placed in a high-traffic area or near entrances, make sure it does not obstruct any pathways. Ensure that the rug is flat and lies smoothly to prevent tripping hazards. Regularly inspect the rug for any signs of wear or damage and address them promptly.
By following these steps, you can safely and securely place your blue outdoor rug in your outdoor space. Taking the time to properly position and secure the rug will ensure that it stays in place and adds both functionality and aesthetic appeal to your outdoor area. Now that your rug is in place, let’s move on to the final section on maintaining and cleaning your outdoor rug.
Maintaining and Cleaning Your Outdoor Rug
To keep your blue outdoor rug looking its best and prolong its lifespan, regular maintenance and cleaning are essential. Here are some tips to help you maintain and clean your outdoor rug:
- Vacuum or Shake Regularly: Remove loose dirt, dust, and debris by regularly vacuuming or shaking your outdoor rug. This will prevent dirt from becoming embedded in the fibers and prolong its overall cleanliness.
- Spot Cleaning: Deal with spills or stains promptly to prevent them from settling into the rug. Blot the affected area with a clean cloth or sponge, working from the outer edges towards the center to avoid spreading the stain. Use a mild outdoor-friendly cleaning solution or a mixture of water and gentle dish soap. Rinse thoroughly and allow the rug to air dry.
- Deep Cleaning: Depending on the level of dirt accumulation, periodic deep cleaning may be necessary. Follow the manufacturer’s instructions for deep cleaning your specific type of outdoor rug. Typically, this involves using a mild outdoor rug cleaner, soft brush or broom, and a hose or pressure washer on a low setting.
- Mold and Mildew Prevention: To prevent the growth of mold and mildew, ensure that your rug is fully dry before rolling or storing it. If you live in a damp or humid climate, consider bringing the rug indoors during extended periods of rain or humidity.
- Protect from Extreme Weather: During harsh weather conditions such as heavy rain, snow, or intense sunlight, it’s advisable to roll up and store your outdoor rug to prevent damage. Store it in a clean, dry area where it won’t be exposed to moisture or extreme temperature fluctuations.
- Avoid Harsh Chemicals: When cleaning your outdoor rug, avoid using harsh chemicals or bleach, as they can damage the fibers and color of the rug. Stick to mild cleaning solutions or consult the manufacturer’s recommendations for appropriate cleaning agents.
- Frequent Inspection: Regularly inspect your outdoor rug for any signs of wear, fading, or damage. Address any issues promptly to prevent further deterioration. Trim any loose threads or frayed edges to maintain a neat appearance.
By following these maintenance and cleaning tips, you can keep your blue outdoor rug in pristine condition and enjoy its beauty and functionality for years to come. Regular care and attention will help maintain the rug’s vibrant color, texture, and overall appeal. With proper maintenance, your outdoor rug will continue to enhance your outdoor space and provide a comfortable and stylish area for relaxation and entertainment.