
Choosing the Right Wick Material
When it comes to making a candle, choosing the right wick material is crucial for achieving optimal burning performance. The wick material you select can greatly affect how your candle burns, including factors such as flame size, burn time, and overall quality. Here are a few popular wick materials to consider:
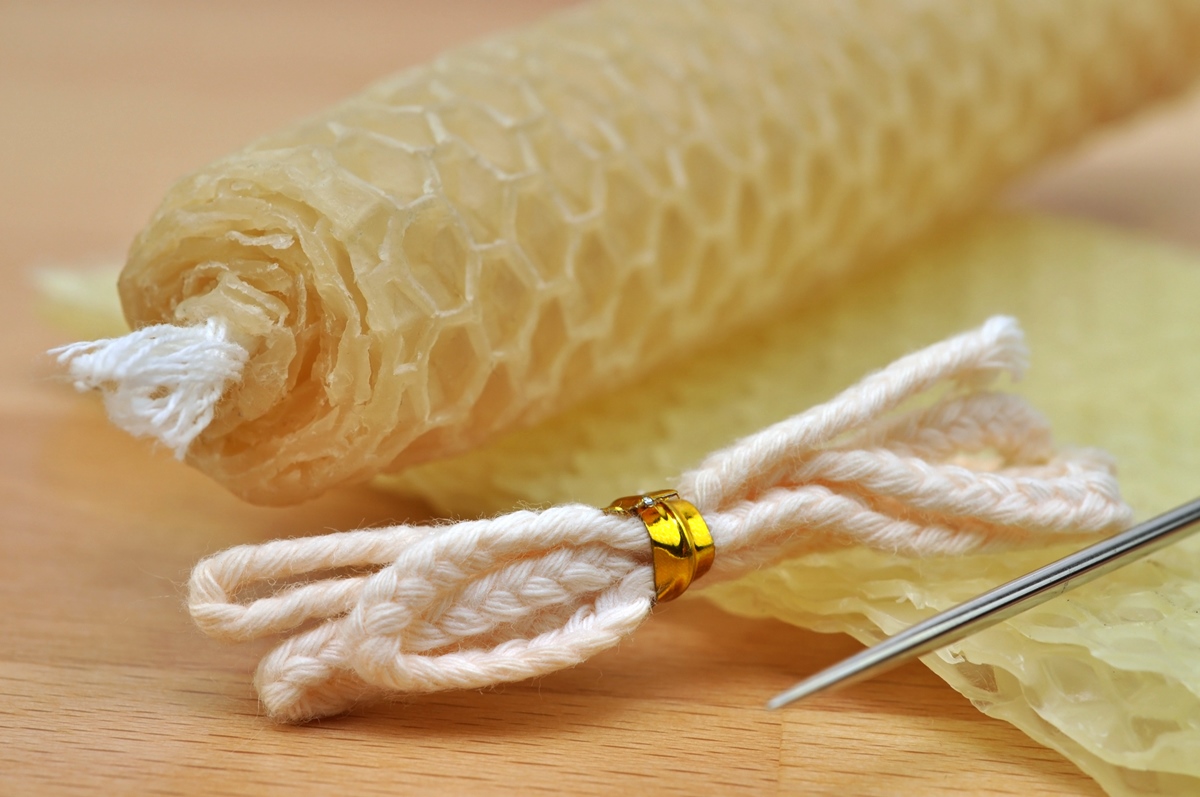
Cotton Wicks: Cotton wicks are a popular choice among candle makers due to their clean and consistent burn. They are made from natural cotton fibers and are known for producing a steady flame and minimal soot. Cotton wicks work well with a variety of waxes and are suitable for both container and pillar candles.
Wooden Wicks: Wooden wicks have gained popularity in recent years due to their unique crackling sound and rustic charm. Made from sustainably sourced wood, these wicks offer a slower burn time and can add a cozy atmosphere to your candles. However, they may require a larger flame size and different wax formulations to ensure proper burning.
Zinc-Core Wicks: If you’re looking for a wick that provides a hotter and larger flame, zinc-core wicks may be the right choice. These wicks have a zinc wire core that helps with self-trimming and promotes a consistent burn. However, they are primarily recommended for use in container candles and may not be suitable for certain types of wax.
Hemp Wicks: Hemp wicks are another eco-friendly option for candle makers. They are made from natural hemp fibers and are known for their clean burn and minimal soot production. Hemp wicks work well with many types of waxes, but they may require a larger diameter compared to cotton wicks to achieve the same flame size.
When choosing the right wick material for your candle, consider factors such as the type of wax you’re using, the size of your container, and the desired burn time. It’s always a good idea to conduct small test burns with different wick materials to determine which one works best for your specific candle-making project. Remember, the right wick material can make all the difference in creating a beautiful and long-lasting candle.
Determining the Correct Wick Size
Choosing the correct wick size is essential for a well-performing candle. The size of the wick will directly impact how effectively your candle burns, including factors such as the flame’s size, even wax consumption, and minimal soot production. To determine the right wick size for your candle, consider the following:
Container Diameter: The size of your candle container plays a significant role in selecting the appropriate wick size. The wider the diameter, the larger the wick needed to ensure optimal burning. Measure the diameter of your container and consult a wick size chart, which can provide guidance based on various container sizes.
Wax Type: Different types of wax have different characteristics that can affect wick performance. For example, soy wax tends to cool and set faster than other waxes, so it may require a larger wick size to maintain a consistent burn. Experimenting with different wick sizes can help you achieve the best results with your specific wax type.
Desired Burn Time: Consider the desired burn time of your candle. A larger wick usually results in a faster burn, while a smaller wick can extend burn time. If you prefer a longer-lasting candle, choose a wick that is slightly smaller than what would typically be recommended for your container size.
Testing: It’s crucial to conduct test burns with various wick sizes to determine which one works best for your candle. This involves lighting the candle and observing how it burns. Look for factors such as a stable flame, minimal smoking, even wax pool formation, and no excessive sooting. Keep notes on each test burn to help you evaluate the wick’s performance after each trial.
Adjusting the Wick Size: If you find that your candle is burning too quickly, producing excessive soot, or creating a small flame, it may be necessary to adjust the wick size. For a larger flame, try using a slightly larger wick, while for a smaller flame, opt for a slightly smaller wick. It’s important to make gradual adjustments to avoid any drastic changes that could negatively impact the candle’s burning characteristics.
Determining the correct wick size may require some trial and error, but it’s an important step in creating a high-quality candle. By considering factors such as the container diameter, wax type, desired burn time, and conducting test burns, you can ensure that your candles burn evenly, have a steady flame, and provide an enjoyable experience for those who use them.
Preparing the Wick
Before you can start making a candle, it’s essential to properly prepare the wick for optimal burning performance. Preparing the wick involves a few important steps to ensure that it burns evenly and efficiently. Here’s how to prepare the wick:
Cut the Wick: Start by cutting the wick to the desired length. When determining the length, consider the height of your container and leave a little extra length for attaching it to the container’s base. Use sharp scissors or wire cutters to make a clean cut.
Secure the Wick: To prevent the wick from moving around during the pouring process, it’s important to secure it in place. There are a few methods you can use to accomplish this. One option is to use a wick sticker: a small adhesive disc that can be attached to the bottom of the wick and then pressed onto the container’s base. Alternatively, you can also use a wick tab or metal sustainer by threading the wick through it and crimping it securely.
Prime the Wick: Priming the wick is a crucial step to enhance its burn performance. To prime the wick, simply dip it into melted wax. This process helps the wick absorb the wax and promotes a cleaner and more efficient burn. You can use a pair of tweezers or wick centering tool to hold the wick while dipping it into the melted wax. Once the wick is coated, let it dry and harden before continuing with the candle-making process.
Straighten and Trim the Wick: After priming the wick, straighten it out to remove any kinks or bends. This helps ensure an even and stable burn. Additionally, trim the wick to a proper length, leaving about 1/4 to 1/2 inch protruding above the wax surface. Trimming the wick will prevent excessive smoking and mushrooming while the candle burns.
By properly preparing the wick, you can improve the overall burning performance of your candle. Cutting the wick to the appropriate length, securing it in place, priming it with wax, and straightening and trimming it are essential steps that contribute to a steady flame, even wax consumption, and minimal soot production. Taking the time to prepare the wick correctly sets the foundation for a well-made and long-lasting candle.
Assembling the Wick
Once you have prepared the wick, it’s time to assemble it into your candle. Assembling the wick involves properly positioning it in the container and ensuring it remains centered throughout the pouring and curing process. Follow these steps to assemble the wick:
Center the Wick: Begin by placing the assembled wick at the center of the container. Ensure that it is straight and aligned with the container’s diameter. This step is crucial for maintaining a balanced burn and preventing the candle from tunneling.
Use a Wick Holder: To ensure the wick remains centered during the pouring and curing process, a wick holder or wick centering tool can be used. This tool attaches to the container’s rim and holds the wick in place. Alternatively, you can also use a simple workaround by placing a pen or pencil across the top of the container and securing the wick to it with a clip or tape.
Secure the Wick in Place: It’s important to secure the wick in a stable position to prevent it from shifting or moving during the pouring of the wax. You can achieve this by tying a small weight, such as a metal washer or a paperclip, to the end of the wick and letting it hang into the container. This weight will help keep the wick centered and taut as you pour the wax.
Double-Check Wick Placement: Before proceeding to pour the wax, take a final moment to double-check the wick’s position. Ensure that it is still centered in the container and that there are no obstructions or knots that could impede its burning performance.
Hold the Wick Steady: While pouring the melted wax into the container, it’s essential to hold the wick steady to prevent it from drifting or falling out of position. Keep a firm grip on the weight or wick holder and slowly pour the wax into the container, taking care not to disturb the wick’s placement.
By properly assembling the wick, you ensure that it remains centered and secure throughout the candle-making process. Centering the wick, using a wick holder, securing the wick in place, and double-checking the placement all contribute to an even burn, minimal wax loss, and a visually appealing finished candle. Taking the time to assemble the wick correctly is an important step in creating a well-crafted and beautiful candle.
Attaching the Wick to the Container
Attaching the wick to the container is a crucial step in candle-making that ensures the wick remains in place throughout the burning process. Properly securing the wick to the container allows for a stable and even burn. Follow these steps to attach the wick securely:
Apply Adhesive: Begin by applying a small amount of adhesive at the base of the wick tab or sustainer. You can use a hot glue gun, adhesive dots, or a small amount of melted wax to secure the wick in place. The adhesive will help keep the wick attached to the container throughout the lifecycle of the candle.
Position the Wick: Carefully place the wick tab or sustainer into the center of the container’s base. Ensure that it is positioned in the middle and aligned with the desired burn area. Press the wick firmly into the adhesive to secure it in place, ensuring it stands upright and straight.
Smooth Out Any Air Bubbles: As you press the wick into the adhesive, be mindful of any air pockets that may form under the tab or sustainer. Smooth out any air bubbles to ensure proper adherence and prevent the wick from detaching during the pouring process.
Allow the Adhesive to Dry: Give the adhesive time to dry and set. The drying time can vary depending on the type of adhesive used, so refer to the product instructions for guidance. Avoid moving or disturbing the wick during this time to ensure a secure attachment.
Tension the Wick: Once the adhesive has fully dried, gently pull on the top end of the wick to remove any slack or looseness. Tensioning the wick helps keep it taut and upright during burning, ensuring an optimal flame size and burn performance.
Trim the Wick: Use sharp scissors to trim the wick to the desired length, leaving about 1/4 inch above the wax surface. Trimming the wick helps control the flame height and reduces the risk of excessive smoking.
By securely attaching the wick to the container, you can ensure a stable and reliable burn throughout the life of your candle. Taking the time to apply adhesive correctly, position the wick accurately, smooth out air bubbles, allow for proper drying, tension the wick, and trim it to the appropriate length all contribute to a well-made candle with consistent burning characteristics.
Troubleshooting Wick Issues
While making candles, it’s not uncommon to encounter some issues with the wick. Understanding how to troubleshoot these problems can help you address them and create candles that burn efficiently and effectively. Here are some common wick issues and how to resolve them:
Weak Flame or Trouble Lighting: If you’re experiencing a weak flame or having trouble lighting the wick, it could be due to a few reasons. First, ensure that the wick is properly primed and trimmed to the correct length. If the wick is too long or hasn’t been primed well, it may struggle to ignite. Additionally, check for any debris or excess wax that may be obstructing the wick’s access to the flame. Remove any obstructions and try again.
Excessive Smoking: Excessive smoking can be caused by several factors. One common issue is a wick that’s too large for the container or wax being used. Consider using a smaller wick or adjusting the wick size to minimize smoking. Another potential cause of smoking is the presence of draft or wind. Ensure that you’re burning the candle in a draft-free area to prevent excessive smoking.
Mushrooming or Excessive Sooting: Mushrooming refers to the formation of a large, bulbous shape at the tip of the wick, which can lead to excessive sooting. One cause of mushrooming is a wick that’s too large for the candle. Consider using a smaller wick to reduce mushrooming. Additionally, trimming the wick to the appropriate length before each burn can help prevent excessive sooting. Regularly monitor the candle and trim the wick if mushrooming occurs during burning.
Uneven Burn or Tunneling: Tunneling is when the candle burns down the center, leaving wax residue on the sides. This can be caused by a wick that’s too small or not properly centered. Ensure that you’re using the correct wick size for your container and that it’s positioned centrally. Additionally, allow the candle to burn long enough during each use to achieve a full melt pool, which helps prevent tunneling and promotes an even burn.
Inconsistent Burn Time: If you’re experiencing inconsistent burn times, it could be due to various factors. First, ensure that the wick size is appropriate for your container and wax type. Additionally, consider the ambient temperature and airflow around the candle, as these factors can influence burn time. Testing different wick sizes and keeping detailed records of burn times can help you assess and adjust accordingly.
When troubleshooting wick issues, be patient and methodical in your approach. Test different wick sizes, prime the wick properly, trim it to the appropriate length, and keep track of your findings to make informed adjustments. Understanding and addressing these common wick issues will help you create candles that burn consistently, last longer, and provide a satisfying experience for candle enthusiasts.