
What is a Border Inside a Picture Frame?
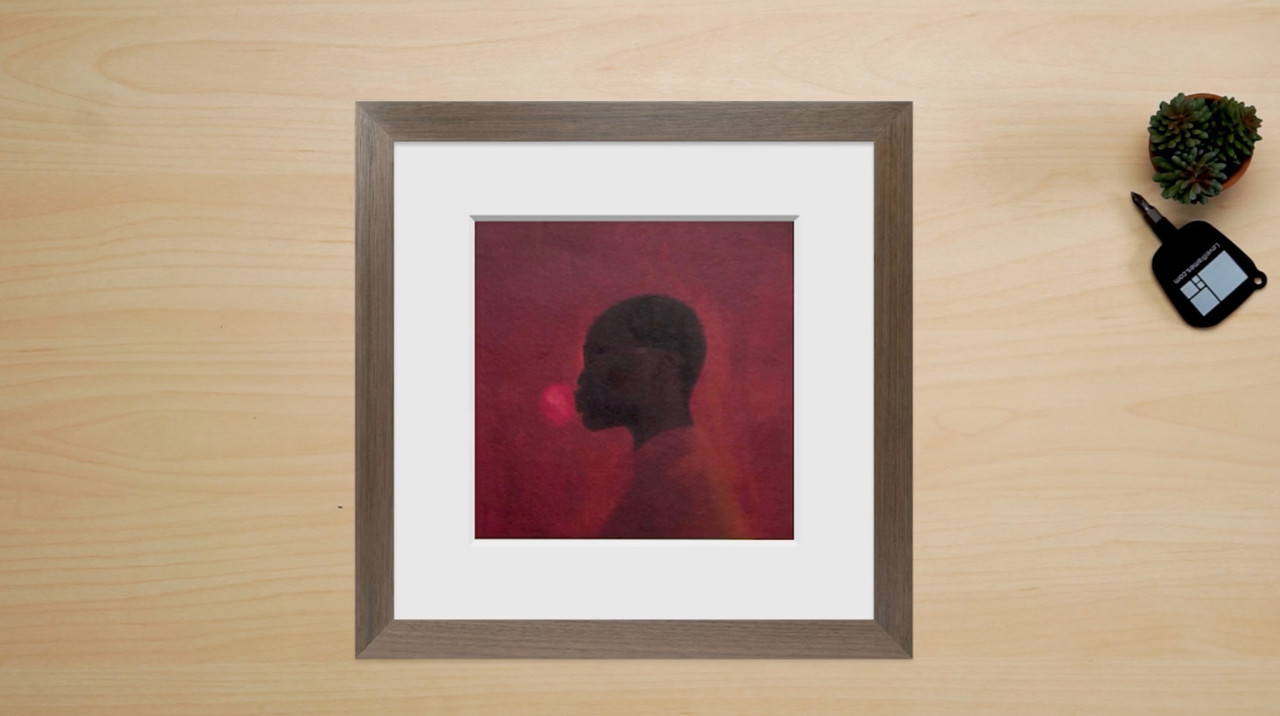
A border inside a picture frame, also known as a mat or a mount, refers to the decorative element that surrounds the artwork or photograph within the frame. It is a strip of material, typically made of paper or cardboard, positioned between the frame and the image. The primary purpose of a border inside a picture frame is to provide a visual separation between the artwork and the frame, adding depth and enhancing the overall presentation.
The border inside a picture frame serves multiple functions. Firstly, it creates a buffer between the image and the frame, preventing direct contact that may cause damage or smudging. Secondly, it adds a sense of elegance and professionalism to the framed piece, elevating its aesthetic appeal. Lastly, it allows for better framing proportions, giving the image enough breathing space and making it visually pleasing to the viewer.
Not only does a border inside a picture frame bring aesthetic value, but it also serves as a practical element. It helps to protect the artwork from humidity, moisture, and potential fading caused by direct contact with the glass or acrylic cover. Additionally, the border can act as a visual guide, drawing the viewer’s attention towards the main image and emphasizing its significance.
Picture frames with borders inside them are commonly used in various settings, such as galleries, museums, homes, and offices. They are especially popular for framing photographs, paintings, certificates, diplomas, and other cherished artworks. The choice of a border can significantly impact the overall look and feel of a framed piece, making it important to select one that complements the artwork’s style and enhances its visual impact.
When considering a border inside a picture frame, factors to keep in mind include the width of the border, the color and texture of the mat, and the overall dimensions of the framed piece. These elements can be customized to suit personal preferences, align with the artwork’s theme, or match the surrounding décor. The possibilities are endless, allowing for creative expression and individualized framing choices.
The Purpose of a Border Inside a Picture Frame
The border inside a picture frame serves several important purposes that go beyond mere decoration. It plays a crucial role in enhancing both the visual appeal and protection of the framed artwork. Let’s explore the main purposes of a border inside a picture frame:
1. Visual Separation: The primary purpose of a border is to create a visual separation between the artwork and the frame. It acts as a transitional element, providing a buffer zone that prevents the image from blending too closely with the frame. This separation helps to draw attention to the artwork and gives it a more balanced and professional look.
2. Aesthetic Enhancement: Borders inside picture frames are a powerful design tool that can enhance the overall presentation of the artwork. By selecting a border that complements the colors, style, and theme of the image, you can elevate its visual impact. A well-chosen border can add sophistication, depth, and harmonious balance to the framed piece.
3. Protection: The border inside a picture frame also serves a practical purpose by offering protection to the artwork. It acts as a barrier that prevents direct contact between the image and the glass or acrylic cover, reducing the risk of damage or smudging. Additionally, it helps to prevent the artwork from sticking to the glass due to changes in temperature or humidity.
4. Proportional Framing: A border inside a picture frame plays a vital role in achieving proper framing proportions. It provides breathing space around the image, allowing it to stand out and be appreciated without feeling cramped. This proportional framing enhances the visual balance and impact of the artwork, making it more pleasing to the viewer’s eye.
5. Focus and Emphasis: The border can act as a visual guide, directing the viewer’s attention to the main image within the frame. It helps to emphasize the significance of the artwork and draws the eye towards its central elements. Whether through contrasting colors, decorative patterns, or unique textures, the border can enhance the focal point of the framed piece.
Different Types of Borders Inside a Picture Frame
When it comes to choosing a border for your picture frame, there are various options available, allowing you to customize the look and feel of your framed artwork. Here are several types of borders commonly used inside picture frames:
1. Single Mat: A single mat is a classic and straightforward border design. It consists of a single layer of matboard with a consistent color and thickness surrounding the image. This type of border adds a clean and minimalist look to the framed piece and works well with a variety of artworks.
2. Double Mat: A double mat involves using two layers of matboard, often in contrasting colors or shades. The inner mat is positioned closer to the image, creating a narrower border, while the outer mat has a wider border. This technique adds depth and dimension to the frame, making the artwork stand out more prominently.
3. V-Groove Mat: A v-groove mat includes a subtle groove or channel carved into the matboard surrounding the artwork. This groove adds an element of design and sophistication to the border, enhancing the overall aesthetic appeal. The v-groove can be tailored to follow the shape of the image, adding a unique touch to the framed piece.
4. Decorative Patterns: Borders can also feature decorative patterns or designs, such as embossed patterns, filigree, or scrollwork. These intricate patterns add a touch of elegance and personality to the frame, accentuating the artwork’s style and theme. Decorative patterned borders often work well with more traditional or ornate artworks.
5. Customized Borders: If you are seeking a truly unique and personalized border, you can opt for a customized design. This can involve adding elements like artwork or text directly onto the border, creating a bespoke look that perfectly complements the image. Customized borders offer endless possibilities for creative expression and individuality.
When selecting a border for your picture frame, consider the style, theme, and colors of the artwork you are framing. You want to choose a border that enhances the visual appeal of the image and complements its overall aesthetic. Additionally, factor in the surrounding décor and the intended display location to ensure a harmonious integration of the framed piece into its environment.
Choosing the Right Border for Your Picture Frame
Choosing the right border for your picture frame is an important decision that can greatly impact the overall look and feel of your framed artwork. Here are some factors to consider when selecting the perfect border:
1. Artwork Style and Theme: Take into account the style and theme of the artwork you are framing. Is it a modern abstract painting, a vintage photograph, or a traditional landscape? Consider the mood and vibe of the artwork and look for a border that complements its aesthetic qualities.
2. Colors and Contrast: Pay attention to the colors present in the artwork and choose a border that enhances the overall color scheme. You can opt for a border color that harmonizes with the dominant hues in the artwork or choose a contrasting color to create a bold visual impact.
3. Matboard Texture and Thickness: Consider the texture and thickness of the matboard when selecting a border. A textured mat can add depth and tactile interest to the frame, while a smooth mat provides a cleaner and more minimalist look. The thickness of the matboard will also affect the framing proportions, so choose accordingly.
4. Frame Style and Material: The style and material of the frame should complement the chosen border. For example, a modern sleek frame pairs well with a clean and simple border, while an ornate frame may call for a more decorative border. Coordinate the border and frame to create a cohesive and visually pleasing combination.
5. Proportions and Size: Consider the dimensions of the artwork and the overall frame when selecting a border. The width of the border should be proportional to the size of the artwork. A wider border can provide a sense of elegance and presence, while a narrower border may be suitable for smaller and more delicate pieces.
6. Personal Preference and Intended Display: Ultimately, your personal preference and the intended display location should guide your choice. Consider the overall ambiance of the room where the framed artwork will be displayed and select a border that complements the existing décor and contributes to the desired aesthetic.
When choosing a border for your picture frame, it is essential to strike a balance between enhancing the artwork and seamlessly integrating it into its environment. Take your time to explore different options, seek inspiration, and perhaps even consider consulting a professional framer for expert advice. The right border can elevate your framed artwork and transform it into a captivating and visually stunning piece.
Design Ideas for Borders Inside Picture Frames
The border inside a picture frame is an opportunity to add a creative and personalized touch to your framed artwork. Here are some design ideas to inspire you when choosing a border for your picture frame:
1. Monochromatic Elegance: Create an elegant and sophisticated look by choosing a border color that matches the dominant color in your artwork. This monochromatic approach creates a seamless and harmonious transition between the image and the frame, giving a timeless and polished appearance.
2. Two-Tone Contrast: Opt for a double mat with contrasting colors to add a dynamic visual impact. Choose colors that complement or create a striking contrast with both the artwork and the frame. This design choice provides depth and dimension to the framed piece, making it stand out and grab attention.
3. Artistic Edge: Consider using a v-groove mat or a custom-designed border with artistic and intricate patterns. These decorative elements can add a unique touch and reflect the theme or style of the artwork. From delicate filigree to bold geometric patterns, an artistic border can elevate your framed artwork and make it a true statement piece.
4. Nature-Inspired: Bring the beauty of nature into your framed artwork by incorporating a natural or textured matboard. Look for mats with patterns that resemble wood grain, foliage, or other organic elements. These nature-inspired borders can enhance landscapes, botanical illustrations, or any artwork with a connection to the natural world.
5. Vintage Charm: For a vintage or nostalgic look, consider using a matboard with an aged or distressed texture. This design choice can add warmth and character to old family photographs, vintage posters, or any artwork with a nostalgic theme. Pair the vintage border with a classic frame to complete the timeless aesthetic.
6. Bold and Graphic: If your artwork lends itself to a modern and bold aesthetic, consider using a solid-colored matboard with a clean and simple design. This minimalist approach allows the artwork to take center stage while adding a contemporary touch to the overall presentation. A bold and graphic border can work well with abstract art or pieces with strong visual elements.
7. Personal Touch: Express your creativity by customizing the border with personal elements. This can include adding a hand-drawn design, stenciling a pattern, or incorporating meaningful quotes or text. Customizing the border allows you to make the framed artwork truly unique and reflective of your personal style or the story behind the piece.
These design ideas are meant to inspire you, but remember to select a border that aligns with the artwork’s theme, style, and your personal preferences. Experiment with different colors, textures, and patterns to find the perfect border that enhances the visual appeal and captures the essence of the artwork.
How to Create a Border Inside a Picture Frame
Creating a border inside a picture frame requires careful attention to detail and precision. Here is a step-by-step guide on how to create a border inside a picture frame:
1. Measure and Prepare: Measure the dimensions of your artwork and determine the desired width and height of the border. Take into account the matboard’s thickness and any additional space you want to allocate within the frame. Prepare the matboard by cutting it to the measured dimensions, ensuring clean and straight edges.
2. Center the Artwork: Place the artwork on top of the matboard, ensuring it is centered and aligned properly. Use a ruler or T-square to make precise measurements and adjustments. Mark the corners or edges of the artwork lightly on the matboard to serve as a guide during the next steps.
3. Create an Opening: Use a mat cutter or a utility knife to carefully cut an opening in the matboard, following the marked corners or edges of the artwork. The opening should be slightly smaller than the actual size of the image to provide a border around it. Take your time to ensure clean and accurate cuts.
4. Attach the Artwork: Once the opening is cut, secure the artwork to the back of the matboard using archival tape or acid-free adhesive. Ensure that the image is properly aligned within the opening so that it sits centered and straight. If necessary, use small pieces of tape or adhesive at the corners and along the edges to keep the artwork securely in place.
5. Assemble the Frame: Now that the artwork is attached to the matboard, carefully insert the matted artwork into the picture frame. Ensure that the matboard fits snugly within the frame and is straight and aligned. Use flexible or spring clips to secure the matboard in place, ensuring it does not shift or move within the frame.
6. Adjust and Finalize: Take a step back and carefully examine the framed artwork to ensure that the border is evenly positioned and visually pleasing. Make any necessary adjustments to the position of the artwork within the frame or the alignment of the border. Secure the back of the frame with screws or clips to complete the assembly.
7. Clean and Protect: Once the border inside the picture frame is created, use a clean, lint-free cloth to gently wipe the glass or acrylic cover to remove any dust or fingerprints. Ensure that the frame is adequately sealed to protect the artwork from dust, moisture, and other environmental factors.
Creating a border inside a picture frame requires patience, precision, and attention to detail. If you are not comfortable with cutting the matboard or assembling the frame, it is recommended to seek the assistance of a professional framer who can ensure a flawless and professional result.
Decorating Tips for Borders Inside Picture Frames
When it comes to decorating the borders inside picture frames, there are a variety of creative techniques you can incorporate to add interest and enhance the overall presentation of your framed artwork. Here are some decorating tips to consider:
1. Layered Borders: Instead of using a single matboard, experiment with layering multiple mats to create a unique and textured border. Combine different colors, textures, or patterns to add depth and visual interest. Play with the sizes and proportions of each layer to achieve the desired effect.
2. Decorative Corner Accents: Add decorative corner accents to your borders to give them a personalized and artistic touch. This can be done by attaching small embellishments such as corner caps, metal accents, or decorative elements to the corners of the matboard. These accents can complement the artwork’s theme or add a touch of elegance to the overall design.
3. Hand-drawn Borders: Showcase your artistic skills by hand-drawing a custom border directly onto the matboard. This can entail intricate patterns, personalized typography, or even small illustrations that reflect the style and theme of the artwork. Hand-drawn borders add a unique and artistic touch to your framed piece.
4. Collage or Mixed-Media Borders: If you’re feeling adventurous, consider creating a collage or using mixed-media techniques to decorate the borders. Incorporate various materials such as fabric, paper cutouts, or even small photos to create a visually dynamic and textured border. This technique works particularly well when framing eclectic or mixed-media artworks.
5. Theme-Related Borders: Tailor the border design to complement the theme or subject of the artwork. For example, if you have a seaside landscape, use seashells or small bits of seaglass to accent the border. For a floral composition, consider adding pressed flowers or leaves to create a botanical-inspired border. In this way, the border becomes an extension of the artwork itself.
6. Metallic or Foil Accents: Incorporate metallic or foil accents to add a touch of glamour and visual appeal to the border. This can be achieved by using metallic pens or foiling techniques to create a border with shimmering or reflective elements. Metallic accents work especially well when framing artwork with metallic or reflective elements.
7. Personalized Messages: Consider adding personalized messages or quotes directly onto the border. This can be done with calligraphy, letter stickers, or even printed typography that expresses a sentiment or captures the essence of the artwork. These personalized messages add a heartfelt touch and further engage viewers with the framed piece.
When decorating the borders inside picture frames, let your creativity shine. Experiment with different techniques, materials, and styles to find the perfect design that captures the essence of the artwork and reflects your unique personality and artistic vision.
Maintenance and Care for Borders Inside Picture Frames
Proper maintenance and care for the borders inside picture frames are essential to preserve the visual appeal and longevity of your framed artwork. Here are some tips to keep in mind:
1. Regular Cleaning: Dust and debris can accumulate on the surface of the borders, affecting their appearance. Use a soft, lint-free cloth or a microfiber duster to gently remove any dust particles from the borders. Avoid using harsh chemicals or abrasive materials that could damage the borders or the artwork.
2. Avoid Direct Sunlight: Prolonged exposure to direct sunlight can cause fading and discoloration of both the artwork and the borders. Display your framed artwork in an area where it is shielded from direct sunlight or use UV-protective glass or acrylic covers to prevent damage from harmful UV rays.
3. Keep away from Moisture and Humidity: Excessive moisture or high levels of humidity can cause the borders and the artwork to warp, mold, or deteriorate. Avoid hanging framed artwork in areas prone to moisture, such as bathrooms or kitchens. Use dehumidifiers or ensure proper ventilation to maintain an optimal environment for your framed pieces.
4. Handle with Clean Hands: When handling the frames, ensure that your hands are clean and free from oils or lotions. Oils and residues from your hands can transfer onto the borders, leaving prints or stains that are difficult to remove. If necessary, use gloves or handle the frames from the edges to minimize contact with the borders.
5. Regular Inspections: Periodically inspect the borders for any signs of damage, such as scratches, dents, or discoloration. If you notice any issues, take appropriate measures to address them promptly. For minor scratches, use a touch-up pen or marker that matches the color of the borders to conceal the imperfections.
6. Professional Cleaning and Restoration: In case of significant damage or if the borders require thorough cleaning, consider seeking assistance from a professional framer. They have the expertise and tools to clean, restore, or repair the borders while ensuring the preservation of the artwork.
7. Proper Storage: If you need to temporarily store or transport framed artwork, wrap it in acid-free tissue paper or archival plastic sleeves to protect the borders from scratches or dust. Store the framed pieces in a clean and dry area, away from potential hazards like extreme temperatures or moisture.
By following these tips, you can ensure that the borders inside your picture frames remain in excellent condition and continue to enhance the beauty and presentation of your framed artwork for years to come.
Troubleshooting Common Issues with Borders Inside Picture Frames
While borders inside picture frames are meant to enhance the overall presentation of your artwork, they may sometimes encounter common issues that need troubleshooting. Here are some tips to address these common problems:
1. Uneven Borders: If you notice that the borders appear uneven or off-center within the frame, try adjusting the placement of the matboard. Ensure that the artwork is centered within the opening and make small adjustments until the borders appear even on all sides. You can use a ruler or measuring tape for guidance.
2. Warping or Curling: Over time, matboard borders may warp or curl due to changes in humidity or temperature. To address this issue, gently flatten the borders by placing a clean, heavy object on top of them for a period of time. Alternatively, consult a professional framer who may use specific techniques or tools to correct the warping.
3. Discoloration or Stains: The borders may develop stains or discoloration due to exposure to pollutants, mold, or sunlight. Prioritize prevention by ensuring the framing area is clean and free from environmental pollutants. If discoloration occurs, consult a professional framer who may suggest specific cleaning techniques or recommend replacements if necessary.
4. Damage to Corners: Corners of the borders can become damaged or frayed over time. If there is minor damage, carefully trim away the damaged portion using a sharp utility knife or scissors. If the damage is more extensive, consider consulting a professional framer who can repair or replace the affected corners.
5. Fading of Colors: Some matboard colors may fade over time, particularly if exposed to excessive sunlight. To prevent fading, display your framed artwork away from direct sunlight or use UV-protective glass or acrylic covers to minimize UV ray exposure. If fading has already occurred, consult a professional framer to discuss options for restoring or replacing the faded borders.
6. Ripples or Bubbles: Occasionally, matboards may develop ripples or bubbles, giving an uneven appearance to the borders. To address this issue, carefully lift the artwork and matboard from the frame, then smooth out the wrinkles or bubbles by gently pressing them down from the center towards the edges. If the problem persists or worsens, consult a professional framer for further assistance.
7. Pests or Insects: In some cases, insects or pests may find their way into the borders of picture frames, causing damage or leaving residue. Prevention is key, so ensure that your framing area is clean and regularly inspect your framed artwork for signs of infestation. If pests are found, consult a professional pest control service and seek their guidance on appropriate measures to eliminate the infestation.
If you encounter any of these issues with the borders inside your picture frames, it’s important to take appropriate action to address them promptly. Depending on the severity of the problem and your comfort level, you may choose to troubleshoot and implement solutions yourself or seek assistance from a professional framer for their expertise and guidance.