
Choosing the Right Router Bits
When it comes to making a picture frame using a router, selecting the right router bits is crucial. The right bits will determine the type of cuts and profile designs you can achieve. Here are some tips for choosing the right router bits for your project:
1. Straight Bits: Straight bits are essential for creating clean, straight cuts on the frame pieces. They come in various sizes and can be used for both stock removal and edge trimming. Make sure to select a straight bit that matches the width of the frame material you are using.
2. Rabbeting Bits: Rabbeting bits have a guide bearing that allows you to cut a recessed groove, called a rabbet, along the edge of the frame pieces. This groove will accommodate the glass, artwork, and backing of the picture frame. Choose a rabbeting bit that matches the desired depth and width of the rabbet you want to create.
3. Cove Bits: Cove bits have a concave curve that adds decorative detail to the frame profiles. They are commonly used to create ornate edges on picture frames. When selecting a cove bit, consider the desired depth and width of the curve to achieve the desired look.
4. Roundover Bits: Roundover bits are used to create a rounded edge on the frame pieces. They are ideal for providing a smooth, finished appearance to the frame. Roundover bits come in various sizes, so choose one that matches the thickness of your frame material.
5. Chamfer Bits: Chamfer bits are used to create angled cuts on the edges of the frame pieces. They add a decorative touch and can also help create a smoother transition between frame corners. Consider the angle and width of the chamfer when selecting a bit.
Remember, it’s important to use high-quality router bits made from durable materials, such as carbide, to ensure clean and precise cuts. Additionally, always wear appropriate safety gear, such as safety glasses and ear protection, when operating a router.
Selecting the Right Wood
When it comes to making a picture frame, selecting the right type of wood is essential to achieve the desired look and durability. Here are some factors to consider when choosing the right wood for your frame:
1. Hardwood vs. Softwood: Hardwood is a popular choice for picture frames due to its durability, strength, and attractive grain patterns. Common hardwoods used for frames include oak, walnut, cherry, and mahogany. Softwoods, such as pine or cedar, can also be used if you prefer a lighter and more rustic look.
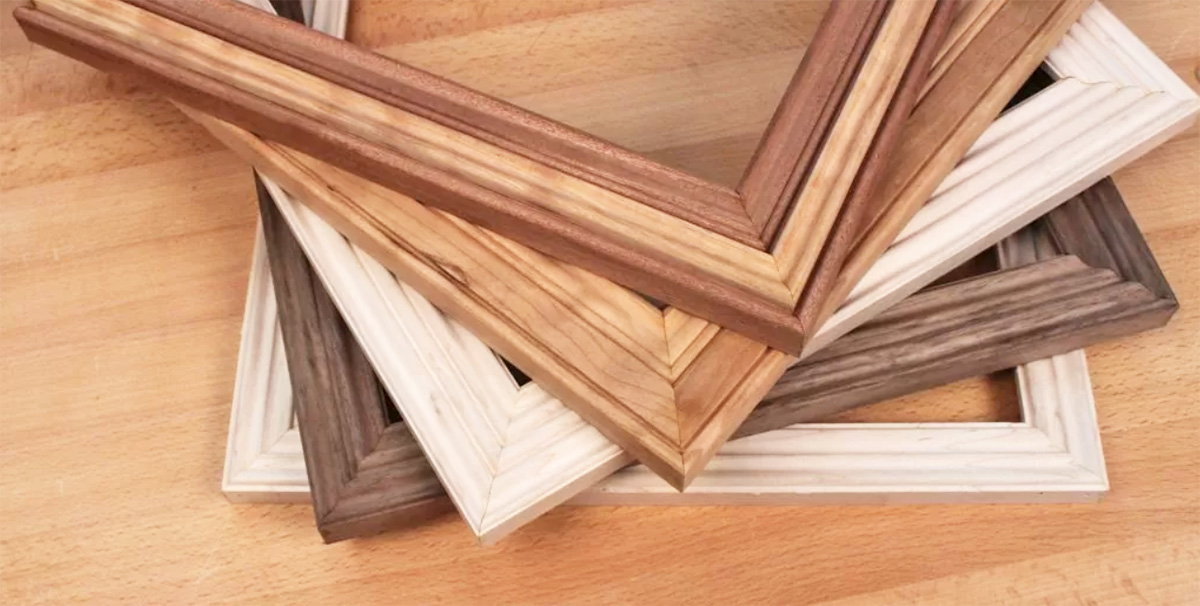
2. Color and Appearance: Consider the desired color and appearance of your frame when selecting wood. Different wood species have unique grain patterns, tones, and textures. Oak, for example, has a prominent grain pattern, while walnut offers rich, dark brown tones. Choose a wood species that complements the artwork or photograph you plan to display in the frame.
3. Stability and Moisture Resistance: Wood expands and contracts due to changes in moisture and temperature. It’s important to select wood that is stable and less likely to warp or distort over time. Hardwoods like maple and cherry are known for their stability, while softwoods like pine may be more susceptible to changes in humidity. Consider the environment where the frame will be displayed to make an informed choice.
4. Workability: Different wood species have varying levels of workability. Some woods are easier to cut, shape, and sand, while others may be more challenging. Consider your skill level and the tools you have when selecting wood. If you are a beginner, choosing a wood that is easier to work with, such as poplar, can make the process smoother.
5. Cost: The cost of wood can vary depending on the species and availability. Exotic hardwoods like ebony or rosewood tend to be more expensive than common hardwoods like oak or maple. Consider your budget when selecting wood for your picture frame project.
Remember to select wood that is kiln-dried and properly seasoned to minimize the risk of warping and other issues. Taking the time to choose the right wood will ensure a beautiful and long-lasting picture frame that showcases your artwork or photograph perfectly.
Measuring and Cutting the Pieces
Accurate measurements and precise cuts are the foundation of a well-crafted picture frame. Before you start cutting, gather the necessary tools: a tape measure, miter saw, and a miter box or miter sled. Follow these steps to ensure precise measurements and clean cuts:
1. Measure the Artwork: Begin by measuring the dimensions of the artwork or photograph that will be placed in the frame. This will give you an idea of the inside dimensions your frame needs to accommodate.
2. Calculate the Frame Dimensions: Add a margin to the artwork dimensions to determine the total frame size. Typically, a 1/8 inch to 1/4 inch margin is added on each side. For example, if your artwork measures 8×10 inches, the total frame dimensions might be 8 1/4 x 10 1/4 inches.
3. Mark the Pieces: Take the measurements obtained in the previous step and mark them on your wood pieces. Use a pencil or a marking gauge to make accurate markings.
4. Cut the Pieces: Set up your miter saw with a fine-toothed crosscut blade. Place the wood piece against the miter fence and align the blade with the marked line. Secure the wood and make a smooth, even cut. Repeat this step for each frame piece.
5. Check the Accuracy: After cutting each piece, use a square to check the accuracy of the angles. The corners should form perfect 90-degree angles for a seamless join. If adjustments are needed, reposition the wood and recut.
6. Test the Fit: Dry fit the frame pieces together to ensure they align properly and form tight joints. Make any necessary adjustments to the angles or lengths to achieve a precise fit.
Remember to double-check your measurements before cutting to avoid costly mistakes. Take your time and use sharp blades for clean cuts. It’s always a good idea to practice on scrap wood before cutting your final pieces. With proper measuring and cutting techniques, you’ll be on your way to creating a beautifully crafted picture frame.
Preparing the Router
Before you can start using a router to make a picture frame, it’s important to properly prepare the router for the task at hand. Here are the steps to follow to ensure your router is ready for precise and smooth woodworking:
1. Gather the Necessary Tools: In addition to a router, you will need a wrench, router bits (selected based on your desired cuts), and a router table or a handheld router base.
2. Install the Router Bit: Start by ensuring the router is unplugged. Use a wrench to loosen the collet nut on the router. Insert the desired router bit into the collet, making sure it is inserted fully. Tighten the collet nut with the wrench, ensuring the bit is securely in place. Keep in mind that different router bits require different collet sizes, so select the appropriate collet for the bit you are using.
3. Adjust the Router Depth: Determine the desired cutting depth for your project. Adjust the router’s depth by loosening the depth adjustment ring and sliding the motor up or down. Once you have set the desired depth, tighten the adjustment ring to secure the position.
4. Set the Fence or Guide: If you are using a router table, ensure the fence is set at the correct distance from the router bit. The fence will provide support and guide the wood during the routing process. Adjust the fence position based on the complexity of your cuts. If you are using a handheld router, consider using a straight edge or a template as a guide for consistent cuts.
5. Check the Router Power and Speed: Plug in the router and ensure it is functioning properly. Most routers have variable speed settings, so adjust the speed based on the type of wood and the router bit being used. Higher speeds are generally used for smaller bits and softer woods, while lower speeds are suitable for larger bits and harder woods. Ensure the router is securely held before turning it on.
6. Test the Router Setup: Prior to working on the actual frame pieces, it’s always a good idea to test the router setup on a scrap piece of wood. This will allow you to make any necessary adjustments and familiarize yourself with the tool’s operation.
Always prioritize safety when preparing a router. Wear appropriate safety gear such as safety glasses and ear protection, and ensure the workspace is clear of any obstructions. By properly preparing your router, you will be well-equipped to create precise and professional-looking cuts for your picture frame project.
Setting Up a Router Table
A router table provides stability, control, and added versatility when using a router to make a picture frame. Follow these steps to properly set up a router table for your woodworking project:
1. Choose a Router Table: Select a router table that suits your needs and fits your router. Ensure the table is sturdy and has ample space for your frame pieces. Look for features such as an adjustable fence, a miter gauge, and a dust collection system for enhanced functionality.
2. Mount the Router: Remove the base plate from your router to attach it securely to the router table. Use the mounting screws provided with the router table for a secure fit. Ensure the router is centered and aligned with the opening in the table.
3. Adjust the Router Bit Height: Loosen the lock on the router’s depth adjustment mechanism and lower or raise the bit until it is at the desired height for your cuts. Tighten the lock to secure the position. Keep in mind that the bit should extend slightly beyond the table surface to ensure efficient cutting.
4. Set the Fence Position: Align the fence parallel to the miter slot on the router table. The fence acts as a guide for the frame pieces, ensuring straight and accurate cuts. Adjust the fence position based on the desired width of the cut. Use measurements and markings on the fence for precise alignment.
5. Install the Featherboards: Featherboards are used to hold the wood against the fence and table, providing additional stability and preventing kickback. Install the featherboards on both sides of the table, securing them in place with the provided hardware. Adjust the featherboards to exert firm pressure against the wood while allowing it to slide smoothly.
6. Test the Setup: Before working on your frame pieces, test the router table setup on a scrap piece of wood. This will help you ensure that the router, fence, and featherboards are aligned properly and functioning as intended. Make any necessary adjustments before proceeding to the actual project.
Always prioritize safety when using a router table. Use push sticks or push blocks to keep your hands away from the router bit, and wear appropriate safety gear such as safety glasses and ear protection. Ensure the router table is placed on a stable surface and that the workspace is clear of any obstructions. By setting up the router table correctly, you’ll have a sturdy and reliable tool for creating precise cuts in your picture frame project.
Routing the Rabbet Joint
The rabbet joint is an important step in making a picture frame as it creates a recessed groove to hold the glass, artwork, and backing. Follow these steps to successfully route the rabbet joint using a router:
1. Set the Router Depth: Adjust the router’s cutting depth based on the desired width and depth of the rabbet joint. Keep in mind the thickness of the materials you will be inserting into the frame. It’s advisable to make several shallow passes rather than attempting to remove the entire material in one go.
2. Adjust the Fence Position: Position the fence on your router table to control the width of the rabbet cut. Align it with the router bit, ensuring a consistent and straight cut across all frame pieces.
3. Place the Frame Piece Against the Fence: Hold the frame piece firmly against the fence with the rabbet area facing the router bit. Ensure the piece is secure and in constant contact with the fence during the routing process.
4. Start Routing: Turn on the router and slowly push the frame piece into the bit, moving the piece along the fence. Use a smooth and steady motion to ensure an even and clean cut. Keep control of the piece by using a push stick or other appropriate safety tools.
5. Make Multiple Passes: If the depth of the rabbet joint is greater than the cutting capacity of your router, make multiple shallow passes until you achieve the desired depth. Take your time and make clean, precise cuts for a professional-looking result.
6. Check the Fit: Test the fit of the glass, artwork, and backing in the routed rabbet joint. The materials should fit snugly without any gaps or movement. Make any necessary adjustments or additional routing if needed.
Remember to follow all safety precautions when using a router. Always wear safety glasses and ear protection and secure your workpiece properly. Take your time, be patient, and practice on scrap wood if needed to ensure a successful rabbet joint for your picture frame.
Creating the Decorative Profile
Adding a decorative profile to your picture frame can elevate its visual appeal and bring a unique touch to your artwork or photograph. Follow these steps to create a decorative profile using a router:
1. Choose the Router Bit: Select a router bit that will create the desired profile for your frame. There are various options available, such as ogee, cove, bead, or roundover bits. Consider the style and aesthetics you want to achieve, and choose a bit accordingly.
2. Adjust the Router Bit Height: Set the cutting depth of the router bit based on the desired profile. It’s a good practice to perform test cuts on scrap wood to ensure the depth and profile are to your liking. Make any necessary adjustments before moving on to the frame pieces.
3. Secure the Frame Piece: Use clamps or a vise to secure the frame piece in place, allowing both hands to be free when operating the router. Ensure the piece is stable and won’t move during the routing process.
4. Start Routing: Turn on the router and slowly guide it along the edge of the frame piece, allowing the router bit to create the decorative profile. Use a smooth, steady motion and keep the router base in full contact with the wood to achieve consistent results.
5. Make Multiple Passes if Needed: Depending on the depth and complexity of the profile, you may need to make multiple passes to achieve the desired result. Take your time and make sure each pass lines up accurately with the previous one to create a smooth and continuous profile.
6. Repeat for Each Frame Piece: Repeat the routing process for each frame piece, ensuring consistency in the profile design across all pieces. Take care to align the router bit with the previous cuts to maintain a uniform look.
7. Test the Fit: After routing the decorative profiles on all frame pieces, test their fit together. Check for any gaps or inconsistencies in the joints. Make any necessary adjustments or additional routing to ensure a seamless fit.
Always prioritize safety when working with a router. Wear safety glasses and ear protection, and secure your workpiece properly. Take your time, be patient, and practice on scrap wood if needed to ensure a beautifully crafted decorative profile for your picture frame.
Assembling the Picture Frame
Once you have prepared the frame pieces and created the desired decorative profile, it’s time to assemble the picture frame. Follow these steps to ensure a sturdy and professional-looking assembly:
1. Dry Fit the Frame Pieces: Before adding any adhesive or fasteners, dry fit the frame pieces together to ensure they align properly. Check the corners for any gaps or misalignment. Sand or trim the edges if necessary for a seamless fit.
2. Apply Wood Glue: Once you are satisfied with the dry fit, remove the frame pieces one at a time and apply a thin, even layer of wood glue along the joining edges. Use a brush or finger to spread the glue evenly.
3. Reassemble the Frame Pieces: Carefully reassemble the frame pieces, ensuring the glue-covered edges come into contact with each other. Apply gentle pressure to ensure a tight bond.
4. Use Corner Clamps: To keep the corners of the frame square and secure during the glue curing process, use corner clamps. Place the clamps across each corner and tighten them to hold the pieces firmly together.
5. Wipe off Excess Glue: Use a damp cloth or sponge to remove any excess glue that may have squeezed out of the joints. It is important to clean off the excess glue before it dries to ensure a clean and finished appearance.
6. Allow the Glue to Cure: Follow the manufacturer’s instructions for the recommended curing time of the wood glue. It typically takes several hours or overnight for the glue to fully cure. Keep the frame clamped during this time to maintain a tight bond.
7. Remove the Corner Clamps: Once the glue has fully cured, remove the corner clamps from the frame. Check the joints for any weak spots or gaps. If needed, apply additional glue and re-clamp the frame to reinforce any areas that require extra support.
8. Sand and Finish: After the glue has fully cured and any additional reinforcements have been made, use sandpaper or a sanding block to smooth out any rough edges or imperfections. Then, apply your desired finish to enhance the appearance and protect the wood. This could include stain, paint, or varnish.
Remember, attention to detail and precision during the assembly process will result in a well-crafted and durable picture frame. Take your time, use quality materials, and enjoy the satisfaction of seeing your completed frame ready to showcase your artwork or photograph.
Sanding and Finishing the Frame
After assembling the picture frame, the next step is to sand and finish it to achieve a smooth surface and enhance its appearance. Follow these steps to properly sand and finish your frame:
1. Start with Coarse Grit Sandpaper: Begin by using a coarse grit sandpaper, around 100 to 120 grit, to remove any rough edges, glue residue, or imperfections on the frame surface. Sand each side of the frame, going with the grain of the wood, until the surface feels smooth to the touch.
2. Move to a Fine Grit Sandpaper: Transition to a finer grit sandpaper, around 220 to 240 grit, and sand the frame again to further refine the surface. This step helps to remove any visible scratches or marks left by the coarser sandpaper and prepares the frame for the finishing stage.
3. Focus on the Details: Pay attention to the corners and edges of the frame while sanding. Use a sanding block or folded sandpaper to ensure even and consistent sanding. Take your time and be thorough, ensuring all areas are smooth and free from any rough spots.
4. Remove Dust: After sanding, use a clean cloth or a soft brush to remove any sanding dust from the frame. It’s important to have a clean surface before applying the finish to ensure a smooth and even coating.
5. Choose a Finish: Select a finish that complements the wood and meets your desired aesthetic. Common options include wood stain, paint, varnish, or lacquer. Test the finish on a small inconspicuous area of the frame or on a scrap piece of wood to ensure it matches your expectations.
6. Apply the Finish: Follow the manufacturer’s instructions for applying the chosen finish. Use a brush, cloth, or spray to evenly coat the frame’s surface. Apply thin and even layers, allowing sufficient drying time between coats. Take care to cover all areas of the frame, including corners, edges, and the front and back surfaces.
7. Sand between Coats (If applicable): If you’re applying multiple coats of the finish, lightly sand the frame with a fine grit sandpaper, around 320 to 400 grit, between each coat. This helps to smooth out any imperfections or raised wood fibers, resulting in a smoother and more professional finish.
8. Final Finishing Touches: Once the final coat of finish has dried, inspect the frame for any blemishes. If necessary, use a fine-grit sandpaper to gently buff out any inconsistencies. To add an extra touch of finesse, consider applying a coat of clear wax or a protective sealant to enhance the frame’s durability and aesthetic.
Remember to work in a well-ventilated area and follow all safety instructions provided by the manufacturer of the chosen finish. By sanding and finishing your picture frame effectively, you’ll achieve a polished and visually appealing result that will beautifully showcase your artwork or photograph.