
Choosing the Right Mirror Frame for Your Style
A mirror is not just a functional piece; it can also be a stylish addition to any room. When it comes to updating the frame of your mirror, choosing the right style is essential. The frame should complement the overall aesthetics of the space and enhance its visual appeal. Here are some tips for choosing the perfect mirror frame for your style:
1. Consider the room’s theme: Take into account the existing decor and color scheme of the room. If your space has a modern and minimalist vibe, opt for a sleek and contemporary frame. On the other hand, if you have a vintage-inspired room, a distressed or ornate frame might be more suitable.
2. Think about the frame material: The material of the frame can greatly impact its style. Wood frames offer a warm and traditional look, while metal frames can give a sleek and industrial feel. If you’re looking for a more luxurious touch, consider frames with decorative accents like beading or carved details.
3. Choose the right color: The color of your mirror frame should either blend in seamlessly with the surrounding decor or stand out as a focal point. Neutral tones like white, black, or brown are timeless options that work well with any style. However, don’t be afraid to experiment with bold colors or metallic finishes if you want to make a statement.
4. Consider the shape and size: Mirrors come in various shapes and sizes, and the frame should complement the mirror’s proportions. Round or oval frames can add a softer touch, while rectangular frames provide a more structured and classic look. Additionally, consider the size of the mirror in relation to the wall and surrounding furniture to ensure a balanced appearance.
5. Match the frame to the room’s function: Finally, think about the function of the room where the mirror is located. For example, if it’s a bathroom, opt for a frame that can withstand moisture. In a bedroom or living room, choose a frame that reflects the ambiance you want to create.
Remember, the mirror frame should enhance the overall aesthetics of the room and reflect your personal style. By considering the room’s theme, frame material, color, shape and size, and functionality, you can choose a mirror frame that perfectly complements your style and transforms your space into a stylish sanctuary.
Gathering the Necessary Tools and Materials
Before you begin updating the mirror frame, it’s important to gather all the necessary tools and materials. Having everything prepared in advance will help streamline the process and ensure a smoother project. Here are the essential tools and materials you’ll need:
1. Safety equipment: Start by ensuring your safety during the project. Wear protective gloves, safety goggles, and a mask to protect yourself from any potential hazards such as dust or sharp edges.
2. Screwdriver or drill: Depending on the type of mirror frame, you may need a screwdriver or drill to remove any screws or fasteners that hold the old frame in place. Make sure you have the appropriate size and type of screwdriver or drill bit for your specific needs.
3. Pry bar or chisel: If the mirror frame is glued or nailed in place, you’ll need a pry bar or chisel to carefully remove it. Use caution to avoid damaging the mirror or surrounding surfaces during this step.
4. Sandpaper or sanding block: To prepare the surface for the new frame, you’ll need sandpaper or a sanding block to smooth out any rough edges or imperfections. This will help the new frame adhere properly and ensure a professional-looking finish.
5. Measuring tape: Accurate measurements are crucial for cutting the new frame materials. Use a measuring tape to determine the dimensions of the mirror and calculate the lengths of the frame pieces you’ll need.
6. Miter saw or hacksaw: Depending on the type of frame material you choose, you’ll need a miter saw or hacksaw to cut the frame pieces to the correct lengths. If you’re using wood, a miter saw will provide precise and clean cuts, while a hacksaw is suitable for metal or PVC frames.
7. Adhesive or mounting brackets: To attach the new frame to the mirror, you’ll need adhesive suitable for the frame material. Alternatively, you can use mounting brackets for a more secure installation. Make sure to choose adhesives or brackets that are designed to withstand the weight and size of your mirror.
8. Paint or stain: If you want to paint or stain the new frame, gather the appropriate materials, including paintbrushes, paint rollers, or sponges. Choose a paint or stain color that complements your desired style and matches the existing decor.
9. Optional: If you want to add embellishments or decorative elements to the frame, gather any additional materials such as decorative molding, trim, or adhesive-backed embellishments.
By gathering all the necessary tools and materials beforehand, you can ensure a smooth and efficient updating process. Having everything on hand will allow you to focus on the project itself and achieve the desired results with ease and precision.
Removing the Old Mirror Frame
Before you can update the mirror frame, you’ll need to remove the old frame. This process requires careful attention to avoid damaging the mirror or the surrounding area. Follow these steps to safely remove the old mirror frame:
1. Prepare the workspace: Clear the area around the mirror and lay protective coverings, such as a drop cloth or cardboard, to catch any debris. This will help protect the floor or surface beneath the mirror.
2. Inspect the frame: Take a close look at the old frame and determine how it is attached to the mirror. Look for screws, nails, or adhesive that may be holding it in place. Use a flashlight if needed to examine hard-to-reach areas.
3. Remove any screws or fasteners: If the frame is attached with screws, use a screwdriver or drill with the appropriate bit to carefully remove them. Place the screws in a safe place to avoid losing them.
4. Loosen the frame: If the frame is nailed or glued, gently insert a pry bar or chisel between the frame and the mirror. Apply light pressure and carefully work your way around the frame, releasing it from the mirror. Be cautious not to apply too much force to avoid damaging the mirror or surrounding surfaces.
5. Remove the frame: Once the frame is loosened, carefully lift it away from the mirror. If there are any stubborn spots, use a gentle rocking motion to loosen the frame further. Take your time throughout this step to ensure the safety of the mirror.
6. Clean the mirror: After removing the frame, take the opportunity to clean the mirror thoroughly. Use a glass cleaner or a mixture of water and vinegar to remove any dirt, fingerprints, or residue left from the old frame. Wipe the mirror with a soft, lint-free cloth to avoid scratching the surface.
7. Inspect for any damages: Once the mirror is clean, carefully inspect it for any damages or chips that may have occurred during the frame removal process. If you notice any problems, consider repairing or replacing the mirror before proceeding with the new frame installation.
By following these steps, you can safely remove the old mirror frame and prepare the mirror surface for the new frame. Remember to work with caution and take your time to avoid any accidents or damage to the mirror. With the old frame removed, you are now ready to move on to the next steps in updating your mirror’s look.
Preparing the Surface for the New Frame
Once you have removed the old mirror frame, it’s important to properly prepare the surface before installing the new frame. Taking the time to prepare the surface will ensure that the new frame adheres securely and provides a professional and flawless finish. Follow these steps to prepare the surface for the new frame:
1. Clean the mirror surface: Start by cleaning the mirror surface to remove any dust, fingerprints, or residues. Use a glass cleaner or a mixture of water and vinegar to ensure a clean and smooth surface. Wipe the mirror gently with a soft, lint-free cloth to avoid scratching the glass.
2. Assess the condition of the surface: Inspect the mirror surface for any damages or irregularities. If there are any scratches, chips, or imperfections on the mirror, consider repairing or replacing it before proceeding. A smooth and even surface will ensure proper adherence of the new frame.
3. Sand the edges: If the edges of the mirror are rough or uneven, use fine-grit sandpaper or a sanding block to carefully smooth them out. Sand in a gentle circular motion until the edges are even and consistent. Be cautious not to apply too much pressure to avoid damaging the mirror.
4. Remove excess adhesive or residue: If there is any adhesive or residue left from the previous frame, use a scraper or a putty knife to carefully remove it. Be gentle to avoid any scratching or damage to the mirror surface. You can use a solvent or adhesive remover if necessary, but test it on a small inconspicuous area first to ensure it doesn’t harm the mirror.
5. Clean the surface again: After removing any adhesive or residue, clean the surface once more to ensure it is free from any debris. Wipe the mirror with a clean, damp cloth and then dry it thoroughly.
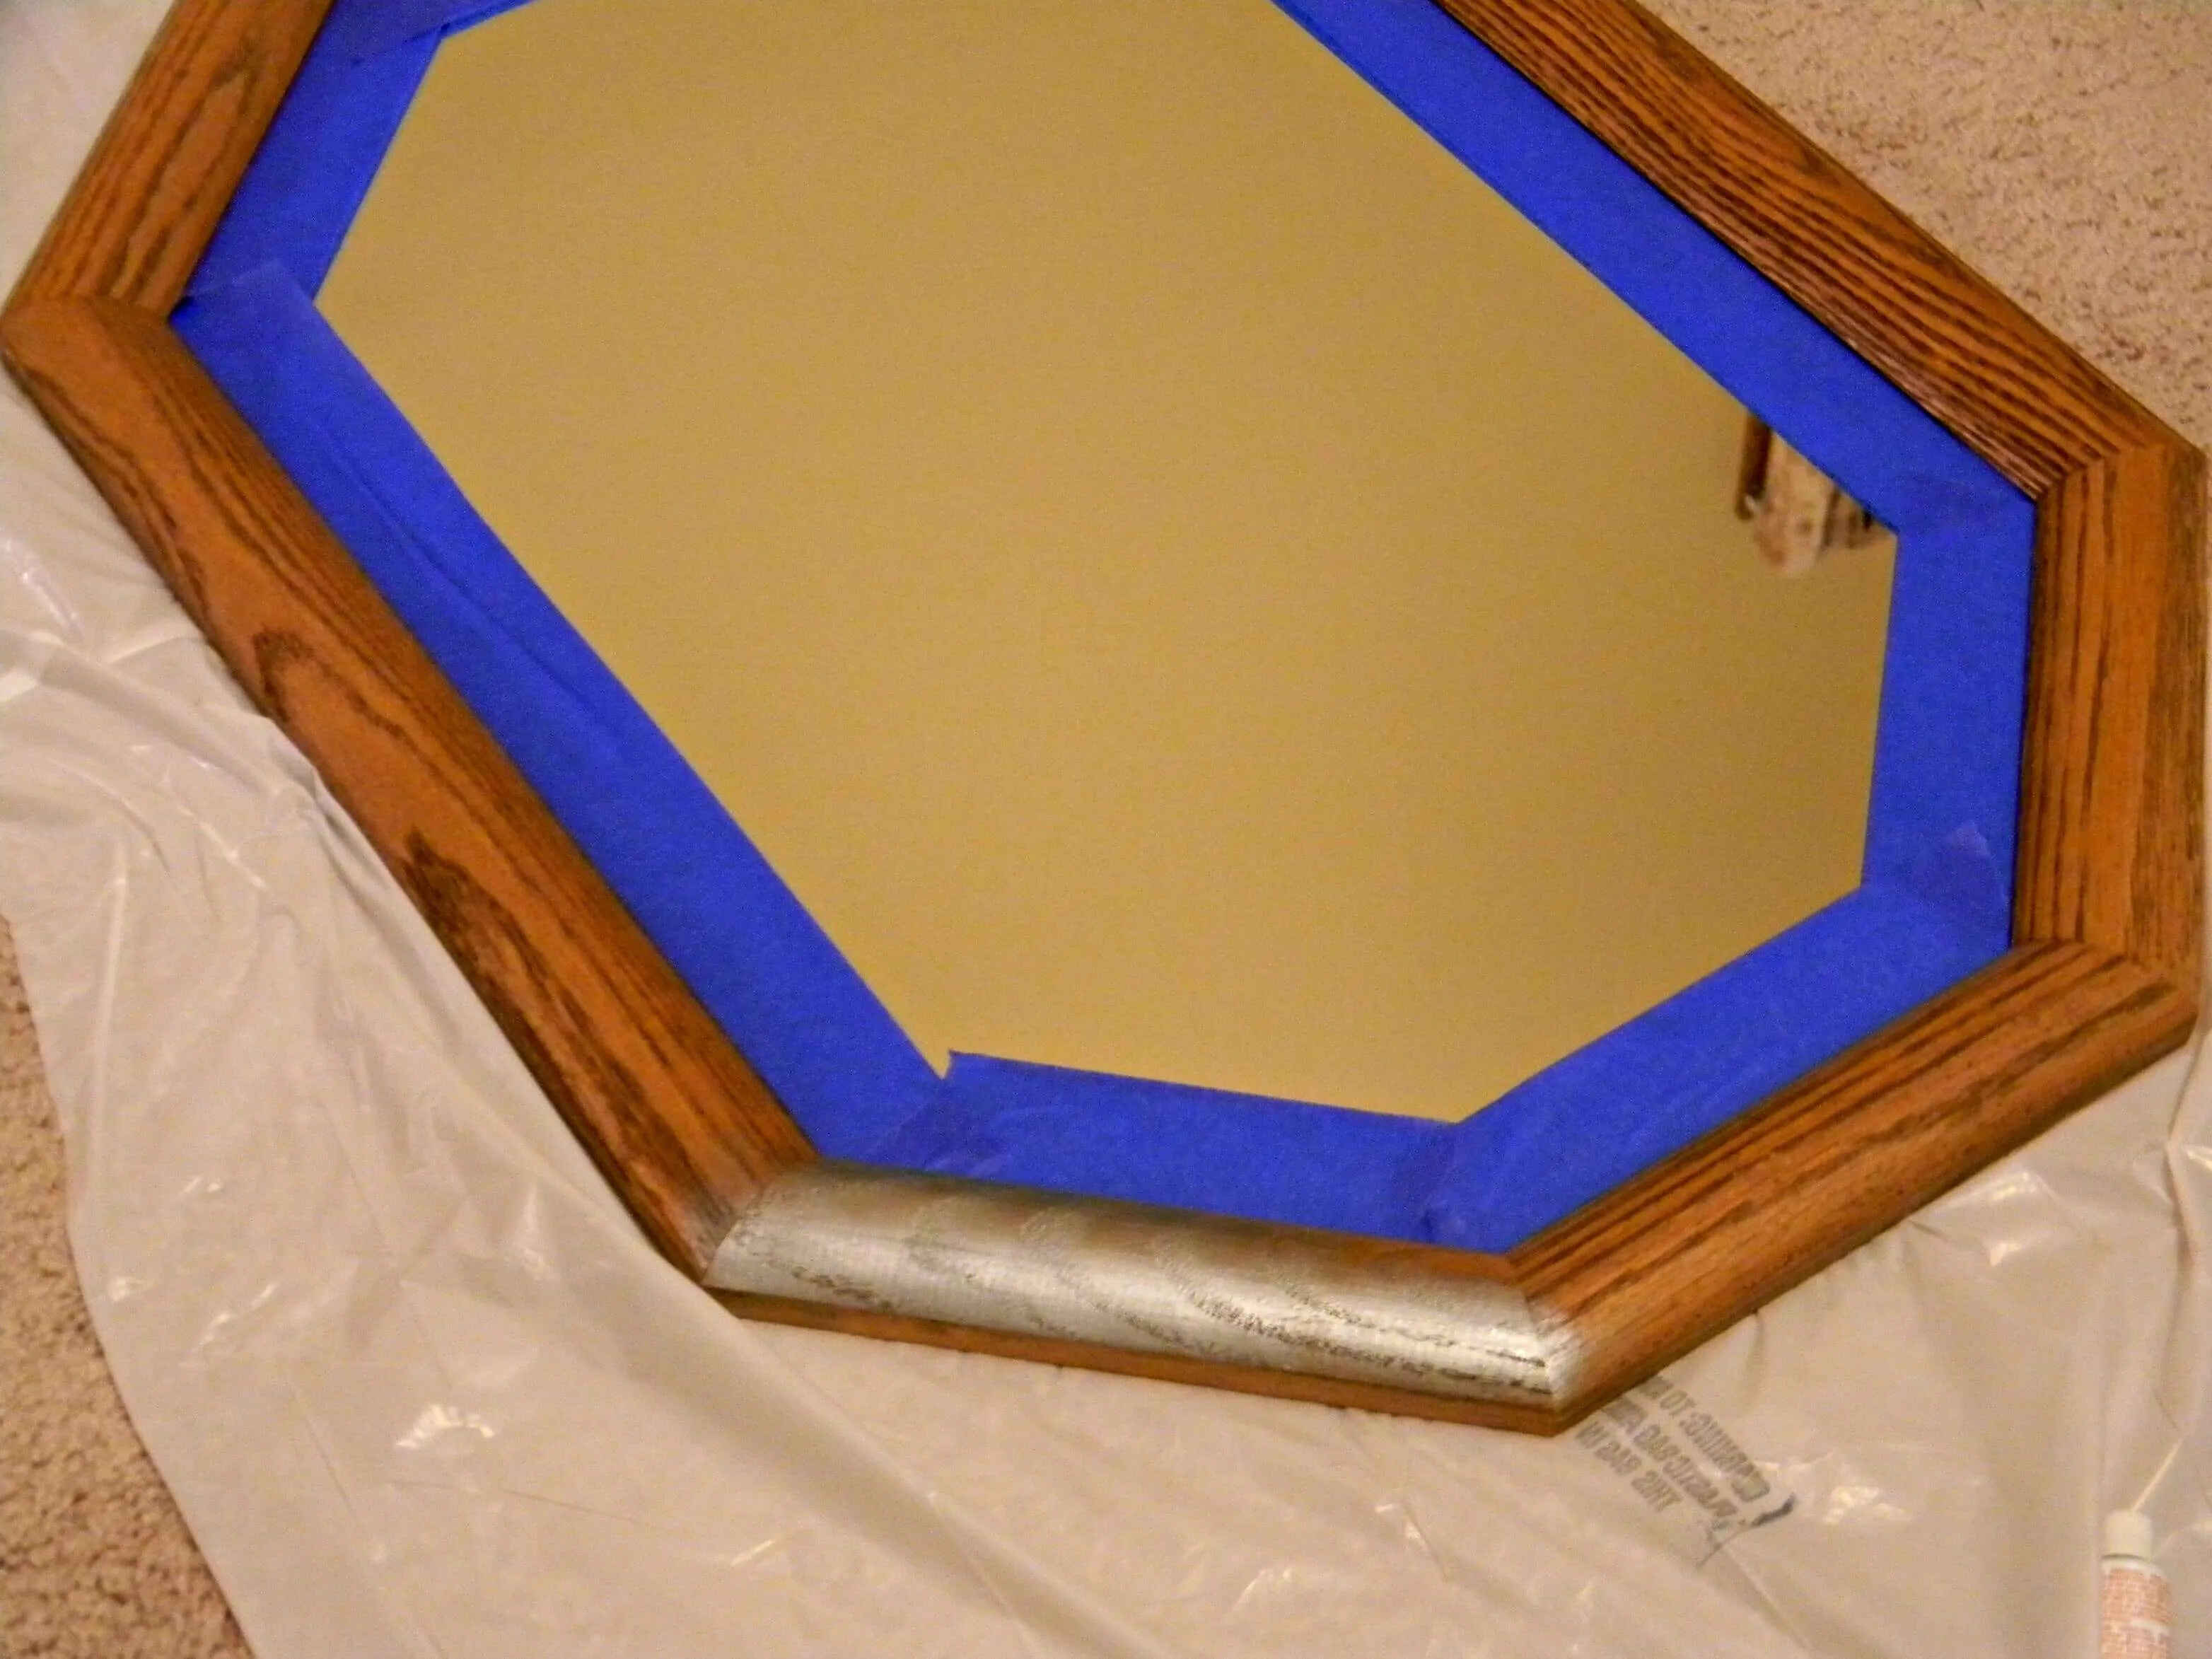
6. Mask off the mirror edges: To protect the mirror surface from any accidental markings or paint splatters, use painter’s tape to mask off the edges of the mirror. This will create a barrier between the mirror and the new frame during the painting or staining process.
By following these steps, you can prepare the surface of the mirror for the new frame installation. Cleaning the surface, assessing its condition, sanding the edges, removing any adhesive or residue, and properly masking off the mirror edges will result in a smooth and pristine surface ready for the new frame. With the surface prepared, you can now move on to measuring and cutting the new frame materials.
Measuring and Cutting the New Frame Materials
With the surface prepared, it’s time to measure and cut the new frame materials that will enhance the look of your mirror. Accurate measurements and precise cuts are essential to ensure the new frame fits perfectly and creates a cohesive and polished appearance. Follow these steps to measure and cut the new frame materials:
1. Measure the mirror dimensions: Use a measuring tape to measure the height and width of the mirror. Take measurements at multiple points to account for any slight variations. Note down the measurements to refer to when cutting the new frame materials.
2. Determine the frame width: Decide on the desired width of the frame around the mirror. This will depend on personal preference and the overall style you want to achieve. Keep in mind that wider frames can make a bolder statement, while narrower frames offer a more delicate and subtle look.
3. Calculate the lengths of the frame pieces: Based on the mirror dimensions and the chosen frame width, calculate the lengths of the frame pieces that will form the top, bottom, and sides of the new frame. Remember to account for mitered corners if you’re using angled cuts for a seamless and professional finish.
4. Mark the measurements on the frame materials: Using a pencil and a measuring tape, carefully mark the measurements on the frame materials. Double-check the accuracy of the marks to ensure precise cuts.
5. Cut the frame materials: Depending on the type of frame material you’re using, use a miter saw or a hacksaw to cut the frame materials to the marked lengths. Follow safety guidelines and use proper techniques to achieve clean and accurate cuts. Take your time to ensure that the angles are correct for mitered corners.
6. Test the frame pieces: Once the frame pieces are cut, dry-fit them together around the mirror to ensure they fit snugly and align properly. Make any adjustments if needed.
7. Sand the cut edges: Use fine-grit sandpaper or a sanding block to smooth out any rough edges or imperfections on the cut ends of the frame pieces. This will ensure a seamless connection when assembling the frame.
By accurately measuring and cutting the new frame materials, you can ensure a precise and customized fit for your mirror. Taking the time to mark the measurements, cut the frame materials with precision, and test the fit will result in a frame that enhances the mirror and complements your desired style. With the frame pieces ready, you can move on to attaching the new frame to the mirror.
Attaching the New Frame to the Mirror
Now that you have measured and cut the new frame materials, it’s time to attach the frame to the mirror. Proper installation is crucial to ensure the frame is secure and aligns perfectly with the mirror. Follow these steps to attach the new frame to the mirror:
1. Clean the mirror surface: Begin by cleaning the mirror surface once again to ensure it is free from any dust or debris. Use a glass cleaner or a mixture of water and vinegar, and wipe it down with a soft, lint-free cloth.
2. Apply adhesive or mounts: Depending on the type of frame material and personal preference, you can either use adhesive or mounting brackets to attach the frame to the mirror. If using adhesive, apply it to the backside of the frame pieces, following the manufacturer’s instructions. If using mounting brackets, position them on the frame pieces according to your measurements.
3. Position the frame pieces: Carefully position the frame pieces around the mirror, aligning them with the measured markings. Apply gentle pressure to ensure a good bond between the adhesive and the mirror or secure the frame with the mounting brackets.
4. Secure the frame: If using adhesive, use clamps or painter’s tape to hold the frame pieces in place until the adhesive dries. If using mounting brackets, use screws or nails to secure them to the wall behind the mirror.
5. Check for alignment and level: Once the frame is secured, double-check that it is aligned properly and leveled. Use a level or a measuring tool to ensure that the frame is straight both horizontally and vertically.
6. Remove any excess adhesive: If there is any adhesive that seeped out from between the frame and the mirror, gently remove it with a damp cloth. Be careful not to disturb the frame pieces during this step.
7. Allow the adhesive to dry: If you have used adhesive, allow it to dry completely according to the manufacturer’s instructions. Avoid placing any excessive weight on the frame until it is fully cured and secured.
By following these steps, you can securely attach the new frame to the mirror. Whether using adhesive or mounting brackets, taking the time to ensure proper alignment, securing the frame, and allowing for sufficient drying time will result in a sturdy and visually appealing installation. Once the frame is attached, you can move onto the next step of painting or staining the frame to complete the transformation of your mirror.
Painting or Staining the New Frame
Now that you have securely attached the new frame to the mirror, it’s time to add the finishing touch by painting or staining the frame. This step allows you to personalize the frame to match your desired style and seamlessly integrate it into the overall aesthetics of the space. Follow these steps to paint or stain the new frame:
1. Prepare the workspace: Set up a well-ventilated and well-lit area for painting or staining. Lay down drop cloths or newspaper to protect the surrounding surfaces from any accidental drips or spills.
2. Sand the frame (optional): If you want to achieve a smoother finish or if the frame material requires it, lightly sand the surface of the frame. Use fine-grit sandpaper or a sanding block to remove any rough spots or imperfections. Wipe away any dust with a clean, damp cloth.
3. Prime the frame (optional): If you’re painting the frame, applying a primer is recommended, especially if the frame is made of wood. Primer helps the paint adhere better and provides a more even and long-lasting finish. Follow the instructions on the primer and allow it to dry thoroughly.
4. Paint or stain application: Using a paintbrush, roller, or sponge, apply the paint or stain to the frame. Start with thin and even coats, allowing each coat to dry before applying the next one. Follow the product instructions for drying times and the number of coats required.
5. Apply additional coats (if needed): Depending on the desired coverage and finish, you may need to apply multiple coats of paint or stain. Take your time and ensure each coat is evenly applied, allowing sufficient drying time between coats.
6. Sand between coats (optional): If you’re aiming for a smoother finish or if you notice any imperfections after a coat has dried, lightly sand the surface with fine-grit sandpaper. This will help create a smoother finish and remove any brush or roller marks. Wipe away any dust before applying the next coat.
7. Add decorative details (optional): If desired, you can add decorative details or embellishments to the frame. Consider using stencils, decals, or adhesive-backed embellishments to create a unique and personalized touch. Apply them after the final coat of paint or stain has dried completely.
8. Seal the frame (optional): To protect the paint or stain and add durability, consider applying a clear sealant or topcoat. This will help prolong the life of the finish and make it easier to clean and maintain.
Remember to follow the instructions on the paint or stain product for the best results. By taking your time to properly paint or stain the new frame, you can achieve a beautiful and customized look that enhances the overall appearance of your mirror and space. Once the paint or stain is dry and any additional details are added, you can move on to adding the finishing touches and accessories to complete the updated mirror frame.
Adding Finishing Touches and Accessories
Once you have painted or stained the new frame, it’s time to add the finishing touches and accessories to complete the look of your updated mirror. These final details can elevate the overall aesthetics of the mirror frame and tie it in with the surrounding decor. Follow these steps to add those finishing touches:
1. Remove painter’s tape: If you used painter’s tape to protect the mirror edges during the painting or staining process, carefully remove it once the paint or stain has dried completely. Check for any residue and gently clean it using a glass cleaner or a mixture of water and vinegar.
2. Inspect the frame: Take a moment to inspect the painted or stained frame for any touch-ups or imperfections. If you notice any areas that need fixing, use a small paintbrush or sponge to correct them. Allow any touch-ups to dry before proceeding.
3. Consider decorative elements: To enhance the visual appeal of the mirror frame, consider adding decorative elements or accessories. This can include adhesive-backed embellishments, such as beads, rhinestones, or decorative molding. Apply them strategically to enhance the frame design and match your personal style.
4. Enhance with lighting: If your mirror is in a dimly lit area, consider adding lighting fixtures around or behind the mirror to create a visually striking effect. LED strip lights or wall-mounted sconces can add a subtle and elegant touch to the overall ambiance.
5. Hang artwork or wall decor: If your mirror is part of a gallery wall or positioned above a piece of furniture, consider hanging complementary artwork or wall decor around it. This will create a cohesive and visually pleasing arrangement that enhances the overall impact of the mirror frame.
6. Style with accessories: Once the mirror frame is complete, style it with accessories that enhance the overall aesthetic of the space. This can include items such as vases, candles, or small sculptures placed strategically around the mirror. Ensure that the accessories complement the mirror frame and tie in with the surrounding decor.
7. Step back and evaluate: Once you have added the finishing touches and accessories, step back and evaluate the overall look of the updated mirror frame. Make any final adjustments or changes as needed to ensure a visually pleasing and harmonious composition.
By following these steps, you can add the finishing touches and accessories that will complete the look of your updated mirror frame. Whether it’s removing the painter’s tape, considering decorative elements, enhancing with lighting, hanging artwork or wall decor, styling with accessories, or evaluating the final look, these steps will help create a visually appealing and cohesive design. Taking the time to add these finishing touches will ensure that your mirror frame becomes a standout piece in your space.
Hanging the Mirror with the Updated Frame
After completing the transformation of your mirror frame, it’s time to hang the mirror and showcase your newly updated masterpiece. Properly hanging the mirror is crucial to ensure it is securely in place and aligned correctly. Follow these steps to hang the mirror with the updated frame:
1. Decide on the hanging method: Determine whether you will be using picture wire, D-rings, sawtooth hangers, or any other type of hanging hardware. Consider the weight of the mirror and the recommendations of the manufacturer for the best hanging method.
2. Mark the wall: Begin by measuring the desired height for hanging the mirror. Use a pencil to mark the center of the wall, where the top edge of the mirror will be positioned. If there are multiple frame hanging points, mark them accordingly.
3. Locate wall studs or use wall anchors: If possible, locate the wall studs using a stud finder and mark their positions. This will provide additional support when hanging a heavier mirror. If there are no available studs, use appropriate wall anchors for the hanging hardware.
4. Attach hanging hardware: Depending on the chosen hanging method, attach the appropriate hardware to the back of the mirror frame. Follow the hardware manufacturer’s instructions for proper placement and secure attachment.
5. Measure and mark the hanging points: Measure the distance between the hanging hardware, ensuring they align with the marked positions on the wall. Use a level to double-check that the hardware is straight and even.
6. Make pilot holes or insert anchors: If necessary, make pilot holes in the wall for screws or insert Wall anchors in the marked positions. This will ensure a secure and stable hanging surface.
7. Hang the mirror: With the help of another person or a mirror hanger, carefully lift the mirror and align the hanging hardware with the marked positions on the wall. Slowly lower the mirror onto the screws or anchors, ensuring it is securely in place.
8. Double-check alignment: Step back and check the alignment of the mirror. Use a level to ensure it is straight both horizontally and vertically. Make any necessary adjustments as needed.
9. Secure the mirror frame: If the mirror has any additional securing mechanisms, such as clips or brackets, make sure they are properly installed and tightened to secure the mirror frame.
10. Enjoy your newly updated mirror: Once the mirror is securely hung, step back and appreciate the transformation you have made. The updated frame will beautifully enhance the mirror and the overall aesthetics of your space.
By carefully hanging the mirror with the updated frame, you can showcase your creative vision and enjoy the visually stunning result. Taking the time to measure and mark the wall, attach the appropriate hanging hardware, and ensure proper alignment will ensure a safe and visually pleasing display. Step back, admire your work, and enjoy the newfound beauty and functionality of your updated mirror.