
Choosing the Right Type of Curtain Tie
When it comes to tying up your curtains, selecting the right type of curtain tie can make all the difference in creating the desired look and functionality. With a wide variety of options to choose from, it’s important to consider the overall style and design of your curtains, as well as your personal preferences. Here are a few popular types of curtain ties to help you make an informed decision.
1. Rope Ties: If you’re looking for a rustic or nautical touch, rope ties can be an excellent choice. These ties are made of thick, braided rope and often come in neutral tones like beige or tan.
2. Fabric Ties: For a softer, more elegant look, fabric ties can add a touch of sophistication to your curtains. These ties are typically made from the same fabric as your curtains, creating a seamless and cohesive appearance.
3. Loop Ties: Loop ties are a classic and versatile option that work well with a variety of curtain styles. They feature a looped design that can be easily adjusted to different heights, allowing you to achieve the desired amount of natural light and privacy.
4. Knot Ties: Simple and effortless, knot ties add a minimalist and casual touch to your curtains. With just a single knot, you can secure your curtains in place or create a decorative accent.
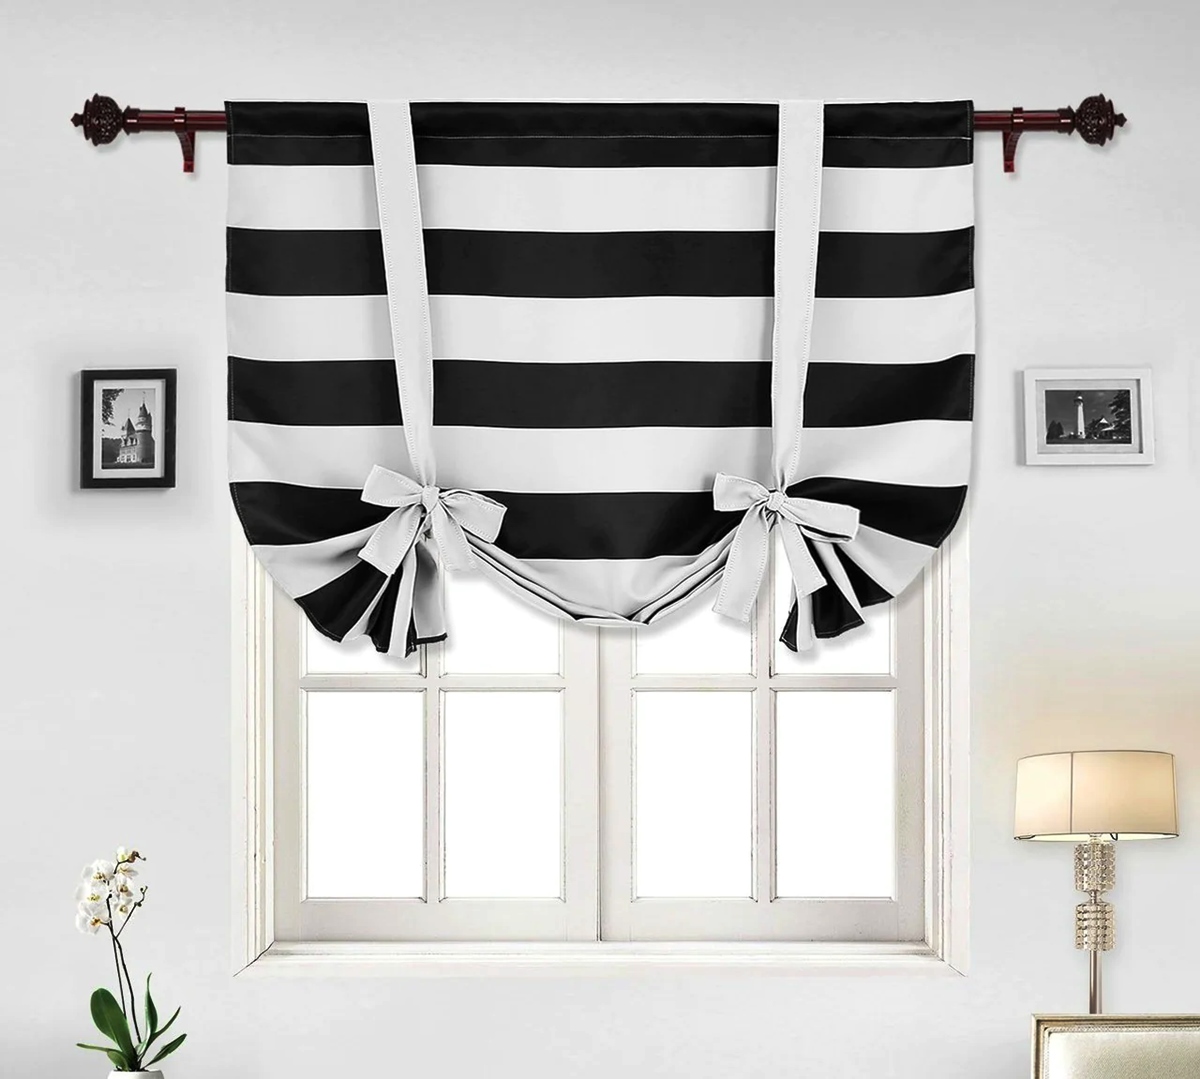
5. Bow Ties: If you’re aiming for a charming and romantic look, bow ties are a perfect choice. These ties create a delicate bow-like shape on each side of your curtains, adding a whimsical touch to any room.
Consider the materials of the ties as well. For example, if you have heavy curtains, you may want to choose a sturdy and durable tie that can securely hold them in place. Conversely, if you have sheer or lightweight curtains, a more delicate tie may be appropriate.
Ultimately, the right curtain tie will depend on your personal style and the look you want to achieve. Take the time to explore different options and consider how they will complement your curtains and overall aesthetic. With the perfect curtain tie, you can transform the appearance of your windows and enhance the visual appeal of your space.
Measuring and Preparing Your Curtain
Before you can tie up your curtains, it’s important to ensure that they are properly measured and prepared. Taking the time to measure your curtains correctly will help you achieve the desired tie-up height and ensure that the final look is both aesthetically pleasing and functional. Here are the steps to measuring and preparing your curtains:
1. Measure the Curtain Length: Start by measuring the length of your curtains from the top to the bottom edge. This will help you determine the amount of fabric you have to work with when tying them up.
2. Determine the Tie-Up Height: Consider how high you want to tie up your curtains. This will depend on factors such as the amount of natural light you want to let in, the desired privacy level, and the overall aesthetic you’re aiming for. Measure and mark the desired tie-up height on your curtains.
3. Prepare the Fabric: If your curtains have a lining, ensure that it is properly folded and tucked away before tying them up. This will ensure that the lining doesn’t get tangled in the tie and that your curtains drape nicely when tied.
4. Secure any Tie-Backs or Holdbacks: If you’re using tie-backs or holdbacks to secure your curtains in a specific position, make sure they are properly installed and in good condition. Secure them around the curtain fabric, ensuring that they are tight enough to hold the fabric in place but not too tight to cause damage.
5. Adjust the Tie-Up Height: Once your curtains are properly prepared, gather the fabric at the marked tie-up height and adjust it accordingly. Experiment with different heights to find the desired look and functionality.
6. Ensure even and symmetrical ties: Whether you’re using loop ties, knot ties, or any other type of tie, it’s essential to ensure that the ties are even and symmetrical on both sides of the curtains. This will create a balanced and visually appealing look.
By properly measuring and preparing your curtains, you can ensure that the tie-up process goes smoothly and the final result meets your expectations. Remember to take your time and make any necessary adjustments to achieve the desired look. With the curtains measured and prepared, you’re now ready to explore different tie-up styles and create beautiful and functional curtain ensembles for your windows.
Basic Tie-Up Styles
Once you have chosen the right type of curtain tie and measured your curtains, it’s time to explore various tie-up styles. These styles can add a touch of elegance, creativity, and functionality to your curtains, transforming them from ordinary window coverings to eye-catching design elements. Here are some basic tie-up styles to consider:
1. Classic Loop Tie: The classic loop tie is a time-tested and versatile method. To achieve this look, gather the curtain fabric at the desired tie-up height and create a loop by folding the fabric back onto itself. Secure the loop with a tie or a decorative knot, and adjust the length of the loop to your preference. This style allows you to easily adjust the height of the tied-up curtains.
2. Simple Knot Tie: For a minimalist and casual look, opt for a simple knot tie. Gather the curtain fabric at the desired tie-up height and tie a knot using the fabric itself. Adjust the length of the tied portion to achieve the desired look. This style works well with lightweight curtains and can be easily untied when you want to let the curtains down.
3. Bow Tie: Bow ties add a charming and whimsical touch to your curtains. Gather the curtain fabric at the desired tie-up height and tie a bow using the fabric itself. Adjust the size and shape of the bow to your liking. This style works exceptionally well with soft and flowy fabrics, adding a romantic flair to any room.
4. Fabric Tieback: A fabric tieback is an elegant option for tying up curtains. It involves using a separate piece of fabric or a decorative tieback holder to secure the curtains in place. Simply gather the curtain fabric at the desired tie-up height and wrap the fabric tieback around it. Secure the tieback using a knot or a hook, depending on the type of tieback you choose. This style adds a touch of sophistication to your curtains and allows for easy adjustment of the tie-up height.
5. Cleat Tie: A cleat tie is a popular choice for those seeking a nautical or rustic look. This style involves using a cleat (a wall-mounted bracket with two horns) to secure the curtain fabric. Gather the fabric at the desired tie-up height and wrap it around one of the horns of the cleat. Then wrap the fabric around the other horn in a figure-eight pattern. This style creates a unique and visually appealing tie-up look.
These basic tie-up styles provide a starting point for your curtain tying adventures. Experiment with different styles and approaches to find the one that best suits your curtains and complements your room’s aesthetic. Remember to consider the fabric, weight, and overall design of your curtains when selecting a tie-up style to ensure both functionality and visual appeal.
Creating a Classic Loop Tie
The classic loop tie is a timeless and versatile method for tying up curtains. It provides an elegant and tailored look, allowing you to adjust the height of the tied-up curtains as desired. Here’s a step-by-step guide on how to create a classic loop tie:
Step 1: Measure and Mark: Start by measuring and marking the desired height at which you want to tie up your curtains. This will give you a reference point for gathering the fabric.
Step 2: Gather the Fabric: Gather the curtain fabric at the marked height. Hold the fabric loosely in your hand, ensuring that you have enough fabric to form a loop.
Step 3: Create the Loop: Fold the fabric over itself to create a loop. The size of the loop will depend on how high you want to tie up the curtains. Experiment with different loop sizes to find the desired look.
Step 4: Secure the Loop: To secure the loop, use a tie or create a decorative knot. For a clean and simple look, use a discreet tie that matches the curtain fabric. Alternatively, you can tie an ornamental knot using a complementary-colored ribbon or cord to add a decorative touch.
Step 5: Adjust the Length: Once you have secured the loop, adjust the length of the tied section of the curtain to your preference. This will determine how much of the fabric hangs below the loop. You can create a longer or shorter tied section based on the amount of natural light and privacy you desire.
Step 6: Fine-Tune the Look: Take a step back and assess the appearance of the classic loop tie. Make any necessary adjustments to ensure that both sides of the curtains are even and symmetrical. Smooth out any wrinkles or folds in the fabric to create a polished and refined look.
The classic loop tie is not only stylish but also functional. It allows you to easily adjust the height of the tied-up curtains, providing versatility in managing light, privacy, and airflow. Whether you prefer a more relaxed and loose loop or a tight and structured loop, this tie-up style can be adapted to suit your personal preferences and the overall aesthetic of your space.
Remember to consider the weight and thickness of your curtains when creating a classic loop tie. Heavier curtains may require a sturdier tie or a reinforced loop to ensure that they stay securely in place. Lighter fabrics, on the other hand, can create a graceful and delicate loop that adds a touch of elegance to your windows.
With a classic loop tie, you can effortlessly add a touch of sophistication to your curtains while maintaining functionality. Experiment with different fabrics, tie styles, and tied-up heights to achieve the perfect look for your space. Enjoy the process of creating a classic loop tie and seeing how it transforms the overall ambiance of your room.
Tying a Simple Knot Tie
A simple knot tie is a minimalist and effortless way to tie up your curtains. It adds a casual and relaxed touch to your window treatment, allowing you to easily secure the curtains in place or create a decorative accent. Follow these simple steps to achieve a perfect knot tie:
Step 1: Measure and Mark: Begin by measuring and marking the desired height at which you want to tie up your curtains. This will serve as a reference point when tying the knot.
Step 2: Gather the Fabric: Gather the curtain fabric at the marked height. Hold the fabric loosely in your hand, ensuring that you have enough fabric to work with when creating the knot.
Step 3: Tie the Knot: With the gathered fabric in your hand, create a simple overhand knot. Cross one end of the fabric over the other end, then bring it through the resulting loop. Gently pull both ends to tighten the knot, but not too tight as you may want to untie it easily later.
Step 4: Adjust the Length: After tying the knot, adjust the length of the tied section of the curtain to achieve your desired look. You can leave a longer or shorter section of fabric below the knot, depending on your preferences and the overall style you want to achieve.
Step 5: Refine the Appearance: Take a step back and assess the appearance of the simple knot tie. Ensure that both sides of the curtains hang evenly and that the knot is centered and balanced. Smooth out any wrinkles or folds in the fabric to create a neat and clean look.
Step 6: Experiment and Customize: The beauty of a simple knot tie lies in its versatility. Feel free to experiment with different knot sizes and styles to add a unique touch to your curtains. You can tie multiple knots along the length of the tied-up section or create a single statement knot for a more dramatic effect.
A simple knot tie is an excellent option for lightweight curtains or for those who prefer a more casual and relaxed look. It is easy to tie and untie, allowing you to quickly adjust your curtains as needed. This tie-up style is especially suitable for creating a bohemian or contemporary aesthetic in your space.
Consider the material and texture of your curtains when tying a simple knot. Fabrics with a bit of drape, like sheer or lightweight fabrics, work best with this tie-up style as they effortlessly form elegant and loose knots. However, you can still experiment with heavier fabrics by tying more secure and tight knots for a unique and contrasting look.
Embrace the simplicity and versatility of a simple knot tie to add a touch of charm and character to your curtains. Whether you’re aiming for a laid-back coastal vibe or a modern and minimalist feel, this tie-up style allows you to express your personal style while ensuring that your curtains are securely tied and beautifully displayed.
Styling with a Bow Tie
A bow tie is a charming and whimsical way to style your curtains. It adds a touch of elegance and playfulness to any space, creating a focal point and enhancing the overall aesthetic of your window treatment. Follow these steps to achieve a beautiful bow tie:
Step 1: Measure and Mark: Start by measuring and marking the desired height at which you want to tie up your curtains. This will serve as a reference point when tying the bow.
Step 2: Gather the Fabric: Gather the curtain fabric at the marked height, holding it loosely in your hand. Ensure that you have enough fabric to create a bow with sizable loops and tails.
Step 3: Tie the Bow: Take the gathered fabric and create two loops, similar to tying a shoelace. Cross one loop over the other, then bring one end up and through the resulting loop. Gently pull both ends to tighten the bow, making sure to leave enough fabric for the tails.
Step 4: Adjust the Bow: Adjust the size and shape of the bow by gently tugging on the loops and tails. You can make the loops larger for a more dramatic appearance or keep them smaller for a daintier look. Play around with the positioning and arrangement of the loops to achieve the desired effect.
Step 5: Refine the Appearance: Step back and assess the appearance of the bow tie. Ensure that both sides of the curtains are even and symmetrical. Adjust the fabric and smooth out any wrinkles or folds to create a polished and elegant look.
Step 6: Customize Your Bow: Get creative with your bow tie by adding decorative elements. You can incorporate ribbons, brooches, or other embellishments to further enhance the visual appeal. Experiment with different fabrics and patterns to create bows that perfectly complement your curtains and room decor.
A bow tie adds a touch of romance and whimsy to your curtains, making it an ideal choice for creating a feminine or vintage-inspired aesthetic. It works particularly well with soft and flowy fabrics, such as silk or chiffon, which can be easily manipulated to form elegant and graceful bows.
Consider the overall style and decor of your space when using a bow tie. It can bring a touch of playfulness and sophistication to a nursery or a bedroom, or create a charming and inviting ambiance in a living room or dining area. The versatility of the bow tie allows you to tailor the look to fit your personal taste and the atmosphere you want to create.
Embrace the elegance and whimsy of a bow tie to elevate your curtain styling. The intricate loops and tails of the bow create a visually appealing focal point, making your curtains a standout feature in your space. With a beautifully tied bow, you can create a curated and enchanting atmosphere that truly reflects your unique style and personality.
Using a Fabric Tieback
A fabric tieback is an elegant and sophisticated way to secure and style your curtains. It adds a touch of luxury and refinement to your window treatment, while also allowing you to easily adjust the tie-up position. Follow these steps to effectively use a fabric tieback:
Step 1: Measure and Mark: Begin by measuring and marking the desired height at which you want to tie up your curtains. This will serve as a reference point when positioning the tieback.
Step 2: Choose the Fabric: Select a fabric that complements the curtains and overall decor of your space. It’s recommended to use a fabric that is similar or complementary in color and texture to the curtains themselves, creating a cohesive and harmonious look.
Step 3: Prepare the Fabric: Cut the fabric into a long strip, ensuring that it is wide enough to create a substantial tieback. The length of the strip will depend on the desired width and length of the tieback. Consider leaving extra length on both ends for a more dramatic effect.
Step 4: Position the Tieback: Place the tieback around the gathered curtain fabric at the marked height. If the curtain fabric is bulky, you may need to tuck it slightly underneath the tieback for a more polished appearance. Ensure that the tieback is centered and evenly positioned on both sides of the curtains.
Step 5: Wrap and Secure: Starting from one end of the tieback, gently wrap it around the gathered curtain fabric, concealing it underneath the tieback as you go. Continue wrapping until you reach the other end of the tieback. Create a knot or bow to secure the fabric tieback in place.
Step 6: Adjust and Fluff: Adjust the position and arrangement of the fabric tieback to achieve the desired look. Arrange the loops and tails of the tieback to create an elegant and visually pleasing draping effect. Gently fluff and smooth out any wrinkles or folds for a polished and refined appearance.
Using a fabric tieback not only adds elegance and style to your curtains but also provides practicality and flexibility. It allows you to easily adjust the tie-up position, enabling you to control the amount of natural light and privacy in your space.
Experiment with different types of fabric, textures, and patterns to create unique and customized fabric tiebacks. You can further enhance the look by adding decorative elements, such as beaded trims, tassels, or decorative pins, to create a personalized and exquisite tieback.
Remember that fabric tiebacks work best with curtains made from lightweight or medium-weight fabrics. Heavier curtains may require a sturdier tieback or additional support to hold them securely in place.
Utilizing a fabric tieback is an excellent way to infuse elegance and sophistication into your curtain ensemble. The beautiful draping effect and customizable options make it a versatile and visually stunning addition to any room. With a fabric tieback, you can effortlessly transform your curtains into a work of art while adding a touch of glamour to your living space.
Giving a Nautical Touch with a Cleat Tie
If you’re aiming to incorporate a nautical theme into your curtain styling, a cleat tie is the perfect choice. This tie-up method not only adds a touch of maritime charm but also provides a secure and visually appealing way to tie up your curtains. Follow these steps to create a cleat tie with a nautical touch:
Step 1: Measure and Mark: Begin by measuring and marking the desired height at which you want to tie up your curtains. This will serve as a reference point for positioning the cleat.
Step 2: Select the Cleat: Choose a decorative cleat that complements the overall aesthetics of your space. Cleats are typically made of metal, wood, or resin, and are available in various shapes and finishes. Select a cleat that fits well with your nautical theme.
Step 3: Install the Cleat: Securely install the cleat on the wall at the marked height. Ensure that it is level and centered, as this will impact the overall appearance and functionality of the tie-up.
Step 4: Gather the Fabric: Gather the curtain fabric at the desired tie-up height, making sure to leave enough length below the gathered section for a visually pleasing display.
Step 5: Create the Cleat Tie: Take the gathered fabric and wrap it around one of the horns of the cleat. Then, wrap the fabric around the other horn in a figure-eight pattern, creating a secure and visually appealing tie. Adjust the fabric and loops as needed to achieve the desired look.
Step 6: Fine-Tune and Adjust: Step back and assess the appearance of the cleat tie. Ensure that the loops are even, the fabric is securely wrapped around the cleat, and the visual balance is maintained. Smooth out any wrinkles or folds in the fabric to create a clean and polished look.
The cleat tie not only adds a distinctive nautical touch to your curtains but also offers practicality and ease of use. It provides a secure way to keep your curtains tied up at a specific height, allowing for easy adjustment of natural light and privacy levels.
The versatility of the cleat tie makes it suitable for various curtain fabrics and styles. Whether you have lightweight sheer curtains or heavier drapery, the cleat tie can hold the fabric securely in place while adding an element of coastal-inspired design.
Consider enhancing the nautical aesthetic by incorporating other maritime elements into your room decor. You can add seashells, rope accents, or decorative anchors to further elevate the nautical theme and create a cohesive look throughout the space.
With a cleat tie, you can effortlessly infuse a nautical ambiance into your window treatment while ensuring that your curtains are securely tied up and visually appealing. Embrace the maritime charm and enjoy the unique combination of functionality and aesthetic appeal that a cleat tie provides.
Creating a Decorative Rope Tie
A decorative rope tie is a fantastic way to add a rustic and stylish touch to your curtain ensemble. This tying method uses a thick and braided rope to secure and accentuate your curtains, creating a unique and visually appealing look. Follow these steps to create a decorative rope tie:
Step 1: Measure and Mark: Begin by measuring and marking the desired height at which you want to tie up your curtains. This will serve as a reference point when positioning the rope tie.
Step 2: Select the Rope: Choose a thick and sturdy rope that complements the overall style and color scheme of your curtains. Natural fibers like jute or sisal are popular choices for creating a rustic and organic look.
Step 3: Prepare the Rope: Cut a length of rope that is long enough to wrap around the gathered curtain fabric and tie a secure knot. Leave extra length on both ends of the rope to create decorative tassels or loops.
Step 4: Gather the Fabric: Gather the curtain fabric at the marked height, ensuring that you have enough fabric to accommodate the rope. Hold the fabric loosely in your hand, preparing it for the rope tie.
Step 5: Wrap and Tie the Rope: Take the prepared rope and wrap it around the gathered fabric, creating a secure and visually appealing tie-up. Cross the rope ends and tie a secure knot, making sure that the rope is held firmly in place.
Step 6: Create Decorative Elements: With the extra length of the rope, you can get creative and add decorative elements. For example, you can twist the rope ends to create tassels or loops, or even weave in additional ribbons or beads to enhance the overall look.
Step 7: Adjust and Fine-Tune: Step back and assess the appearance of the decorative rope tie. Ensure that the loops are even and symmetrical, and the rope is securely tied around the fabric. Make adjustments as needed, smoothing out any wrinkles or folds in the fabric for a polished and refined look.
The decorative rope tie provides a rustic and charming touch to your curtains, adding depth and character to your window treatment. It effortlessly creates a visually interesting focal point and complements various design styles, from farmhouse and coastal to bohemian and eclectic.
Consider pairing the rope tie with curtains made of natural materials like linen or cotton for a cohesive and organic look. The combination of the rough texture of the rope and the soft drapery of the fabric creates a beautiful contrast and adds visual interest to your space.
Not only does the decorative rope tie enhance the aesthetics of your curtains, but it also offers versatility in adjusting the tie-up height. You can easily raise or lower the curtains by untying and retying the rope, allowing you to control the amount of natural light and privacy in your room.
With a decorative rope tie, you can create a visually captivating and personalized curtain ensemble. Let your creativity shine through by selecting the right rope, adding decorative elements, and exploring different tying techniques. Enjoy the process of transforming your curtains into unique and eye-catching design elements with a decorative rope tie.
Incorporating Tassels or Fringes into Your Tie
Adding tassels or fringes to your curtain tie is a wonderful way to infuse a touch of elegance, whimsy, or bohemian charm into your window treatment. These decorative elements serve as delightful accents that elevate the overall look and create a customized tie-up style. Here’s how you can incorporate tassels or fringes into your curtain tie:
Step 1: Measure and Mark: Start by measuring and marking the desired height at which you want to tie up your curtains. This will serve as a reference point when positioning the tassels or fringes.
Step 2: Choose the Tassels or Fringes: Select tassels or fringes that match the color scheme, style, and aesthetic of your curtains. You can opt for delicate and ornate tassels for an elegant look or choose playful and colorful fringes for a more whimsical appearance.
Step 3: Prepare the Tassels or Fringes: Attach the tassels or fringes to the ends of your curtain tiebacks or tie loops. Make sure they are securely fastened so that they don’t come loose with regular use. Alternatively, you can attach the tassels or fringes directly to the curtain fabric itself.
Step 4: Gather the Fabric: Gather the curtain fabric at the marked height, preparing it for the incorporation of tassels or fringes. Adjust the fabric to ensure that the tie is centered and even on both sides, taking into consideration the placement of the tassels or fringes.
Step 5: Wrap and Tie: With the tassels or fringes in place, wrap the fabric around the gathered section and tie it securely. Make sure the tassels or fringes are visible and well-positioned, adding a decorative flair to the tie-up.
Step 6: Finishing Touches: Take a step back and assess the appearance of the incorporated tassels or fringes. Adjust their placement if needed, ensuring that they hang evenly and complement the overall look of your curtains and space.
The incorporation of tassels or fringes into your curtain tie adds a touch of personality and style to your window treatment. It brings an element of visual interest and texture, making your curtains a standout feature in the room.
Consider the overall design and ambiance of your space when selecting tassels or fringes. Delicate tassels with intricate details and metallic accents can add a touch of refinement to formal spaces, while vibrant and playful fringes can inject a sense of joy and liveliness into more casual settings.
Tassels or fringes work well with a variety of curtain styles and fabrics. They can enhance the look of sheer curtains, create an eye-catching contrast against solid-colored drapes, or add an extra layer of texture to patterned curtains.
With the incorporation of tassels or fringes, your curtain tie becomes a personalized and eye-catching feature. These decorative elements not only serve as functional tie-ups but also contribute to the overall aesthetic and ambiance of your room. Have fun exploring different tassel or fringe designs, color combinations, and placements to create a truly unique and visually captivating curtain ensemble.
Installing Curtain Tie Hooks or Holdbacks
If you’re looking for a convenient and stylish way to tie up your curtains, installing curtain tie hooks or holdbacks is a great option. These hardware pieces provide a secure and visually appealing way to hold your curtains in place, adding a touch of sophistication to your window treatment. Here’s how you can install curtain tie hooks or holdbacks:
Step 1: Measure and Mark: Start by measuring and marking the desired height at which you want to tie up your curtains. This will serve as a reference point for positioning the tie hooks or holdbacks.
Step 2: Choose the Style: Select the type of tie hooks or holdbacks that best suit your preferences and the overall aesthetics of your space. There are various designs available, from sleek and modern to ornate and decorative, allowing you to find the perfect style to complement your curtains.
Step 3: Locate the Studs: Use a stud finder to locate the wooden studs in the wall where you want to install the tie hooks or holdbacks. Wooden studs provide the most secure anchoring for the hardware.
Step 4: Mark the Placement: Once you have located the studs, mark the placement of the tie hooks or holdbacks on the wall with a pencil or marker. Ensure that the marks are level and evenly spaced.
Step 5: Install the Hardware: Use a drill to make pilot holes at the marked spots. This will make the installation process easier and prevent the wall from cracking or splitting. Attach the tie hooks or holdbacks to the wall using screws and a screwdriver or drill.
Step 6: Test and Adjust: Once installed, test the tie hooks or holdbacks by placing the curtain fabric into them and ensuring that they can securely hold the weight of the curtains. If needed, make any necessary adjustments to ensure that the tie hooks or holdbacks are properly aligned and can hold the curtains in the desired position.
Curtain tie hooks or holdbacks not only offer a practical solution for tying up your curtains but also serve as decorative accents that enhance the overall aesthetic of your space. They provide a polished and tidy appearance when the curtains are tied back, allowing for maximum natural light and a sophisticated look when desired.
Consider the material and finish of the tie hooks or holdbacks to coordinate with other hardware elements in your space, such as curtain rods or cabinet handles. Coordinating or matching the finishes will create a cohesive and harmonious look throughout the room.
With the installation of curtain tie hooks or holdbacks, you can easily and conveniently tie up your curtains at any desired height. They provide a secure and stable solution that keeps your curtains neatly in place, preventing them from falling or causing any obstructions.
By installing curtain tie hooks or holdbacks, you add a functional and visually appealing element to your curtains. Enjoy the convenience and elegance they bring to your window treatment, while also enhancing the overall style and ambiance of your space.
Tips for Maintaining Curtain Ties
Keeping your curtain ties in good condition not only ensures their longevity but also allows you to continue enjoying their functional and decorative benefits. Here are some tips for maintaining your curtain ties:
1. Regular Cleaning: Depending on the material of your curtain ties, it’s essential to clean them regularly to prevent the buildup of dust and dirt. Follow the manufacturer’s instructions for the appropriate cleaning method, whether it’s spot cleaning or machine washing, to keep them looking fresh and vibrant.
2. Careful Handling: When untying or adjusting your curtain ties, handle them with care to avoid any tugging or pulling that may strain or damage the fabric or decorative elements. Gently untie knots or loops, and avoid excessive force when releasing them.
3. Avoid Excessive Sun Exposure: Prolonged exposure to direct sunlight can cause color fading and weakening of the fabric, particularly for ties made with natural materials. Consider using UV-blocking curtains or applying a protective coating to minimize sun damage and preserve the quality and appearance of your ties.
4. Inspection and Repair: Regularly inspect your curtain ties for any signs of wear and tear, such as loose threads, fraying, or loose decorative elements. Promptly repair or replace any damaged ties to prevent further deterioration and maintain their functionality and aesthetic appeal.
5. Adjust Tie-Up Heights: To prevent strain on the fabric or hardware, periodically adjust the tie-up heights of your curtains. This ensures that the same section of the fabric is not constantly under tension, allowing for even wear and minimizing the risk of damage or stretching.
6. Consider Seasonal Changes: Take into account seasonal changes in temperature and humidity, as these can affect the condition of your curtain ties. During humid periods, moisture-resistant tie materials or regular air circulation can help prevent mildew or mold growth.
7. Store Properly: If you decide to change your curtain ties or remove them temporarily, store them in a clean and dry place. Avoid folding or creasing them tightly to prevent permanent wrinkles or damage. Consider using fabric storage bags or hanging them on a hanger to retain their shape.
8. Avoid Harsh Chemicals: When cleaning or treating your curtain ties, always use mild and gentle cleaning agents to avoid discoloration or damage. Harsh chemicals can weaken the fabric fibers or compromise the integrity of any decorative elements.
9. Professional Cleaning: If your curtain ties require deep cleaning or specialized care, consider consulting with a professional cleaner who specializes in delicate fabrics and decorative elements. They can offer guidance on the appropriate cleaning methods to maintain the quality and appearance of your ties.
By following these tips, you can preserve the beauty and functionality of your curtain ties, ensuring that they continue to enhance the aesthetics of your space for years to come. Regular maintenance and care are key to extending the lifespan of your ties and enjoying their decorative and practical benefits for as long as possible.
Adding Final Touches to Your Curtain Ensemble
Once you have tied up your curtains and achieved the desired look, there are a few final touches you can add to complete your curtain ensemble. These finishing details can enhance the overall aesthetic and create a cohesive and polished look. Here are some ideas:
1. Valances or Cornices: Consider adding a valance or cornice board above your curtains. These additional fabric or wooden elements can provide an elegant and decorative touch, framing the window and complementing the curtains.
2. Curtain Rings or Clips: If you have grommet-style curtains or curtain panels with loops, you can further enhance their appearance by adding decorative curtain rings or clips. These components not only offer a functional way to hang the curtains but also contribute to the overall style and sophistication.
3. Additional Layering: Layering your curtains with sheer or lightweight drapes can add depth and dimension to your window treatment. Sheer curtains allow natural light to filter through while maintaining privacy, and they create an ethereal and soft ambiance when paired with heavier drapery.
4. Decorative Holdbacks or Tiebacks: Enhance the functionality and style of your tied-up curtains by installing decorative holdbacks or tiebacks. These hardware accessories not only keep your curtains neatly in place but also add an extra element of elegance and flair.
5. Embellishments: Consider adding decorative elements, such as beaded trims, tassels, or ribbons, to your curtains. These subtle embellishments can elevate the overall look and create a personalized touch that reflects your style and taste.
6. Coordinate with Room Decor: Pay attention to the color palette and overall decor of your room when selecting curtain accessories and additional elements. Harmonizing the curtains with the surrounding decor creates a seamless and cohesive look that ties the room together.
7. Stylish Curtain Rods: Upgrade your curtain rods to complement the style of your curtains and enhance the overall visual appeal. From minimalist and modern designs to ornate and decorative options, there are various curtain rod styles and finishes available to suit any decor theme.
8. Floor-Length Curtains: For a more dramatic and elegant effect, consider opting for floor-length curtains that pool on the floor. This luxurious look adds a touch of sophistication and opulence to your space, especially in formal living rooms or bedrooms.
9. Window Treatments for Functionality: Think beyond aesthetics and consider the functionality of your window treatments. Adding blackout curtains or thermal liners can provide insulation, block out light, and regulate room temperature, giving you both style and practicality.
By paying attention to these final touches, you can elevate your curtain ensemble and create a visually captivating and cohesive look in your space. These small details make a significant impact and ensure that your curtains are not only functional but also a stunning focal point of your room.
Remember to strike a balance between style and functionality when selecting additional elements for your curtain ensemble. Experiment with different combinations and get creative to achieve a look that reflects your personal style and enhances the overall ambiance of your space.