
What are curtain tie backs?
Curtain tie backs are fabric or decorative accessories that are used to hold curtains or drapes in place when they are open. These versatile items not only serve a practical purpose but also add a touch of elegance and style to any window treatment.
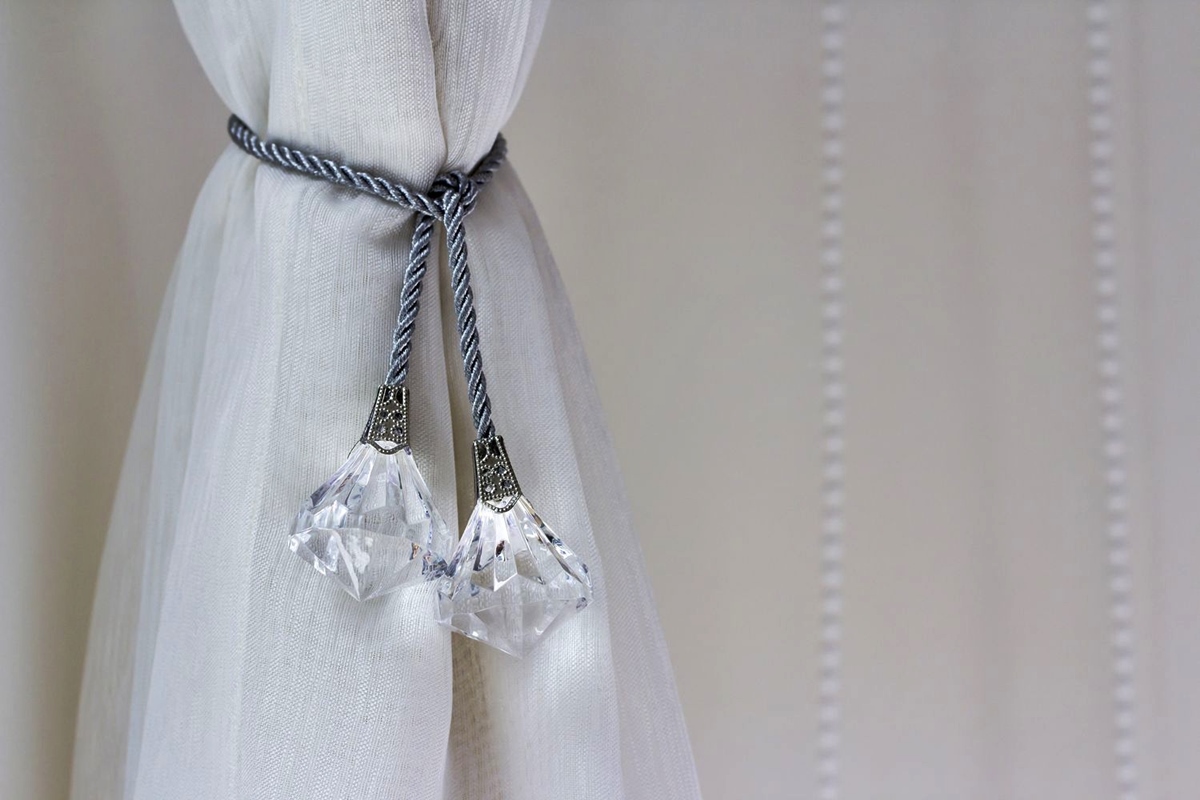
Typically made from a soft fabric such as velvet, satin, or silk, curtain tie backs are available in various designs, colors, and patterns to complement any decor style. They are often embellished with tassels, beads, or decorative knots to further enhance their visual appeal.
The primary function of curtain tie backs is to allow natural light to enter the room while keeping the curtains neatly gathered to the sides. This creates an open and airy feel, while also showcasing the window and the view outside. Additionally, tie backs ensure that the curtains do not obstruct any furniture or decor placed near the windows.
Not only do curtain tie backs offer practical benefits, but they also provide a decorative element that adds flair and personality to the overall aesthetics of the room. By choosing the right tie backs, you can easily enhance the visual impact of your curtains and elevate the style of your space.
Whether you have sheer curtains, heavy drapes, or lightweight blinds, curtain tie backs can be used with various types of window coverings. They are particularly popular for use with classic or traditional style curtains, but can also be incorporated into contemporary or modern decor schemes.
Overall, curtain tie backs are a simple yet effective way to add functionality, elegance, and visual interest to your window treatments. They offer practical benefits by keeping your curtains neatly tied back, while also allowing you to showcase your personal style through the selection of the tie back design.
Why use curtain tie backs?
Curtain tie backs serve several important purposes that can enhance the overall look and functionality of your curtains. Here are a few reasons why using curtain tie backs is beneficial:
1. Enhance the visual appeal: Curtain tie backs add a touch of elegance and charm to your window treatments. By neatly securing the curtains to the sides, they create a clean and polished look. The right tie backs can also complement your curtain fabric and color, enhancing the overall aesthetics of the room.
2. Allow natural light and views: By holding the curtains in an open position, tie backs ensure that ample natural light floods into the room. This creates a bright and airy atmosphere, making the space feel more welcoming and spacious. Additionally, tie backs allow you to enjoy views of the outside world without obstructing your line of sight.
3. Showcase decorative hardware: If you have invested in decorative curtain rods or finials, using tie backs is a great way to show them off. When the curtains are tied back, you can fully display the beautiful hardware and embellishments, adding another layer of visual interest to your window treatments.
4. Create a sense of symmetry: Curtain tie backs help create a balanced look by keeping the curtains symmetrical on either side of the window. This is particularly important for formal settings or rooms with multiple windows. The symmetrical arrangement achieved with tie backs adds a sense of harmony and order to the space.
5. Provide flexibility and versatility: Using curtain tie backs gives you the freedom to adjust the amount of natural light and privacy in the room. When you want the curtains fully closed, simply release the tie backs. When you desire a more open and airy feel, gather and secure the curtains with the tie backs.
6. Protect your curtains: Tie backs help protect your curtains from damage by keeping them neatly folded and held away from potential hazards such as pets, children, or high traffic areas. By securing the curtains in place, tie backs prevent them from getting tangled or caught on any objects.
Choosing the right curtain tie backs
When it comes to choosing the right curtain tie backs, there are a few factors to consider to ensure they complement your curtains and enhance the overall look of your space. Here are some important points to keep in mind:
1. Material: Select tie backs made from high-quality materials that complement the fabric of your curtains. Consider options like velvet, satin, or silk for a luxurious feel, or choose natural materials like cotton or linen for a more casual look.
2. Style: The style of your tie backs should blend well with the overall aesthetic of the room. For a classic or traditional look, opt for tie backs with tassels or ornate designs. If you prefer a modern or minimalist style, choose sleek and simple tie backs without excessive embellishments.
3. Color and pattern: Consider the color and pattern of your curtains when selecting tie backs. You can choose tie backs that match the curtain color for a cohesive look or go for a contrasting color to create visual interest. Additionally, consider tie backs with patterns or textures that complement your overall decor theme.
4. Length: The length of your tie backs will depend on the size and weight of your curtains. Longer tie backs work well with floor-length curtains, while shorter ones are suitable for lighter and shorter curtains. Make sure the length of the tie backs allows for easy gathering and securing of the curtains.
5. Functionality: Consider how you want to fasten your tie backs. Some options include hooks, loops, or ties. Choose a fastening mechanism that is easy to use and secure, ensuring that the tie backs will hold the curtains in place without slipping or coming undone.
6. Personal preference: Above all, choose tie backs that reflect your personal style and taste. Consider your overall decor scheme and the ambiance you want to create in the room. Whether you prefer a traditional, modern, or eclectic style, there are tie backs available to suit your preferences.
By carefully considering these factors, you can select the perfect curtain tie backs that not only complement your curtains but also enhance the overall aesthetic of your space. Remember, tie backs are not only functional but also an opportunity to add a decorative touch to your window treatments.
Step-by-step guide to tying a curtain tie back knot
Tying a curtain tie back knot is a simple process that allows you to neatly secure your curtains in place. Follow these step-by-step instructions to create a beautiful and functional knot:
- Start with a single loop:
- Make a second loop with the remaining fabric:
- Cross the loops over each other:
- Pull one loop through the other:
- Adjust the knot and secure it in place:
Take the curtain tie back in one hand, leaving a tail of fabric to work with. Form a single loop by folding the fabric back on itself, making sure the loop is large enough to slip over the curtain fold.
With the remaining fabric in your hand, create a second loop next to the existing loop. Ideally, this loop should be a bit smaller than the first loop, creating a layered effect.
Cross the larger loop over the smaller loop. This will create an X-shaped formation with the loops.
Take the end of the larger loop and pass it through the smaller loop from behind. Pull the larger loop all the way through, tightening the knot as you do so.
Once the knot is tightened, adjust the loops and fabric to create an aesthetically pleasing knot. If needed, gently pull on the fabric tail to tighten the knot further. Make sure the knot is secure enough to hold the curtains in place.
And there you have it! Your curtain tie back knot is now complete. Repeat the process on the other side of the curtain to achieve a symmetrical and balanced look.
Remember, practice makes perfect! Don’t get discouraged if your first attempt doesn’t turn out exactly how you imagined. With a little bit of practice, you’ll be tying beautiful and functional curtain tie back knots effortlessly.
Start with a single loop
The first step in tying a curtain tie back knot is to start with a single loop. This loop will serve as the foundation for the knot, allowing you to secure the curtain in place. Here is how to create the initial loop:
- Take the curtain tie back in one hand, leaving a tail of fabric to work with.
- Begin by folding the fabric back on itself, creating a loop.
- Make sure the loop is large enough to slip over the curtain fold.
It’s important to ensure that the loop is not too tight, as it needs to accommodate the curtain fabric. Conversely, it should not be too loose, as it may not effectively secure the curtains. Finding the right balance is key.
When creating the loop, consider the length and weight of the curtain fabric. If you are working with heavier curtains, you may want to make the loop slightly larger to accommodate the added fabric. On the other hand, lighter curtains may require a smaller loop to hold them effectively.
Keep in mind that the loop should be positioned at a desired height on the curtain. This will determine how far the curtain will be pulled back from the window when the tie back knot is completed. Experiment with different loop placements until you achieve the desired look and functionality.
Starting with a single loop is the foundation of the curtain tie back knot. This initial step sets the stage for the remaining steps in creating a secure and visually appealing knot that effectively holds the curtains in place.
Make a second loop with the remaining fabric
After creating the first loop in the curtain tie back knot, the next step is to make a second loop with the remaining fabric. This additional loop adds dimension and texture to the knot, making it visually appealing. Here’s how to make the second loop:
- With the remaining fabric in your hand, create a second loop next to the existing loop.
- Ensure that this loop is slightly smaller than the first loop, creating a layered effect.
When making the second loop, you have the opportunity to play with the size and shape. You can create a loop that mirrors the size of the first loop, or you can make it slightly smaller or larger, depending on your preference and the desired look. The second loop should be positioned adjacent to the first loop, maintaining their X-shaped arrangement.
By layering the loops, you add depth and visual interest to the tie back knot, enhancing its aesthetic appeal. The larger loop from the first step and the smaller loop from the second step create a dynamic contrast that adds texture and dimension to the overall knot.
Experiment with different sizes and shapes for the second loop to find the combination that best complements your curtain fabric and decor style. The goal is to create a visually pleasing knot that not only holds the curtains in place but also adds a touch of elegance to your window treatment.
The second loop is an important element in the curtain tie back knot, contributing to its overall appearance and functionality. Once you have mastered this step, you can proceed to the next steps to complete the knot and secure the curtains in an elegant and practical manner.
Cross the loops over each other
Once you have created the first and second loops in the curtain tie back knot, the next step is to cross the loops over each other. This step is essential in creating the X-shaped formation that forms the basis of the knot. Follow these instructions to cross the loops:
- Hold the larger loop in one hand and the smaller loop in the other hand.
- Cross the larger loop over the smaller loop, bringing it towards yourself.
- Ensure that the loops are overlapping and forming an X shape.
When crossing the loops, it’s important to maintain control over the fabric and keep the loops in place. This will allow for a smoother and more precise completion of the knot in the following steps.
By crossing the loops, you create an elegant and visually appealing twist in the curtain tie back knot. This step adds complexity and interest to the knot, making it more than just a simple gathering of fabric. The crossed loops create a unique and distinctive look that elevates the overall aesthetics of your curtains.
Take your time when crossing the loops, ensuring that they are properly aligned and neatly overlapping. This will create a strong foundation for the next step, where the knot begins to take shape.
Remember to be gentle with the fabric to avoid any unnecessary tugging or pulling that could distort the loops or damage the material. Maintaining a careful and controlled approach will result in a neatly formed and visually pleasing knot.
Once you have successfully crossed the loops over each other, you are ready to move on to the next step and complete the curtain tie back knot.
Pull one loop through the other
After crossing the loops over each other in the curtain tie back knot, the next step is to pull one loop through the other. This step finalizes the knot and secures the fabric in place. Follow these instructions to complete this step:
- Take the end of the larger loop and pass it through the smaller loop from behind.
- Hold onto the smaller loop and gently pull the larger loop all the way through.
- Make sure to tighten the knot as you pull on the fabric.
When pulling the loop through, maintain a firm grip on both loops to prevent them from slipping or coming undone. This step requires a steady and controlled movement to ensure a well-formed knot.
As you pull the larger loop through, the fabric will naturally gather and tighten, creating a secure hold on the curtain. The tension applied during this step is crucial in achieving a reliable knot that will keep the curtains neatly tied back.
Take your time when pulling the loop through, ensuring that the knot remains symmetrical and visually pleasing. Adjust the fabric as needed to create uniformity and balance within the knot.
Keep in mind that the tightness of the knot can vary depending on your preferences and the thickness of the fabric. Some may prefer a looser knot for a more relaxed and casual look, while others may prefer a tighter knot for a more structured and tailored appearance.
Once you have successfully pulled one loop through the other, you have completed the main step of tying the curtain tie back knot. The next step involves adjusting the knot and securing it in place to ensure the curtains remain elegantly held back.
Adjust the knot and secure it in place
After pulling one loop through the other in the curtain tie back knot, the final step is to adjust the knot and secure it in place. This step ensures that the knot is visually pleasing and, more importantly, keeps the curtains neatly tied back. Here’s how to complete this step:
- Once the knot is tightened, take a moment to step back and assess its appearance.
- Adjust the loops and fabric as needed to create a visually balanced and aesthetically pleasing knot.
- If necessary, gently pull on the fabric tail to tighten the knot further.
When adjusting the knot, pay attention to the symmetry and overall shape. The loops should be evenly sized and positioned to create a visually appealing knot that complements your curtains and decor.
If the knot appears too loose or has gaps between the loops, gently pull on the fabric tail to tighten it. Be cautious not to pull too forcefully, as this may distort the knot or put unnecessary strain on the fabric.
Take into consideration the thickness and weight of your curtains. Heavier curtains may require a tighter knot to ensure they stay securely in place, while lighter curtains may benefit from a looser knot for a more relaxed and flowing appearance.
Once you have achieved the desired look and tightness, ensure that the knot is securely held in place. This will prevent the curtains from coming undone and will maintain the desired gathering of the fabric.
By adjusting and securing the knot, you not only ensure the practical functionality of the curtain tie back but also enhance the overall aesthetics of your window treatment. The final result should be a visually appealing and reliable knot that adds beauty and functionality to your curtains.
Alternative methods for tying a curtain tie back knot
While the traditional method of tying a curtain tie back knot is popular and widely used, there are also alternative methods available. These variations can add a unique touch to your window treatments and provide different aesthetics. Here are a few alternative methods for tying a curtain tie back knot:
1. The half hitch knot: Instead of creating two loops, the half hitch knot involves making only one loop and wrapping the fabric tail around it. This creates a simple and minimalistic knot that can offer a contemporary look. It is also a quick and easy method to secure your curtains.
2. The tassel knot: If you have curtain tie backs with tassels, you can incorporate them into the knotting process. Start by creating the basic knot and then wrap the fabric tail around the tassel, securing it in place. This method adds an elegant and decorative element to your curtain tie back.
3. The rosette knot: For a more intricate and decorative knot, consider the rosette knot. Start by creating the basic knot and then twist and loop the fabric tail in a circular motion around the knot. This creates a rosette-like design that adds a touch of sophistication to your curtains.
These alternative methods offer versatility and allow you to customize the look of your curtain tie back knots according to your personal style and decor. While they may require a bit of practice to perfect, the results can be stunning and unique.
Remember to consider the weight and length of your curtains when choosing an alternative method. Heavier curtains may require a more secure and tight knot, while lighter curtains can benefit from a looser and more delicate knot.
Feel free to experiment with different methods and styles to find the one that best suits your curtains and enhances your overall decor. Adding a personal touch to your curtain tie back knots can elevate the look of your window treatments and make a statement in your space.
The half hitch knot
The half hitch knot is a simple and minimalist alternative method for tying a curtain tie back knot. Unlike the traditional method that involves creating two loops, the half hitch knot uses just one loop and a wrapping technique. Here’s how to tie a half hitch knot:
- Start by holding the curtain tie back in one hand, leaving a tail of fabric.
- Create a loop by folding the fabric back on itself, making sure the loop is large enough to slip over the curtain fold.
- Hold onto the loop with one hand and take the fabric tail with the other hand.
- Wrap the fabric tail around the loop, crossing it over the loop from behind.
- Bring the fabric tail towards you and pass it through the loop, creating a half hitch knot.
- Tighten the knot by pulling on both ends of the fabric, ensuring a secure hold.
The half hitch knot is a quick and easy way to secure your curtains in place. Its simplicity adds a contemporary and minimalist touch to your window treatments. This knot is especially suitable for modern interior styles or if you prefer a clean and uncluttered look.
While the half hitch knot is simple to tie, it still provides a reliable way to hold your curtains back. However, it may not be as sturdy as other knotting techniques. Consider the weight and thickness of your curtains when using the half hitch knot, as heavier curtains may require a more secure knotting method.
Experiment with the position of the half hitch knot on the curtain to achieve the desired result. You can place it higher or lower on the curtain, depending on how much of the fabric you want to gather and expose the window.
Incorporating the half hitch knot into your curtain tie backs can add a modern and streamlined look to your window treatments. It’s a versatile alternative method that offers simplicity and style, allowing you to create a unique and contemporary statement in your space.
The tassel knot
If your curtain tie backs feature tassels, you can incorporate them into the knotting process to create a stylish and decorative look. The tassel knot adds an elegant and sophisticated touch to your window treatments. Here’s how to tie a tassel knot:
- Hold the curtain tie back in one hand, leaving a tail of fabric.
- Create a loop by folding the fabric back on itself, ensuring that the loop is large enough to slip over the curtain fold.
- Hold onto the loop with one hand and bring the fabric tail towards you.
- Pass the fabric tail through the hole or loop of the tassel from behind.
- Tighten the knot gently by pulling on the fabric, securing the tassel in place.
The tassel knot allows you to showcase the decorative tassels on your curtain tie backs. It not only holds the curtains back but also adds an extra visual element to your window treatment.
When tying a tassel knot, consider the size and weight of the tassel. You may need to adjust the size of the loop or the positioning of the knot to accommodate the tassel and ensure a secure hold.
This knotting method is perfect for adding a touch of elegance and sophistication to a variety of decor styles. It works particularly well in formal or traditional settings, where the tassels can enhance the overall aesthetic and create a refined look.
Play around with different tassels and curtain fabrics to find a combination that complements your decor and personal style. Remember, the tassel knot can also be used in combination with other knotting methods for added visual interest and creativity.
The tassel knot offers a beautiful and decorative alternative to the traditional curtain tie back knot. Embrace the elegance and charm of tassels to elevate the look of your curtains and make a statement in your space.
The rosette knot
The rosette knot is an intricate and decorative alternative method for tying a curtain tie back knot. This knotting technique creates a beautiful rosette-like design that adds a touch of sophistication and elegance to your window treatments. Here’s how to tie a rosette knot:
- Start by holding the curtain tie back in one hand, leaving a tail of fabric.
- Create a loop by folding the fabric back on itself, ensuring that the loop is large enough to slip over the curtain fold.
- While holding the loop with one hand, use the other hand to twist and loop the fabric tail in a circular motion around the loop.
- Continue looping the fabric tail until the desired rosette-like shape is achieved.
- Tuck the end of the fabric tail through the back of the rosette and secure it in place.
- Adjust and fluff the loops of the rosette for a visually pleasing and balanced appearance.
The rosette knot is a knotting technique that adds intricacy and elegance to your curtain tie backs. It creates a stunning focal point that enhances the overall look and feel of your window treatments.
This knotting method works well with lightweight and medium-weight fabrics. Thicker fabrics may be more challenging to manipulate into the intricate circular pattern required for the rosette knot. Consider the thickness and weight of your curtains when deciding if the rosette knot is suitable for your window treatments.
The rosette knot is perfect for formal or special occasions where you want an extra touch of sophistication. It can elevate the look of your curtains, making them a standout feature in your space.
Feel free to experiment with different fabric colors and textures to create unique and eye-catching rosette knots. The rosette knot is a wonderful way to incorporate creativity and personal style into your curtain tie backs.
With its intricate design and attention to detail, the rosette knot is sure to impress and delight anyone who sees your curtain tie backs. Embrace the beauty and elegance of the rosette knot to add a touch of sophistication to your window treatments.
Tips for maintaining and cleaning curtain tie backs
Proper maintenance and cleaning of your curtain tie backs are essential to keep them looking their best and prolong their lifespan. Here are some helpful tips to ensure that your curtain tie backs remain in great condition:
- Regular dusting: Dust your curtain tie backs regularly to prevent the accumulation of dirt and debris. Use a soft cloth or a duster to gently wipe away any dust that may have settled on the fabric or decorative elements.
- Spot cleaning: If your curtain tie backs have minor stains or spills, spot cleaning is often sufficient. Use a mild detergent and a clean cloth or sponge to gently dab the affected area. Avoid rubbing vigorously, as this can damage the fabric or decorative details.
- Follow care instructions: Always refer to the care instructions provided by the manufacturer. Different curtain tie backs may have specific cleaning requirements based on the fabric type and embellishments. Follow the recommended cleaning methods to avoid any potential damage.
- Avoid harsh chemicals: Refrain from using harsh chemicals or strong detergents when cleaning your curtain tie backs, as they can fade the fabric or cause discoloration. Opt for gentle cleansers that are suitable for the material of your tie backs.
- Protect from direct sunlight: To prevent fading or damage to your curtain tie backs, avoid exposing them to direct sunlight for extended periods. If your tie backs are near a window, consider using curtains or blinds to shield them from the sun’s rays.
- Handle with care: When handling or adjusting your curtain tie backs, be gentle to avoid pulling or straining the fabric or decorative elements. Excessive force can cause tears or damage to the tie backs.
- Store properly: If you need to remove your curtain tie backs temporarily, store them in a clean and dry place. Avoid folding or creasing them for extended periods to prevent permanent wrinkles or creases. Consider using hangers or hooks to hang them, ensuring they are kept in good shape.
- Professional cleaning: For delicate or intricate curtain tie backs, it may be best to seek professional cleaning services. They have expertise in handling delicate fabrics and decorative elements, ensuring a thorough and safe cleaning process.
By following these tips, you can maintain the beauty and quality of your curtain tie backs for years to come. Regular cleaning and proper care will not only keep them looking lovely but also extend their durability and functionality.