
Why Use a Bow Around a Vase?
Adding a bow around a vase is an effortless way to elevate its appearance and add a touch of elegance to any room or occasion. Whether you are decorating your own home, preparing for a special event, or looking for a thoughtful gift, incorporating a beautifully tied bow can make a significant difference. Here are a few reasons why using a bow around a vase is a fantastic idea:
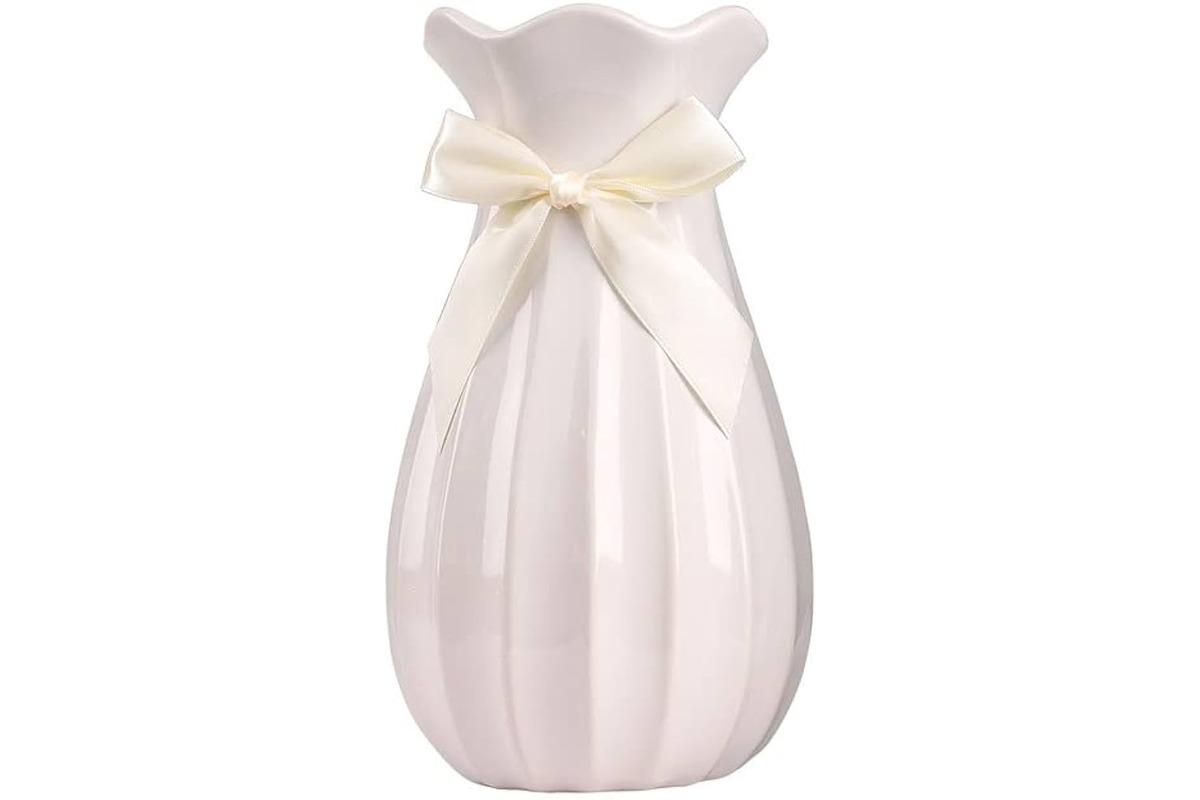
- Enhances Aesthetic Appeal: A well-crafted bow instantly enhances the overall aesthetic appeal of a vase. It can transform a simple, plain vase into a centerpiece that captures attention and creates a focal point in the room.
- Adds a Pop of Color: With the wide variety of ribbon options available, you can easily choose a bow that complements or contrasts with the colors of the flowers or the vase itself. This burst of color can bring life and vibrancy to any space.
- Creates a Festive Atmosphere: When hosting a celebration or special event, decorating vases with bows is an excellent way to create a festive atmosphere. It adds a touch of celebration and elegance to the decor, making guests feel welcome and enhancing the overall ambiance.
- Gift-Worthy Presentation: Presenting flowers in a vase with a beautifully tied bow adds a thoughtful and personalized touch to your gift. It shows that you have taken the time and effort to create a visually appealing presentation, making the recipient feel special and appreciated.
- Versatility: Bows can be customized to suit any occasion or style. Whether you prefer a classic and elegant look or something more playful and whimsical, there are endless variations and styles to choose from. You can easily adapt the bow to match the theme of the event or the personality of the recipient.
Now that we have explored the reasons why using a bow around a vase is a great idea, let’s move on to the different types of bows and the materials needed to create them.
Types of Bows for Vases
When it comes to tying a bow around a vase, there are various styles and techniques to choose from. The type of bow you select can significantly impact the overall look and feel of your arrangement. Here are a few popular options:
- Classic Bow: The classic bow is a timeless choice that works well with any type of vase. It involves creating simple loops with the ribbon, crossing them in the center, and securing them tightly.
- Pom-Pom Bow: For a playful and whimsical look, consider using a pom-pom bow. This style involves folding the ribbon back and forth to create layered loops, giving the appearance of a fluffy pom-pom.
- Tailored Bow: For a more refined and sophisticated look, opt for a tailored bow. This style involves folding the ribbon into crisp and precise loops, creating a polished and elegant finish.
- Loopy Bow: The loopy bow is perfect for adding a touch of volume and drama to your vase. It involves creating multiple loops with the ribbon and securing them in the center, allowing them to cascade down the sides of the vase.
- Bow with Tails: Adding long tails to your bow can create a graceful and flowing appearance. This style works particularly well on tall vases, as the tails can drape down alongside the vase, adding an extra element of visual interest.
Each type of bow offers a unique look and feel, allowing you to tailor your choice to suit the occasion, the vase, and your personal style. Experimenting with different bow styles can also be a fun and creative way to showcase your personality and add a personal touch to your vase decorations.
Now that we have explored the various types of bows, let’s move on to the materials needed to create these beautiful arrangements.
Materials Needed
Before you begin tying a bow around a vase, it’s important to gather all the necessary materials. Here are the items you’ll need:
- Ribbon: Choose a ribbon that is suitable for the size and style of your vase. Satin, grosgrain, or velvet ribbons are popular choices due to their flexibility and durability.
- Scissors: You’ll need a sharp pair of scissors to cut the ribbon to the desired length and trim the ends neatly.
- Double-Sided Tape (optional): Using double-sided tape can help secure the bow in place, especially if you want a more permanent arrangement.
- Decorative Embellishments (optional): If you want to add an extra touch of flair to your bow, consider using decorative embellishments such as beads, rhinestones, or pearls.
Ensure that you have enough ribbon to comfortably wrap around your chosen vase and to create the desired size and style of bow. It’s always better to have a little extra ribbon than to come up short during the bow tying process.
Now that you have gathered all the necessary materials, it’s time to learn the step-by-step process of tying a beautiful bow around a vase. We will guide you through the process, ensuring that you achieve a stunning result.
Step 1: Measure the Ribbon
Before you start tying a bow around a vase, it’s essential to measure the length of ribbon you’ll need. Here’s how to do it:
- Take the empty vase you plan to decorate and wrap the ribbon around it once, making sure to leave a little extra on each end for tying and finishing.
- Hold the ribbon where it meets the starting point and mark it with your thumb or a small piece of tape. This will indicate the length of ribbon needed to encircle the vase.
- Remove the ribbon from the vase, and measure the marked length using a ruler or a tape measure.
- Add an extra inch or two to the measured length to allow for tying the bow and creating a neat finish.
- Cut the ribbon at the appropriate length using sharp scissors.
By accurately measuring the ribbon, you ensure that you have enough material to work with and that your final bow will fit snugly around the vase. It’s always better to have a slightly longer ribbon than a shorter one, as you can easily trim off any excess at the end.
With the ribbon measured and cut, you’re ready to move on to the next step: creating the first loop of the bow. Let’s continue with our bow-tying tutorial!
Step 2: Start with a Loop
Now that you have your measured and cut ribbon, it’s time to start tying a beautiful bow around your vase. Follow these steps to begin:
- Take one end of the ribbon and form a loop by folding it back toward the center, keeping the printed or decorative side facing outward.
- Hold the loop in place with your thumb and forefinger, ensuring that it retains its shape.
- With the loop secured, take the remaining ribbon end and cross it over the loop, forming a simple X shape.
- Bring the loose end of the ribbon under the loop and thread it through the X shape, pulling it gently.
- Hold both ends of the ribbon and tighten the knot, adjusting the size of the loop to your desired bow size.
Starting with a loop creates the foundation for your bow and allows you to begin the tying process. Remember to keep the ribbon flat and untwisted as you form the loop, ensuring a neat and symmetrical appearance.
Once you have successfully created the initial loop, it’s time to move on to the next step: crossing the ends of the ribbon. Let’s continue our bow-tying journey!
Step 3: Cross the Ends
After creating the initial loop, the next step in tying a bow around a vase is to cross the ends of the ribbon. Follow these steps for a polished and professional-looking bow:
- With the initial loop secured, take the longer end of the ribbon and cross it over the shorter end, forming a second X shape.
- Hold the crossed ends in place, ensuring that they are evenly aligned and the ribbon lies flat.
- Gently pull both ends of the ribbon to tighten the cross, making sure it is snug but not too tight.
- Continue to hold the crossed ends securely throughout the next steps to maintain the shape of the bow.
Crossing the ends of the ribbon helps create the distinct butterfly-like shape of the bow. Make sure the cross is centered and neat, with the ends of the ribbon meeting at a point.
With the ends of the ribbon properly crossed, it’s time to move on to the next step: folding the ribbon to form additional loops. Let’s continue our bow-tying tutorial!
Step 4: Fold the Ribbon
After crossing the ends of the ribbon, the next step in tying a beautiful bow around a vase is to fold the ribbon to create additional loops. Follow these steps for a visually appealing bow:
- Hold the crossed ends of the ribbon securely, ensuring they remain in place.
- Take the longer end of the ribbon and fold it over the center of the crossed ends, creating a loop.
- Hold the loop in place with your thumb and forefinger, making sure it maintains its shape and doesn’t unravel.
- Repeat the previous step with the shorter end of the ribbon, forming a second loop of similar size.
- Continue this folding process, alternating between longer and shorter ends, until you achieve the desired number of loops.
As you fold the ribbon, make sure each loop is roughly the same size and maintains symmetry. The folds should be neat and crisp, with the ends of the ribbon positioned in the center.
By folding the ribbon in this manner, you are creating the fullness and volume of the bow. The number of loops you create depends on your personal preference and the size of the vase you are decorating.
With the ribbon folded into loops, it’s time to move on to the next step: repeating the process to add more loops. Let’s continue our bow-tying tutorial!
Step 5: Repeat the Process
After folding the ribbon to create the initial loops, the next step in tying a bow around a vase is to repeat the process to add more loops. Follow these steps to create a beautifully layered bow:
- Hold the existing loops securely, making sure they remain in place.
- Take the longer end of the ribbon and fold it over the center of the loops, creating another loop of similar size.
- Hold the newly created loop in place, ensuring it maintains its shape and doesn’t unravel.
- Repeat the previous step with the shorter end of the ribbon, forming another loop.
- Continue this process of folding and creating loops, alternating between longer and shorter ends, until you achieve the desired number of layers and fullness.
As you repeat the process, ensure that each new loop is positioned slightly higher or lower than the previous one. This layering effect adds depth and dimension to the bow, making it visually appealing.
Remember to hold the loops securely as you add more layers, ensuring they remain evenly spaced and neatly aligned. The number of loops you create depends on your personal preference and the desired aesthetic for your bow.
With multiple layers of loops formed, it’s time to move on to the next step: pulling the bow tight and making adjustments. Let’s continue our bow-tying tutorial!
Step 6: Pull Tight and Adjust
After creating multiple layers of loops, the next step in tying a bow around a vase is to pull the bow tight and make any necessary adjustments. Follow these steps for a perfectly shaped and balanced bow:
- Gently hold the crossed ends of the ribbon and begin pulling them away from each other.
- As you pull, the loops of the bow will start to tighten and come together.
- Continue pulling until you achieve the desired level of tightness, ensuring the loops are evenly gathered and secure.
- Take a moment to evaluate the appearance of the bow and make any adjustments as needed.
- If necessary, gently adjust the position of the loops, ensuring they are symmetrically arranged and lie flat against the vase.
When pulling the bow tight, be careful not to pull too harshly, as this can distort the loops or cause the ribbon to tear. Apply gentle and even pressure to ensure a neat and appealing result.
As you evaluate the bow’s appearance, take note of any areas that may require adjustment. You can gently manipulate the loops, fluffing them up or smoothing them down, to achieve the desired shape and overall balance.
With the bow pulled tight and adjusted, it’s time to move on to the next step: cutting the ends of the ribbon to create a clean finish. Let’s continue our bow-tying tutorial!
Step 7: Cut the Ends
After pulling the bow tight and making adjustments, the next step in tying a bow around a vase is to cut the ends of the ribbon to create a clean and finished look. Follow these steps for a professional and polished bow:
- Hold the tightly pulled bow securely with one hand, making sure it remains in place.
- Using a pair of sharp scissors, carefully trim the ends of the ribbon at an angle, creating a diagonal cut.
- Start by cutting one end of the ribbon, then repeat the process with the other end.
- Take your time and make small, controlled cuts to ensure a clean and even result.
- Double-check the length of the cut ends, ensuring they are symmetrical and uniform in appearance.
When cutting the ribbon, it’s important to pay attention to the angle of the cut. A diagonal cut gives the ends a neat and professional finish, adding to the overall aesthetic of the bow.
Be cautious not to trim the ends too short, as this can compromise the integrity of the bow and make it difficult to secure or adjust. It’s better to have slightly longer ends that can be trimmed further if necessary.
With the ends of the ribbon neatly cut, it’s time to move on to the final step: adding finishing touches to your bow. Let’s continue our bow-tying tutorial!
Step 8: Finishing Touches
After cutting the ends of the ribbon, the final step in tying a bow around a vase is to add some finishing touches to enhance the overall look. Follow these steps to ensure a beautifully completed bow:
- Take a moment to fluff and shape the loops of the bow, adjusting them as needed to create a full and appealing appearance.
- If desired, you can lightly press the loops with your fingertips to give them a more voluminous and textured look.
- Inspect the bow and make any final adjustments to ensure it is positioned symmetrically and centered on the vase.
- If the ribbon feels loose or insecure, you can apply a small amount of double-sided tape on the back of the bow to secure it in place.
- Step back and admire your beautifully tied bow around the vase. It’s now ready to display or gift!
By taking the time to fluff and shape the loops, you give the bow a more attractive and three-dimensional appearance. This step allows you to create a visually appealing arrangement that adds a touch of elegance to any space.
If you wish to ensure the bow remains in place and doesn’t shift or loosen over time, applying a small amount of double-sided tape on the back of the bow will provide extra security.
Once you are satisfied with the overall appearance of the bow, step back and appreciate your handiwork. Your elegantly tied bow around the vase is now complete and ready to be showcased or presented as a thoughtful gift!
Now that you have mastered the art of tying a bow around a vase, you can confidently apply these steps to create stunning arrangements for various occasions and settings.
Alternative: Using a Pre-Made Bow
If you prefer a quicker and more convenient option, you can also use a pre-made bow to adorn your vase. Here’s how:
- Choose a pre-made bow that matches your desired style and complements the vase and occasion.
- Ensure that the size of the bow is suitable for the size of the vase and the overall aesthetic you want to achieve.
- Place the pre-made bow on top of the vase, positioning it in the desired location.
- Secure the bow in place by using a small piece of double-sided tape or a dab of adhesive putty.
- Take a step back to assess the placement and adjust the angle of the bow if necessary.
Using a pre-made bow eliminates the need to tie and shape the ribbon yourself, providing a quick and easy solution for adding a decorative touch to your vase. It saves time and effort, making it an ideal option for those who are short on time or prefer a more simplified approach.
When selecting a pre-made bow, consider the color, style, and material of the ribbon to ensure it complements the vase and creates the desired visual impact. You can find pre-made bows in various sizes and designs, allowing you to choose one that best suits your taste and the occasion.
With a pre-made bow, you can instantly elevate the appearance of your vase and enhance the overall decor. It’s a convenient alternative that still offers a polished and finished look, making it an excellent choice for those who want a hassle-free solution.
Now that you are aware of the alternative option, it’s time to choose the method that suits your preferences and needs. Whether you opt for tying a bow from scratch or utilizing a pre-made bow, the end result will surely add a touch of sophistication to your vase.
Tips and TricksWhen it comes to tying a bow around a vase, it’s always helpful to have some tips and tricks up your sleeve. These suggestions will help you achieve the best results and make the process smoother. Here are some valuable tips to keep in mind:
- Practice Makes Perfect: If you’re new to bow tying, consider practicing with a spare ribbon or string before working with the actual vase and ribbon. This will help you become more comfortable and refine your technique.
- Choose the Right Ribbon: Select a ribbon that is appropriate for the occasion and complements the vase. Experiment with different materials, textures, and colors to achieve the desired look.
- Avoid Fraying: To prevent the ends of the ribbon from fraying, gently run a lighter or a lit match along the cut edges for a few seconds. Be cautious and avoid touching the flame directly to the ribbon.
- Be Mindful of Proportions: Consider the size of the vase and the space in which it will be displayed. Opt for a bow that is proportionate to the vase, ensuring it doesn’t overwhelm or get lost in the arrangement.
- Add Greenery: To enhance the overall look, consider adding some greenery, such as leaves or sprigs of baby’s breath, to the bow. This can provide a fresh and natural touch that complements the flowers and the vase.
- Experiment with Styles: Don’t be afraid to explore different bow styles and variations. From classic to playful, the possibilities are endless. Play around with different techniques and find the style that aligns with your vision.
- Consider the Occasion: Keep the occasion and the overall theme in mind when choosing the ribbon and shaping the bow. Whether it’s a formal event or a casual gathering, adapt the bow accordingly.
- Take Your Time: Tying a bow around a vase requires patience and attention to detail. Take your time to ensure each step is executed carefully and that the final result is exactly as you envisioned.
Remember, practice and experimentation will help you develop your own unique style and technique. Don’t be afraid to get creative and have fun with the process. Tying a bow around a vase is not only a practical skill but also an opportunity to express your artistic flair and enhance the beauty of your space.