
Tools Needed
Before you begin the process of removing the detergent tray from your Samsung washer, it’s essential to gather a few tools that will make the job easier. Having the right tools handy will save you time and effort throughout the process. Here are the tools you’ll need:
- Screwdriver – Depending on the model of your Samsung washer, you may need either a Phillips or a flathead screwdriver. Check the washer’s manual or look for any visible screws to determine which type of screwdriver you’ll need.
- Cleaning brush – A small brush with soft bristles will come in handy for cleaning the detergent tray and removing any residue or build-up.
- Safety gloves – It’s always a good idea to wear protective gloves while handling any cleaning or maintenance tasks to protect your hands from chemicals and sharp edges.
- Clean cloth or sponge – You’ll need a cloth or sponge to wipe down the detergent tray and the surrounding areas once it’s removed.
Having these tools ready before you start the process will help ensure a smooth and efficient removal of the detergent tray from your Samsung washer. Now that you have everything you need, let’s move on to the step-by-step instructions on how to remove the detergent tray.
Step 1: Turn off the Power
Before attempting to remove the detergent tray from your Samsung washer, it’s essential to turn off the power to ensure your safety. Follow these steps to turn off the power:
- Locate the power cord – The power cord is typically located at the back of the washing machine. Trace the cord until you find the power outlet.
- Unplug the power cord – Once you’ve located the power outlet, unplug the cord from the outlet to disconnect the washer from the electrical supply.
- Ensure the washer is completely off – Some washers may have a power button or switch that needs to be turned off. Double-check that all power sources have been disconnected to avoid any electrical accidents.
By turning off the power to your Samsung washer, you minimize the risk of electric shock or injury while handling the detergent tray. Make sure to keep the power off throughout the entire process until it’s time to reassemble the detergent tray.
Step 2: Open the Detergent Tray
Now that you’ve ensured the power is turned off, it’s time to open the detergent tray of your Samsung washer. Follow these steps to open the detergent tray:
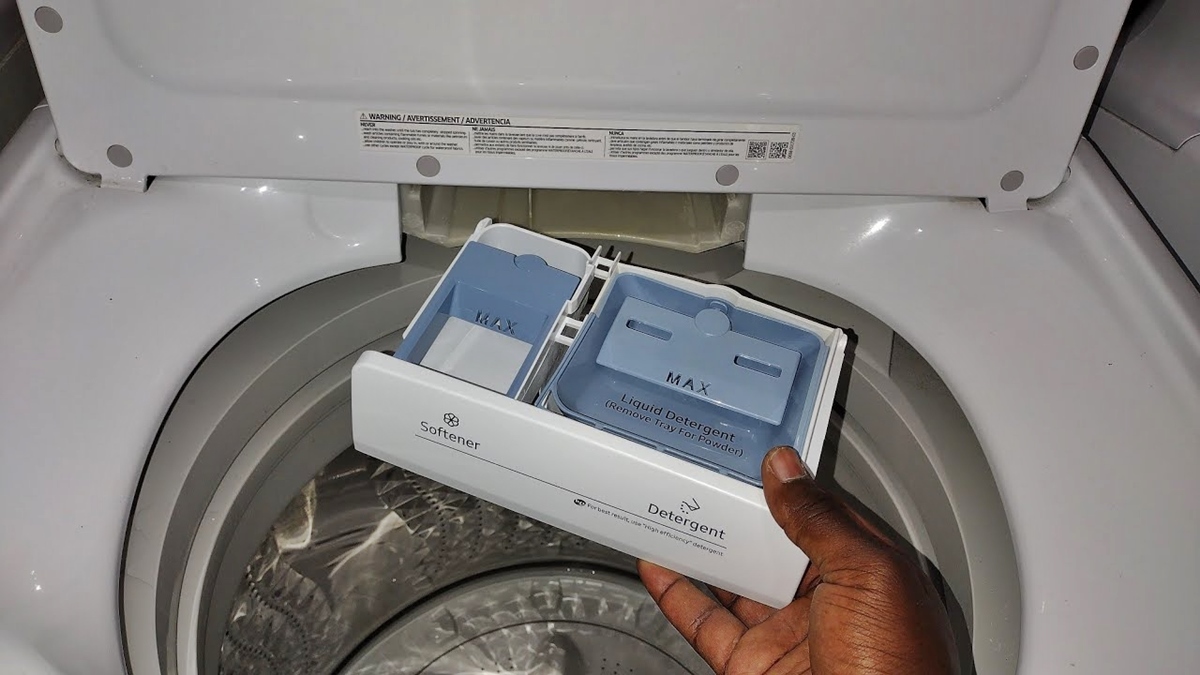
- Locate the detergent tray – The detergent tray is usually located on the top left corner of the washer’s control panel. Look for a rectangular compartment with various sections for different types of detergent.
- Gently pull out the detergent tray – Grasp the detergent tray handle and pull it towards you. Apply gentle but even pressure to avoid any damage to the tray or the surrounding parts of the washer.
- Inspect the detergent tray – Check the detergent tray for any signs of residue, mold, or mildew. If you notice any build-up, it’s a good idea to clean the tray before proceeding further. Refer to the next steps for instructions on how to clean the detergent tray.
By opening the detergent tray, you gain access to the inner compartments where you can remove and clean the individual parts. It’s important to inspect the tray for any build-up before continuing to ensure optimal functioning and cleanliness of your Samsung washer.
Step 3: Remove the Tray Cover
With the detergent tray open, the next step is to remove the tray cover. Follow these steps to safely remove the tray cover from your Samsung washer:
- Identify the tray cover – The tray cover is a plastic or metal piece that sits on top of the detergent tray. It usually has a latch or release mechanism that secures it in place.
- Locate the release mechanism – Look for a latch or button on the front or side of the tray cover. This mechanism may vary depending on the model of your Samsung washer.
- Release the tray cover – Press or slide the latch or button to release the tray cover. Apply gentle pressure and ensure that you’re not forcing it open to avoid damaging the cover or other parts of the washer.
- Remove the tray cover – Once the latch is released, carefully lift the tray cover upwards to remove it completely. Set it aside in a safe place for cleaning or inspection.
Removing the tray cover allows you to access the inner components of the detergent tray for thorough cleaning. Examine the tray cover for any signs of dirt, grime, or residue. If needed, clean it using a gentle detergent and a cleaning brush before moving on to the next step.
Step 4: Remove the Detergent Tray
Once the tray cover is removed, you can proceed to remove the detergent tray from your Samsung washer. Follow these steps to safely remove the tray:
- Hold the detergent tray firmly – Place one hand underneath the detergent tray to support it while you work. This will prevent any accidental drops or damage to the tray or surrounding parts.
- Inspect the tray for any locking mechanisms – Depending on the model of your Samsung washer, there may be additional locking mechanisms that secure the tray in place. Look for any tabs, buttons, or levers that need to be disengaged before removing the tray.
- Release the locking mechanism – If there are any locking mechanisms, press, slide, or lift them to release the tray. Follow the specific instructions provided in your washer’s manual or look for any visible indicators that show how to unlock the tray.
- Slide or lift the tray out – Once the locking mechanism is disengaged, carefully slide or lift the detergent tray out of its compartment. Take your time and ensure a smooth and steady motion to avoid any spills or damage.
With the detergent tray removed, you can now clean each compartment individually and address any residue or build-up that may have accumulated. Inspect the tray for any signs of damage and clean it thoroughly before reassembling it.
Step 5: Clean the Detergent Tray
Now that you have removed the detergent tray from your Samsung washer, it’s time to clean it thoroughly. Follow these steps to ensure a sparkling clean detergent tray:
- Remove any excess detergent or residue – Use a clean cloth or sponge to wipe away any visible detergent or residue from the tray. This will make the cleaning process easier and more effective.
- Prepare a cleaning solution – Fill a basin or sink with warm water and add a mild detergent. Mix the solution well to create a soapy mixture that will help remove dirt and grime.
- Soak the detergent tray – Place the detergent tray in the basin or sink, ensuring that it is fully submerged in the cleaning solution. Allow it to soak for about 15-20 minutes to loosen any stubborn stains or residue.
- Scrub the tray – After the soaking period, use a soft-bristled brush or cleaning brush to scrub the detergent tray gently. Pay extra attention to the corners and crevices where residue tends to accumulate.
- Rinse thoroughly – Once you’ve scrubbed the tray, rinse it thoroughly with clean water to remove any traces of detergent or residue. Ensure that all the soap is washed away completely.
- Dry the tray – Use a clean towel or allow the detergent tray to air dry completely before reassembling it. Make sure that no moisture remains to prevent any mold or mildew growth.
By following these steps, you’ll ensure that your detergent tray is clean and free from any dirt, grime, or residue that may affect the performance of your Samsung washer. Once the tray is completely dry, you can proceed to reassemble it and continue using your washer as normal.
Step 6: Reassemble the Detergent Tray
After cleaning the detergent tray, it’s time to reassemble it and restore it to its original position in your Samsung washer. Follow these steps to properly reassemble the detergent tray:
- Inspect the cleaned tray – Before proceeding with reassembly, take a moment to ensure that the detergent tray is completely dry and free from any moisture or residue.
- Align the tray with the compartment – Position the detergent tray in the correct orientation, aligning it with the compartment from which it was removed. Make sure it fits securely and snugly in place.
- Engage any locking mechanisms – If your Samsung washer has locking mechanisms, such as tabs or levers, ensure they are engaged to secure the tray in position. Follow the instructions specific to your washer’s model.
- Replace the tray cover – Take the tray cover that you removed earlier and carefully place it back on top of the detergent tray. Ensure that it fits securely and aligns with any notches or grooves.
- Lock the tray cover – If there is a latch or button mechanism on the tray cover, press, slide, or secure it properly to lock the cover in place.
By reassembling the detergent tray correctly, you ensure that it is firmly in position and ready for use. Take a moment to double-check that everything is securely aligned and locked before moving on to the final step.
Step 7: Turn on the Power
Now that you have successfully reassembled the detergent tray in your Samsung washer, it’s time to turn the power back on and resume normal operations. Follow these steps to turn on the power:
- Locate the power cord – Ensure that the power cord is easily accessible and not tangled or obstructed in any way. It should be within reach so that you can plug it back into the power outlet.
- Plug in the power cord – Carefully insert the power cord into the power outlet and push it in until secure. Ensure that it is connected properly to restore the power supply to your Samsung washer.
- Power on the washer – Look for the power button or switch on the control panel of your washer. Press or toggle the switch to turn on the power and activate the washer.
Once you have turned on the power, listen for any sounds or indicators that confirm the washer is functioning correctly. If everything appears normal, you can start using your Samsung washer with the detergent tray now back in place.
Remember to follow the manufacturer’s guidelines regarding detergent dosage and types to ensure optimal performance and longevity of your washer. Regularly cleaning the detergent tray will help maintain its efficiency and prevent any potential issues caused by build-up or residue.