
Tools and Materials Needed
Before you start pouring paint into a roller tray, make sure you have all the necessary tools and materials ready. Having everything prepared in advance will save you time and ensure a smoother painting process. Here is a list of items you will need:
- A roller tray: Choose a tray that is the appropriate size for your roller. It should be sturdy and have a deep well to hold enough paint.
- A paint can opener: This tool will come in handy when opening the paint can without damaging the lid. You can find paint can openers at any hardware store or use a flathead screwdriver as an alternative.
- A paintbrush: Keep a paintbrush nearby to clean any spills or drips that may occur during the pouring process.
- Drop cloths or plastic sheets: To protect your floor or work area from paint splatters, lay down drop cloths or plastic sheets. This will make cleanup much easier.
- Painter’s tape: Use painter’s tape to cover any areas you do not want to get paint on. This can include baseboards, trim, or windows.
- A stir stick: Before pouring the paint, give it a good stir to ensure an even consistency. Use a stir stick to mix the pigments thoroughly.
- A paint strainer (optional): If you want to make sure there are no lumps or debris in your paint, consider using a paint strainer. This will provide a smoother application.
Having these tools and materials on hand will make the paint pouring process much more convenient and efficient. Take a moment to gather everything before proceeding with the next steps of pouring paint into the roller tray.
Preparing the Roller Tray
Before you start pouring paint into the roller tray, it is essential to prepare the tray properly. Taking the time to set up the tray correctly will ensure a smooth and hassle-free painting experience. Follow these steps to prepare your roller tray:
- Clean the tray: If you have used the tray before, make sure it is clean and free of any leftover paint or debris. Use warm soapy water and a sponge or cloth to wipe away any residue. Rinse the tray thoroughly and allow it to dry completely before pouring the new paint.
- Secure the liner (optional): If you prefer, you can line the tray with a disposable tray liner or plastic bag. This will make cleanup much easier as you can simply discard the liner after use. Ensure the liner fits snugly inside the tray and stays in place as you pour the paint.
- Position the tray: Find a stable and flat surface to place the roller tray on. The working area should be well lit and easily accessible. Position the tray so that it is comfortable to reach and allows you to roll the paint onto the roller without any obstructions.
- Secure the tray (optional): To prevent any accidental spills or movements, consider securing the roller tray to the working surface. You can use painter’s tape or a non-slip mat underneath the tray to hold it in place. This will give you added stability and peace of mind as you pour the paint.
By preparing the roller tray before pouring the paint, you ensure that it is clean, secure, and positioned for easy use. Taking these simple steps will help create a smooth and efficient painting process, allowing you to focus on achieving the best results for your project.
Choosing the Right Paint
Choosing the right paint is crucial to ensure a successful painting project. The type of paint you select will depend on the surface you are painting and your desired finish. Here are a few factors to consider when choosing paint:
- Surface type: Different surfaces require different types of paint. For example, if you are painting walls, you would typically use interior wall paint, while for painting a metal surface, you would need paint specifically designed for metal.
- Finish: Consider the desired finish of your project. Common paint finishes include matte, eggshell, satin, semi-gloss, and gloss. Each finish has its own distinct look and level of sheen.
- Quality: Invest in high-quality paint to achieve better coverage and durability. Higher quality paints often have better pigmentation and adhesion, resulting in a longer-lasting finish.
- Color selection: Choose a paint color that complements your overall design scheme. Consider factors such as lighting, room size, and personal preference when selecting a color.
- Environmental considerations: If eco-friendliness is important to you, opt for low VOC (Volatile Organic Compounds) or zero VOC paints. These paints have reduced levels of harmful emissions, making them safer for both you and the environment.
When choosing paint, it is also helpful to consult with a paint specialist or refer to the paint manufacturer’s guidelines. They can provide valuable insights and recommendations based on your specific project requirements.
Remember, selecting the right paint is essential for achieving a professional-looking finish and ensuring the longevity of your paint job. Take the time to research and choose a paint that meets your needs and preferences.
Setting up the Paint Can
Before you can pour paint into the roller tray, it is important to properly set up the paint can. By following these steps, you can ensure that the can is secure and easy to work with:
- Choose a stable surface: Place the paint can on a flat and stable surface, such as a workbench or the floor. Ensure that the surface is level to prevent any accidental spills or tip-overs.
- Remove the lid: Use a paint can opener or a flathead screwdriver to carefully pry open the lid of the paint can. Insert the opener under the lid and gently lift it up. Be cautious not to damage the lid or the can in the process.
- Clean the rim: Before pouring the paint, wipe off any paint residue or debris from the rim of the can. This will ensure a clean seal when you put the lid back on later.
- Stir the paint: Use a stir stick to thoroughly mix the paint. This will ensure that the pigments and additives are evenly distributed. Stir the paint in a circular motion, reaching the bottom of the can to avoid any settling or clumping.
- Check the consistency: Take a moment to evaluate the consistency of the paint. It should be smooth and free of any lumps or thickening. If the paint appears too thick, you can add a small amount of water or paint thinner to achieve the desired consistency.
- Secure the lid: After pouring the paint, ensure that the lid is securely placed back on the can. Use a rubber mallet or the palm of your hand to tap it firmly in place. This will prevent any leaks or spills during the painting process.
By properly setting up the paint can, you can ensure that the paint is well-mixed and easily accessible for pouring into the roller tray. Taking these steps will help you maintain a clean work area and prevent any unnecessary accidents or spills.
Opening the Paint Can
Opening a paint can may seem straightforward, but it’s essential to do it properly to avoid any spills or damage to the can. Follow these steps to open a paint can safely and efficiently:
- Gather the necessary tools: You will need a paint can opener or a flathead screwdriver. Ensure that the tool is clean and free from any dirt or debris.
- Inspect the can: Before opening the can, examine it for any signs of damage or rust. If the can is damaged or compromised, it is best to use a new can to prevent any contamination or leaks.
- Secure the can: Hold the paint can firmly and place it on a stable surface. Make sure it is positioned in a way that allows easy access to the lid without obstructing your view.
- Insert the opener: If using a paint can opener, slide it into the groove under the lid. Apply gentle pressure to lift the lid up. If using a flathead screwdriver, insert it into a corner of the lid and gently pry it open.
- Work your way around: Once the opener is inserted, carefully move along the rim of the can to release the lid. Use even and controlled pressure to avoid damaging the lid or splattering any paint.
- Remove the lid: Once the lid is loosened, lift it straight up. Be cautious of any drips or paint on the underside of the lid that could spill when removing it.
- Clean the lid and rim: Inspect the underside of the lid and the rim of the can. Wipe away any paint residue or debris to ensure a clean seal when you put the lid back on.
By following these steps, you can safely and efficiently open a paint can without causing any damage or messy spills. Taking care during this process will help keep your work area clean and ensure that the paint inside the can remains uncontaminated.
Pouring the Paint
Once you have properly set up the paint can and opened it, it’s time to pour the paint into the roller tray. This step requires precision and control to avoid any spills or wastage. Follow these steps to pour the paint smoothly:
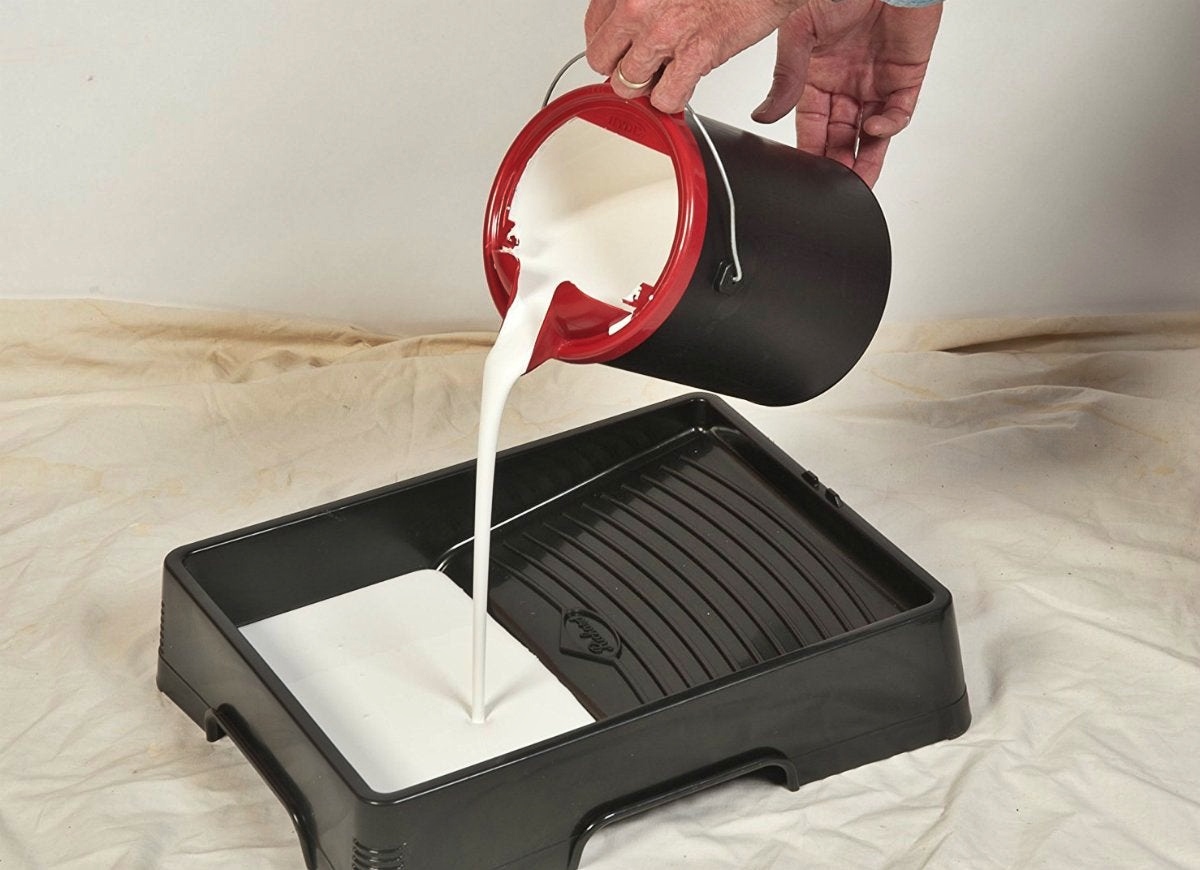
- Hold the paint can securely: With one hand firmly gripping the handle of the can, tilt it slightly towards the roller tray. Keep a steady grip to maintain control over the pour.
- Pour slowly and steadily: Begin pouring the paint into the roller tray in a controlled manner. Pour slowly to prevent any splashing or splattering. Aim for the center of the tray to distribute the paint evenly.
- Monitor the fill level: As you pour, keep an eye on the fill level in the roller tray. Avoid overfilling the tray, as it can lead to spills and make it difficult to load the roller evenly. Maintain a moderate and manageable amount of paint.
- Scrape any excess: After pouring the desired amount of paint into the tray, use the edge of the paint can or the stir stick to scrape off any excess paint on the rim. This will prevent drips and keep the can clean for future use.
- Set the can aside: Once you have poured the paint, set the can aside in a safe place. Make sure it is away from your work area and in a location where it won’t be accidentally knocked over.
By following these steps, you can pour the paint from the can into the roller tray with precision and control. Taking your time and being aware of the fill level will ensure a smooth pouring process and minimize the risk of spills or wasted paint. Now that you have successfully poured the paint, you are ready to continue with the painting process.
Filling the Roller Tray
After pouring the paint into the roller tray, it’s time to fill it up and prepare it for painting. Filling the roller tray properly ensures that you have enough paint for your project and allows for a smooth and even application. Follow these steps to fill the roller tray effectively:
- Position the roller: Place your paint roller in the tray, ensuring that the roller cover is fully submerged in the paint.
- Distribute the paint: Gently roll the roller back and forth in the tray, spreading the paint evenly across the roller cover. This helps to saturate the cover with paint and ensure an even distribution of paint on your walls or surface.
- Remove excess paint: Once the roller cover is adequately coated with paint, lightly press the roller against the ridges of the tray to remove any excess paint. This step prevents drips and ensures that your roller is not overloaded with paint.
- Roll the excess paint onto the tray’s incline: Many roller trays have an incline or a textured area designed for excess paint removal. Roll the roller onto this inclined surface to further remove any excess paint from the roller cover.
- Ensure an even distribution: Before beginning your painting project, check that the roller cover has an even coat of paint. This ensures that you achieve consistent coverage and a uniform finish.
By following these steps, you can effectively fill the roller tray and prepare your roller for painting. Remember to remove excess paint and ensure an even distribution on the roller cover for optimal painting results. With your roller tray filled and your roller prepared, you’re ready to proceed with your painting project!
Tips for Pouring Paint Efficiently
Pouring paint into a roller tray may seem like a simple task, but with a few tips, you can make the process even more efficient and streamlined. By following these suggestions, you can minimize waste, prevent spills, and make your painting experience smoother overall:
- Use a paint can spout: Consider using a paint can spout or pour spout attachment to make pouring paint easier. These tools help direct the flow of paint and prevent dribbles or spills down the side of the can.
- Pour in stages: Rather than pouring all the paint at once, pour it in stages. Pour a small amount into the roller tray and assess if you need more. This way, you can avoid overpouring and wasting excess paint.
- Hold the can steady: To have better control over the pour, hold the paint can with both hands and keep it steady. This helps prevent any accidental tilting or tipping of the can.
- Opt for larger roller trays: If you are working on a large painting project, consider using larger roller trays. This allows you to pour more paint at once, reducing the need for frequent refills.
- Keep a wet rag handy: Accidental spills or drips can occur while pouring paint. Have a damp rag or sponge nearby to quickly clean up any messes and prevent them from spreading.
- Use a pouring aid: If you find it challenging to pour paint straight from the can, use a pouring aid such as a funnel or a paint jug with a spout attachment. This makes the pouring process more controlled and precise.
- Practice control and precision: Slow and steady wins the race when it comes to pouring paint. Take your time, pour with precision, and avoid rushing to prevent spills or splatters.
- Dispose of excess paint responsibly: If you have any leftover paint in the can after pouring, make sure to seal the lid tightly. Store the can properly or dispose of any unused paint according to local regulations.
By implementing these tips, you can make pouring paint into a roller tray a more efficient and tidy process. Not only will this help minimize wastage, but it will also contribute to a more enjoyable and streamlined painting experience.
Cleaning Up after Pouring Paint
After pouring paint into a roller tray, it’s essential to clean up any spills and maintain a tidy work area. By taking the time to clean up properly, you can ensure that your painting project proceeds smoothly and that your tools remain in good condition. Follow these steps to clean up after pouring paint:
- Wipe the tray: If there are any paint drips or spills on the roller tray, use a clean cloth or paper towel to wipe them up immediately. This prevents the paint from drying and making a mess later on.
- Clean the lid: Inspect the lid of the paint can for any paint residue or splatters. Use a clean cloth or sponge dampened in water to wipe away any paint and ensure a tight seal when you put the lid back on.
- Secure the paint can: Ensure that the paint can lid is securely closed to prevent any accidental spills. Tap the lid gently with a rubber mallet or the palm of your hand to ensure a tight seal.
- Dispose of any waste: If there are any disposable items, such as tray liners or paper towels, that contain paint residue, dispose of them in the appropriate manner, following local regulations for paint disposal.
- Clean your tools: Rinse out any paintbrushes or stir sticks that have come into contact with the paint. Use warm soapy water and thoroughly clean the tools to remove any leftover paint. Allow them to dry properly before storing them for future use.
- Store leftover paint: If you have any leftover paint in the roller tray, carefully pour it back into the paint can. Use a funnel or a spout attachment to avoid spills. Seal the paint can tightly and store it in a cool, dry place.
- Wash your hands: After cleaning up, thoroughly wash your hands with soap and water to remove any paint residue. This helps to keep your hands clean and prevents the spread of paint to other surfaces.
By following these steps to clean up after pouring paint, you can maintain a clean and organized work area, prolong the life of your painting tools, and ensure that your painting project proceeds smoothly. Taking the time to clean up properly will also make future painting ventures more enjoyable and less stressful.