
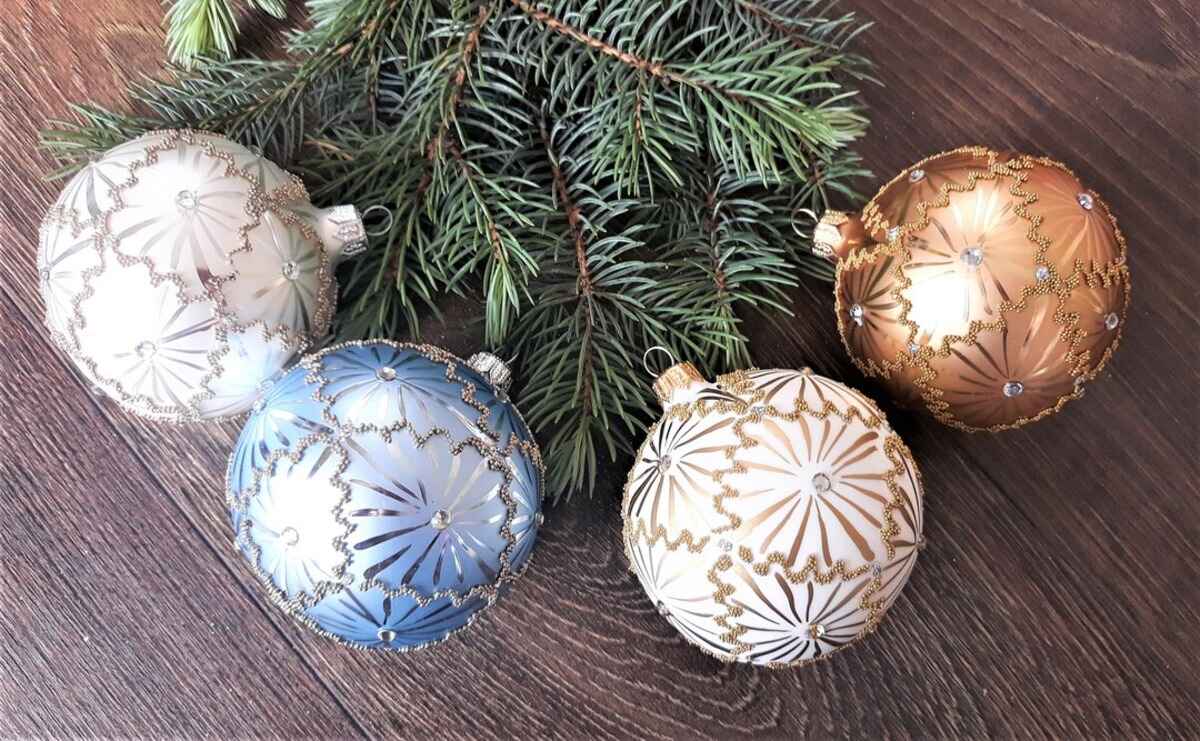
Choosing the right ornament
When it comes to painting the inside of an ornament, choosing the right ornament is the first step to creating a stunning and unique piece. The type of ornament you select will depend on your personal preferences and the overall aesthetic you want to achieve. Here are some factors to consider when choosing the perfect ornament:
- Size: Determine the size of the ornament you want to paint. Keep in mind that larger ornaments provide more space to work with, allowing for more intricate designs and details.
- Shape: Consider the shape of the ornament, as it can influence the overall design. Round ornaments are popular choices, but you can also find ornaments in various shapes like teardrops, hearts, stars, and more.
- Material: The material of the ornament will determine the type of paint you can use. Glass ornaments are commonly used for inside painting, as they provide a smooth surface and allow light to pass through, creating a beautiful glowing effect.
- Clear or colored: Decide whether you want to work with a clear or colored ornament. Clear ornaments offer the advantage of showcasing the paint colors more prominently, while colored ornaments can add a unique touch to your design.
- Theme or occasion: Consider the theme or occasion for which you are creating the ornament. Whether it’s for Christmas, a birthday, a wedding, or any other special event, choosing an ornament that aligns with the theme will add a personalized touch to your creation.
Once you have taken these factors into account, you can head to your local craft store or browse online to find the perfect ornament that meets your criteria. Don’t be afraid to get creative and think outside the box when choosing your ornament. Remember, the right ornament will serve as the canvas for your artistic expression and make your painted creation truly stand out.
Gathering the necessary supplies
Before you start painting the inside of an ornament, it’s important to gather all the necessary supplies to ensure a smooth and successful painting process. Having everything you need at hand will save you time and prevent interruptions. Here are the essential supplies you’ll need:
- Ornament: Choose the ornament you’ve selected for painting, as discussed in the previous section.
- Paints: Select paint specifically designed for glass or transparent surfaces. Acrylic paints work well for this purpose, as they adhere easily and offer a wide range of colors. Consider selecting paints in various shades to add depth and dimension to your design.
- Paintbrushes: Have a variety of paintbrushes on hand, including fine-tip brushes for detailed work and larger brushes for broader strokes. Nylon or synthetic brushes work best for glass painting, as they offer good control and maintain their shape well.
- Palette or paint mixing surface: Use a palette or any non-porous surface like a ceramic tile or plastic plate to mix and blend your paint colors.
- Palette knife: A palette knife is useful for mixing paint colors and scraping excess paint.
- Palette cups: Use small palette cups or containers to hold and dilute your paint if necessary.
- Protective gloves and apron: To protect your hands and clothing from paint stains and chemicals, wear disposable gloves and an apron.
- Paper towels or rags: Keep paper towels or rags nearby to wipe excess paint, clean brushes, and correct any mistakes.
- Masking tape: Masking tape can be used to create clean edges and protect certain areas of the ornament from paint.
- Optional decorations: If you wish to embellish your ornament further, gather any additional decorations like glitter, rhinestones, ribbons, or beads.
With these supplies at the ready, you’ll have everything you need to embark on your ornament painting adventure. Ensure that your workspace is well-ventilated and properly lit to make the painting process more enjoyable and efficient. Once you have everything prepared, it’s time to move on to the next step: preparing the ornament for painting.
Preparing the ornament
Before you begin the painting process, it’s crucial to properly prepare the ornament to ensure the paint adheres smoothly and lasts long. Follow these steps to prepare the ornament:
- Clean the ornament: Start by cleaning the ornament with a gentle glass cleaner or mild soap and water. This will remove any dirt, dust, or oils from the surface, creating a clean and smooth canvas for your paint.
- Dry thoroughly: After cleaning, make sure the ornament is completely dry before proceeding. Moisture can interfere with the paint adhesion and cause smudging or smearing.
- Masking tape: If you want to create specific designs or protect certain areas from paint, use masking tape to cover those sections. Ensure the tape adheres firmly to prevent any paint seepage.
- Prepare your workspace: Find a flat and clean working surface where you can comfortably paint the ornament. Lay down a protective covering, such as a drop cloth or newspaper, to prevent any accidental spills or stains.
By properly cleaning and preparing the ornament, you’ll create an ideal surface for the paint to adhere to, resulting in a longer-lasting and more professional-looking finish. Take your time with this step, as it sets the foundation for the painting process. Now that the ornament is prepped, let’s move on to the next section: choosing the paint colors.
Choosing the paint
When it comes to painting the inside of an ornament, selecting the right paint is essential for achieving the desired effect and ensuring a long-lasting finish. Consider the following factors when choosing the paint for your ornament:
- Glass or transparent paint: Opt for paints specifically designed for glass or transparent surfaces. These paints adhere well to the surface and offer excellent transparency, allowing the light to shine through the ornament.
- Acrylic or enamel paint: Acrylic and enamel paints are commonly used for glass painting due to their durability and vibrant colors. They come in a wide range of hues, making it easier to achieve your desired color palette.
- Multiple colors: Consider using a variety of colors to add depth and dimension to your design. Select shades that complement each other and create a visually appealing contrast.
- Specialty glass paints: If you want to incorporate special effects like translucent colors, metallic finishes, or glitter, explore specialty glass paints that offer these options.
- Quality and durability: Choose high-quality paints that are designed to withstand various environmental conditions and resist fading or chipping over time.
Before starting the painting process, it’s a good idea to test the paint colors on a small area of the ornament or on a scrap piece of glass to ensure they achieve the desired effect. Additionally, consider the drying time of the selected paints as it will affect the overall timeline of your project.
Remember to always follow the manufacturer’s instructions on the paint bottles for application techniques, drying time, and any additional precautionary measures. By carefully selecting the paint for your ornament, you’ll be one step closer to creating a beautiful and unique piece of art. Let’s continue to the next section: painting the base coat.
Painting the base coat
The base coat sets the foundation for your ornament painting and provides a smooth background for the design and details you’ll add later. Follow these steps to confidently apply the base coat:
- Choose your base color: Select the color you want for the base coat of your ornament. This color will serve as the background for your design. Consider using a light and contrasting color to make the overall design pop.
- Pour a small amount of paint: Pour a small amount of your chosen base color onto a palette or any non-porous surface. You can always add more if needed.
- Apply the base coat: Use a paintbrush to apply an even layer of paint to the inside of the ornament. Start from the top and work your way down in smooth, even strokes. Be careful not to apply the paint too thickly, as it may take longer to dry and could create clumps or streaks.
- Rotate and tilt the ornament: To ensure full coverage and an even distribution of the base coat, rotate and tilt the ornament gently as you paint. This will help the paint reach all areas and eliminate any air bubbles that may have formed.
- Allow the base coat to dry: Set the painted ornament aside in a dust-free area and allow the base coat to dry completely. Follow the recommended drying time specified on the paint bottle.
Once the base coat is dry, you’ll have a solid foundation to build upon with additional designs and details. The chosen base color will influence the overall look and feel of your ornament, so take your time to ensure it’s applied smoothly and evenly. With the base coat complete, it’s time to move on to the exciting part: adding details and designs.
Adding details and designs
With the base coat dried and ready, it’s time to unleash your creativity and add intricate details and designs to your ornament. Here’s a step-by-step process to help you bring your vision to life:
- Plan your design: Before starting, have a clear idea of the design you want to achieve. Sketch it out on paper or visualize it in your mind. This will help you stay focused and ensure a cohesive and visually pleasing outcome.
- Choose your paint colors: Select the colors that will bring your design to life. Consider using contrasting colors, shades, or complementary hues to make your ornament visually striking.
- Use fine-tip brushes: Switch to fine-tip brushes for precision work and to create intricate details. These brushes allow you to add delicate lines, swirls, dots, or any other design elements with accuracy.
- Start painting the details: Carefully and steadily, begin adding your desired details to the inside surface of the ornament. Take your time and work with a steady hand, allowing the paint to flow smoothly. Remember, you can always go back and correct or modify any mistakes.
- Experiment with different techniques: Get creative and explore different painting techniques to enhance your design. Try blending colors, creating gradients, adding texture, or using stippling or dry brushing techniques for unique effects.
- Allow the paint to dry: After completing each section or element, set the ornament aside to allow the paint to dry completely. This will prevent smudging or smearing when you move on to the next section.
- Add layers and depth: To add depth to your design, consider layering different colors or adding shadows and highlights. This will give your ornament a three-dimensional look and make the details stand out.
- Step back and evaluate: Periodically step back and take a look at your progress. Evaluate the overall composition, balance, and harmony of your design. Make adjustments as necessary to create a visually pleasing ornament.
Remember that practice makes perfect, so don’t be afraid to experiment and make mistakes along the way. Adding details and designs to your ornament is an opportunity to showcase your artistic skills and create a truly unique piece. Once you’re satisfied with your design, the next step is to consider any special effects you may want to incorporate.
Using special effects
Special effects can elevate your painted ornament to the next level, adding a touch of sparkle, shine, or dimension. Here are some ideas for incorporating special effects into your design:
- Translucent colors: Consider using translucent or sheer paints to create a stained glass effect within your design. These paints allow light to pass through, adding depth and vibrancy to your ornament.
- Metallic finishes: Add an elegant touch by incorporating metallic paints or leafing. Gold, silver, or copper finishes can bring a luxurious and eye-catching element to your ornament.
- Glitter and shimmer: Take your ornament to the next level with the addition of glitter or shimmer paints. Apply them strategically to highlight certain details or create a sparkling effect.
- Decals or stickers: If you’re looking for a quick and easy way to add intricate designs, consider using decals or stickers designed specifically for glass painting. These can be applied directly to the inside of the ornament for instant embellishment.
- Texture: Experiment with different painting techniques to add texture to your ornament. Use sponges, stencils, or textured brushes to create unique patterns and tactile elements.
- Layering: Create depth by layering different colors and designs. Apply translucent or sheer paints over other colors to give the illusion of depth and dimension.
- Mixing colors: Play with color mixing to create new shades and tones. Gradually blend colors together or create bold contrasts for added visual interest.
- Crackle effect: Consider using a crackle medium to achieve a cracked glass effect. This can add a vintage or antique look to your design.
Remember, special effects should complement your overall design and enhance its visual impact. The key is to use them strategically and sparingly to avoid overwhelming the ornament. Once you’ve incorporated any desired special effects, you’re ready to move on to the next step: drying and sealing the paint.
Drying and sealing the paint
After investing time and effort into painting your ornament, it’s important to properly dry and seal the paint to ensure its longevity and protect your masterpiece. Follow these tips to effectively dry and seal the paint:
- Allow sufficient drying time: Make sure the paint is completely dry before moving on. Follow the instructions provided by the paint manufacturer, as drying times can vary depending on the brand and type of paint used. It’s better to wait longer than risk smudging or damaging your artwork.
- Avoid touching the painted surface: While the paint is drying, refrain from touching the inside of the ornament to prevent smudges or fingerprints. Handle the ornament with care to maintain the quality of your design.
- Consider air drying: Air drying is a popular method for allowing the paint to cure naturally. Place the ornament in a well-ventilated area with good air circulation, away from dust and direct sunlight. This method may take longer, but it ensures a thorough drying process.
- Use a drying rack: If you’re working with multiple ornaments, using a drying rack can help keep them upright and prevent any accidental smudging or damage. Ensure the ornaments are spaced apart to allow for proper air circulation.
- Apply a sealant: Once the paint is thoroughly dry, consider applying a clear sealant to protect the artwork from scratches and fading. Select a sealant that is suitable for glass or transparent surfaces and follow the manufacturer’s instructions for application.
- Choose the finish: Depending on your preference, you may opt for a glossy, matte, or satin finish for your ornament. The choice of finish can add a polished and professional touch to the overall appearance.
- Allow the sealant to dry: After applying the sealant, let it dry according to the instructions provided. This will ensure that the paint is properly sealed and protected.
Properly drying and sealing the paint not only preserves the quality of your ornament but also enhances its durability, allowing you to enjoy your artwork for years to come. Once the paint is dry and sealed, you’re ready to move on to the final step: adding the finishing touches to your ornament.
Adding final touches
Adding the final touches to your painted ornament can elevate its overall appearance and make it truly unique. Here are some ideas to consider when adding those finishing touches:
- Inspect and touch up: Carefully examine your ornament for any imperfections or areas that might need touch-ups. Use a fine-tip brush and matching paint color to correct any smudges, gaps, or uneven lines.
- Embellishments: Consider adding additional embellishments to enhance your design. This could include attaching small beads, rhinestones, sequins, or ribbon to certain areas of the ornament.
- Glitter accents: Add a touch of sparkle by selectively applying glitter to specific details or areas of your ornament. Use a small brush or glue with a fine-tip applicator to apply the glitter precisely.
- Ribbon or bow: Attach a festive ribbon or bow to the top of your ornament for a decorative finishing touch. Choose a ribbon that complements your design or aligns with the occasion or theme.
- Personalization: Consider adding a personal touch by painting a name, initials, or a short message on the ornament. This adds a sentimental value and makes the ornament a meaningful keepsake or gift.
- Signature or date: Sign your artwork by adding your signature or initials along with the year. This adds a professional touch and serves as a visual reminder of when the ornament was created.
- Display stand: If you want to showcase your ornament on a shelf or mantelpiece, consider using a display stand or hanger designed specifically for ornaments. This will not only protect your ornament but also allow it to be prominently displayed.
Remember, the final touches give you the opportunity to add a personal and distinct touch to your painted ornament. Take your time to ensure that the added elements are cohesive with your overall design and complement the style you’ve created.
Once you’re satisfied with the final touches, take a step back and admire your completed ornament. Congratulations! You’ve transformed a plain ornament into a stunning work of art. Whether you’re keeping the ornament for yourself or giving it as a heartfelt gift, it’s a beautiful reminder of your creativity and skill.
Displaying your finished ornament
After all the hard work and creativity you’ve invested in painting your ornament, you’ll want to display it proudly for everyone to see. Here are some ideas for showcasing your finished ornament:
- On a Christmas tree: Hang your ornament on a Christmas tree, either as a stand-alone decoration or among other ornaments. Find a spot where it catches the light and allows the design to shine.
- As a centerpiece: Place your ornament in a decorative bowl or on a plate and use it as a centerpiece for a holiday or special occasion table setting.
- On a wreath: Incorporate your ornament into a festive wreath by attaching it with a ribbon or wire. This adds a unique and personal touch to your door or wall décor.
- As a window decoration: Hang your ornament from a suction cup hook or clear fishing line on a window, allowing the sunlight to illuminate the colors and details from within.
- As a gift: If you’ve created the ornament as a gift, consider presenting it in a decorative gift box or wrapping it with a beautiful ribbon and tag. It will be a thoughtful and cherished gift for your loved ones.
- As room décor: Incorporate your ornament into your home’s décor by placing it on a decorative tray, shelf, or mantelpiece. It adds a personal and artistic touch to any room.
- On a decorative stand: If your ornament has a flat base or a stand, place it on a decorative stand to showcase its beauty and intricate design.
- As a mobile or hanging display: Create a mobile or hanging display by suspending multiple painted ornaments from a branch, chandelier, or mobile frame. Arrange them at varying heights to create an eye-catching art installation.
Remember to choose a display option that highlights your ornament and complements its style. Whether it’s a holiday-themed display or an everyday home décor arrangement, your finished ornament deserves to be showcased and appreciated.
Take a step back, admire your artwork, and enjoy the joy and pride that comes from creating something beautiful with your own hands. Your finished ornament is a testament to your creativity and skill, and it will bring joy and beauty to any space it adorns.