
Overview of the Stanley Screwdriver Set Storage Rack
The Stanley Screwdriver Set Storage Rack is a practical and efficient solution for organizing and storing your Stanley screwdriver set. This storage rack is designed to keep your screwdrivers neatly organized, easily accessible, and protected from damage. Whether you are a professional tradesperson or a DIY enthusiast, having your screwdrivers organized and within reach can significantly improve your productivity and efficiency.
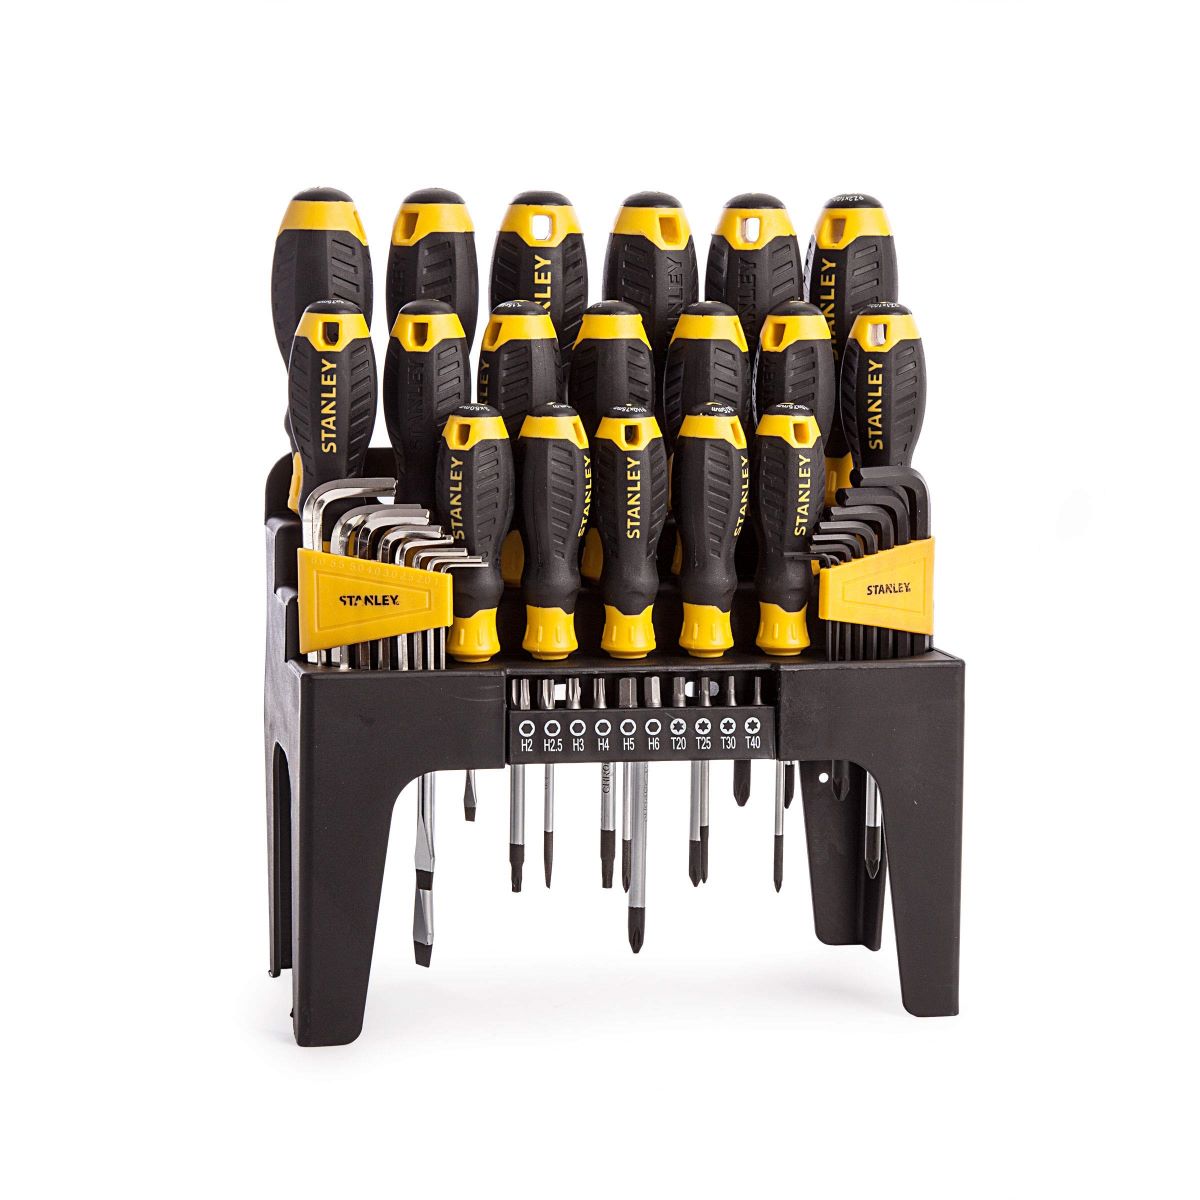
The Stanley Screwdriver Set Storage Rack is crafted from durable materials to ensure long-lasting performance. It features a compact design that can fit perfectly in your workshop, garage, or tool shed. The rack is designed to accommodate various sizes and types of Stanley screwdrivers, making it versatile for different projects.
With this storage rack, you no longer have to waste time searching for the right screwdriver or dealing with a cluttered toolbox. The rack allows you to easily identify and select the screwdriver you need, saving you precious time and effort.
Designed with convenience in mind, the storage rack is easy to assemble and requires minimal tools. It comes with dividers and screwdriver holders that securely hold each screwdriver in place. The dividers help separate and organize the screwdrivers by size or type, allowing for easy selection and storage.
Moreover, the Stanley Screwdriver Set Storage Rack can be mounted on a wall for added stability and space-saving benefits. This option is especially useful for those with limited workspaces or for those who want to keep their screwdrivers within reach while minimizing clutter.
By using the Stanley Screwdriver Set Storage Rack, you can maintain a tidy and efficient work area, keeping your screwdrivers in excellent condition, and maximizing your productivity for any project that requires screwdriving tasks.
Step 1: Gather the Required Tools and Materials
Before you begin assembling the Stanley Screwdriver Set Storage Rack, it is essential to gather all the necessary tools and materials. Having everything prepared will save you time and ensure a smooth assembly process. Here is a list of the tools and materials you will need:
- A Stanley Screwdriver Set Storage Rack kit (including dividers and screwdriver holders)
- A screwdriver or power drill with appropriate bits
- A hammer (optional, for wall-mounting)
- A measuring tape
- A pencil or marker for marking the wall (if wall-mounting)
- Screws or wall anchors (if wall-mounting)
- A level (if wall-mounting)
It is recommended to read the instructions provided with the storage rack kit to verify if any specific tools or materials are required or recommended. Additionally, ensure that you have a suitable workspace with enough room to assemble the storage rack comfortably. A clean and well-lit area will make the process easier.
By gathering the required tools and materials beforehand, you will save time and avoid disruptions during the assembly process. Once you have everything ready, proceed to the next step to begin unpacking and setting up the Stanley Screwdriver Set Storage Rack.
Step 2: Unpack the Stanley Screwdriver Set Storage Rack
Once you have gathered all the necessary tools and materials, the next step is to unpack the Stanley Screwdriver Set Storage Rack. Carefully remove all the components from the packaging and lay them out on a flat surface. This will allow you to assess and familiarize yourself with the different parts of the storage rack.
Inspect the contents of the packaging to ensure that all the required components are present. Depending on the specific model or kit you have, the packaging may include dividers, screwdriver holders, screws, and other necessary hardware.
It is important to handle the components with care to avoid any accidental damage. Check for any signs of defects, such as cracks or missing parts. If you notice any issues, contact the manufacturer or retailer to resolve the problem before proceeding with the assembly.
During the unpacking process, take some time to read through the instructions provided with the storage rack. Familiarize yourself with the assembly steps and any additional guidelines or tips mentioned. This will help ensure that you have a clear understanding of the assembly process before you begin.
By unpacking the Stanley Screwdriver Set Storage Rack and familiarizing yourself with its components and instructions, you will be well-prepared to proceed with the assembly process. Keeping a clear workspace and handling the components with care will help maintain the integrity of the storage rack and ensure a successful assembly.
Step 3: Identify the Different Components of the Storage Rack
Before you start assembling the Stanley Screwdriver Set Storage Rack, it is important to identify and familiarize yourself with the different components included in the kit. This will make the assembly process smoother and help you understand how each part contributes to the overall functionality of the storage rack.
Typically, the storage rack kit will include dividers, screwdriver holders, and any necessary hardware. The dividers are designed to separate and organize the screwdrivers, while the screwdriver holders secure the screwdrivers in place. The hardware may consist of screws, nuts, or brackets, depending on the specific design of the storage rack.
Inspect each component and take note of its shape, size, and functionality. The dividers are usually slotted to accommodate the screwdriver holders, which can vary in size to fit different types and lengths of screwdrivers. Carefully examine any connecting points or fastening mechanisms to understand how they will come together during the assembly process.
If the storage rack includes wall-mounting options, identify the specific components related to this feature. These may include brackets, wall anchors, or screws for securing the rack to the wall. Familiarize yourself with these components to ensure proper installation and stability if you choose to mount the storage rack.
Refer to the instructions provided with the storage rack for any specific information or diagrams that outline the components. Pay attention to any labels or markings that differentiate between different parts. This will help you identify and differentiate the components accurately during the assembly process.
By taking the time to identify and understand the different components of the Stanley Screwdriver Set Storage Rack, you will be better prepared for the subsequent steps of the assembly process. This knowledge will help you align and connect the components correctly, ensuring a sturdy and functional storage rack for your screwdrivers.
Step 4: Assemble the Base of the Storage Rack
Now that you have unpacked and identified the different components, it’s time to start assembling the base of the Stanley Screwdriver Set Storage Rack. The base provides a stable foundation for the rest of the rack and is an essential component in ensuring the durability of the storage system.
Begin by laying out the base pieces on a flat and clean surface. Refer to the instructions provided with the storage rack to confirm the correct positioning of the base components. Some storage racks may have pre-drilled holes or specific alignment markers to guide the assembly process.
Align the base components together, ensuring that they fit snugly and securely. Depending on the specific design of the storage rack, you may need to interlock or fasten the base components using screws, nuts, or other provided hardware. Use a screwdriver or power drill with the appropriate bits to fasten the components together, following the instructions provided.
During the assembly, make sure the base is level and stable. Use a level tool to ensure that the base is not tilted or uneven. If necessary, make small adjustments to achieve a level and secure base for the storage rack.
Once the base is assembled and level, double-check that all the connections are tightened and secure. Ensure that there is no wobbling or instability in the base structure. This will guarantee the overall stability and longevity of the storage rack.
By successfully assembling the base of the Stanley Screwdriver Set Storage Rack, you have laid the groundwork for the rest of the assembly process. The secure base will provide a solid foundation for the dividers, screwdriver holders, and the organization of your screwdriver set.
Step 5: Attach the Dividers to the Base
With the base of the Stanley Screwdriver Set Storage Rack assembled, it’s time to attach the dividers. The dividers are an important component of the storage rack as they help separate and organize your screwdrivers, making them easier to access and preventing them from getting tangled or damaged.
Start by referring to the instructions provided with the storage rack to determine the correct positioning and alignment of the dividers. Lay the dividers out on the base, ensuring that they are evenly spaced and aligned properly.
Depending on the design of the storage rack, the dividers may have slots or connectors that allow them to securely fit onto the base. Insert the dividers into the designated slots or connectors, making sure they are snugly and securely attached to the base.
Take care to align the dividers properly along the length of the base. Use a measuring tape or ruler to confirm that the dividers are spaced evenly and parallel to each other. This will ensure that your screwdrivers will fit comfortably and prevent any misalignment issues.
Once all the dividers are attached, double-check that they are securely in place. Give them a gentle tug to ensure that they are firmly attached to the base. If necessary, adjust the dividers to make sure they are level and aligned correctly.
Attaching the dividers to the base is a crucial step in the assembly process, as it sets the foundation for the organization of your screwdrivers. With the dividers securely in place, you can now move on to the next step of inserting the screwdriver holders into the dividers.
Step 6: Insert the Screwdriver Holders into the Dividers
After attaching the dividers to the base of the Stanley Screwdriver Set Storage Rack, the next step is to insert the screwdriver holders into the dividers. The screwdriver holders play a crucial role in securely holding and organizing your screwdrivers within the storage rack.
Start by examining the screwdriver holders and identifying their design and configuration. They are typically designed to fit into the slots or openings in the dividers. Depending on the specific model of the storage rack, the holders may have different shapes or sizes to accommodate various types and lengths of screwdrivers.
Take the screwdriver holders and insert them into the designated slots in the dividers. Ensure that the holders fit snugly and securely into place. They should be positioned in a way that provides a stable and supportive grip for the screwdrivers without being too tight or loose.
As you insert the screwdriver holders, pay attention to the alignment and spacing. Ensure that they are evenly spaced and parallel to each other for a clean and organized arrangement of your screwdrivers. Use a measuring tape or ruler if needed to verify consistent spacing between each screwdriver holder.
If the screwdriver holders are adjustable or removable, you may have the option to customize their positions within the dividers. This allows you to accommodate different sizes and quantities of screwdrivers, based on your specific needs and preferences.
Once all the screwdriver holders are inserted into the dividers, give them a gentle tug to ensure that they are securely in place. They should not move or wobble when subjected to slight pressure. This will ensure that your screwdrivers will be held securely and prevent them from slipping or falling out of the storage rack.
By properly inserting the screwdriver holders into the dividers, you are taking a significant step towards creating a well-organized and easily accessible storage solution for your screwdriver set.
Step 7: Secure the Screwdriver Holders in Place
Once you have inserted the screwdriver holders into the dividers of the Stanley Screwdriver Set Storage Rack, the next step is to secure them in place. Securing the holders will ensure that they remain stable and firmly hold your screwdrivers, preventing any accidental dislodging or movement.
Review the instructions provided with the storage rack to determine the recommended method for securing the screwdriver holders. Depending on the design of the storage rack, there may be specific fastening mechanisms or hardware to use.
If the holders have built-in locking mechanisms, follow the instructions to engage the locks and secure them in place. This feature provides added stability and prevents the holders from sliding or shifting when inserting or removing screwdrivers.
If the screwdriver holders require additional hardware, such as screws or fasteners, ensure that you have the correct size and type recommended by the manufacturer. Use a screwdriver or power drill with the appropriate bits to secure the holders to the dividers. Follow the provided guidelines for the proper placement and tightening of the fasteners.
As you secure the screwdriver holders, pay attention to their alignment and ensure that they remain parallel and evenly spaced. Use a level tool or visual inspection to verify their straightness. Making small adjustments at this stage will contribute to an overall organized and visually pleasing layout of your screwdrivers.
After securing each screwdriver holder, give them a gentle tug to test their stability. They should remain securely in place without any looseness or wobbling. Confirm that the holders can firmly grip the screwdrivers and prevent them from shifting or falling out when the storage rack is moved or jostled.
By properly securing the screwdriver holders, you can have confidence that your screwdrivers will be held securely in place and remain easily accessible whenever you need them. This step ensures the long-term functionality and organization of your Stanley Screwdriver Set Storage Rack.
Step 8: Arrange and Organize Your Screwdrivers in the Storage Rack
With the screwdriver holders securely in place, it’s time to arrange and organize your screwdrivers within the Stanley Screwdriver Set Storage Rack. This step allows you to optimize the storage space and ensure that your screwdrivers are easily accessible whenever you need them.
Begin by gathering your screwdrivers and assessing their sizes and types. Sort them according to their length, head type, or any other criteria that is relevant to your projects. This will help you determine the best arrangement within the storage rack.
Consider your workflow and the frequency with which you use different screwdrivers. Place the most commonly used screwdrivers in easily accessible positions in the storage rack. This will save you time and effort when reaching for the tools you need during your projects.
Insert each screwdriver into its corresponding holder, ensuring that it fits securely. The holders should provide a snug grip without damaging the handles or tips of the screwdrivers. Pay attention to the alignment and spacing of the screwdrivers, keeping them parallel and evenly spaced within the rack.
Depending on the size of your screwdriver set and the available space in the storage rack, you may need to adjust the positions of the holders to accommodate all your screwdrivers. Add or remove holders if necessary, ensuring that the overall arrangement remains organized and visually pleasing.
Make use of any labeling or marking options provided by the storage rack to further enhance organization. Label the dividers or screwdriver holders with the corresponding sizes or types of screwdrivers. This will make it even easier to quickly locate the specific screwdriver you need for your projects.
Periodically assess and reorganize your screwdrivers as needed. As your tool collection grows or changes, adjust the arrangement within the storage rack to accommodate any new additions. Regularly maintaining the organization of your screwdrivers will ensure that your storage system remains functional and efficient.
By thoughtfully arranging and organizing your screwdrivers within the Stanley Screwdriver Set Storage Rack, you will have a neat and accessible tool storage solution. This step allows you to keep your screwdrivers in order, so you can quickly find the right tool for the job at hand.
Step 9: Mount the Storage Rack on a Wall (Optional)
If you want to maximize space efficiency and keep your screwdrivers within easy reach, you have the option to mount the Stanley Screwdriver Set Storage Rack on a wall. Mounting the rack on a wall provides added stability and frees up valuable workspace on your bench or workstation.
Before proceeding with the wall-mounting process, carefully consider the location where you want to install the storage rack. Choose a spot that is easily accessible and visible, allowing you to quickly locate and grab the required screwdriver for your projects.
Begin by gathering the necessary tools and hardware for wall-mounting, including screws, wall anchors, a screwdriver or power drill with appropriate bits, a level, a measuring tape, a pencil or marker for marking the wall, and a hammer (if needed).
Hold the storage rack against the wall at the desired height and position. Use a level to ensure that it is perfectly horizontal. Mark the positions for the screw holes on the wall using a pencil or marker.
If you are mounting the storage rack on drywall or a similar material, it is recommended to use wall anchors for added stability. Drill pilot holes into the marked positions, then insert the wall anchors into the holes. If you are mounting the rack on a stud or solid surface, you can simply drill screws directly into the wall.
Align the storage rack with the pilot holes or wall anchors and slowly insert the screws, tightening them securely. Ensure that the rack is level and stable as you tighten the screws. Use a screwdriver or power drill with the appropriate bit to complete the wall-mounting process.
Once the storage rack is securely mounted on the wall, give it a gentle shake to ensure that it is firmly in place. Make any necessary adjustments to ensure that it is stable and level.
It’s important to note that if you are mounting the storage rack on a wall, ensure that the wall can support the weight of the rack and your screwdriver set. If in doubt, consult a professional or consider using additional support brackets or reinforcements.
By choosing to mount the Stanley Screwdriver Set Storage Rack on a wall, you can optimize your workspace and keep your screwdrivers easily accessible. This optional step provides additional convenience and organization for your tool storage needs.
Step 10: Tips and Tricks for Using the Stanley Screwdriver Set Storage Rack
Now that you have successfully assembled and organized your Stanley Screwdriver Set Storage Rack, here are some valuable tips and tricks to make the most of this tool storage solution:
- Label the holders: Consider labeling each screwdriver holder with the corresponding screwdriver size or type. This will make it even easier to locate the specific screwdriver you need for a particular task.
- Regularly clean and maintain: Keep your storage rack clean and free from dust and debris. Regularly inspect the holders and dividers for any signs of damage, and replace or repair them as needed to maintain the functionality of the rack.
- Prioritize safety: Always handle and store your screwdrivers with care. Ensure that they are properly inserted into the holders and that the rack is securely mounted to prevent accidents or damage.
- Modify for customization: If you have different types of screwdrivers or additional tools that you want to incorporate into the storage rack, consider making modifications or adding additional holders to accommodate them.
- Maximize space efficiency: If you have limited workspace, consider mounting the storage rack on a wall to free up valuable surface area. This will provide more room for your projects and reduce clutter.
- Regularly reassess organization: As your screwdriver collection grows or changes, periodically reorganize the storage rack to ensure that it remains efficient and suits your evolving needs. This will help you maintain an organized and easily accessible tool storage system.
- Utilize other storage solutions: While the Stanley Screwdriver Set Storage Rack is an excellent tool storage option, consider complementing it with other storage solutions such as toolboxes, magnetic strips, or tool chests to further organize and secure your tools.
By following these tips and tricks, you can optimize the functionality and organization of your Stanley Screwdriver Set Storage Rack. Enjoy the convenience of having your screwdrivers readily accessible and well-organized for all your projects.