
Ingredients
Creating beautiful and festive ornaments from dough is a delightful way to bring the holiday spirit into your home. To make your own ornament dough, you will need the following ingredients:
- 2 cups all-purpose flour
- 1 cup salt
- 3/4 cup warm water
- 1 tablespoon vegetable oil
These simple ingredients are likely already in your pantry, making it easy to get started right away. The flour provides the base for the dough, while the salt acts as a preservative, ensuring that your ornaments will last for years to come. The warm water helps bind the ingredients together, while the vegetable oil adds moisture and helps prevent the dough from sticking to your hands.
It’s important to note that this recipe is not suitable for consumption. These ornaments are intended for decorative purposes only. If you have small children or pets, make sure to keep the ornaments out of their reach as they may mistake them for food.
Now that you have gathered your ingredients, let’s move on to the next step: mixing the dough.
Mixing the Dough
Creating the perfect dough consistency is key to making sturdy and long-lasting ornaments. Follow the steps below to mix the dough:
- In a large mixing bowl, combine the all-purpose flour and salt. Mix them together until they are well combined.
- Add the warm water to the flour mixture gradually, stirring as you pour. Continue to mix until a soft and pliable dough forms. You may need to adjust the amount of water slightly to achieve the right consistency. The dough should hold its shape without being too sticky or crumbly.
- Once the dough is formed, drizzle the vegetable oil over it. This will help keep the dough moisturized and prevent it from drying out as you work with it.
- Knead the dough for a few minutes until it becomes smooth and elastic. This will help ensure that the ingredients are well incorporated and the dough is easy to work with.
During the mixing process, feel free to get creative and add in some fragrant spices like cinnamon, nutmeg, or ginger to give your ornaments a lovely aroma. Just sprinkle a small amount into the dough as you mix for a festive touch.
Once the dough is mixed to perfection, you’re ready to move on to the next step: coloring the dough.
Coloring the Dough
To add a vibrant and personalized touch to your ornaments, you can color the dough with various shades. Here’s how you can bring your dough to life:
- Divide the dough into smaller portions, depending on how many different colors you want to create.
- Using gel food coloring or liquid food coloring, add a few drops of the desired color to each portion of dough. Start with a small amount and gradually add more until you achieve the desired intensity of color. Remember, a little goes a long way, so start conservatively.
- Knead the dough well to distribute the color evenly. You may want to use gloves to avoid staining your hands.
- If you want to experiment with different shades or create marbled effects, you can combine different colored portions of dough and gently knead them together until you achieve the desired effect.
While traditional holiday colors like red, green, and white are popular choices, don’t be afraid to get creative with other colors that reflect your personal style and holiday decor. Remember, this is your opportunity to let your imagination run wild!
It’s important to note that if you choose to paint your ornaments after they are dry, you don’t need to color the dough in advance. You can paint them with acrylic paints or use markers to add intricate details and designs. Coloring the dough is simply another option for customization.
With your dough beautifully colored, it’s time to move on to the next step: shaping the dough into ornaments.
Shaping the Dough
Now that your dough is prepared and colored, it’s time to transform it into festive shapes and designs. Follow these steps to shape your dough into ornaments:
- Dust your work surface with flour to prevent the dough from sticking.
- Take a portion of the colored dough and roll it out using a rolling pin until it’s about ¼ inch thick. If the dough feels too sticky, sprinkle some flour on top to make it easier to handle.
- Use cookie cutters in various shapes such as stars, snowflakes, or gingerbread men to cut out your desired ornament shapes. If you don’t have cookie cutters, you can also create shapes using a knife or mold them by hand.
- Poke a small hole at the top of each ornament using a straw or the end of a paintbrush. This will allow you to hang the ornaments later.
- Gently lift the shaped ornaments and place them on a parchment-lined baking sheet, leaving some space between each one.
- Repeat the process with the remaining dough, re-rolling and shaping until all the dough is used.
Feel free to get creative with your shapes and designs. Add texture by pressing stamps or textured objects onto the dough, or make imprints using leaves or other natural elements. The possibilities are endless!
Once you’ve shaped all your ornaments, it’s time to move on to the next step: adding decorations.
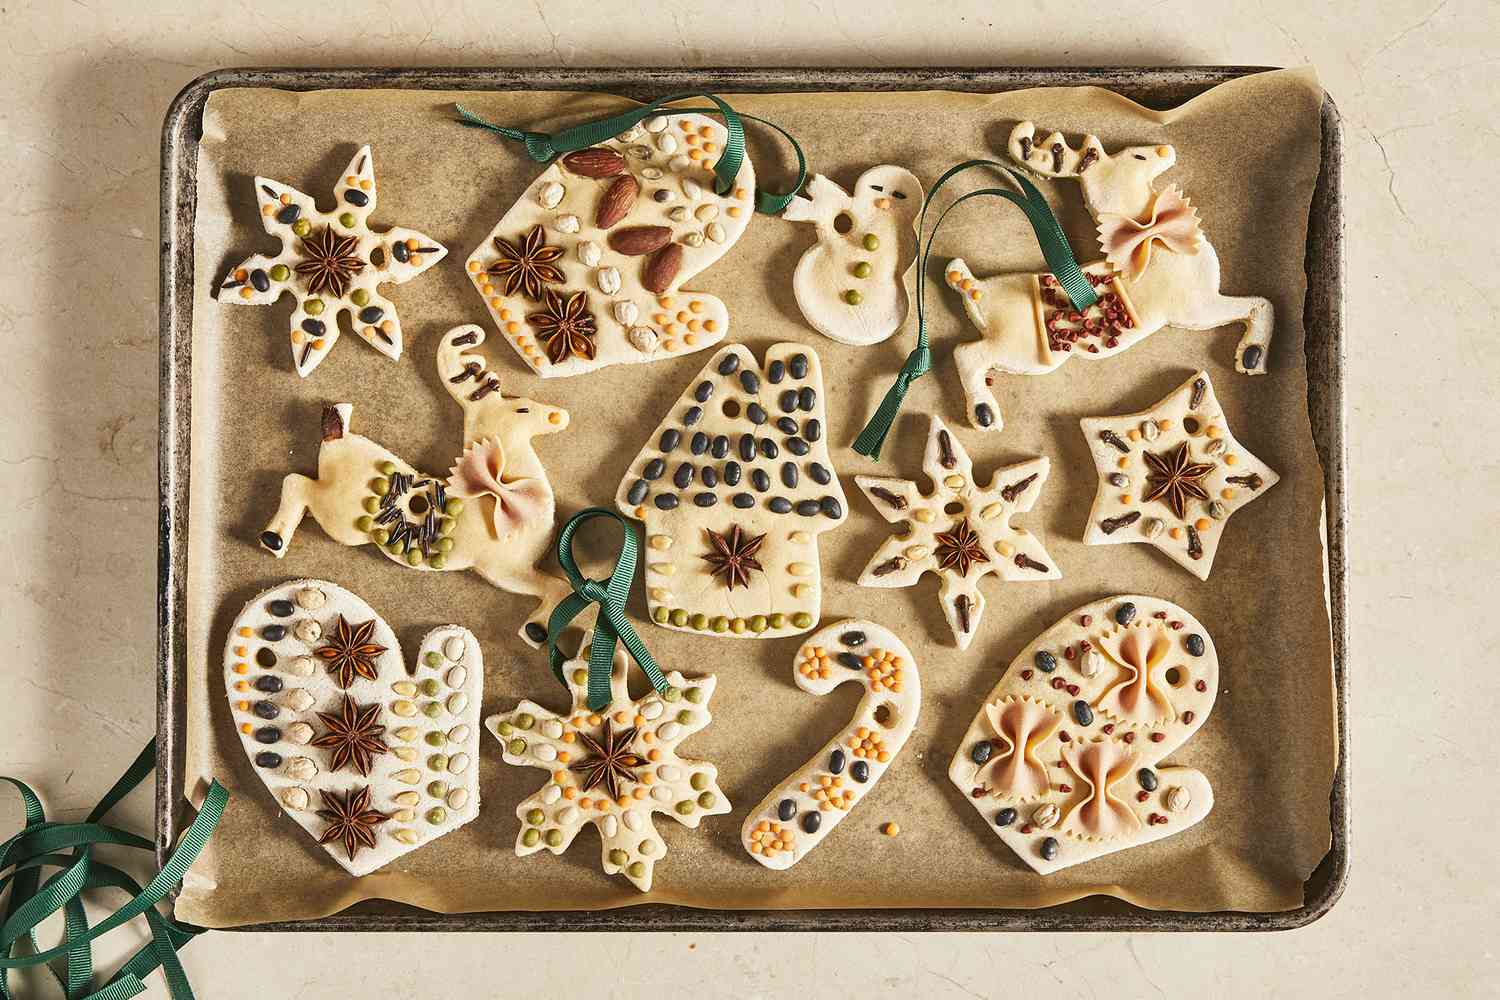
Adding Decorations
Now that your ornaments are shaped and ready, it’s time to add some decorative elements to make them truly special. Here are some ideas to inspire you:
- Glitter: Sprinkle some glitter over the ornaments while the dough is still wet. This will give them a sparkling and festive touch.
- Rhinestones or Beads: Press rhinestones or beads onto the surface of the ornaments to create a dazzling effect.
- Paint: Use acrylic paints to add intricate designs, patterns, or even names and dates to your ornaments. Let your imagination guide you as you paint.
- Ribbons or Twine: Thread a colorful ribbon or twine through the hole at the top of each ornament to create a hanger. You can tie a bow or leave the ends loose for a whimsical look.
- Personalized Messages: Use a fine-tipped marker to write personalized messages or quotes on the ornaments. This will add a heartfelt touch and make them even more meaningful.
Remember, the key is to have fun and let your creativity shine. Experiment with different decorations and combinations to create ornaments that reflect your own unique style and holiday spirit.
Once you have finished adding decorations, it’s time to move on to the next step: drying the ornaments.
Drying the Ornaments
After putting in all the effort to create your beautiful ornaments, it’s essential to ensure they dry properly to maintain their shape and durability. Follow these steps to dry your ornaments effectively:
- Place the decorated ornaments on a flat surface, such as a baking sheet or wire rack.
- Allow the ornaments to air dry naturally for about 24 to 48 hours. The drying time may vary depending on the thickness of the dough and the humidity levels in your area, so it’s best to check periodically.
- For faster drying, you can also place the ornaments in a preheated oven set to a low temperature (around 200°F or 93°C) for about 2 hours. Just make sure to keep a close eye on them to prevent any burning.
- Once the ornaments are completely dry, remove them from the oven or drying area and let them cool down before handling.
It’s important to note that patience is key during the drying process. Rushing the drying time may cause the ornaments to crack or lose their shape. Take your time and allow the ornaments to dry thoroughly for the best results.
With your ornaments properly dried, it’s time to move on to the final step: storing them for future use.
Storing the Ornaments
Once your ornaments are fully dried and ready to be stored, it’s important to handle them with care to ensure their longevity. Here are some tips for safely storing your handmade ornaments:
- Wrap each ornament individually in tissue paper or bubble wrap to protect them from scratches and breakage.
- Store the wrapped ornaments in a sturdy container, such as a plastic storage bin or a cardboard box. Make sure the container is clean and dry.
- Add a layer of padding, such as crumpled tissue paper or foam, to the bottom of the container to provide cushioning for the ornaments.
- Place the wrapped ornaments in the container carefully, making sure they are not tightly packed. Leave some space between them to avoid any pressure that could cause damage.
- Close the container tightly to prevent dust, moisture, and pests from getting inside.
- Choose a cool and dry storage area for the container. Avoid places with extreme temperatures or high humidity, as this can affect the quality of the ornaments.
By following these storage guidelines, you can help prolong the life of your cherished ornaments and keep them looking beautiful for years to come.
Now that you know how to store your ornaments safely, you’ve completed all the necessary steps to create and preserve your handmade dough ornaments. Enjoy the festive beauty they bring to your holiday decor and create lasting memories with your loved ones.