
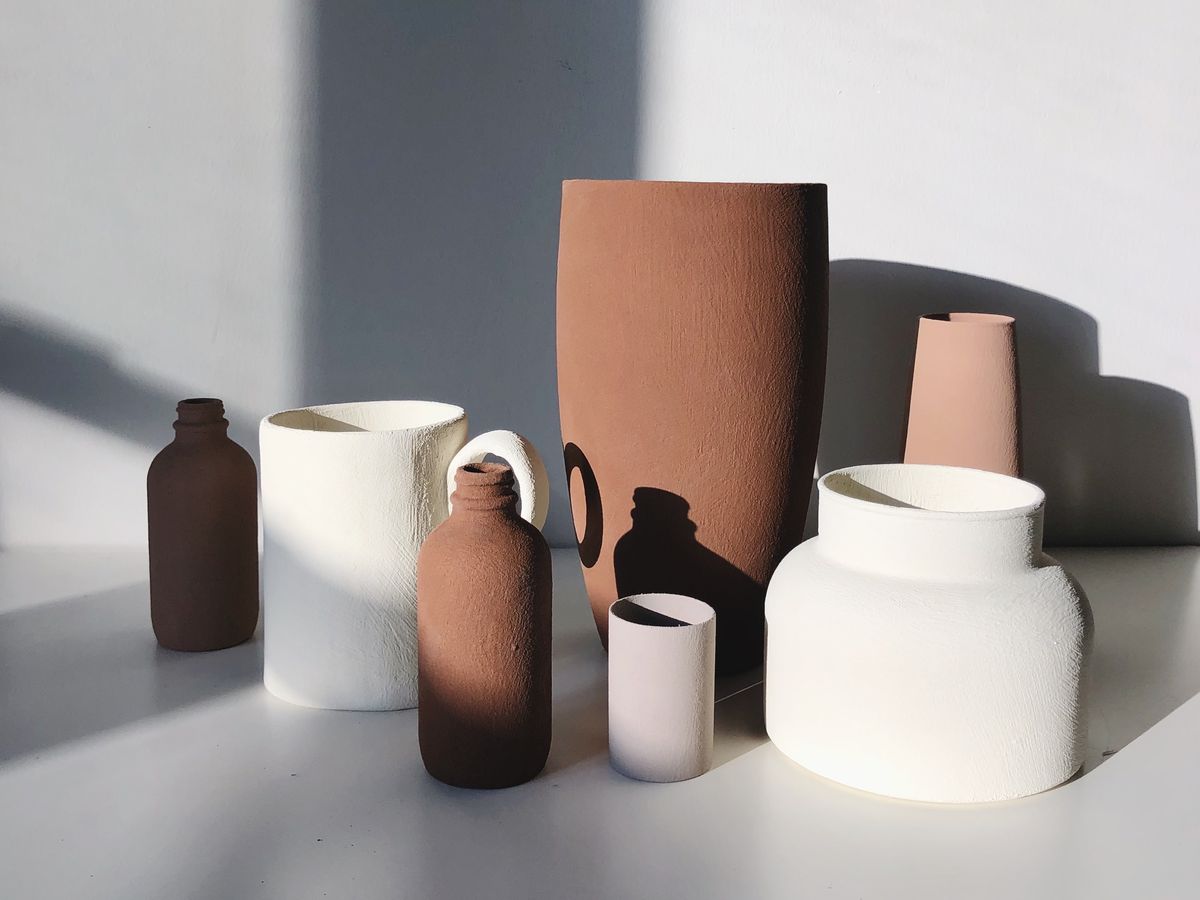
Choosing the Right Clay
Choosing the right type of clay is crucial when making a clay vase. There are several types of clay available, each with its own unique properties and characteristics. When selecting the clay for your project, consider factors such as color, texture, plasticity, and firing temperature.
One popular type of clay used for pottery is earthenware clay. It is a low-fire clay that is easily workable and comes in a variety of colors. Earthenware clay is great for beginners as it is forgiving and allows for experimentation with different techniques and finishes.
If you prefer a more refined finish, stoneware clay might be the better choice. Stoneware clay is fired at higher temperatures and is known for its durability. It comes in a range of colors and has a smooth texture, making it ideal for creating functional vases.
Porcelain clay is another option to consider. It is known for its delicate and translucent appearance, making it perfect for creating intricate and delicate designs. However, porcelain clay can be more challenging to work with due to its tendency to warp and its high firing temperature.
Once you have decided on the type of clay, consider its plasticity. Plasticity refers to how easily the clay can be shaped and manipulated. Clays with higher plasticity are more malleable, allowing for complex forms and intricate details. However, keep in mind that different clays have different plasticity levels, so choose one that suits your skill level and desired outcome.
Finally, consider the firing temperature of the clay. Each type of clay has a specific range of temperatures at which it needs to be fired to achieve the desired hardness and durability. Make sure to choose a clay that can be fired using the equipment and facilities available to you.
By carefully considering the type of clay, its properties, and how it fits your project requirements, you’ll be off to a great start in making a clay vase that meets your expectations.
Preparing the Clay
Before you can start creating a clay vase, it’s important to properly prepare the clay. This involves several key steps to ensure its workability, cleanliness, and readiness for shaping.
The first step in preparing the clay is to remove any impurities or foreign materials. Begin by wedging the clay, which involves kneading and pressing it to improve its consistency and remove air bubbles. Wedging also helps to create a uniform texture throughout the clay, making it easier to work with.
Once the clay is wedged, you’ll need to prepare a clean and smooth working surface. Dust the surface with a thin layer of powdered clay, commonly known as ‘grog’, to prevent sticking. This helps to maintain the clay’s moisture and make it easier to shape and manipulate.
Next, it’s time to moisten the clay. Sprinkle a small amount of water over the surface of the clay and use a spray bottle or misting device to evenly distribute the moisture. Be cautious not to over-moisten the clay as it can become too soft and lose its structural integrity.
As you work with the clay, keep a bucket of water nearby to dip your hands in periodically. This helps to prevent the clay from sticking to your hands and allows for smoother shaping and manipulation.
During the preparation process, it’s important to check the consistency of the clay regularly. The ideal clay consistency is pliable and slightly damp, allowing you to easily shape and form it. If the clay becomes too dry or stiff, mist it with water and continue kneading and wedging until it reaches the desired consistency.
Remember, each type of clay may have specific preparation requirements, so it’s essential to follow any guidelines provided by the clay manufacturer. Adhering to these instructions will help ensure the best results when creating your clay vase.
By properly preparing the clay, you will set a solid foundation for the subsequent steps of shaping and transforming it into a beautiful vase.
Creating the Base of the Vase
Creating a sturdy and well-formed base is essential when making a clay vase. The base provides stability and structural support for the rest of the vase. Follow these steps to ensure a strong foundation:
- Start by taking a small portion of clay and kneading it to make it pliable and workable. This will help eliminate any air bubbles and ensure that the clay is evenly textured.
- On your prepared working surface, flatten the clay into a disc shape using your palms. Apply even pressure and rotate the clay as you work to maintain a consistent thickness.
- Use a rolling pin or a slab roller to further flatten and smooth the clay disc. Aim for a thickness of around 1/4 to 1/2 inch, depending on the size and desired thickness of your vase.
- Next, use a round template or a circular object, such as a jar or a cup, to trace a circle onto the clay. This will serve as a guide for the base of your vase.
- Gently cut along the traced circle using a sharp knife or a pottery tool. Take your time and make precise cuts to ensure a clean edge.
- Once the base is cut out, carefully lift it off the working surface and transfer it onto a piece of plastic or a textured mat to prevent sticking.
- Now, it’s time to shape the base. Place the cut-out clay circle on a cylindrical object, such as a rolling pin or a small jar, to give it a curved form. Adjust the height of the cylindrical object to determine the desired height of the vase’s base.
- Gently press the clay against the cylindrical object, using your hands and fingers to shape and smooth the clay. Pay attention to the edges to ensure they blend seamlessly with the rest of the base.
- Once you’re satisfied with the shape and smoothness of the base, carefully remove it from the cylindrical object.
- Allow the base to dry partially before moving on to the next steps. This will give it enough firmness to support the weight of the walls and prevent it from losing its shape.
By following these steps, you’ll create a solid and stable base for your clay vase. Remember to take your time and work with care to ensure a well-formed foundation for the rest of your vase.
Shaping the Walls of the Vase
Once the base of your clay vase is complete, it’s time to move on to shaping the walls. This step is where you have the opportunity to unleash your creativity and give your vase its unique form and character. Follow these steps to shape the walls of your vase:
- Take a sufficient amount of clay and knead it to make it pliable and workable. This will help eliminate any air bubbles and ensure that the clay is evenly textured.
- Start with a small portion of the clay and form it into a ball shape. This will be the starting point for shaping the walls of your vase.
- Place the clay ball onto the center of the base, gently pressing it down to ensure it sticks. Begin to apply gentle pressure and use your palms and fingers to shape the clay into a cylindrical form.
- Slowly raise the walls of the vase by pinching and pushing the clay upwards. Use your fingers to shape and refine the walls, gradually thinning them out as you go.
- Rotate the vase as you work on shaping the walls to keep the thickness even and symmetrical. This will help create a balanced and visually appealing form.
- Continue to refine and shape the walls of the vase, paying attention to the desired height and curvature. Experiment with different techniques, such as coiling or throwing, to achieve the desired aesthetic.
- Use a damp sponge or a rib tool to smooth out any imperfections and refine the surface of the clay. This will give your vase a polished and professional finish.
- Be mindful of the drying process as you shape the walls. If the clay becomes too dry and starts to crack, lightly mist it with water to restore moisture and prevent further cracking.
- Once you are satisfied with the shape and thickness of the walls, carefully set the vase aside to dry completely. This can take several hours to a few days, depending on the size and thickness of your vase.
Remember to take your time and have patience while shaping the walls of your clay vase. This step is crucial in determining the overall appearance and character of your creation. Enjoy the creative process and let your imagination guide you as you bring your vision to life.
Adding Texture and Design
Adding texture and design to your clay vase can elevate its visual appeal and make it truly unique. There are various techniques and tools you can use to create textures, patterns, and decorative elements. Here are some ideas to inspire you:
- Carving: Use carving tools or pottery knives to create intricate designs by gently etching into the surface of the clay. You can create patterns, lines, or even intricate motifs, adding depth and visual interest to your vase.
- Impressions: Press objects such as leaves, shells, or fabric onto the surface of the clay to create interesting textures and patterns. Experiment with different materials to achieve the desired effect.
- Slip trailing: Slip trailing involves applying a liquid clay mixture, known as slip, onto the surface of the vase. You can use a slip trailer or a small squeeze bottle to create intricate lines, dots, or even freehand designs.
- Stamping: Use pre-made stamps or create your own by carving into soft clay. Press the stamp onto the surface of the clay vase to create repetitive patterns or motifs.
- Sgraffito: This technique involves applying layers of colored clay or slips onto the surface of the vase and then carving or scratching through them to reveal contrasting colors or textures beneath.
- Texture mats and rollers: These tools come in a variety of patterns and textures, allowing you to imprint intricate designs onto the surface of the clay vase with ease.
- Additions: Consider adding clay coils, handles, or other decorative elements to your vase. These can be attached securely to the surface with slip and then shaped and textured to match the overall design.
When adding texture and design to your clay vase, let your imagination run wild. Explore different techniques, experiment with various tools, and don’t be afraid to take risks. Remember that each choice you make will contribute to the final aesthetic, so take your time and enjoy the creative process.
Drying and Trimming the Vase
After shaping and adding texture to your clay vase, the next step is to allow it to dry and then trim any excess clay. Proper drying and trimming are essential to ensure the structural integrity and aesthetic of the vase. Follow these steps to properly dry and trim your vase:
- Place the vase in a well-ventilated area away from direct sunlight or drafts. It’s important to allow the vase to dry slowly and evenly to prevent cracking or warping. Cover the vase loosely with a plastic bag or sheet to slow down the drying process and prevent the clay from drying too quickly.
- Monitor the drying progress regularly. Depending on the size and thickness of your vase, drying can take several days or even weeks. As the vase dries, you may notice the color of the clay lightening and the surface becoming firmer.
- When the vase is partially dry, you can begin the trimming process. Trimming involves removing any excess clay from the bottom of the vase to create a clean and neat foot. Using a pottery trimming tool or a sharp knife, carefully trim the excess clay while the vase is still on the wheel or supported on a flat surface.
- Start by leveling the base of the vase by running the tool along the bottom edge. This will create a smooth and even foot for the vase to stand on.
- Continue trimming the sides of the vase if necessary, removing any uneven or rough areas. Take your time and make small, controlled cuts to achieve the desired shape and form.
- As you trim, periodically check the foot of the vase to ensure it is level and even. This will help prevent wobbling or instability once the vase is finished.
- After the trimming is complete, gently brush away any clay debris or dust from the vase. You can use a soft-bristled brush or a damp cloth to clean the surface and reveal its final appearance.
- Allow the vase to continue drying completely before moving on to firing. This can take several more days or weeks, depending on the thickness and size of your vase.
Properly drying and trimming your vase is crucial in achieving a professional and polished final result. Take your time and be patient throughout the process, as rushing can lead to structural issues or imperfections in the finished piece.
Firing the Vase
Once your clay vase is completely dry, it’s time to fire it in a kiln. Firing is the process of subjecting the clay to high temperatures, causing it to undergo chemical changes and transform into a durable ceramic material. Follow these steps to properly fire your vase:
- Before firing, make sure to carefully clean the surface of your vase to remove any remaining debris or dust. A damp cloth or sponge can be used to wipe away any residue.
- Place your vase in a kiln-safe container or directly onto kiln shelves, ensuring that it is appropriately supported and won’t tip over during the firing process.
- Consult the specific firing instructions for the type of clay you are using, as different clays require different firing temperatures and schedules. Set the kiln to the appropriate temperature, following the manufacturer’s guidelines.
- Start the firing process, allowing the kiln to gradually heat up to the desired temperature. This slow heating helps prevent thermal shock and minimizes the risk of the clay cracking.
- Maintain the desired temperature for the recommended amount of time, allowing for the clay to fully mature and achieve its optimal strength and durability.
- Once the firing process is complete, allow the kiln to cool down slowly. Rapid cooling can also cause the clay to crack or break.
- Once the kiln has reached room temperature, open it carefully and remove your vase. Be cautious as it may still be hot, and use protective gloves or tools to handle it.
- Inspect your fired vase for any defects or issues, such as cracks or glaze irregularities. While firing can enhance the appearance of the clay, it can also expose any existing flaws.
Firing your clay vase is a critical step in transforming it into a permanent ceramic piece. Always follow the firing instructions for the specific clay you are using, as each clay type has its own firing requirements for optimal results. Ensure proper kiln ventilation and take necessary safety precautions when working with high temperatures.
Glazing the Vase
Glazing adds the final touch to your clay vase, providing both protection and enhancing its aesthetics. Glazes are liquid coatings that contain minerals and oxides, which, when fired, create a glass-like finish on the surface of the pottery. Follow these steps to successfully glaze your vase:
- Prepare your glaze by following the manufacturer’s instructions. Some glazes need to be stirred or sieved to remove any lumps or air bubbles.
- Apply a base coat of glaze to the entire surface of your vase using a brush, sponge, or spray gun. This base layer will provide a foundation for additional layers and help the glaze adhere to the clay.
- Allow the base coat to dry completely before proceeding. This will prevent the glazes from running together and creating undesired effects.
- Once the base coat is dry, you can start applying additional layers of glaze to achieve the desired color, texture, and patterns. Experiment with different brushing techniques, layering, or even blending different glazes to create unique effects.
- Take care to allow each layer of glaze to dry before applying the next. This will prevent colors from mixing and ensure a clear distinction between each layer.
- Pay attention to the thickness of the glaze. If the glaze is too thick, it may run or bubble during firing. If it is too thin, the color may appear washed out.
- Consider using various application techniques like dripping, spraying, or splattering to add texture and visual interest to your vase.
- Take note of any areas you wish to leave unglazed, as glazes will fuse to surfaces and can be difficult to remove after firing.
- Once you have finished applying the glaze, allow the vase to dry completely before firing it in the kiln.
- Follow the glaze firing instructions provided by the manufacturer, as different glazes have specific firing temperature and duration requirements.
Glazing provides the opportunity to add color, depth, and visual appeal to your clay vase. Experiment with different glaze combinations and application techniques to achieve the desired effect. Always follow safety precautions when working with glazes, as some can contain toxic materials, and ensure proper ventilation during the firing process.
Firing the Vase Again
Once you have applied the glazes to your clay vase, it’s time to fire it again to transform the glazes into a beautiful and durable finish. The second firing, also known as the glaze firing or the final firing, is a crucial step in the pottery-making process. Follow these steps to successfully fire your glazed vase:
- Ensure that your kiln is clean and free from any debris or residue from previous firings. A clean kiln helps prevent any unwanted reactions or contamination during the firing process.
- Check that the kiln shelves and supports are in place and are suitable for holding your vase without any risk of tipping or damage.
- Load your glazed vase into the kiln, making sure to leave enough space between pieces to allow for proper heat circulation.
- Set the kiln to the recommended firing temperature for the specific glazes you have used. Refer to the glaze manufacturer’s guidelines or consult a firing schedule suitable for your clay and glaze combination.
- Slowly raise the temperature of the kiln according to the firing schedule. This gradual increase helps prevent any thermal shock that could cause the glazes to crack or peel.
- Maintain the desired temperature for the recommended duration, allowing the glazes to mature and fuse with the clay surface. This temperature and duration are crucial for achieving the desired color, texture, and finish of the glazes.
- After the firing process is complete, allow the kiln to cool down gradually. Rapid cooling can cause thermal stress and may result in cracks or defects in the glazed surface.
- Once the kiln has cooled to room temperature, carefully open it and remove your vase. Use appropriate protective gloves or tools, as the vase may still be hot.
- Inspect your fired vase to ensure that the glazes have developed as desired. Look for any issues such as uneven or runny glaze, pinholes, or rough areas.
- Make note of any adjustments or improvements you might want to make for future glazing projects.
Firing the glazed vase for a second time is crucial in achieving a vibrant and durable surface. Follow the glaze firing schedule and pay attention to the specific requirements of the glazes you have used. With proper firing, your glazed vase will showcase the beauty of the glazes and the skill and artistry that went into creating it.
Finishing Touches and Final Thoughts
As you near the end of your clay vase-making journey, there are a few finishing touches you can add to complete your masterpiece. These final touches will elevate the overall appearance of your vase and provide a polished and professional look. Here are some ideas to consider:
- Inspect your vase for any rough edges or imperfections. Use a sponge, sandpaper, or a pottery tool to smooth out any rough spots and refine the final shape of the vase.
- Consider adding a signature or a small personal mark to the bottom of the vase. This adds a personal touch and identifies you as the artist behind the creation.
- If desired, you can apply a clear glaze to the interior of the vase for added functionality and to ensure it is watertight if you plan on using it for holding flowers or other liquids.
- Once you are satisfied with the overall appearance and texture of your vase, take the time to clean it thoroughly. Remove any dust or debris from the surface using a soft brush or a damp cloth.
- Display your finished vase in a prominent place where it can be admired. Whether on a shelf, mantel, or as a centerpiece, showcasing your creation will bring joy and pride.
Reflecting on your clay vase-making experience, remember to take pride in your work, regardless of imperfections. Each vase you create is a unique expression of your creativity and passion for pottery.
As you continue to explore the art of making clay vases, remember to experiment and refine your techniques. With each project, you will learn and grow, improving your skills and creating even more remarkable pieces.
Lastly, don’t forget to enjoy and appreciate the process. The journey of creating a clay vase is just as rewarding as the final result. Embrace the creative flow, embrace the imperfections, and have fun expressing your artistic vision through the versatile medium of clay!