
Materials Needed
Before you begin making an acrylic tray, it’s important to gather all the necessary materials. Having everything at hand will ensure a smooth and efficient process. Here are the materials you’ll need:
- Acrylic sheet: Choose a size that suits your desired tray dimensions. Opt for a thickness of around ¼ inch for durability.
- Measuring tape: This will be essential for accurately measuring and marking the acrylic sheet.
- Marker or pencil: Use a marker or pencil to mark the dimensions and cutting lines on the acrylic sheet.
- Acrylic cutter or jigsaw: An acrylic cutter or jigsaw will enable you to cut the sheet to the desired size and shape.
- Sandpaper: To smooth the edges of the cut acrylic sheet, you’ll need sandpaper with a medium grit.
- Clamps: Clamps will help hold the acrylic sheet in place during cutting and sanding.
- Rubbing alcohol: Use rubbing alcohol and a lint-free cloth to clean the acrylic sheet before assembly.
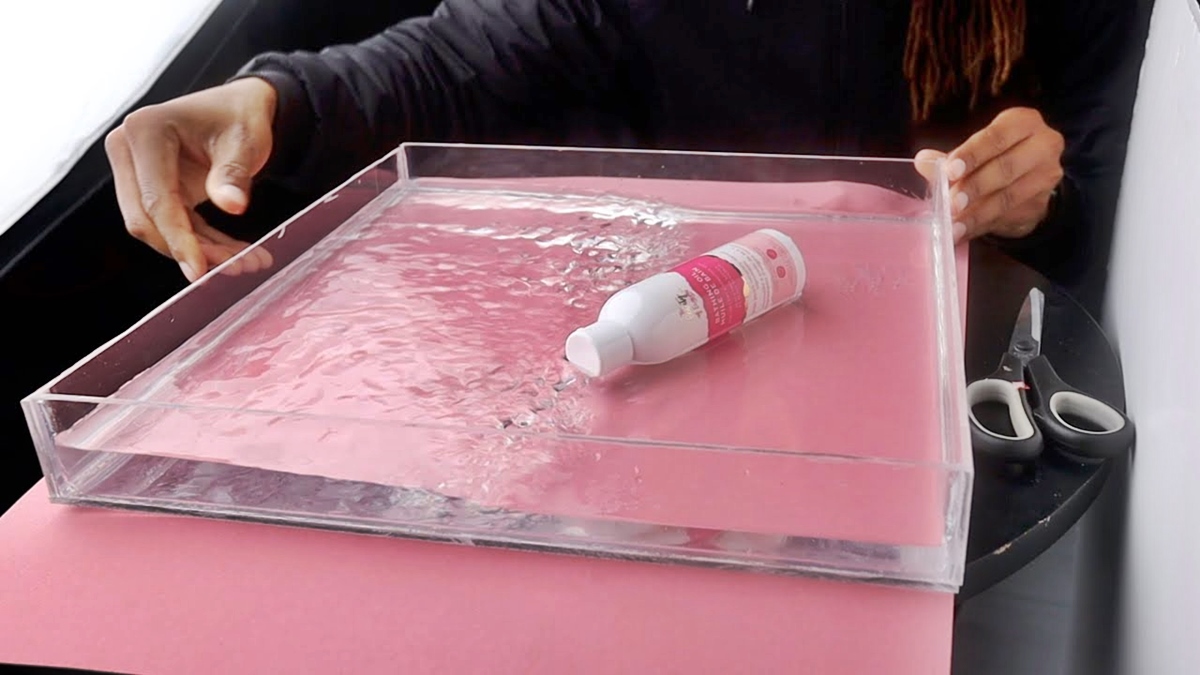
- Adhesive: Opt for a strong adhesive suitable for bonding acrylic, such as acrylic cement or solvent-based glue.
- Handles (optional): If desired, choose handles that complement the style and functionality of your acrylic tray.
- Polishing compound: This will be used to restore the glossy finish of the acrylic surface.
Ensure that you have all the necessary materials ready before you begin, as it will save you time and make the process more enjoyable. Once you’ve gathered everything on the list, you’re ready to move on to the next steps of preparing and cutting the acrylic sheet.
Preparing the Acrylic Sheet
Before you start cutting and shaping the acrylic sheet for your tray, it’s important to properly prepare it. Follow these steps to ensure the best results:
- Clean the acrylic sheet: Begin by cleaning the sheet with a lint-free cloth and rubbing alcohol. This will remove any dirt, debris, or oil that may affect the adhesive’s effectiveness.
- Protective film removal: If your acrylic sheet has a protective film, carefully remove it to reveal the clear surface underneath. This will prevent any scratches or damage while you work on the tray.
- Secure the sheet: Use clamps to secure the acrylic sheet to a stable work surface. This will prevent it from moving around during cutting and sanding.
By properly preparing the acrylic sheet, you’ll ensure a clean and smooth surface to work with. This will result in a professional-looking tray without any imperfections or blemishes that could detract from its overall appearance.
Measuring and Marking
Accurate measurements and markings are crucial for achieving the desired dimensions and shape of your acrylic tray. Follow these steps to ensure precise results:
- Decide on the dimensions: Determine the length, width, and height you want for your acrylic tray. Take into consideration the purpose and functionality of the tray, as well as the space where it will be used.
- Measure and mark the acrylic sheet: Use a measuring tape to mark the dimensions on the protective film or directly onto the acrylic sheet if the film has been removed. Make sure to double-check your measurements to avoid any errors.
- Mark the cutting lines: Once you have marked the measurements, use a marker or pencil to draw the cutting lines on the acrylic sheet. Ensure that the lines are clear and easily visible.
- Add additional markings: If you plan to include handles or other decorative elements, mark their positions on the acrylic sheet. This will guide you during the assembly process.
Accurate measurements and clear markings will serve as a guide during the cutting and assembly stages. Take your time with this step to ensure that your acrylic tray turns out perfectly to your specifications.
Cutting the Acrylic Sheet
Once you have measured and marked the dimensions of your acrylic tray, it’s time to cut the sheet to size. Follow these steps to safely and accurately cut the acrylic sheet:
- Prepare the cutting area: Find a flat and sturdy surface to work on, ideally with a cutting mat or scrap wood underneath. This will protect both the acrylic sheet and your work surface.
- Choose the cutting tool: Depending on the thickness of your acrylic sheet, you can use an acrylic cutter or a jigsaw. An acrylic cutter is suitable for thinner sheets, while a jigsaw is more appropriate for thicker sheets.
- Wear safety equipment: Put on safety glasses and gloves to protect yourself from any potential debris or sharp edges during the cutting process.
- Cut along the marking lines: Start cutting along the marked lines using a steady and even motion. Apply gentle pressure to avoid cracking or chipping.
- Take breaks if needed: If you’re working on a larger tray or a thicker acrylic sheet, take breaks to prevent the tool from overheating and maintain accuracy.
Remember to always prioritize safety when cutting the acrylic sheet. Take your time and use steady, controlled movements to ensure clean and precise cuts.
Sanding the Edges
After cutting the acrylic sheet for your tray, the edges may be rough or uneven. Sanding the edges will give them a smooth and polished finish. Follow these steps to properly sand the edges of the acrylic sheet:
- Choose the right sandpaper: Select sandpaper with a medium grit, typically around 220-320, to start with. This will help remove any rough edges and create a more even surface.
- Sand the edges: Hold the sandpaper firmly and start sanding the edges of the acrylic sheet using circular or back-and-forth motions. Be careful not to apply too much pressure to avoid scratching the surface.
- Check for smoothness: Periodically check the edges to see if they feel smooth to the touch. Continue sanding until you achieve the desired level of smoothness and a consistent appearance across all edges.
- Change the sandpaper if necessary: If the edges are still rough after sanding with the medium-grit sandpaper, switch to a finer-grit sandpaper, such as 400 or higher. This will help refine the edges even further.
- Clean the acrylic sheet: Once you have finished sanding, use a clean cloth or compressed air to remove any sanding dust or particles from the acrylic sheet.
Sanding the edges of the acrylic sheet will not only make them visually appealing but also eliminate any potential sharpness. This will ensure a safe and comfortable handling experience when using your acrylic tray.
Assembling the Tray
Now that you have prepared the acrylic sheet and sanded the edges, it’s time to assemble the tray. Follow these steps to properly assemble your acrylic tray:
- Apply adhesive: Begin by applying a suitable adhesive to the edges of the acrylic sheet. Make sure to choose an adhesive specifically designed for bonding acrylic to ensure a strong and long-lasting hold.
- Align the edges: Carefully align the edges of the acrylic sheet, ensuring they are properly aligned with the markings you made during the measuring and marking stage.
- Hold the edges together: Apply gentle and even pressure to hold the edges of the acrylic sheet together. Clamps can be useful in keeping the edges secured while the adhesive sets.
- Let the adhesive dry: Follow the manufacturer’s instructions for the recommended drying time of the adhesive. Avoid disturbing or moving the tray during this process, as it may affect the final result.
Once the adhesive has dried and the tray is securely assembled, you can remove any excess adhesive using a scraper or a soft cloth. Take care not to scratch the acrylic surface while doing so.
It’s important to note that different adhesives may have different drying times and specific instructions. Always refer to the manufacturer’s guidelines for the best results.
By assembling the tray with precision and using the appropriate adhesive, you’ll ensure the structural integrity of your acrylic tray.
Adding Handles
Adding handles to your acrylic tray not only enhances its functionality but also adds a touch of style. Here’s how you can easily add handles to your tray:
- Choose the handles: Select handles that best fit the design and size of your tray. Consider factors such as material, shape, size, and aesthetics to ensure they complement the overall look of the tray.
- Mark the handle positions: Using a measuring tape and a pencil, mark the positions where you want to attach the handles on the sides of the tray. Ensure that the markings are evenly spaced and aligned.
- Drill pilot holes: With the appropriate drill bit and a drill suited for acrylic, carefully drill pilot holes at the marked positions. The size of the drill bit should match the screws or bolts that will be used to attach the handles.
- Attach the handles: Place the handles over the pilot holes and insert the screws or bolts through the back of the tray. Tighten them securely but avoid over-tightening, as it may crack or damage the acrylic.
- Test the handles: Give the handles a gentle tug to ensure they are securely attached and can withstand the weight and usage of the tray. Make any necessary adjustments or tighten the screws if needed.
Adding handles to your acrylic tray not only adds practicality when carrying and moving it but also enhances its overall appearance. Select handles that not only match your personal style but also provide a comfortable grip for easy handling.
Remember to take caution when drilling the pilot holes and tightening the screws to prevent any damage to the acrylic sheet. Take your time during this step to ensure a secure and aesthetically pleasing outcome.
Polishing the Tray
Polishing the acrylic tray adds the final touch of elegance and ensures a glossy, professional finish. Follow these steps to properly polish your acrylic tray:
- Clean the tray: Before beginning the polishing process, make sure the tray is free of any dust, debris, or fingerprints. Use a soft, lint-free cloth and a mild, non-abrasive cleaner to clean the surface of the tray.
- Apply the polishing compound: Apply a small amount of acrylic polishing compound onto a clean, soft cloth. Gently rub the compound onto the surface of the tray using circular motions.
- Buff the tray: Using a separate clean cloth, buff the tray by gently rubbing the surface in circular motions. Apply even pressure to ensure a consistent shine across the entire tray.
- Inspect and repeat if necessary: Once you have completed the initial polishing, inspect the tray for any remaining scratches or dull areas. If needed, reapply the polishing compound and repeat the buffing process until you achieve the desired level of shine.
- Remove any residue: After polishing, use a clean cloth dampened with water to remove any residue left behind by the polishing compound. Make sure the tray is completely dry before using or displaying it.
Properly polishing your acrylic tray will not only enhance its appearance but also help to protect the surface from scratches and maintain its shine over time. Remember to use gentle and consistent movements during the polishing process to avoid accidentally creating any new scratches.
Regularly cleaning and polishing your acrylic tray will help it maintain its pristine condition and prolong its lifespan. Enjoy your beautifully polished acrylic tray for years to come!