
Choosing the Right Tray
When it comes to making a tiered tray, the first step is to choose the right base tray. This is an important decision as it will determine the overall look and stability of your tiered tray. Here are some key factors to consider when selecting the perfect tray:
- Size and Shape: Consider the size and shape of the tray based on your intended use and the available space. If you plan to use the tray for displaying small items like jewelry or candles, a smaller size would be ideal. On the other hand, if you’re planning to use it for hosting parties or to display larger items, go for a larger tray.
- Material: Choose a material that suits your style and complements the overall aesthetic of the room. Common materials used for tiered trays include wood, metal, and glass. Each material has its own unique look and feel, so take your time to decide which one best suits your needs.
- Design and Style: Consider the design and style of the tray and how it aligns with your personal taste. Do you prefer a sleek and modern look or something more rustic and vintage-inspired? Look for trays with features like decorative handles or intricate patterns to add an extra touch of charm.
- Sturdiness: Pay attention to the sturdiness of the tray. It should be able to hold the weight of multiple items without wobbling or tipping over. Check for a solid construction and sturdy materials to ensure that your tiered tray will last for a long time.
By taking these factors into consideration, you can select the perfect tray for your tiered tray project. Remember to measure the available space and gather inspiration from various sources to help you make an informed decision. Once you have chosen the right tray, you can move on to the next step of gathering the necessary materials.
Gathering Materials
Now that you have chosen the ideal tray for your tiered tray project, it’s time to gather the materials you will need to bring your vision to life. Here is a list of essential materials you should have on hand:
- Tray: Of course, the main material you will need is the tray itself. Make sure you have the selected tray that meets your desired size, shape, and style.
- Wooden Dowels or Spindles: To create the tiers, you will need wooden dowels or spindles. These will act as the support system between the trays. Ensure that they are sturdy and of the appropriate length for your tiered tray design.
- Power Drill and Drill Bits: A power drill and drill bits are essential for creating holes in the trays and the wooden dowels. Make sure to have different sizes of drill bits to accommodate the dowels and any additional decorative accents you may want to add.
- Sandpaper: Sandpaper is crucial for preparing the surface of the tray before painting or staining. It helps smooth out any imperfections and provides a better finish.
- Paint or Stain: Depending on your design preference, you will need paint or stain to give your tiered tray its desired color. Choose high-quality paint or stain that is suitable for the material of your tray.
- Paintbrushes or Foam Brushes: Select a variety of paintbrushes or foam brushes in different sizes to ensure you can reach all the nooks and crannies of your tray.
- Decorative Accents: To add a personal touch and enhance the overall aesthetic of your tiered tray, gather decorative accents such as ribbon, faux flowers, beads, or any other embellishments that align with your desired theme.
Make sure to double-check your materials list and ensure you have everything you need before starting the project. It can be frustrating to realize you’re missing something in the middle of the process. With your materials ready, you can proceed to prepare the tray for the transformation.
Preparing the Tray
Before applying paint or any other decorative elements to your selected tray, it’s crucial to properly prepare the surface. This will ensure that the paint adheres well and creates a smooth and flawless finish. Here are the steps to follow when preparing your tray:
- Clean the Tray: Start by thoroughly cleaning the tray to remove any dust, dirt, or grease. Use a gentle cleanser or soap and water, and make sure to dry it completely before moving on to the next step.
- Sand the Surface: Use sandpaper to lightly sand the surface of the tray. This process will help to roughen up the surface slightly, allowing the paint or stain to adhere better. Sanding also helps to eliminate any existing imperfections on the tray.
- Remove Any Hardware: If your tray has any handles, knobs, or other hardware, consider removing them before painting or staining. This will make the process easier and allow you to achieve a more consistent finish.
- Fill in Imperfections: If there are any noticeable dents, scratches, or holes on the tray, now is the time to fill them in. Use wood filler or putty to smooth out the surface, ensuring a seamless appearance once the tray is painted or stained.
- Sand Once Again: After filling in imperfections, lightly sand the tray once again to ensure the surface is smooth and even. Wipe away any dust or debris before moving on to the next step.
- Protect Any Areas: If there are parts of the tray you want to keep unpainted or unstained, such as the bottom or certain edges, use painter’s tape or masking tape to protect those areas from the paint or stain.
By following these preparation steps, you will create an ideal canvas for applying paint or stain to your tray. Taking the time to properly prepare the surface will result in a professional-looking finished product. Once the tray is prepared, you can move on to the exciting step of sanding and painting.
Sanding and Painting
After preparing the tray, it’s time to move on to the fun part – sanding and painting! This step will add color and personality to your tiered tray. Here’s a step-by-step guide to help you achieve a beautiful finish:
- Sand the Surface: Before painting, lightly sand the tray once again to ensure a smooth surface. This will help the paint adhere better and create a flawless finish. Wipe away any dust or debris with a clean cloth.
- Prime (Optional): If you’re painting a wooden tray or a tray with a glossy surface, applying a primer can help improve the paint’s adhesion and provide a more even finish. Follow the instructions on the primer and allow it to dry completely.
- Choose Your Paint: Select a paint color that matches your desired aesthetic. Acrylic paints or spray paints work well for most tray materials. Choose high-quality paint that is suitable for the material of your tray.
- Apply the Paint: Use a paintbrush or foam brush to apply a thin, even coat of paint to the tray. Start from one side and work your way across, ensuring complete coverage. Allow the first coat to dry completely before applying the next coat, if necessary.
- Add More Coats: Depending on the intensity of the color and the material of your tray, you may need to apply multiple coats of paint. Allow each coat to dry before applying the next, and sand lightly between coats if needed.
- Finishing Touches: Once the final coat of paint is dry, you can add any additional decorative accents or details. Consider using stencils, decals, or freehand techniques to create unique designs on the tray.
- Allow for Proper Drying: After completing the painting process, it’s essential to allow the tray to dry thoroughly before handling or adding any decorative elements. Follow the paint manufacturer’s instructions for drying times.
By following these steps, you’ll achieve a beautifully painted tray that suits your personal style. Remember to work in a well-ventilated area and take your time to ensure an immaculate finish. With the tray painted, it’s time to add some decorative details to enhance its visual appeal.
Adding Decorative Details
Now that you have a freshly painted tray, it’s time to take it to the next level by adding decorative details. This step is where you can let your creativity shine and personalize your tiered tray to match your style and the overall theme of your space. Here are some ideas to get you started:
- Ribbon and Bow: Tie a beautiful ribbon around the handle or edges of the tray to add an elegant touch. Choose a ribbon that complements the color scheme or theme you’ve chosen for your tiered tray.
- Faux Flowers: Incorporate artificial flowers or greenery to bring a touch of nature to your tiered tray. Arrange them in small vases or use floral foam to secure them in place. Opt for flowers that match the color palette of your tray or select seasonal blooms for an added pop.
- Decals or Stencils: Apply decals or use stencils with your favorite designs to add patterns or motifs to the tray’s surface. This is a great way to customize the tray and make it truly unique.
- Beads or Gems: Adorn the edges or corners of your tray with beads or gems for a touch of glamour. Choose colors and sizes that coordinate with your tray’s color scheme.
- Personalized Tiles: If you’re feeling crafty, create personalized tiles using clay or ceramic materials. Paint or write messages on the tiles and attach them to the tray for a personal touch.
- Themed Accents: Tailor your decorative details to a specific theme, such as coastal, farmhouse, or bohemian. Incorporate items like seashells, mini farm animals, or dreamcatchers to enhance the desired aesthetic.
Remember to arrange the decorative elements in a balanced and visually appealing manner. Play around with different placements and configurations until you find the arrangement that best suits your taste. Make sure not to overcrowd the tray – leave enough space for each item to shine.
Adding decorative details will elevate the overall look of your tiered tray and make it a statement piece in your decor. Once you’re satisfied with the arrangement, it’s time to assemble the tiered tray and showcase your creative masterpiece.
Assembling the Tiered Tray
Now that you have all the components ready, it’s time to assemble your tiered tray. Follow these steps to ensure a stable and visually appealing arrangement:
- Measure and Mark: Start by measuring and marking the desired placement of the wooden dowels or spindles on the bottom tray. Ensure even spacing between the tiers and mark the positions accordingly.
- Drill Holes: Use a power drill with the appropriate drill bit to create holes at the marked positions on the bottom tray. Make sure the holes are deep enough to securely hold the wooden dowels or spindles.
- Attach the Dowels: Insert the wooden dowels or spindles into the drilled holes. Apply a small amount of wood glue to each end of the dowels before inserting them for added stability.
- Repeat for Each Tier: If you’re planning to have multiple tiers, repeat the same process for attaching the dowels or spindles to the middle and top trays. Make sure the height of each tier is appropriate for the items you’re planning to display.
- Secure the Tiers: Once all the dowels or spindles are in place, carefully stack the trays on top of each other, aligning them with the wooden dowels. Ensure that the tiers are stable and secure.
- Add Final Decorative Touches: Now that the tray is assembled, take a final look and make any adjustments to the positioning of the decorative details. Ensure that they are evenly distributed and visually appealing.
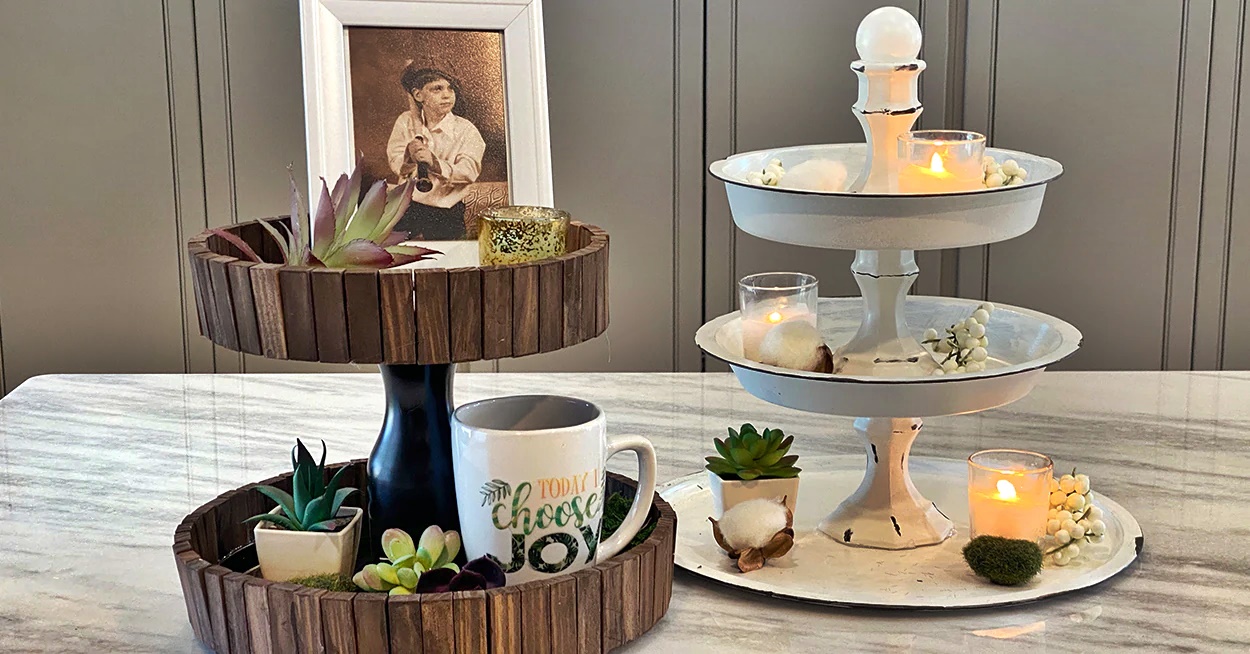
Once you’re satisfied with the assembly and decoration, your tiered tray is ready to be displayed and enjoyed. Place it on a countertop, table, or any other suitable surface to showcase your favorite items, such as candles, small potted plants, or kitchen essentials.
Remember to periodically check the stability of the tiered tray and make any necessary adjustments to ensure it remains secure. With proper care, your tiered tray will be a stylish and functional addition to your home decor, adding charm and organization to your space.