
Materials Needed
Before you begin making your own string lights, make sure you have the following materials on hand:
- String Lights: Choose a string light set that fits your desired length and style. Opt for LED lights as they are energy-efficient and have a longer lifespan.
- Extension Cord: To ensure that your string lights can reach a power source, have an extension cord that matches the length of your lights.
- Outdoor Hooks or Clips: If you plan to hang the lights outdoors, gather some outdoor hooks or clips to securely attach the string lights to your desired location.
- Zip Ties or Twist Ties: These handy ties will come in handy when securing the lights in place, especially if you’re attaching them to a surface.
- Tape Measure: To accurately measure the distance and length needed for your string lights, have a tape measure ready.
- Ladder or Step Stool: Depending on the height at which you plan to hang the lights, have a ladder or step stool to safely reach those areas.
- Electrical Tape: Use electrical tape to secure any exposed wires or connections to ensure safety and prevent accidents.
- Decorative Accessories: Optionally, gather some decorative accessories like lanterns, paper lanterns, or lampshades to add a unique touch to your string lights.
Having these materials ready will ensure a smooth and successful process when making your own string lights. Once you have gathered everything, you’re ready to move on to the next step!
Step 1: Gather Supplies
Before you begin creating your string lights, it’s important to gather all the necessary supplies. This will ensure a smooth and efficient process. Follow these steps to gather your supplies:
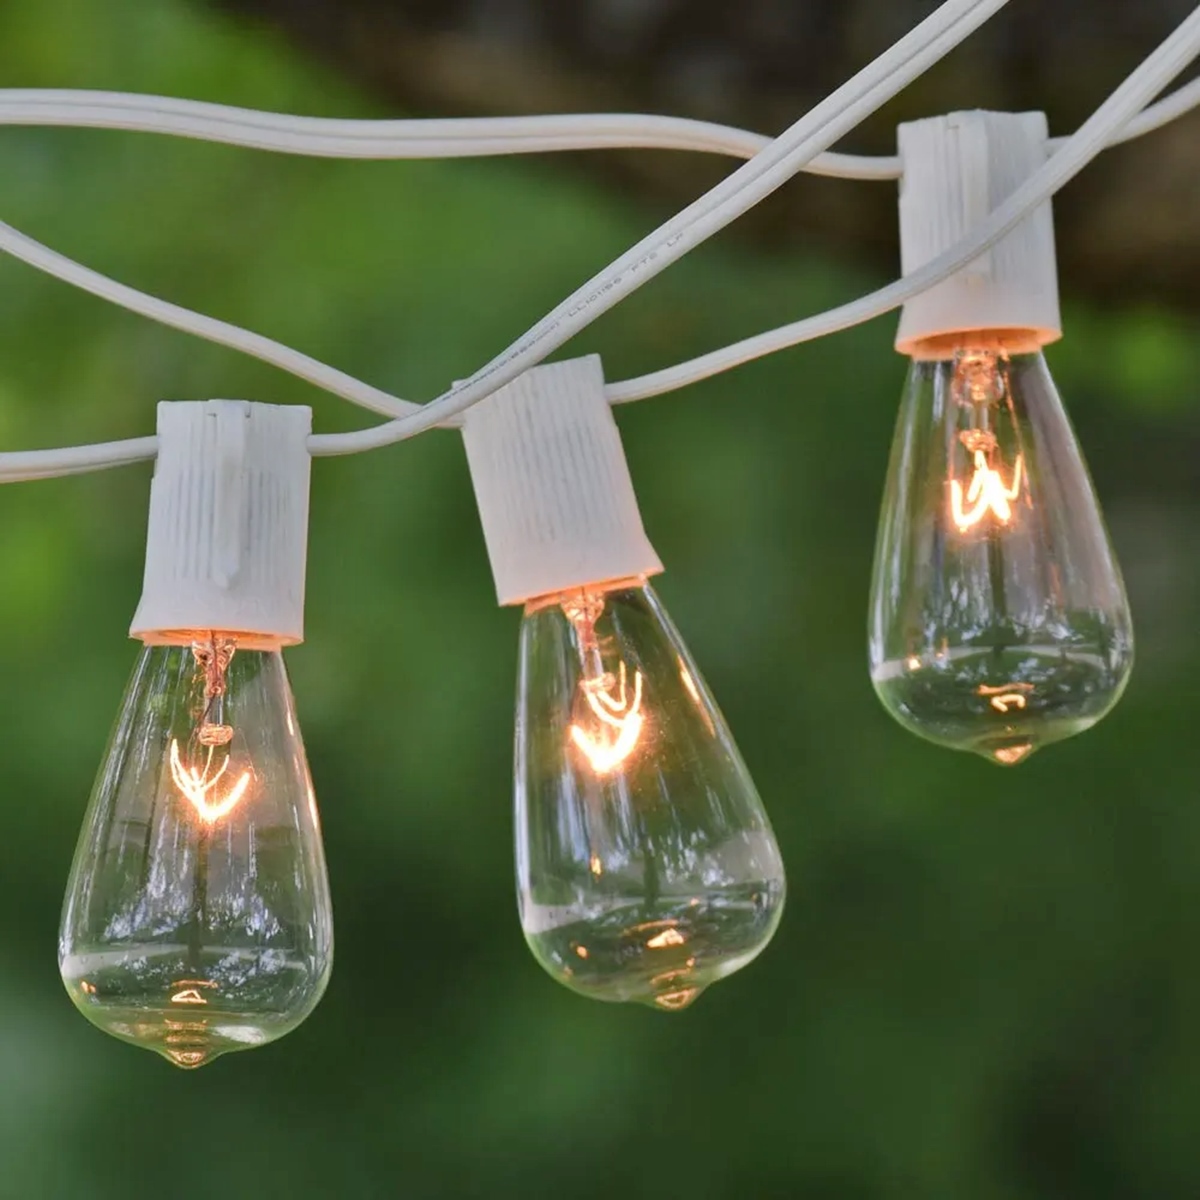
- Choose the Type of String Lights: Decide on the type of string lights you want to create. There are various options available, including globe lights, fairy lights, or Edison bulbs. Consider the ambiance you want to create and select the appropriate style.
- Determine the Length: Measure the area where you plan to hang the string lights. This will help you determine the length of the string lights you need. Consider whether you prefer a shorter string for a concentrated area or a longer string for a more expansive look.
- Ensure Adequate Power Supply: Check the power source availability in the chosen location. If needed, consider using an extension cord to reach a power outlet.
- Choose Hanging Method: Decide how you want to hang the string lights. This could be using hooks, clips, or attaching them to a structure like a pergola or fence. Ensure that your chosen method is suitable for the location and can support the weight of the lights.
- Check Safety Measures: Ensure that your chosen location is safe for string lights. Avoid placing them near flammable materials or in areas exposed to rain or extreme weather conditions. Safety should always be a priority.
- Gather Additional Decorative Accessories: If desired, gather any additional decorative accessories such as lanterns, paper lanterns, or lampshades that you may want to incorporate into your string lights to add a personalized touch.
By gathering all the necessary supplies, you’ll be well-prepared to continue with the next steps of creating your own string lights. With everything ready, you’re one step closer to enjoying the warm and inviting ambiance they will bring to your space.
Step 2: Prepare the Lights
Once you have gathered all the necessary supplies, it’s time to prepare the lights for installation. Follow these steps to properly prepare your string lights:
- Inspect the Lights: Before getting started, carefully inspect the string lights for any signs of damage or loose connections. Replace any damaged bulbs or wires to ensure safe and optimal performance.
- Untangle the Lights: Gently unravel the string lights and take your time to avoid any tangling. This will make it easier to work with and prevent any frustration during the installation process.
- Test the Lights: Plug in the lights and test them to ensure they are in working condition. This step allows you to identify any faulty bulbs that may need to be replaced before installation.
- Consider Customizing: If you want to add a unique touch to your string lights, consider customizing them by adding decorative elements or colored bulb covers. These small details can enhance the overall aesthetic appeal.
- Measure and Cut: Measure the distance between the power source and the desired location for your string lights. If necessary, use scissors or wire cutters to trim the lights to the desired length, keeping in mind that some string lights may have designated cut points.
By properly preparing your string lights, you’ll ensure that they are in good condition and ready for installation. Take the time to untangle and test them to avoid any complications during the installation process. With the lights prepared, you’re ready to move on to the next step of attaching them to the string.
Step 3: Attach the Lights to the String
Now that your lights are prepared, it’s time to attach them to the string. Follow these steps to securely attach the lights:
- Identify Attachment Points: Determine the locations on the string where you want to attach the lights. This can be done by evenly spreading them out or clustering them together, depending on the desired look.
- Use Hooks or Clips: If you’re hanging the lights indoors, consider using adhesive hooks or clips to attach the lights to the string. Make sure these hooks or clips are strong enough to hold the weight of the lights and won’t damage the string.
- Secure with Zip Ties or Twist Ties: For outdoor installations or if you prefer a more secure attachment, use zip ties or twist ties to fasten the lights to the string. Wrap the tie around the wire and tighten it snugly, ensuring that it is secure but not too tight to avoid damaging the wires.
- Maintain Even Spacing: As you attach the lights, pay attention to achieving an even spacing between each bulb. This will help create a balanced and visually appealing display.
- Check Alignment: Throughout the attachment process, step back and check the alignment of the lights. Make any necessary adjustments to ensure they are straight and hanging at your desired height.
By carefully attaching the lights to the string, you’ll create a neat and organized display. Whether you’re using hooks, clips, or zip ties, ensure that the attachments are secure and evenly spaced. With the lights successfully attached, you’re ready to move on to the next step of ensuring safety measures.
Step 4: Ensure Safety Measures
Safety should always be a top priority when installing string lights. Follow these safety measures to ensure a secure and hazard-free setup:
- Check Outlet Capacity: Before plugging in your string lights, ensure that the power outlet can handle the electrical load. Avoid overloading the circuit by connecting too many lights or appliances to the same outlet.
- Use Outdoor-Rated Lights (if applicable): If you’re installing string lights outdoors, make sure they are rated for outdoor use. Outdoor-rated lights are designed to withstand the elements and have additional protective features.
- Protect Exposed Wiring: Inspect the wiring connections to ensure they are not exposed or damaged. Use electrical tape to cover any exposed areas or secure loose connections to prevent potential electrical hazards.
- Avoid Overheating: Be cautious of lights that may generate excessive heat. Ensure that the lights have proper ventilation and are not in contact with flammable materials or surfaces.
- Keep Lights Away from Water: If using string lights outdoors, ensure they are kept away from water sources and not exposed to rain or moisture. Make use of waterproof connectors and extension cords to prevent any electrical mishaps.
- Regular Inspections: Periodically inspect your string lights for signs of wear and tear. Replace any damaged or broken bulbs immediately to maintain a safe and functional setup.
- Follow Manufacturer’s Instructions: Always refer to the manufacturer’s instructions for specific safety guidelines and recommendations for the string lights you are using.
By taking these safety measures, you can enjoy your string lights with peace of mind. Prioritizing safety ensures that your installation is not only visually appealing but also free from potential hazards. With safety measures in place, you’re ready to move on to the next step of hanging the string lights.
Step 5: Hang the String Lights
With the lights prepared and safety measures in place, it’s time to hang the string lights. Follow these steps for a successful hanging process:
- Plan the Layout: Take a moment to visualize and plan how you want the string lights to be hung. Consider the desired shape, height, and pattern that will best complement your space.
- Attach the String to Supports: If you’re hanging the lights outdoors, secure the string to sturdy supports such as trees, fence posts, or pergolas. Use hooks, nails, or any appropriate fasteners to ensure a secure attachment.
- Use Guiding Lines: To maintain a straight and even hanging line, consider using guiding lines such as a taut string or laser level. This will help you ensure that the lights are aligned correctly.
- Be Mindful of Spacing: Maintain a consistent spacing between each attachment point to create a balanced and visually pleasing arrangement. Adjust the positioning of the lights as needed to achieve the desired effect.
- Consider Height: Determine the height at which you want to hang the lights. Whether you prefer them closer to the ground or elevated, make sure they are hung securely and at a height that suits your space.
- Test the Placement: Before permanently securing the lights, plug them in and step back to assess the placement. Make any necessary adjustments to the positioning to ensure the desired lighting effect.
By following these steps, you’ll be able to hang your string lights with precision and create an enchanting atmosphere in your space. Take your time to ensure the lights are properly hung and aligned according to your vision. With the lights securely in place, you’re ready to move on to the next step of connecting them to a power source.
Step 6: Connect to Power Source
With the string lights hung in place, it’s time to connect them to a power source. Follow these steps to ensure a proper and safe connection:
- Locate the Nearest Power Outlet: Identify the nearest power outlet to your string lights. Ensure that it is easily accessible and in close proximity to avoid the need for long extension cords.
- Choose the Right Extension Cord: If the power outlet is not within reach, select an appropriate extension cord that matches the length needed to reach the lights. Ensure that the extension cord is rated for outdoor use if applicable.
- Connect the Extension Cord: Plug one end of the extension cord into the power outlet and the other end into the designated input connection on your string lights. Ensure a secure connection to avoid any power interruptions or accidents.
- Hide and Secure the Cords: To create a neater and safer display, consider hiding and securing the cords. Use cord clips, hooks, or cable management solutions to keep the cords out of sight and prevent trip hazards.
- Consider Timer or Remote Options: To conveniently control the string lights’ operation, consider using a timer or remote control. This allows you to set automatic on/off schedules or adjust the lighting settings without manually unplugging them.
- Test the Connection: Before finalizing the installation, test the connection to ensure that the lights are receiving power properly. Ensure that the lights illuminate and that there are no issues with the electrical connection.
By carefully connecting your string lights to a power source, you’ll be able to enjoy their warm glow and ambiance. Take the necessary precautions to ensure a secure and well-hidden electrical connection. With the lights connected, you’re ready to move on to the next step of testing and adjusting the lighting.
Step 7: Test and Adjust the Lighting
After connecting your string lights to the power source, it’s crucial to test and adjust the lighting to achieve the desired ambiance. Follow these steps to ensure that your lighting setup is perfect:
- Turn on the Lights: Switch on the power to illuminate the string lights and observe their overall effect.
- Assess the Lighting Level: Determine if the lighting level is too bright or too dim for your preferences and the atmosphere you want to create.
- Adjust the Positioning: If you find areas that are unevenly lit or too concentrated, make necessary adjustments by repositioning the lights or changing the spacing between bulbs.
- Add or Remove Bulbs: Depending on your desired lighting effect, consider adding or removing bulbs to achieve the ideal brightness and distribution of light.
- Experiment with Dimmers: If your string lights support dimming, consider using a dimmer switch or compatible smart device for more control over the brightness levels.
- Add Additional Lighting Elements: If you feel the need for more illumination in certain areas, supplement your string lights with other lighting elements such as lanterns or spotlights.
- Observe the Overall Ambiance: Step back and observe how the string lights contribute to the overall ambiance of the space. Make any further adjustments as needed to achieve the desired effect.
By testing and adjusting the lighting, you can create the perfect atmosphere that suits your preferences. Take the time to experiment and fine-tune the positioning, brightness, and overall distribution of light. With the lighting adjusted to perfection, you’re almost ready to enjoy your beautifully lit space.
Step 8: Optional: Add Decorative Touches
To elevate the visual appeal and personalize your string lights, you can incorporate additional decorative elements. Follow these optional steps to add a unique and charming touch to your lighting setup:
- Hang Decorative Lanterns: Attach decorative lanterns or mini lantern string lights along with your main string lights to create a whimsical and enchanting atmosphere.
- Add Paper Lanterns: Hang colorful paper lanterns to add a festive and vibrant touch to your string lights. Opt for different sizes and shapes to create visual interest.
- Wrap Lights around Trees or Structures: Wind the string lights around trees, pergolas, or other outdoor structures to create a magical and cozy ambiance.
- Attach Lampshades: For a creative twist, consider attaching lampshades or lamp covers to your string lights. This adds a unique and sophisticated touch to the overall lighting arrangement.
- Add Faux Greenery or Flowers: Integrate artificial greenery, vines, or floral accents along with the string lights to create an inviting and natural look. This works particularly well for outdoor settings.
- Hang Photos or Polaroids: Clip photos, polaroids, or small artwork to the string lights using mini clothespins. This adds a personal and sentimental touch to your lighting display.
- Use Fabric or Tulle: Drape sheer fabric or tulle between the string lights to create a dreamy and romantic ambience. This can be especially effective for weddings or special events.
By adding these decorative touches, you can transform your string lights into a stunning and personalized lighting installation. Get creative and experiment with different elements that reflect your style and enhance the overall ambiance. With the decorative touches in place, you’re ready to move on to the next step of implementing some helpful tips and tricks.
Step 9: Tips and Tricks
Here are some helpful tips and tricks to ensure a successful string light installation:
- Measure Twice, Hang Once: Take accurate measurements and carefully plan the placement of your string lights before hanging them to avoid unnecessary adjustments or re-installation.
- Use Outdoor or Waterproof Lights: If you plan to install string lights outdoors or in areas exposed to moisture, make sure to choose lights that are specifically designed for outdoor use or have waterproof features.
- Consider Different Lighting Effects: Experiment with different types of bulbs or colored filters to achieve various lighting effects, such as warm white for a cozy ambiance or colored bulbs for a festive atmosphere.
- Ensure Proper Support: Make sure that the chosen attachment points or support structures can handle the weight of the string lights. Reinforce or adjust as necessary to avoid any safety concerns.
- Secure Loose Cords: Use electrical tape or cable clips to secure any loose cords or wires to prevent accidents or tripping hazards.
- Be Mindful of Draping: When draping string lights, avoid tightly pulling or stretching them. Allow some natural sagging or drooping between attachment points for a relaxed and natural look.
- Keep a Spare Bulb Set: It’s always a good idea to have spare bulbs on hand in case any burn out or break. This ensures that you can quickly replace them and maintain the overall aesthetic of your string lights.
- Consider Energy Efficiency: Choose LED string lights, as they are energy-efficient and can help reduce energy consumption compared to traditional incandescent bulbs.
- Check Local Regulations: Familiarize yourself with any local regulations or guidelines regarding outdoor lighting installations to ensure compliance and avoid any potential issues.
- Regular Maintenance: Periodically inspect and clean your string lights to ensure they are in good working condition and maintain their visual appeal. Replace any damaged bulbs or components promptly.
By following these tips and tricks, you can enhance the installation process, optimize the functionality of your string lights, and maintain their longevity. Take advantage of these useful insights to ensure a stunning and hassle-free lighting display.
Step 10: Enjoy Your Ambiance
After all the hard work and careful installation, it’s time to sit back, relax, and enjoy the beautiful ambiance created by your string lights. Here are some suggestions to make the most of your lighting setup:
- Create a Cozy Outdoor Space: Arrange outdoor furniture, cushions, and blankets around the string lights to create a cozy and inviting outdoor seating area.
- Plan Memorable Gatherings: Host gatherings with family and friends to share the warm and inviting atmosphere created by your string lights. Whether it’s a barbecue, a garden party, or a romantic dinner, the ambiance will be sure to impress.
- Implement Theme Nights: Enhance the atmosphere by incorporating themed nights such as a movie night under the stars, a romantic dinner for two, or a festive celebration.
- Capture the Moment: Take advantage of the beautiful lighting to capture memorable photos and create lasting memories. The string lights will provide a magical backdrop for your photographs.
- Enjoy Evening Reading or Relaxation: Create a cozy nook with a comfortable chair or hammock under the string lights. Use the soft glow to unwind with a good book or simply enjoy the peaceful atmosphere.
- Extend the Season: String lights can bring warmth and charm to your outdoor space during cooler months as well. Bundle up and enjoy the twinkling lights, extending the usability of your outdoor area.
- Adjust the Lighting for Different Moods: Take advantage of dimmers or other lighting controls to customize the ambiance based on the occasion or your mood. Create a soothing and romantic atmosphere or a lively and vibrant setting.
- Appreciate Year-Round Beauty: String lights can be enjoyed year-round. Whether it’s during holidays, special occasions, or everyday moments, the enchanting glow can add beauty and charm to any setting.
By embracing and enjoying the ambiance created by your string lights, you enhance the overall experience of your living space. Take pleasure in the warm, inviting glow and the magical atmosphere that your carefully installed string lights bring. Let the ripple effect of their beauty extend towards creating memorable moments and cherished memories.