
Choosing the Right Materials
When it comes to creating a beautiful macrame lamp shade, choosing the right materials is essential. The materials you select will not only determine the durability and strength of the lamp shade, but also contribute to its overall aesthetic appeal. Here are some factors to consider when choosing the materials for your macrame lamp shade:
- Cord: The most common material used for macrame projects is cotton cord. It is durable, easy to work with, and has a natural look and feel. You can also opt for other materials like jute or hemp for a more rustic or bohemian look.
- Thickness: The thickness of the cord will depend on the size and design of your lamp shade. Thicker cords create a more substantial and intricate macrame pattern, while thinner cords give a delicate and airy feel. Experiment with different thicknesses to find the right one for your project.
- Color: Consider the color scheme of your room when selecting the cord color. You can choose a neutral color that blends seamlessly with your decor or go for a bold and vibrant hue to make a statement. Play around with different color combinations to create a visually appealing lamp shade.
- Lamp Frame: The lamp frame is the foundation of your macrame lamp shade. Choose a frame that complements the style and size of your shade. You can opt for a wire frame, wooden hoop, or even repurpose an old lampshade frame. Ensure that the frame is sturdy enough to support the weight of the macrame.
When it comes to macrame lamp shades, there are no hard and fast rules. Don’t be afraid to experiment with different materials, colors, and textures to create a shade that reflects your style and personality. Remember to keep the functionality and safety aspects in mind when selecting materials for your project. By choosing the right materials, you can set the foundation for a stunning macrame lamp shade that will become a focal point in any room.
Measuring and Cutting the Cords
Before you start creating your macrame lamp shade, it’s important to measure and cut the cords accurately. This step is crucial to ensure that the cords are the appropriate length for your desired design and fit well on the lamp frame. Here’s how you can go about measuring and cutting the cords:
- Measure the Lamp Frame: Start by measuring the circumference of the lamp frame where you will be attaching the macrame. This will give you the total length of the cords needed for your project.
- Account for the Knots: Keep in mind that the knots and patterns you will be creating will use up some of the cord length. Depending on the complexity of your design, you may need to factor in an additional length when cutting the cords. It’s always better to have extra cord than to run out in the middle of the project.
- Cut the Cords: Once you have determined the length needed, use sharp scissors or a craft knife to cut the cords to size. Make sure to cut them all at once to ensure consistency in length.
- Label the Cords: To avoid confusion later on, label each cord with a small piece of masking tape or a marker to indicate its intended position in the macrame pattern. This will make it easier to keep track of the cords as you work.
Accuracy is key when measuring and cutting the cords for your macrame lamp shade. Double-check your measurements and take your time to ensure that each cord is cut to the correct length. Remember that it’s always better to have slightly longer cords that can be trimmed later, rather than cords that are too short to work with. Once you have your cords measured and cut, you’re ready to move on to the next step – creating the macrame knots.
Creating the Macrame Knots
Now that you have your cords measured and cut, it’s time to start creating the macrame knots for your lamp shade. Macrame offers a variety of knotting techniques that can be used to achieve different patterns and textures. Here are a few common macrame knots to get you started:
- Square Knot: The square knot is one of the basic knots used in macrame. It creates a symmetrical pattern and is perfect for creating a solid base for your lamp shade. To make a square knot, cross the left cord over the right cord, then bring the right cord over the left and through the loop created. Repeat this process in reverse order to create a square knot.
- Half Square Knot: The half square knot is created by tying two consecutive half knots. It produces a diagonal pattern and adds depth to your macrame design. To make a half square knot, take the left cord and cross it over the right. Then, bring the left cord under the right and through the loop. Repeat this process in reverse order to complete the half square knot.
- Double Half Hitch: The double half hitch knot is used to create vertical and diagonal lines in your macrame design. To make a double half hitch, take one cord and loop it around the other cord, creating a half hitch. Repeat the process with the same cord, creating a second half hitch. This will secure the cord in place and create the double half hitch knot.
As you work on your macrame lamp shade, feel free to explore different knot combinations and experiment with texture and pattern. Don’t be afraid to incorporate your own unique ideas and make the design your own. Remember to maintain a consistent tension throughout your knots to ensure an even and professional-looking outcome.
It’s important to note that macrame can be time-consuming, so be patient and enjoy the process. Take breaks as needed to rest your hands and avoid strain. As you progress, your macrame lamp shade will start to take shape and showcase the intricate beauty of the knots you have created.
Adding Beads or Embellishments
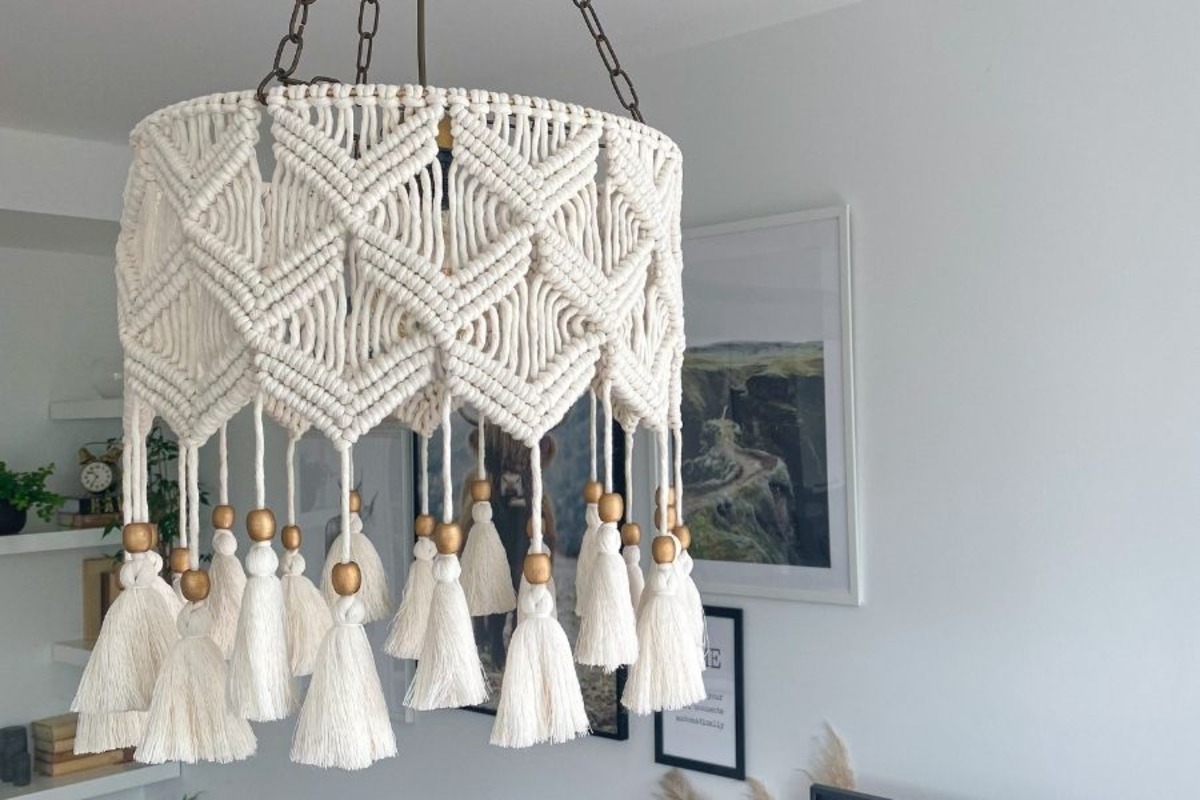
Adding beads or other embellishments can take your macrame lamp shade to the next level, giving it a unique and personalized touch. Beads can add texture, color, and visual interest to your design. Here are some tips for incorporating beads or embellishments into your macrame lamp shade:
- Select the right beads: Choose beads that complement the style and aesthetic of your lamp shade. You can opt for wooden beads for a natural look, glass beads for a touch of elegance, or colorful beads to make a statement. Consider the size, shape, and color of the beads and how they will enhance the overall design.
- Plan your bead placement: Before you start adding beads, plan where you want them to go on your macrame lamp shade. You can create patterns or randomly scatter them for a more eclectic look. Use a tapestry needle to thread the beads onto the cords and secure them in place by knotting the cord above and below each bead.
- Experiment with different techniques: Explore different macrame techniques that incorporate beads, such as the “lark’s head knot” or “bead weaving.” These techniques allow you to attach beads at various points in your design or weave them directly into the macrame knots. Play around with different placements and techniques to achieve your desired look.
- Consider other embellishments: Beads are not the only embellishments you can add to your macrame lamp shade. You can also incorporate feathers, tassels, shells, or fabric strips for additional texture and visual interest. These elements can be attached using the same techniques as beads, adding depth and personality to your design.
Adding beads or embellishments to your macrame lamp shade is an opportunity to showcase your creativity and style. Remember to not overdo it and balance the use of beads and other embellishments with the overall design of your lamp shade. Allow yourself to experiment, try different combinations and placements, and trust your instincts to create a stunning and unique macrame piece.
Attaching the Macrame to the Lamp Frame
With the macrame knots and embellishments in place, it’s time to attach the macrame to the lamp frame. This step is crucial in securing the macrame design and ensuring that it is properly supported. Here’s how you can attach the macrame to the lamp frame:
- Prepare the lamp frame: If you’re using a wire frame, make sure it is clean and free from any dust or debris. If you’re repurposing an old lampshade frame, remove the fabric or covering before attaching the macrame.
- Position the macrame: Place the macrame over the lamp frame, ensuring that it covers the entire frame evenly. Adjust and align the macrame so that it hangs straight and has a balanced appearance.
- Secure the macrame: Use small, clear zip ties or strong thread to secure the cords of the macrame to the lamp frame. Start at one point and gradually work your way around the frame, tying the cords securely. Trim any excess cords once they are secured.
- Check the stability: Once the macrame is attached to the lamp frame, gently shake the lamp shade to check for any loose cords or instability. Make any necessary adjustments or additional knots to ensure that the macrame is firmly in place.
It’s important to ensure that the macrame is securely attached to the lamp frame for both aesthetic and safety reasons. A properly attached macrame lamp shade will not only look visually appealing but will also provide stability and support. Take your time during this step to ensure that the macrame is centered, straight, and well-secured to the frame.
Once the macrame is securely attached, you can admire your handiwork and prepare to install the lampshade onto your lamp base. The attachment method will depend on the type of lamp base you have, so follow the manufacturer’s instructions or consult a professional if needed.
Finishing Touches and Cleaning Up
Now that you have successfully attached the macrame to the lamp frame, it’s time to add the finishing touches to your macrame lamp shade and tidy up any loose ends. Paying attention to these final details will ensure a polished and professional-looking result. Here’s what you can do to add those finishing touches:
- Trim excess cords: Carefully trim any excess cord that is sticking out or hanging below the macrame knots. Use sharp scissors to achieve clean and neat cuts. Be cautious not to cut the cords too short, as it can compromise the overall integrity of the macrame design.
- Hide knots and fasteners: If you used zip ties or other fasteners to secure the macrame to the lamp frame, consider hiding them. Use matching colored cords or decorative elements to cover the fasteners, creating a seamless and cohesive look.
- Inspect for loose threads: Take a close look at the macrame knots and overall structure. If you notice any loose threads or weak areas, reinforce them with additional knots or secure them with a small dab of fabric glue for extra durability.
- Clean and polish: Ensure that your macrame lamp shade looks its best by cleaning it gently. Use a soft cloth or a duster to remove any dust or debris. If there are any stains or spots, you can spot clean the macrame using a mild detergent or a fabric cleaner. Blot the stain gently with a soft cloth and let it air dry.
By giving attention to these finishing touches, you can elevate the overall appearance of your macrame lamp shade and ensure its longevity. Taking the time to clean and maintain your macrame lamp shade regularly will help preserve its beauty and quality for years to come.
Once you have completed the finishing touches and cleaning up, you can proudly display your macrame lamp shade. Install it on your lamp base and enjoy the warm and inviting ambiance it creates in your space. Your macrame lamp shade is not only a functional lighting accessory, but also a stunning piece of art that reflects your creativity and personal style.