
Materials Needed for Food Can Storage Rack
Building a food can storage rack requires a few essential materials to ensure stability and durability. Before you begin, gather the following supplies:
1. Wood: Choose a sturdy and thick plywood or solid wood for the frame and shelves. The dimensions will depend on the size of your desired rack.
2. Measuring Tape: Accurate measurements are crucial for a well-fitting and functional storage rack.
3. Saw: A circular saw or a miter saw will be needed to cut the wood precisely to the desired dimensions.
4. Sandpaper: Use different grits of sandpaper to smoothen the edges and surfaces of the wood, ensuring a splinter-free finish.
5. Wood Glue: Opt for a strong wood adhesive to join the various parts of the rack securely.
6. Screws: Select screws that are appropriate for the thickness of the wood to ensure a secure and stable structure.
7. Screwdriver or Drill: Depending on your preference, use a screwdriver or a drill to insert the screws into the wood.
8. Paint or Stain: Decide whether you want to paint the rack in a color that complements your kitchen or stain it to showcase the natural beauty of the wood.
9. Paintbrushes or Rags: For painting or staining, gather the necessary tools to apply the finish evenly.
10. Level: Use a level to ensure that the rack is properly aligned and straight when installed.
Remember to wear appropriate safety gear, such as goggles and gloves, and have a clean and well-lit workspace to complete the project safely.
With these materials in hand, you’ll be one step closer to creating an efficient and organized food can storage rack for your kitchen.
Step 1: Measuring and Planning
The first step in building a food can storage rack is to measure the available space in your pantry or kitchen where the rack will be installed. Carefully note the height, width, and depth of the area to ensure that the rack fits perfectly.
Consider the size and quantity of cans you intend to store. This will help you determine the number of shelves needed and their spacing. Measure the height and diameter of the cans to calculate the distance between each shelf.
Once you have accurate measurements, it’s time to plan the design of your rack. Decide on the number of shelves, their heights, and the overall size of the rack. Sketch out a rough plan or create a digital representation using software or online tools to visualize the final result.
Keep in mind any additional features you may want, such as a slanted design for easy access or adjustable shelves to accommodate different-sized cans. Take into consideration any obstructions, such as pipes or power outlets, that may affect the placement of the rack.
During the planning phase, consider the weight-bearing capacity of the rack. Ensure that the chosen materials and design can support the weight of the cans without sagging or collapsing. This is particularly important if you plan to store a large number of cans or heavier items.
Double-check your measurements and design before proceeding to the next step. It’s better to catch any potential errors or adjustments now to avoid wasted time and resources later.
By taking the time to accurately measure and meticulously plan, you’ll have a solid foundation for constructing your food can storage rack. This preparation will help ensure a successful and functional end result that fits perfectly in your kitchen.
Step 2: Cutting the Wood
With your measurements and design plan in hand, it’s time to move on to the next step: cutting the wood for your food can storage rack.
Using a circular saw or miter saw, carefully cut the wood according to the dimensions specified in your design. Be sure to follow the measurements precisely to ensure that all pieces fit together seamlessly.
For the frame of the rack, cut the longer pieces that will serve as the vertical supports or sides, as well as the shorter pieces that will function as the horizontal supports or top and bottom. Cut additional pieces for any internal bracing or reinforcements, if necessary.
Next, cut the shelves according to the predetermined measurements. Take your time to ensure accurate cuts, using a straight edge or a measuring guide if needed. Remember to account for the thickness of the wood when determining the final dimensions of each shelf.
While cutting the wood, pay attention to safety precautions. Wear protective goggles to shield your eyes from any flying debris, and use clamps to secure the wood firmly in place before cutting. Maintain a steady hand and a slow, controlled cutting speed to achieve clean and precise cuts.
As you finish cutting each piece, label them accordingly to avoid confusion during the assembly process. It’s helpful to use a pencil or marker to mark the top and bottom of each piece and indicate any intricate angles or notches that may be required.
Once all the wood pieces are cut, take a moment to inspect them for any imperfections or rough edges. Use sandpaper to smooth the surfaces and edges, removing any splinters or rough spots. This will not only enhance the aesthetic appeal but also ensure the safety of handling the wood.
By carefully cutting the wood according to your measurements and design, you’ll have the necessary components ready for the next step of assembling the frame of your food can storage rack.
Step 3: Sanding the Wood
After cutting the wood for your food can storage rack, it’s essential to take the time to sand the surfaces and edges. Sanding not only smoothens the wood but also ensures a professional and polished finish.
Begin by selecting the appropriate grit of sandpaper. A medium-grit sandpaper, typically around 120 to 150 grit, is ideal for removing any roughness or imperfections from the wood surfaces. You can always start with a coarser grit if needed and gradually transition to a finer grit for a smoother finish.
Using a sanding block or sanding sponge, apply even pressure and gently sand the visible surfaces of the wood. Work in the direction of the wood grain to avoid causing unnecessary scratches. Pay extra attention to the cut edges, as they tend to be rougher and will require additional sanding.
As you sand, periodically check the smoothness and feel of the wood with your fingertips. Sand until the wood feels consistently smooth to the touch, free from any noticeable bumps or roughness. Be thorough but cautious, ensuring that you don’t over-sand and accidentally remove too much material.
After sanding the surfaces, focus on the edges of the wood. Use a sanding block or wrap sandpaper around a small piece of wood to sand the edges evenly. Smooth out any splinters or sharp corners to create a safe and visually appealing result.
Once you have completed the sanding process, wipe down the wood with a clean cloth or tack cloth to remove any residual dust. This step is crucial before moving on to the next step, as it ensures a clean surface for painting or staining.
If desired, you can further refine the smoothness of the wood by using a finer grit sandpaper and repeating the sanding process. This step is particularly beneficial if you are planning to stain the wood, as it creates a beautifully smooth and consistent surface for the stain to penetrate.
Sanding the wood not only improves its appearance but also minimizes the risk of splinters and enhances the overall durability of your food can storage rack. By investing time in this crucial step, you’ll achieve a professional-looking result that you can take pride in.
Step 4: Assembling the Frame
With the wood cut and sanded, it’s time to move on to assembling the frame of your food can storage rack. This step is where all the individual pieces come together to form a sturdy and functional structure.
Start by laying out the vertical and horizontal pieces according to your design plan. Begin with one side of the frame, placing the vertical supports upright and attaching the horizontal supports to create a rectangular shape. Use wood glue or screws to secure the joints, ensuring they are tight and secure. Repeat this process for the other side of the frame.
Once both sides of the frame are assembled, connect them by attaching the top and bottom horizontal supports. Double-check the alignment and use a level to ensure that the frame is square and perfectly upright. Secure all the joints with wood glue and screws, tightening them to create a stable structure.
At this stage, it may be helpful to have an extra set of hands for assistance, particularly if the frame is large or heavy. Working together, carefully position the sides of the frame and attach the top and bottom supports, ensuring they align perfectly.
If needed, add internal bracing or reinforcements to increase the strength and stability of the frame. This can be done by attaching additional pieces of wood diagonally or horizontally within the frame, depending on your design and preference. Secure these reinforcements with wood glue and screws for added support.
Throughout the assembly process, regularly check the squareness and alignment of the frame. Adjust as necessary to ensure a level and balanced structure. Using clamps to hold the pieces together temporarily can be helpful in achieving precise alignment before permanently attaching them.
Once the frame is fully assembled, inspect each joint and connection to ensure they are secure and tight. Make any necessary adjustments and tighten the screws or reinforce with additional wood glue if needed.
Take a moment to step back and admire your progress. The frame is the foundation of your food can storage rack, and with it successfully assembled, you are well on your way to creating a functional and attractive storage solution for your cans.
Step 5: Attaching the Shelves
Once the frame of your food can storage rack is fully assembled, it’s time to move on to the next step: attaching the shelves. The shelves will provide the necessary storage space for your cans, keeping them organized and easily accessible.
Start by determining the height positioning for each shelf. Refer to your initial measurements and design plan to ensure that the spacing between shelves is appropriate for the size of your cans. Use a measuring tape to mark the desired distance between each shelf on both sides of the frame.
Next, apply wood glue or adhesive along the marked lines on each side of the frame where the shelves will be placed. Carefully position each shelf, aligning it with the marked lines. Press down firmly to ensure a strong bond between the shelf and the frame.
For additional reinforcement and stability, secure each shelf by using screws inserted from the outside of the frame through the sides and into the shelves. Place screws evenly on each side of the frame to hold the shelves securely in place.
Take care to ensure that the shelves are level and parallel to each other. Use a level to confirm their horizontal alignment. Adjust as necessary before tightening the screws fully.
If desired, you can add adjustable shelves by incorporating shelf pins or brackets that allow for flexibility in setting the height of each shelf. This is particularly useful if you plan to store cans of varying sizes or need to make adjustments in the future.
As you attach each shelf, double-check the stability and weight-bearing capacity of the rack. Give the shelves a gentle shake to ensure they are secure and won’t shift or collapse under the weight of the cans.
Repeat this process for all the shelves, ensuring each one is securely attached and properly aligned. Take your time and pay attention to detail, as the proper installation of the shelves is crucial for the functionality and overall success of your food can storage rack.
Once all the shelves are securely in place, step back and admire your progress. The rack is beginning to take shape, providing you with organized and accessible storage for your food cans.
Step 6: Installing the Rack
With the frame of your food can storage rack fully assembled and the shelves securely attached, it’s time to move on to the next step: installing the rack in your desired location.
Begin by selecting the ideal spot for the rack. Consider factors such as accessibility, convenience, and available space. Ensure that the area you choose allows for easy access to the cans and does not obstruct any other items or pathways in your kitchen.
Before installation, it’s important to double-check the stability of the rack. Give it a gentle shake and ensure that all joints and connections are tight and secure. If any adjustments or reinforcements are needed, make them at this stage to avoid any potential issues later.
Depending on the design and weight of your rack, there are several methods for installation. If the rack is relatively light and you want the flexibility to move or reposition it in the future, using wall brackets is a popular option. Measure and mark the location where you want to mount the rack, ensuring that it is level and aligned. Attach the brackets to the wall using appropriate screws or anchors, and then secure the rack to the brackets.
If you prefer a more permanent installation, directly affixing the rack to the wall or cabinet is another option. Measure and mark the precise location where each corner or side of the rack will be mounted. Use screws or anchors to secure the rack to the wall, ensuring that it is level and plumb.
Always use proper tools and hardware suitable for the weight and size of your rack. If you are unsure, consult with a professional or seek advice from a local hardware store to ensure a safe and secure installation.
Once the rack is installed, give it another gentle shake and check for any movement or instability. If everything feels solid and secure, you can begin to load it with your food cans.
Take a moment to step back and admire your completed installation. You now have a fully functional and stylish food can storage rack that will help keep your kitchen organized and efficient.
Step 7: Painting or Staining the Rack
Now that your food can storage rack is fully assembled and installed, it’s time to consider the aesthetics of the rack by painting or staining it to enhance its appearance and blend with your kitchen decor.
Before applying any paint or stain, take a moment to prepare the wood surface. Ensure it is clean and free from any dust or debris. Use a damp cloth to wipe down the entire rack, removing any dirt or residue. Allow the wood to dry completely before proceeding.
If you choose to paint the rack, select a high-quality paint that is suitable for wood surfaces. Consider using a paint color that complements your kitchen’s color scheme and style. Apply the paint with a brush or roller, making sure to cover all visible surfaces, including the inside of the frame and the top and bottom of each shelf. Let the paint dry completely between coats, following the manufacturer’s instructions.
Alternatively, if you prefer a more natural look, staining the wood can highlight its natural beauty while adding a protective layer. Choose a wood stain that matches your preference in color and opacity, whether it’s a transparent stain that allows the wood grain to show through or an opaque stain for a more solid color. Apply the stain with a brush or cloth, following the direction of the wood grain. Wipe off any excess stain and let it dry according to the manufacturer’s instructions. Apply additional coats if desired for a deeper color.
Both painting and staining methods provide protection for the wood against moisture and daily wear and tear. They also offer the opportunity to customize the rack to your personal taste and style.
Whichever method you choose, allow the paint or stain to cure fully before loading the rack with your food cans. This will prevent the cans from sticking to the freshly painted or stained surfaces and ensure a long-lasting finish.
By painting or staining the rack, you can give it a polished and cohesive look, making it a visually appealing addition to your kitchen space.
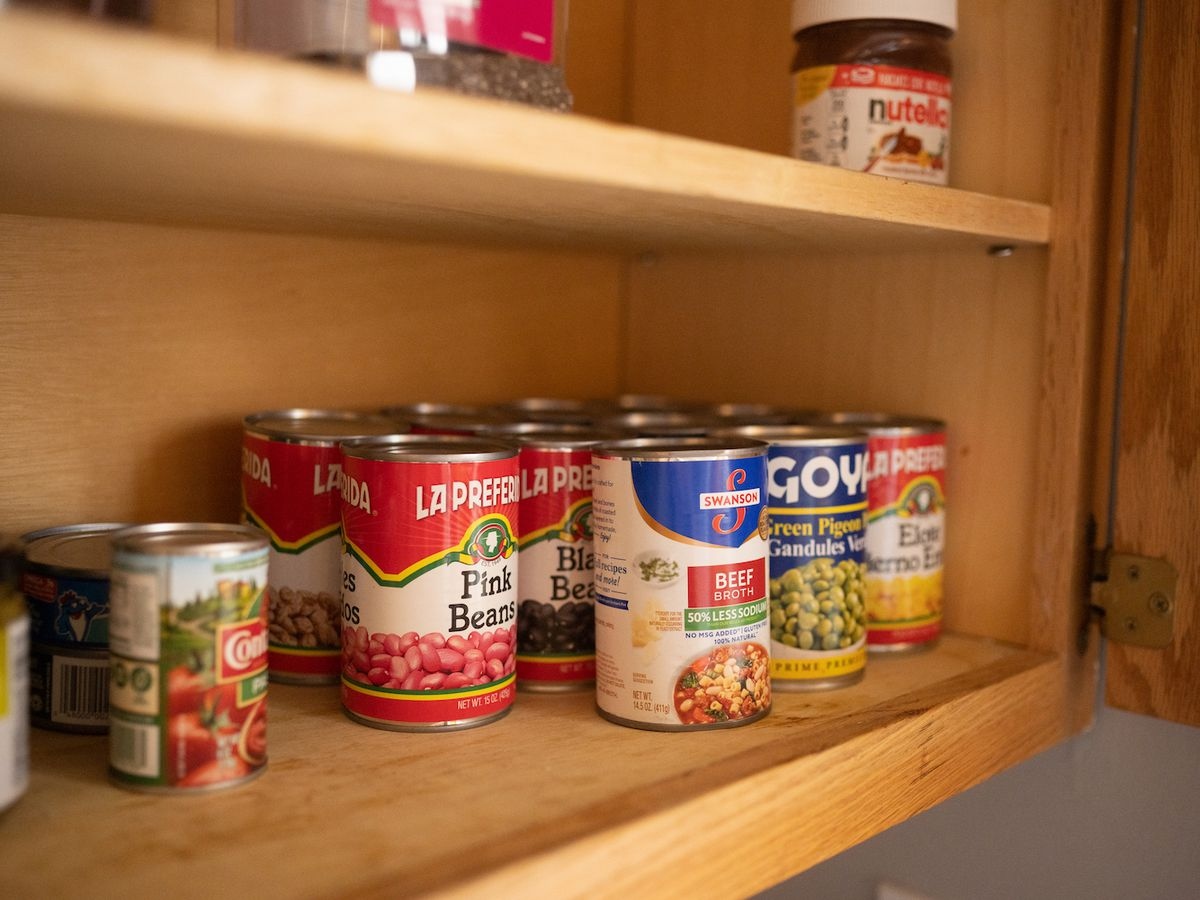
Step 8: Organizing the Cans
With your newly constructed and beautifully finished food can storage rack, it’s time to move on to the important step of organizing your cans. Proper organization will not only make it easier for you to find what you need but also maximize the storage capacity of your rack.
Start by categorizing your cans based on their contents or usage. You can group them by food type, such as vegetables, soups, or fruits, or organize them based on their expiration dates. Consider your cooking habits and preferences to determine the most efficient way to group your cans.
Once you have determined your categories, decide on the placement of each category on the shelves. Place the most frequently used or soon-to-expire items at the front for easy access. Optimize the available space by using smaller cans to fill gaps or stacking cans of the same height to maximize vertical storage.
Consider using labels or tags to identify the different categories on each shelf. This will make it easier to locate specific cans and maintain the organization over time. You can use adhesive labels, sticky notes, or even create your own decorative labels for a personalized touch.
As you organize the cans, it’s important to maintain a sense of order and cleanliness. Regularly check for any expired or damaged cans and remove them from the rack. Wipe down the shelves periodically to keep them clean and free from dust or spills.
Additionally, it may be helpful to create a system for rotating your cans to ensure that older items are used first and newer ones are placed at the back. This prevents cans from going past their expiration dates and helps keep your stock of food cans fresh and up to date.
Remember to periodically reassess and adjust your organization system as needed. As your inventory of cans changes or your cooking habits evolve, you may find it beneficial to rearrange and reorganize the cans to better suit your needs.
By taking the time to organize your cans effectively, you’ll save time and effort when searching for specific items, maintain the freshness of your food, and make the most of the storage space provided by your food can storage rack.
Step 9: Maintenance and Care Tips
To ensure that your food can storage rack remains in optimal condition and continues to serve as a functional and reliable storage solution, it’s important to follow proper maintenance and care practices. Here are some tips to keep in mind:
1. Regular Cleaning: Take the time to periodically clean your storage rack. Wipe down the surfaces, shelves, and frame with a damp cloth to remove any dust or spills. This will help maintain a clean and hygienic storage environment for your cans.
2. Avoid Overloading: While the rack is designed to hold a significant number of cans, it’s important not to overload it beyond its weight capacity. Distribute the weight evenly across the shelves and ensure that the frame remains stable. Overloading can lead to sagging or structural damage.
3. Inspect for Damage: Routinely inspect the rack for any signs of damage, such as loose screws, wobbly shelves, or worn-out parts. Repair or replace any damaged components as soon as possible to prevent further issues.
4. Maintain Proper Ventilation: Ensure that your food can storage rack is placed in an area with adequate ventilation. Good airflow helps prevent moisture buildup, which can lead to mold or mildew growth on the cans or the rack itself.
5. Keep Away from Heat Sources: Avoid placing the rack near direct heat sources, such as stovetops or ovens. Heat can potentially affect the stability and integrity of the wood, causing warping or discoloration.
6. Store Cans Properly: When placing cans on the storage rack, ensure they are properly sealed and not damaged. Avoid stacking heavy cans on top of delicate or lightweight ones, as this can cause dents or compromises in the cans’ integrity.
7. Regularly Rotate Stock: Periodically check the expiration dates on your cans and rotate the stock accordingly. Use older cans before newer ones to maintain a fresh and up-to-date inventory of food.
8. Reorganize as Needed: As your needs or inventory change, don’t be afraid to reorganize and adjust the placement of your cans. This will help maximize the space and efficiency of your food can storage rack.
By following these maintenance and care tips, you can extend the lifespan of your storage rack and ensure that it remains a reliable and functional solution for keeping your cans organized and easily accessible.
Step 10: Alternative Design Ideas
While the construction and installation of a traditional food can storage rack are covered in the previous steps, there are also alternative design ideas that you can explore to create a unique and personalized storage solution. Here are some alternative design ideas to consider:
1. Hanging Can Storage: Instead of a freestanding rack, you can optimize wall space by creating a hanging can storage system. Utilize hooks or pegs mounted on the wall to hang cans individually or in rows. This design allows for easy visibility and access to your cans while adding a decorative element to your kitchen walls.
2. Sliding Drawer System: Incorporating sliding drawers in your cabinet or pantry can provide a sleek and space-saving solution for organizing your food cans. Install heavy-duty drawer slides and custom-sized drawers to fit your cans. This design allows for easy access to cans from both sides and provides a neat and hidden storage solution.
3. Adjustable Can Shelves: Opt for adjustable shelves in your storage rack design. Incorporate shelf pins or brackets that allow for flexibility in setting the height of each shelf. This allows you to accommodate cans of varying sizes and adjust the spacing as needed.
4. Rolling Can Rack: If you have extra space in your kitchen or pantry, consider building a rolling can rack. Install casters or wheels at the bottom of the rack to allow for easy movement and accessibility. This design allows you to easily bring the cans to your prep area and provides flexibility for repositioning the rack when needed.
5. Repurposed Furniture: Get creative by repurposing old furniture pieces into unique can storage solutions. For example, you can convert an old bookshelf or a vintage cabinet into an attractive and functional can storage unit. Customize the shelves and compartments to accommodate your cans and give the piece a fresh new purpose.
6. Modular Can Storage: Consider using modular storage units that can be stacked or rearranged to fit your space and needs. This design allows for easy customization and expansion to adapt to your changing can storage requirements over time.
7. Magnetic Can Storage: Install magnetic strips or panels on the walls or inside cabinet doors to create a magnetic can storage system. Attach metal lids or cans directly to the surface, allowing for vertical storage and easy visibility of the cans.
These alternative design ideas offer creative approaches to organizing and storing your food cans. Whether you prefer a space-saving solution, a decorative element, or a repurposed furniture piece, there are various options to suit your style and functional needs.