
Materials Needed
Before you start assembling your 3-tiered tray, gather the following materials:
- Three wooden boards: You’ll need three boards of different sizes to create the tiers of your tray. Choose boards that are sturdy and have a smooth surface.
- Wood glue: This will be used to securely attach the boards together.
- Clamps: Clamps are essential for holding the boards in place while the glue dries. Make sure to have enough clamps to secure each tier.
- Sandpaper: Get sandpaper with various grits, such as rough, medium, and fine, to smoothen the rough edges and surfaces of the boards.
- Stain or paint: Decide whether you want to stain the wood to enhance its natural beauty or paint it to match your decor. Choose a stain or paint color that complements your style.
- Brushes: You’ll need brushes to apply the stain or paint onto the wooden boards. Consider using different sizes of brushes to cover large and small areas effectively.
- Screwdriver or drill: Depending on the type of screws you use, you’ll need either a screwdriver or a drill to attach the tiers together securely.
- Decorative items: Gather decorative items like ribbon, faux flowers, or tiny figurines to personalize your 3-tiered tray and add a charming touch.
Make sure you have all the materials before you begin the project. It’s helpful to have everything organized and easily accessible for a smooth and hassle-free assembly process.
Step 1: Gather Supplies
Before you start building your 3-tiered tray, it’s important to gather all the necessary supplies. By having everything ready, you can work efficiently and avoid interruptions during the assembly process. Here’s what you need to do:
- Refer to the list of materials needed: Take a look at the list of materials needed for this project. Ensure that you have all the items before proceeding. This includes the wooden boards, wood glue, clamps, sandpaper, stain or paint, brushes, screwdriver or drill, and decorative items.
- Check the condition of the materials: Inspect the wooden boards to make sure they are in good condition. Look for any cracks, splits, or damage that may affect the stability of your tray. Also, ensure that the wood glue, clamps, sandpaper, stain or paint, brushes, and screwdriver or drill are all in proper working order.
- Organize your workspace: Clear a workspace that provides enough room to assemble and work on your 3-tiered tray comfortably. Remove any clutter or obstacles that may hinder your progress. Consider placing a protective covering, such as a drop cloth or old sheet, on your work surface to catch any spills or drips.
- Arrange the materials: Lay out all the materials in an organized manner. This will make it easier to access them as you progress through the steps. Place the wooden boards next to each other, position the clamps within reach, and have the brushes and stain or paint ready for application.
- Double-check your supplies: Before you start building, double-check that you have all the necessary supplies within reach. Verify that you haven’t missed anything from the materials list. This will save you time and frustration during the construction process.
By following these steps and ensuring that you have all the supplies ready, you’ll be well-prepared to embark on the exciting journey of creating your own 3-tiered tray.
Step 2: Prep the Boards
Once you have gathered all the necessary supplies, it’s time to prepare the wooden boards for assembly. Preparing the boards properly will ensure that your 3-tiered tray is sturdy and visually appealing. Follow these steps to prep the boards:
- Measure and mark the boards: Start by measuring and marking the desired lengths for each tier of your tray. Use a measuring tape to ensure accuracy. Make sure to measure and mark the boards on the side that will be hidden, as it will be easier to hide any imperfections during assembly.
- Cut the boards: Using a saw, carefully cut along the marked lines to create the three tiers of your tray. Take your time and make precise cuts to achieve clean edges.
- Sand the edges: Once the boards are cut, use sandpaper to smooth out any rough edges. Sand both the top and bottom of each board as well as the sides. This will ensure a polished and professional look for your finished 3-tiered tray.
- Round the corners (optional): If you prefer a softer look, you can use sandpaper or a router to round the corners of each board. This step is optional but can add a nice touch to the overall design.
Prepping the boards is an important step in the construction process. It ensures that the boards are the correct size and shape, as well as smooth and free from any rough edges. Taking the time to properly prep the boards will contribute to the overall quality and aesthetics of your 3-tiered tray.
Step 3: Sand the Boards
After prepping the boards, the next step in creating your 3-tiered tray is to sand them. Sanding the boards will help create a smooth and even surface, ensuring a professional finish. Follow these steps to sand the boards effectively:
- Choose the right sandpaper grit: Start by selecting the appropriate sandpaper grit for the initial sanding. A rougher grit, around 80 or 100, can be used for the initial sanding to remove any rough spots or imperfections on the surface of the wood.
- Sand with the grain: Always sand with the grain of the wood, following the natural direction of the wood fibers. This helps to prevent any unwanted scratches or damage to the surface. Apply even pressure while sanding to ensure an even finish.
- Gradually move to finer grits: As you progress, switch to finer grit sandpaper, such as 120 or 150, for a smoother finish. This will help to remove any remaining roughness and create a polished surface.
- Check for smoothness: Periodically run your hand over the boards to check for smoothness. If you feel any rough patches, continue sanding until the entire surface feels smooth and consistent.
- Remove dust: After sanding, use a brush or a clean cloth to remove any dust or debris from the boards. This will ensure that the stain or paint adheres properly to the surface.
Sanding the boards is a vital step in the construction process as it helps to create a flawless and professional finish. Take your time and pay attention to detail to achieve the desired results. Remember, a well-sanded surface will enhance the overall appearance of your 3-tiered tray.
Step 4: Stain the Boards
Now that you have sanded the boards to a smooth finish, it’s time to add some color and character to your 3-tiered tray by staining the boards. Staining not only enhances the natural beauty of the wood but also protects it from wear and tear. Follow these steps to stain the boards effectively:
- Choose the right stain: Select a wood stain color that matches your aesthetic preferences and complements your overall decor. Consider testing the stain on a small, inconspicuous area of the board to ensure it achieves the desired color.
- Prepare the stain: Stir the stain thoroughly using a paint stick or similar tool. This ensures an even and consistent color throughout the application process.
- Apply the stain: Using a brush or a clean cloth, apply a thin and even coat of stain to the boards. Follow the wood grain and work in small sections to prevent the stain from drying unevenly. Allow the stain to penetrate the wood for the recommended duration mentioned in the manufacturer’s instructions.
- Wipe off excess stain: After the recommended time, use a clean cloth to gently wipe off any excess stain. This helps to achieve a more uniform color and prevents sticky residue from forming on the surface.
- Repeat for desired color intensity: If you prefer a darker or more intense color, you can apply additional coats of stain after allowing the previous coat to dry completely. Keep in mind that each subsequent coat will result in a richer and deeper hue.
- Let the boards dry: Once you have achieved the desired color, allow the boards to dry fully before proceeding to the next step. Follow the drying time mentioned in the manufacturer’s instructions, usually ranging from 24 to 48 hours.
Staining the boards adds a touch of elegance and sophistication to your 3-tiered tray. By following these steps, you can achieve a beautiful finish that highlights the natural grain of the wood.
Step 5: Assemble the Base
With the stained boards dry and ready, it’s time to start assembling the base of your 3-tiered tray. The base provides stability and serves as the foundation for the tiers. Follow these steps to assemble the base:
- Arrange the boards: Begin by arranging the largest board, which will serve as the bottom tier, flat on your work surface. Place the medium-sized board on top of it, ensuring it is centered.
- Apply wood glue: Apply a generous amount of wood glue to the top of the bottom tier board.
- Align and clamp: Place the medium-sized board on top of the bottom tier, aligning it with the edges. Use clamps to hold the boards together firmly. Make sure the clamps are evenly distributed to ensure a secure bond.
- Let it dry: Allow the wood glue to dry completely as per the instructions provided by the manufacturer. This typically takes a few hours, but it’s best to give it ample time to ensure a strong bond.
- Remove excess glue: Once the glue is dry, carefully remove any excess glue using a scraper or sandpaper. This will ensure a clean and professional appearance.
By following these steps, you will successfully assemble the base of your 3-tiered tray. The base provides a solid foundation for the tiers and ensures stability throughout the construction process and beyond. Proceed to the next step once the base is fully dry and secure.
Step 6: Attach the Middle Tier
With the base of your 3-tiered tray complete, it’s time to attach the middle tier. Follow these steps to securely attach the middle tier to the base:
- Apply wood glue: Apply a generous amount of wood glue to the top of the base tier board, where the middle tier will be placed.
- Position the middle tier: Carefully place the medium-sized board, which will serve as the middle tier, on top of the base tier. Ensure that it is centered and aligned with the edges of the base tier.
- Secure with clamps: Use clamps to hold the middle tier in place, securing it to the base tier. Position the clamps evenly around the edges of the tray for a stable and balanced attachment.
- Allow the glue to dry: Leave the clamps in place and allow the wood glue to dry completely. Refer to the manufacturer’s instructions for the recommended time. It’s essential to give the glue sufficient time to set for a strong and durable bond.
- Check for stability: Once the wood glue is completely dry, carefully remove the clamps. Check the stability of the middle tier by gently pressing on it from different angles. It should feel securely attached to the base tier without any wobbling or shifting.
By following these steps, you will successfully attach the middle tier to the base of your 3-tiered tray. This step brings your tray one step closer to completion, creating a sturdy structure for the final tier to be added. Proceed to the next step once the middle tier is securely attached and stable.
Step 7: Attach the Top Tier
Now that the base and middle tier of your 3-tiered tray are securely attached, it’s time to complete the assembly by attaching the top tier. Follow these steps to ensure a stable and visually appealing top tier:
- Apply wood glue: Apply a generous amount of wood glue to the top of the middle tier board, where the top tier will be placed.
- Position the top tier: Carefully place the smallest board, which will serve as the top tier, on top of the middle tier. Ensure that it is centered and aligned with the edges of the middle tier.
- Secure with clamps: Use clamps to hold the top tier in place, securing it to the middle tier. Position the clamps evenly around the edges of the tray to ensure a stable and balanced attachment.
- Allow the glue to dry: Leave the clamps in place and allow the wood glue to dry completely. It’s crucial to follow the manufacturer’s instructions for the recommended drying time. This will ensure a strong bond between the tiers.
- Check for stability and levelness: Once the wood glue is dry, carefully remove the clamps. Check the stability of the top tier by gently pressing on it from different angles. It should feel securely attached, with no wobbling or shifting. Additionally, use a level to ensure that the top tier is perfectly flat and aligned with the middle and base tiers.
By following these steps, you will successfully attach the top tier to complete your 3-tiered tray. This step brings the tray to its full height and provides a functional and visually appealing structure. Proceed to the next step to add the finishing touches and truly make the tray your own.
Step 8: Decorate the Tray
With the assembly of your 3-tiered tray complete, it’s time to add your personal touch and bring it to life with decorative elements. Follow these steps to decorate your tray:
- Choose your theme or style: Decide on the theme or style you want to achieve with your tray. Consider the overall aesthetics of your space and the purpose of the tray. You can opt for a rustic farmhouse look, a minimalist modern design, or a vibrant and colorful display.
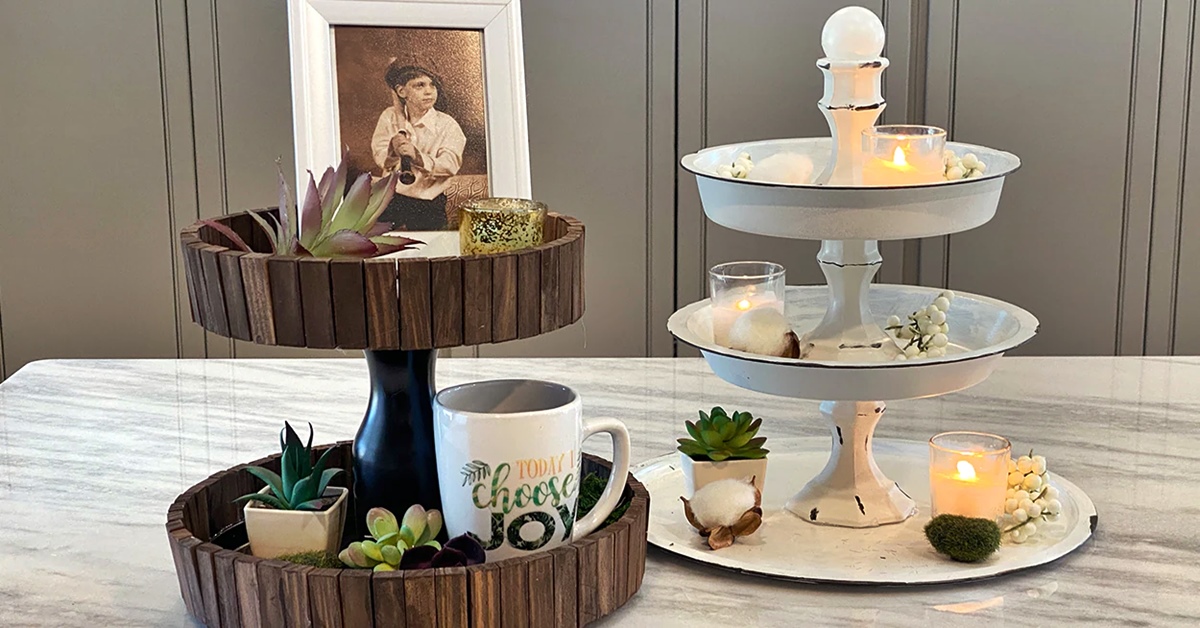
- Add decorative items: Select decorative items that align with your chosen theme and fit appropriately on each tier. Common choices include small plants, candles, figurines, faux flowers, or seasonal ornaments. Arrange them strategically to create an eye-catching and visually appealing display.
- Consider height and balance: Pay attention to the height and balance of the decorative items across the tiers. Vary the heights to create visual interest, ensuring that taller items are placed towards the back and shorter items in the front. This will add depth and dimension to your tray’s display.
- Incorporate textures and colors: Experiment with textures and colors to add depth and visual appeal. Consider using different materials such as glass, wood, ceramic, or metal to create an interesting mix. Play with complementary or contrasting colors to enhance the overall aesthetic.
- Personalize with accents: Add personalized accents such as ribbons, name tags, or small signs to make the tray uniquely yours. These details can add a special touch and tie in with your overall home decor style.
- Review and adjust: Step back and review the overall arrangement of your decorative items. Make any adjustments as needed to achieve the desired look and feel. Take your time to ensure that the tray reflects your personal style and meets your aesthetic expectations.
Decorating your 3-tiered tray adds the final flourish to your creation. Whether it’s a functional centerpiece for your dining table or a stylish organizer for your bathroom or kitchen, the decorative elements will make it truly stand out. With creativity and attention to detail, you can transform your tray into a charming and personalized display piece.
Step 9: Optional Finishing Touches
Once you have decorated your 3-tiered tray, you may choose to add some optional finishing touches to further enhance its appearance and functionality. Consider these additional steps:
- Apply a protective coat: Depending on the type of wood and finish you have chosen, you may want to apply a protective coat to safeguard the surface from damage or staining. This can be done with a clear polyurethane sealant or a food-safe wax, especially if you plan to use the tray for serving food.
- Add embellishments: Get creative and add extra embellishments to your tray. You can attach decorative handles or knobs to the sides for easier handling or tie ribbons or bows around the tiers for a charming touch.
- Install tier separators (optional): If you wish to create designated spaces on each tier, you can install dividers or separators. These can be made from wood, acrylic, or any other suitable material. They can be attached with glue or screws, depending on your preferences.
- Accessorize with lighting: To create a warm and inviting ambiance, consider incorporating lighting elements into your tray. You can include small string lights, LED candles, or even small battery-operated fairy lights to add a cozy glow.
- Revise and adjust: Step back and review the overall appearance of your decorated tray. Make any necessary revisions or adjustments to ensure everything is in place as desired. Take the time to ensure that your finishing touches align with your chosen theme or style.
Remember, these finishing touches are optional and can be customized according to your preferences and the intended purpose of the tray. They offer the opportunity to add personalization and uniqueness to your 3-tiered tray, making it a standout piece in your home decor.
Step 10: Final Thoughts
Congratulations! You have successfully completed constructing and decorating your 3-tiered tray. Now it’s time to step back and reflect on your accomplishment. Here are some final thoughts to consider:
- Admire your creation: Take a moment to appreciate the hard work and effort you’ve put into building your 3-tiered tray. It is a testament to your craftsmanship and creativity.
- Showcase your tray: Find the perfect spot in your home to display and showcase your tray. It can serve as a functional and decorative piece, adding charm and organization to any room.
- Experiment and refresh: Don’t be afraid to experiment with different decorations and arrangements. The versatility of your 3-tiered tray allows for endless possibilities. Feel free to refresh the contents of the tray seasonally or whenever you want to change up the look.
- Share your creation: If you’re proud of your work, consider sharing it with others. You can post pictures on social media, join craft communities, or even gift a 3-tiered tray to a loved one.
- Continue exploring: Building a 3-tiered tray is just the beginning of your creative journey. Continue to explore other DIY projects and expand your crafting skills. There are countless possibilities awaiting you!
By following the steps outlined in this guide, you have successfully created a beautiful and functional 3-tiered tray. Enjoy the process of decorating and using your tray, and let it serve as a reflection of your personal style and creativity. Keep exploring and experimenting, and may your crafting endeavors bring you joy and satisfaction.