
Determining the Required Curtain Track Length
Before you begin installing curtain tracks on your ceiling, it’s important to determine the required track length to ensure a proper fit for your curtains. Here’s an easy step-by-step guide to help you measure the correct length:
- Measure the width of your window: Start by measuring the total width of your window. For full coverage, add an additional 2-4 inches on each side to allow the curtains to overlap the window.
- Consider the curtain style: Different curtain styles require different amounts of gathering or fullness. If you plan to have heavily gathered curtains or want a more luxurious look, you may need to double or triple the width of your window when calculating the required track length.
- Account for any obstructions: Take note of any obstructions such as wall-mounted lights or air conditioning units that may interfere with the curtain track. Ensure that there is enough clearance for the curtain to hang freely without obstruction.
- Measure the drop or length of your curtains: Determine the desired length of your curtains by measuring from where you plan to mount the track to where you want the curtains to end. Add a few extra inches if you want the curtains to puddle on the floor or if you have a high ceiling.
- Consider any special requirements: Certain curtain styles, such as blackout curtains or heavy thermal curtains, may require additional length to accommodate their thickness and weight. Be sure to account for any special requirements when measuring the track length.
Once you have these measurements, you can determine the required curtain track length. When purchasing the track, it’s always a good idea to round up to the nearest whole number to ensure that you have enough length to span the window and account for any variations.
By taking the time to accurately measure the required curtain track length, you can ensure a seamless installation and a perfect fit for your curtains.
Gathering the Necessary Tools and Materials
Before you begin installing curtain tracks on your ceiling, it’s important to gather all the necessary tools and materials. Having everything you need on hand will help ensure a smooth and efficient installation process. Here’s a list of tools and materials you will need:
- Curtain track: Purchase a curtain track that is suitable for ceiling installation. Make sure it is the correct length to accommodate the width of your window and the desired curtain style.
- Mounting brackets: The curtain track will need to be secured to the ceiling using mounting brackets. Check that the brackets are compatible with the chosen curtain track and are designed for ceiling installation.
- Screws and wall plugs: Depending on the type of ceiling material, you may need screws and wall plugs to secure the mounting brackets. Ensure that the screws and wall plugs are appropriate for the ceiling material in your space.
- Power drill: A power drill will be essential for drilling pilot holes for the mounting brackets and screws. Make sure it is charged and equipped with the appropriate drill bit.
- Tape measure: Accurate measurement is crucial for a successful curtain track installation. Have a tape measure handy to measure the window width, track length, and mounting points.
- Pencil or marker: Marking the mounting points on the ceiling will help guide the installation process. Keep a pencil or marker handy for this purpose.
- Screwdriver: Depending on the type of screws used, you may need a screwdriver to secure the brackets to the ceiling.
- Ladder or step stool: In most cases, you will need a ladder or step stool to reach the ceiling comfortably and safely during the installation process. Ensure that it is stable and positioned securely.
By gathering these tools and materials in advance, you will save time and effort during the installation process. It’s always a good idea to double-check that you have everything you need before starting to avoid any unnecessary interruptions or delays.
Measuring and Marking the Mounting Points
Once you have gathered all the necessary tools and materials, the next step in installing curtain tracks on your ceiling is to measure and mark the mounting points. This ensures that the curtain track is properly positioned and securely attached. Follow these steps for accurate measurement and marking:
- Measure the distance from the top of the window frame: Use a tape measure to measure the desired distance between the top of the window frame and the curtain track. This will depend on your preference and the curtain style.
- Mark the first mounting point: Starting from one end of the window, use a pencil or marker to mark the location of the first mounting point. This will typically be the outermost edge of the curtain track.
- Space the remaining mounting points: Measure and mark the remaining mounting points along the window, ensuring that they are evenly spaced to provide adequate support for the curtain track.
- Ensure a level installation: Use a level to confirm that the marked mounting points are aligned horizontally. This step is crucial to ensure that the curtain track will be properly installed and straight.
- Double-check the measurements: Before proceeding with drilling, double-check the measurements to ensure their accuracy. Adjust as necessary to achieve the desired position and spacing.
It’s important to take your time during this step to ensure that the mounting points are correctly positioned. Precise measurements and markings will result in a secure and aesthetically pleasing curtain track installation.
Remember to consider any obstructions, such as lights or vents, when marking the mounting points. Ensure that the track will not interfere with these elements and that there is enough clearance for the curtains to hang freely.
By accurately measuring and marking the mounting points, you will lay the foundation for a successful curtain track installation that will add functionality and style to your windows.
Preparing the Ceiling for Installation
Before you can install curtain tracks on your ceiling, it’s important to properly prepare the surface to ensure a secure and long-lasting installation. Follow these steps to prepare the ceiling:
- Clear the area: Remove any furniture or objects that may obstruct your access to the ceiling. This will ensure a safe and unobstructed installation process.
- Clean the ceiling: Use a broom or a vacuum cleaner to remove any dust or debris from the ceiling surface. A clean surface will ensure better adherence of the mounting brackets and a smooth installation.
- Locate joists or support beams: In most cases, it’s recommended to attach the mounting brackets to joists or support beams for added stability and strength. Use a stud finder or tap lightly on the ceiling to locate these structural elements.
- Mark the location of the joists: Once you have located the joists, use a pencil or marker to mark their location on the ceiling. This will help guide the installation of the mounting brackets and ensure a secure attachment.
- Consider ceiling type and weight capacity: If you have a suspended or drop ceiling, or if your ceiling is made of a delicate material, such as plaster, consider the weight capacity and installation requirements. You may need additional support or special fasteners to ensure a stable installation.
- Plan for screw locations: Depending on the mounting brackets and the curtain track, you may need to drill pilot holes before securing the brackets with screws. Mark the locations for these holes to guide you during the installation process.
Preparing the ceiling before installation is crucial for a successful and secure curtain track installation. Taking the time to clear the area, clean the surface, locate joists or support beams, and plan for screw locations will ensure a smooth and problem-free installation process.
Remember to always follow the manufacturer’s instructions and recommendations when preparing the ceiling and installing the curtain tracks. This will help you achieve the best results and ensure that your curtains are hung safely and securely.
Installing the First Curtain Track Bracket
With the ceiling prepared, it’s time to start installing the curtain tracks. The first step is to install the first curtain track bracket. Follow these steps to ensure a proper installation:
- Position the first bracket: Take the first curtain track bracket and align it with the marked mounting point on the ceiling. Make sure it is positioned correctly and level according to the markings. If the bracket needs to be attached to a joist or support beam, ensure it is aligned with the marked location.
- Mark the screw hole locations: With the bracket in position, use a pencil to mark the locations of the screw holes on the ceiling. This will guide you during the drilling process.
- Drill pilot holes: Using a power drill and an appropriate drill bit, carefully drill pilot holes at the marked locations. Make sure the holes are slightly smaller than the screws you will be using to secure the bracket.
- Attach the bracket: Position the bracket over the pilot holes and align it with the marks. Secure the bracket to the ceiling by driving screws through the pre-drilled holes. Use a screwdriver or a power drill for this step, making sure not to overtighten the screws.
- Check the level: Use a level to ensure that the installed bracket is straight and level. Adjust if necessary by loosening the screws, making the needed adjustments, and tightening them again.
By carefully following these steps, you can successfully install the first curtain track bracket. It’s important to ensure that the bracket is securely attached to the ceiling and properly aligned to ensure a stable and level track installation.
Remember to repeat these steps for each additional curtain track bracket, following the marked mounting points and maintaining consistency in positioning and levelness.
Once the first bracket is installed, you are ready to proceed with the installation of the remaining brackets to complete the curtain track installation.
Installing the Remaining Curtain Track Brackets
With the first curtain track bracket properly installed, it’s time to move on to installing the remaining brackets. Follow these steps to ensure a smooth and secure installation:
- Measure and mark the spacing: Measure the desired spacing between the remaining brackets, ensuring that it is consistent with the spacing of the first bracket. Use a tape measure and a pencil to mark the mounting points on the ceiling, keeping in mind any obstructions or specific requirements.
- Position the brackets: Take the next bracket and align it with the marked mounting point. Ensure that the bracket is level and positioned accurately according to the markings and desired spacing.
- Mark the screw hole locations: Use a pencil to mark the locations of the screw holes on the ceiling, just as you did with the first bracket.
- Drill pilot holes: Use a power drill and an appropriate drill bit to drill pilot holes at the marked locations. Make sure the holes are slightly smaller than the screws you will be using to secure the brackets.
- Attach the brackets: Position each bracket over the pilot holes and align them with the marks. Secure each bracket to the ceiling by driving screws through the pre-drilled holes, making sure not to overtighten them.
- Ensure levelness and alignment: Using a level, check the levelness and alignment of each installed bracket. Make any necessary adjustments by loosening the screws, adjusting the bracket position, and tightening the screws again.
Continue following these steps for each remaining curtain track bracket until all brackets are securely installed. Take your time to ensure that each bracket is level, properly aligned, and spaced according to your desired curtain track configuration.
Remember to refer to the manufacturer’s instructions for any specific guidelines or recommendations regarding the installation of the curtain track brackets. Following these instructions will help ensure a successful installation and a sturdy foundation for your curtain tracks.
Once all the brackets are in place, you are ready to proceed with attaching the curtain track to the brackets, which will be covered in the next section.
Attaching the Curtain Track to the Brackets
Now that all the curtain track brackets are securely installed, it’s time to attach the curtain track itself. Follow these steps to properly attach the track to the brackets:
- Position the curtain track: Hold the curtain track and align it with the installed brackets. Slide the track into the brackets from one end, ensuring that it sits snugly and securely in place.
- Secure the track to the brackets: Depending on the type of curtain track and brackets you are using, there may be different mechanisms for securing the track. This typically involves locking or fastening the track onto or within the brackets. Follow the manufacturer’s instructions for your specific curtain track system to properly secure the track.
- Test the stability and alignment: Once the track is attached, gently pull on one end of the curtain track to ensure that it is securely held in place by the brackets. Check that the track is level and aligned properly with the brackets and the window.
- Make adjustments if necessary: If the track is not level or aligned correctly, slightly loosen the track from the brackets, make the necessary adjustments, and then resecure the track. Use a level to ensure that the track is straight and level along its entire span.
It’s important to pay attention to detail during this step to ensure that the curtain track is properly attached and aligned. A secure and level installation will provide a stable foundation for your curtains and allow for smooth operation.
If you have multiple curtains or track sections, repeat these steps for each section, ensuring that they are properly aligned and joined together seamlessly.
Once the curtain track is securely attached, you can proceed with the next steps in the installation process, such as attaching the curtain hooks or gliders and hanging the curtains themselves.
By following these steps, you can confidently attach the curtain track to the brackets, creating a sturdy and reliable support for your curtains.
Testing the Curtain Track for Smooth Operation
After the curtain track is securely attached to the brackets, it’s important to test its operation to ensure smooth movement of the curtains. Here’s how you can test the curtain track for smooth operation:
- Slide the curtains back and forth: Gently slide the curtains along the track to test how smoothly they move. Pay attention to any resistance or sticking points. The curtains should glide effortlessly from one end of the track to the other.
- Check for obstructions: Inspect the track and brackets for any obstructions that may hinder the movement of the curtains. Remove any debris or objects that may obstruct the path of the curtains.
- Ensure even and balanced movement: The curtains should move smoothly and evenly across the entire length of the track. If you notice any lopsided or uneven movement, double-check that the brackets are securely attached and properly aligned.
- Test the curtain track stops: If your curtain track has stoppers or end caps, test them to ensure that they function as intended. They should prevent the curtains from sliding off the track at the ends while still allowing for smooth movement within the track.
- Make adjustments if needed: If you encounter any issues during the testing process, such as sticking or unbalanced movement, adjust the track as necessary. Loosen the brackets slightly, make the needed adjustments, and then resecure the track to ensure smooth operation.
Testing the curtain track for smooth operation is essential to ensure that your curtains will open and close effortlessly. It allows you to identify and address any issues before hanging the curtains, ensuring a seamless and enjoyable user experience.
If you encounter persistent issues with the curtain track’s operation, it may be necessary to consult the manufacturer or seek professional assistance to resolve the problem.
By conducting a thorough testing phase, you can rest assured that your curtain track is functioning properly and ready for the next steps in the installation process.
Attaching the Curtain Hooks or Gliders
Once the curtain track is tested and functioning smoothly, it’s time to attach the curtain hooks or gliders. The method will depend on the type of curtain track you have chosen. Here are the general steps to follow:
- Choose the appropriate attachment method: Determine whether your curtain track requires hooks or gliders for attaching the curtains. Refer to the manufacturer’s instructions or the specific requirements of your curtain track system.
- Attach the curtain hooks: If your curtain track uses hooks, insert them into the designated holes or slots on the curtain header. Ensure that the hooks are evenly distributed across the width of the curtains and securely attached.
- Attach the curtain gliders: For curtain tracks that use gliders, insert each glider onto the track from the end or the designated insertion point. Make sure the gliders are evenly spaced for smooth and balanced curtain movement.
- Test curtain movement: Once all the hooks or gliders are attached, test the movement of the curtains by gently pulling and releasing them along the track. Ensure that the curtains move smoothly and evenly across the entire length of the track.
- Make adjustments if necessary: If you notice any issues during the testing phase, such as resistance or uneven movement, adjust the placement or positioning of the hooks or gliders to resolve the problem. It may require redistributing the hooks or gliders or realigning them with the curtain track.
Attaching the curtain hooks or gliders is a crucial step in the installation process, as it allows you to connect the curtains to the track and ensure proper functionality. It’s important to carefully follow the recommended attachment method to avoid any complications or damage to the curtains or the track.
Remember to refer to the manufacturer’s instructions or consult with a professional if you are unsure about the specific requirements of your chosen curtain track system.
Once the curtain hooks or gliders are securely attached, you are ready to move on to the final step in the installation process: hanging the curtains on the track.
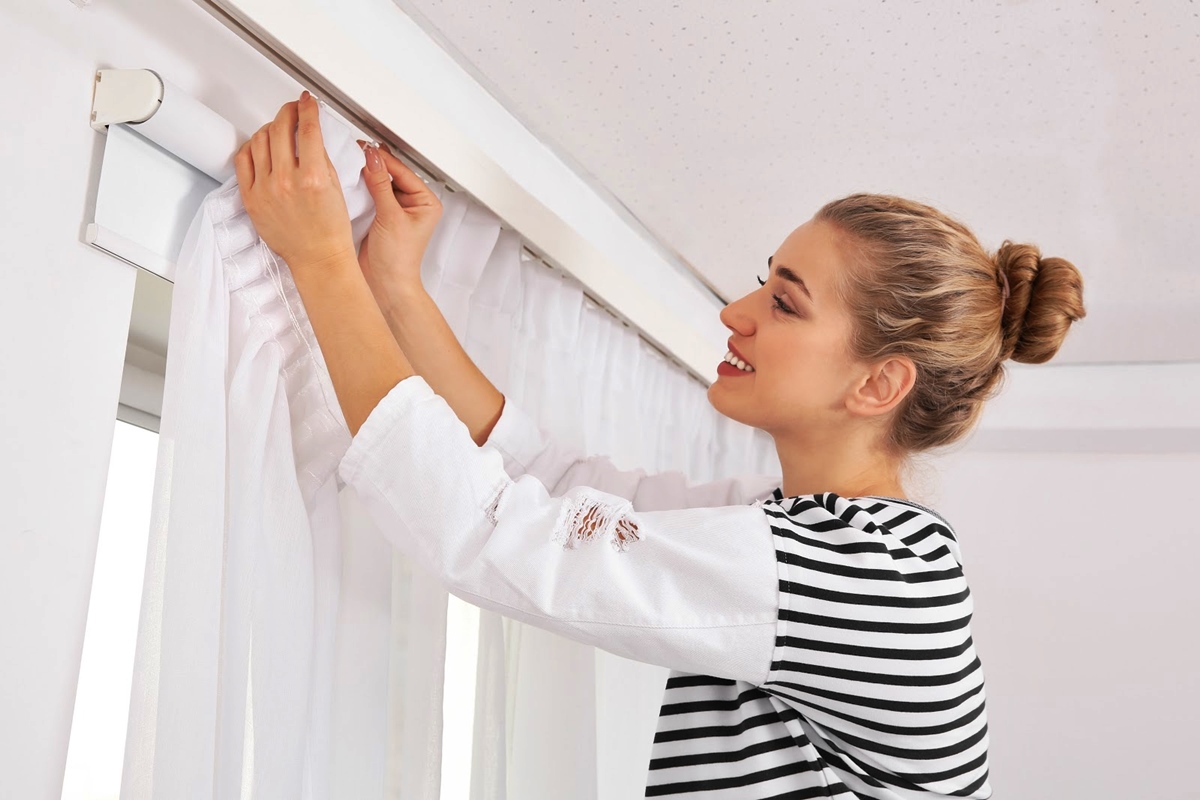
Hanging the Curtains on the Track
With the curtain hooks or gliders securely attached to the track, it’s time to hang the curtains. Follow these steps to ensure a successful and professional-looking installation:
- Prepare the curtains: Before hanging the curtains, make sure they are properly prepared. This may include ironing or steaming out any wrinkles and ensuring that the curtain header is evenly spaced and aligned.
- Open the curtain track: If your curtain track has adjustable hooks or gliders, open the track slightly to create enough space for inserting the curtains. Refer to the manufacturer’s instructions for guidance on how to open the track.
- Insert the curtain hooks or gliders: Starting from one end of the track, carefully insert each curtain hook or glider into the corresponding hole or slot on the track. Ensure that they are securely attached and evenly distributed across the width of the curtains.
- Distribute the fabric evenly: Once the curtains are hanging on the track, distribute the fabric evenly along the track, ensuring that it hangs smoothly and without any bunching or sagging.
- Test curtain movement: Gently pull the curtains back and forth along the track to test their movement. Ensure that the curtains slide smoothly and evenly, without any resistance or obstructions.
- Make adjustments if needed: If you notice any issues during the testing phase, such as uneven movement or fabric bunching, adjust the hooks or gliders as necessary. This may involve redistributing them or realigning them with the track.
Hanging the curtains on the track is the final step in the installation process. Paying attention to detail during this step will ensure that your curtains hang beautifully and that the track provides smooth and effortless movement.
Take the time to adjust and fine-tune the curtain placement and alignment as needed. This will help achieve the desired look and functionality for your curtains.
Once the curtains are properly hung on the track, step back and admire your completed installation. Enjoy the added beauty, privacy, and functionality that your new curtains provide.
Finishing Touches and Final Adjustments
After hanging the curtains on the track, there are a few finishing touches and final adjustments you can make to ensure a polished and professional installation. Consider these steps to complete the installation:
- Check for uniformity: Step back and assess the overall appearance of the curtains and track. Ensure that the curtains are hanging at an equal level and that the track is straight and aligned with the window.
- Adjust the curtain length: If necessary, make any final adjustments to the length of the curtains. Trim or hem them as needed to achieve the desired length. Ensure that the curtains gently touch the floor or hover just above it, depending on your preference.
- Secure loose threads or cords: Check for any loose threads or cords and trim them carefully to prevent them from getting caught in the track or tangled with the curtains.
- Consider tiebacks or holdbacks: If you want to style your curtains with tiebacks or holdbacks, install them at the desired positions on the windowsill or adjacent wall. This will enhance the overall appearance and functionality of the curtains.
- Test the curtain operation again: Re-test the movement of the curtains along the track to ensure that any adjustments you made have improved the smoothness and ease of operation. Make any additional fine-tuning as necessary.
- Clean and tidy up: Give the area a final clean-up, removing any dust, debris, or tools that may still be lingering. Wipe down the curtain track and surrounding area to ensure a neat and tidy finish.
Taking the time for these finishing touches and final adjustments will ensure a professional and refined curtain track installation. It will also contribute to the longevity and efficient operation of your curtains.
Step back and admire your completed installation, appreciating the improved aesthetics and functionality that your curtains bring to your space. Enjoy the privacy, light control, and style they provide.
Remember to refer to the manufacturer’s instructions or seek professional assistance if you encounter any difficulties or have questions during the installation process.