
Choosing the Right Curtain Track
When it comes to installing ceiling-mounted curtain tracks, choosing the right one is crucial for the overall functionality and aesthetic appeal of your space. Let’s explore some essential factors to consider before making a purchase:
- Track Type: There are various types of curtain tracks available, including aluminum, PVC, and steel. Aluminum tracks are lightweight, durable, and suitable for most installations. PVC tracks are budget-friendly and flexible, making them ideal for curved or angled installations. Steel tracks offer excellent weight-bearing capacity and are perfect for heavier curtains or room dividers.
- Track Length: Measure the length of the area where you want to install the curtain track. Choose a track that is slightly longer than the measurement to ensure complete coverage. If needed, you can trim the track to the desired length.
- Weight Capacity: Consider the weight of your curtains. If you have heavy drapes or blackout curtains, opt for a curtain track with a higher weight capacity to ensure proper support and smooth gliding.
- Installation Method: Determine how you want to install the curtain track. Some tracks require drilling into the ceiling, while others can be mounted using adhesive or tension. Consider your preferences and the feasibility of installation based on the structure of your ceiling.
- Additional Features: Certain curtain tracks offer additional features that can enhance convenience and functionality. These include adjustable track widths, corded systems for easy opening and closing, and ceiling brackets for added stability. Assess your specific needs and choose a track with the features that best suit your requirements.
By considering these factors, you can select the perfect curtain track that will not only complement your interior design but also ensure smooth operation and durability. Keep these considerations in mind when shopping for your curtain track to make the installation process a breeze.
Gathering the Materials and Tools
Before starting the installation process, it’s important to gather all the necessary materials and tools. Having everything ready will save you time and ensure a smooth installation. Here are the essential items you’ll need:
- Curtain track: Purchase the appropriate length and type of curtain track based on your measurements and preferences.
- Mounting brackets: These brackets will secure the curtain track to the ceiling. Make sure they are compatible with the track you’ve chosen.
- Screws and anchors: Depending on your ceiling material, you may need screws and anchors to securely attach the brackets to the ceiling.
- Drill and drill bits: A drill will be essential for pre-drilling holes in the ceiling for the mounting brackets.
- Pencil or marker: Use these to mark the placement of the track and brackets on the ceiling.
- Tape measure: Accurate measurements are crucial for proper installation. Use a tape measure to ensure precision.
- Level: A level will help you ensure that the curtain track is straight and properly aligned.
- Screwdriver: You’ll need a screwdriver to tighten the screws and secure the mounting brackets.
- Step ladder or stool: Depending on the height of your ceiling, you may need a step ladder or stool to reach the installation area safely.
Make a checklist of these materials and tools before starting the installation to ensure you have everything you need. This will help you avoid interruptions and frustrations during the process. Keep the materials organized and within reach for easy access when needed.
Remember, using the correct tools and materials is key to a successful installation. So, take the time to gather everything before you begin, and you’ll be well-equipped to complete the project smoothly.
Measuring and Marking the Track Placement
Accurate measurements and proper placement are crucial for a successful curtain track installation. Follow these steps to measure and mark the placement of the track on the ceiling:
- Measure the width: Use a tape measure to measure the width of the area where you want to install the curtain track. This will help determine the length of the track you’ll need to purchase.
- Mark the center: Once you have the width measurement, mark the center point of the installation area on the ceiling. This will help ensure that the track is evenly spaced and aligned with the window or desired curtain placement.
- Measure the track length: From the center point, measure the desired length of the curtain track on both sides. Make small pencil or marker marks on the ceiling to indicate the end points of the track.
- Mark the bracket placement: Determine the spacing between the mounting brackets based on the length of the track. Typically, brackets are placed approximately 12-18 inches apart. Mark the positions of the brackets on the ceiling using a pencil or marker.
- Check for alignment: Use a level to ensure that the marks for the track and brackets are straight and level. Adjust the placement if needed to ensure proper alignment.
It’s essential to take your time and be precise when measuring and marking the track placement. Accurate markings will ensure that the curtain track is installed correctly and that your curtains will hang evenly.
Remember, every installation may have unique requirements, so adjust the measurements and placement based on your specific situation. Following these steps will help you accurately measure and mark the placement of the curtain track, setting the stage for a successful installation.
Pre-drilling Holes for the Mounting Brackets
Before you can attach the curtain track to the ceiling, it’s essential to pre-drill holes for the mounting brackets. Here’s how you can do it:
- Prepare your drill and drill bit: Choose a drill bit that matches the size of the screws that came with your mounting brackets. Attach the drill bit securely to your drill.
- Align the bracket: Take one of the mounting brackets and align it with the marked position on the ceiling. Ensure that it is properly aligned with the track placement and the center point.
- Start drilling: Hold the drill steady and slowly start drilling into the ceiling, applying gentle pressure. Use a slow and consistent speed to prevent the drill bit from slipping or damaging the ceiling material.
- Drill to the appropriate depth: Drill the hole to the depth required for your specific type of anchor or screw. This will ensure that the mounting bracket is securely attached to the ceiling.
- Repeat for other brackets: Repeat the drilling process for the remaining mounting brackets, following the same steps for each one.
Take care not to drill too close to any existing electrical wires or pipes in the ceiling. If you’re unsure of the positioning, consult a professional to ensure safety.
Remember that different ceiling materials may require different drilling techniques. For example, drilling into plaster or drywall may be different from drilling into concrete. Make sure to adjust your drilling technique accordingly.
By pre-drilling the holes for the mounting brackets, you’ll ensure that the installation process goes smoothly and there is no unnecessary damage to your ceiling. With the holes in place, you’re now ready to move on to the next step: installing the mounting brackets.
Installing the Mounting Brackets
Once you have pre-drilled the holes for the mounting brackets, it’s time to install them. Follow these steps to securely attach the brackets to the ceiling:
- Insert anchors (if necessary): If you’re using anchors, insert them into the pre-drilled holes. Make sure they are flush with the ceiling surface.
- Align the bracket: Take one of the mounting brackets and position it over the pre-drilled hole or anchor. Ensure that it aligns with the track placement and the marks on the ceiling.
- Attach the bracket: Using a screwdriver or drill, insert the screws through the holes in the bracket and into the pre-drilled holes or anchors. Begin by securing the screws with a few turns and tighten them fully to ensure a secure attachment.
- Repeat for other brackets: Repeat the process for the remaining mounting brackets, ensuring proper alignment and secure attachment for each one.
When installing the mounting brackets, it’s important to follow the manufacturer’s instructions and use the appropriate screws or hardware provided with the curtain track. This will ensure that the brackets are securely attached and can support the weight of the curtain track and curtains.
During the installation process, you may need to hold the brackets in place with one hand while tightening the screws with the other. This will help ensure that the brackets are properly aligned and securely attached to the ceiling.
Once all the mounting brackets are installed, double-check that they are straight and securely attached. Give them a gentle tug to confirm their stability. If any brackets feel loose, tighten the screws further or reposition the bracket if necessary.
With the mounting brackets securely in place, you’re now ready to move on to the next step: mounting the curtain track.
Mounting the Curtain Track
With the mounting brackets installed, it’s time to mount the curtain track. Follow these steps to attach the track securely:
- Place the track onto the brackets: Position the curtain track onto the mounted brackets. Ensure that the track is properly aligned and rests securely on each bracket.
- Secure the track: Depending on the specific design of your curtain track, there may be screws or clips that need to be fastened to secure the track in place. Follow the manufacturer’s instructions to secure the track properly.
- Double-check alignment: Once the track is secured, use a level to ensure that it is straight and properly aligned. Adjust the track if needed to ensure it is level across its entire length.
- Tighten any remaining screws: If there are any additional screws or fasteners on the track, make sure they are tightened properly to secure the track in place.
When mounting the curtain track, it’s crucial to follow the manufacturer’s instructions to ensure that the track is properly installed. Different curtain track designs may have specific mounting requirements, so be sure to read the provided documentation carefully.
After mounting the track, give it a gentle tug to ensure that it is securely attached to the brackets. The track should not wobble or move easily. If you notice any instability, double-check that the brackets are securely attached and the track is properly aligned.
With the curtain track securely mounted, you’re now ready to move on to the next step: attaching the curtains to the track.
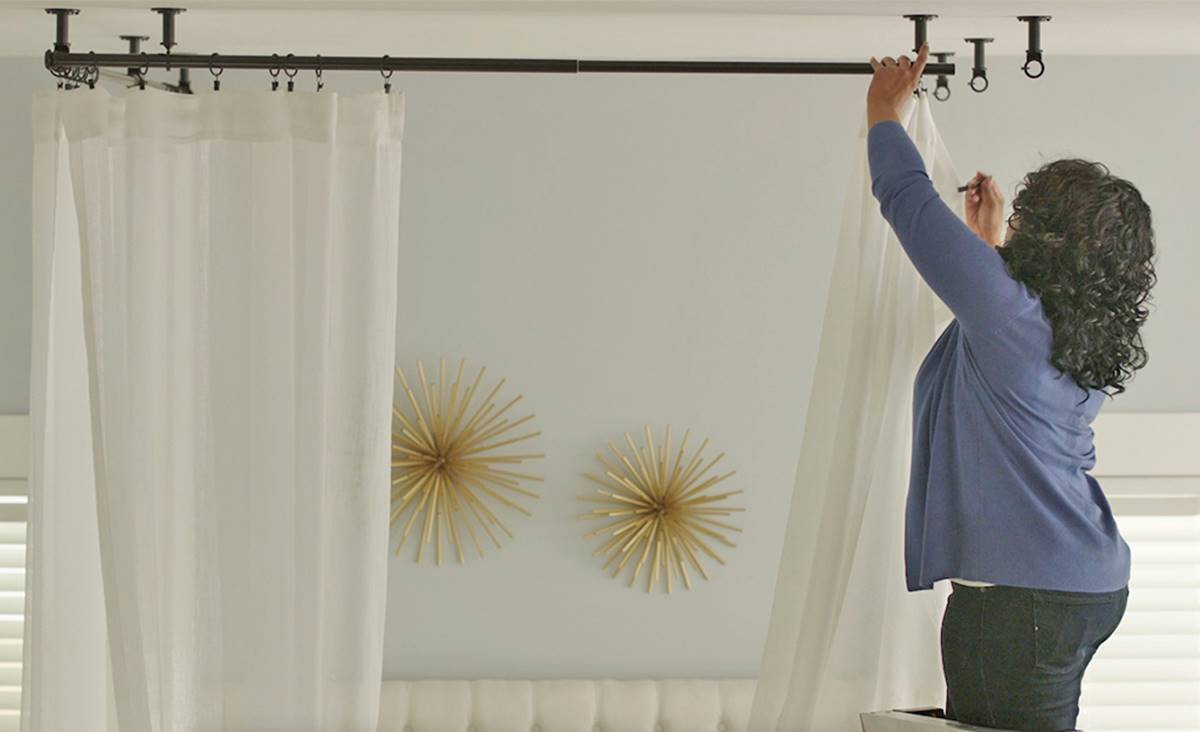
Attaching the Curtains to the Track
Now that you have successfully mounted the curtain track, it’s time to attach your curtains. Follow these steps to securely hang your curtains:
- Prepare the curtains: Ensure that your curtains are properly sized and ironed or steamed to remove any wrinkles. This will help them hang smoothly and enhance their appearance.
- Open the curtain hooks or gliders: If your curtain track uses hooks or gliders, open them to create a gap for inserting the curtains. Most curtain hooks or gliders can be gently pulled apart for easy attachment.
- Insert the hooks or gliders: Starting from one end of the track, insert the hooks or gliders into the curtain track. Push them along the track, evenly spacing them according to your preference or the curtain’s pleats.
- Hang the curtains: Once all the hooks or gliders are inserted, hang the curtains onto the hooks or gliders. Ensure that the fabric is evenly distributed along the length of the track, with no bunching or sagging.
- Test the curtain movement: Gently tug on the curtains to ensure smooth gliding along the track. Make any necessary adjustments if the curtains don’t move freely or if they catch on any part of the track.
It’s important to note that curtain tracks may have different attachment mechanisms. Some tracks may use hooks, while others may use specific clips or rings. Follow the instructions provided with your curtain track to ensure correct attachment.
Additionally, if your curtains have additional weights or tiebacks, make sure to attach them according to the manufacturer’s instructions. These additional elements can enhance the appearance and functionality of your curtains.
With your curtains securely attached to the track, step back and admire your newly installed ceiling-mounted curtains. The next step is to test and make any necessary adjustments to ensure smooth operation and a polished finish.
Testing and Adjusting the Curtain Track
After attaching the curtains to the track, it’s important to test the functionality of the curtain track and make any necessary adjustments. Follow these steps to ensure smooth operation:
- Open and close the curtains: Gently slide the curtains along the track to open and close them. Pay attention to how smoothly they glide and whether there are any areas of resistance or sticking.
- Check for even pleating: Observe the curtains as they open and close to ensure that the fabric falls into even pleats. Adjust the spacing of the hooks or gliders if necessary to achieve a balanced and visually appealing look.
- Address any issues: If you encounter any difficulties during the testing phase, identify the cause of the problem. It could be due to misaligned brackets, improperly attached hooks or gliders, or fabric getting caught on the track. Make the necessary adjustments or troubleshoot the issue accordingly.
- Ensure stability: Confirm that the curtain track and mounting brackets are stable and securely attached to the ceiling. Give the track a gentle tug to verify its stability and make any additional adjustments or tightening as needed.
- Make aesthetic tweaks: Step back and assess the overall appearance of the curtains. If necessary, make minor adjustments to the positioning of the curtains or the spacing of the pleats to achieve the desired aesthetic appeal.
Take your time during the testing and adjustment phase to ensure that everything is functioning smoothly and the curtains are hanging beautifully. Make any necessary tweaks or fixes as you go to create an optimal curtain display.
Remember, each installation may have unique aspects, so adapt these steps to your specific situation. By testing and adjusting the curtain track, you’ll ensure a flawless and visually pleasing final result.
Extra Tips and Troubleshooting
Here are some additional tips and troubleshooting suggestions to help you during the ceiling-mounted curtain track installation:
- Measure twice, install once: Double-check your measurements before making any cuts or drilling holes. This will help prevent costly mistakes.
- Use a stud finder: If possible, locate the ceiling joists or studs to provide additional support when installing the mounting brackets.
- Ensure proper weight distribution: For longer curtain tracks, consider using additional support brackets or fasteners in the middle to distribute the weight and prevent sagging.
- Consider corded curtain tracks: If you have tall windows or have difficulty reaching the curtains, consider opting for corded curtain tracks for easy opening and closing.
- If facing resistance, lubricate the track: If you experience difficulty sliding the curtains along the track, apply a small amount of silicone spray or wax to the track to enhance smoothness.
- Check for ceiling obstructions: Before drilling, ensure there are no electrical wires, plumbing, or other obstructions hidden in the ceiling. If unsure, consult a professional.
- Take safety precautions: When working with tools or climbing on ladders, prioritize safety. Wear protective gear, use a sturdy ladder, and exercise caution at all times.
- Refer to the manufacturer’s instructions: The specific instructions provided by the curtain track manufacturer should always be followed for the best results and to ensure warranty compliance.
If you encounter any issues during the installation process, don’t hesitate to troubleshoot or seek assistance. Refer to the manufacturer’s troubleshooting guide, consult online resources, or seek advice from professionals in the field if needed.
By following these extra tips and troubleshooting suggestions, you’ll be better equipped to tackle any challenges that may arise during the ceiling-mounted curtain track installation.