
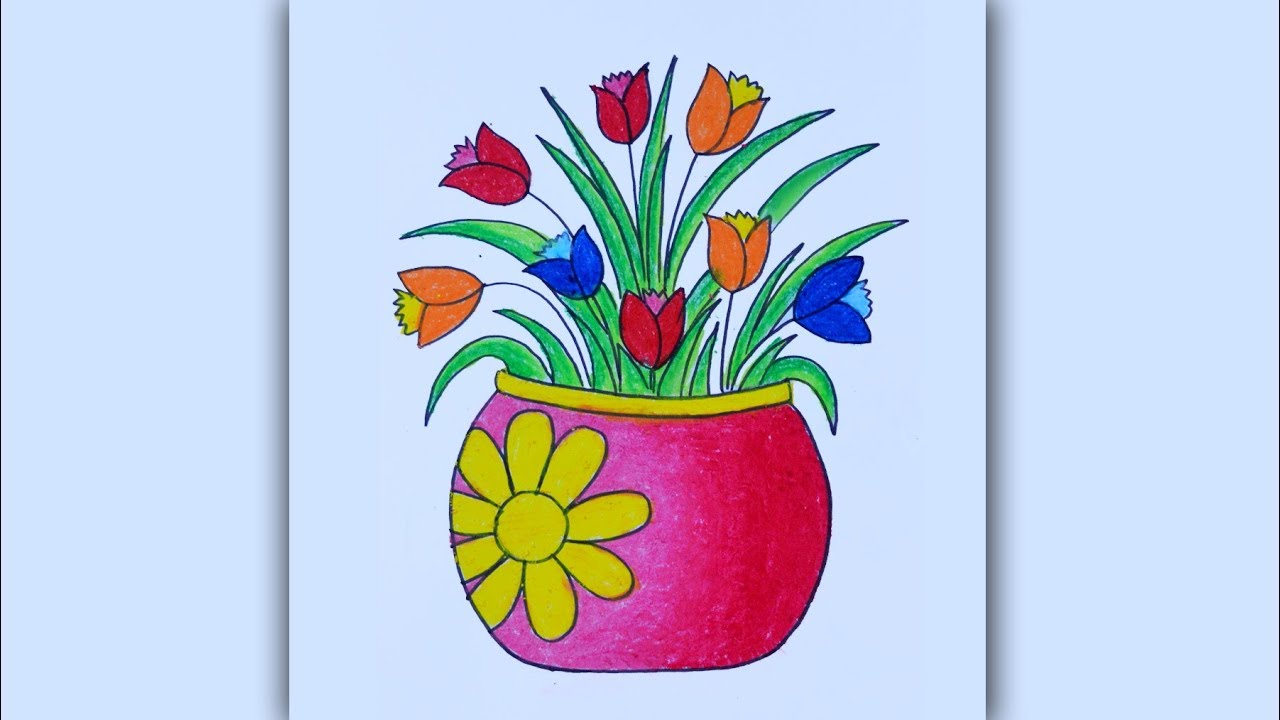
Materials needed
Before you begin drawing flowers in a vase, it’s important to gather all the necessary materials. Having everything prepared in advance will make the process smoother and more enjoyable. Here’s a list of items you’ll need:
- Sketchbook or drawing paper
- Pencil (preferably HB or 2B)
- Eraser
- Ruler
- Fineliner or ink pen
- Colored pencils or markers
- Reference image of flowers in a vase
Having a dedicated sketchbook or drawing paper will provide a sturdy surface for your artwork. The texture of the paper can also affect the outcome of your drawing, so consider choosing a paper that suits your preferred artistic style.
A pencil is essential for sketching the initial outlines and making any necessary adjustments along the way. It’s recommended to use an HB or 2B pencil as they offer a good balance of darkness and ease of erasing.
Speaking of erasers, having a good quality eraser is crucial for correcting mistakes and smudges. Look for a soft eraser that won’t damage the paper but can effectively remove pencil marks.
A ruler is handy for drawing straight lines, especially when sketching the vase and stems. It ensures accuracy and precision in your artwork.
When it comes to adding finer details or outlining your drawing, a fineliner or ink pen can be useful. This pen provides a more defined and consistent line than a regular pencil.
If you plan on adding color to your drawing, colored pencils or markers are essential. These tools allow you to bring your flowers and vase to life with vibrant hues.
Finally, having a reference image of flowers in a vase will help you capture the proportions and characteristics of the flowers accurately. You can find inspiration from books, magazines, or even online sources.
With all these materials at your disposal, you’re ready to embark on the artistic journey of drawing flowers in a vase.
Step 1: Choosing the type of flowers
Choosing the right type of flowers will set the tone and mood of your drawing. Whether you want to create a vibrant and colorful arrangement or a more subtle and delicate composition, selecting the right flowers is essential. Here’s how to choose the perfect flowers for your drawing:
1. Consider the mood: Think about the atmosphere you want to create in your drawing. Are you aiming for a cheerful and lively scene or a romantic and serene ambiance? Different flowers can convey different emotions, so choose accordingly.
2. Study flower characteristics: Take the time to observe and study the characteristics of different flowers. Pay attention to their shape, size, petal arrangement, and color variations. This will help you accurately depict them in your drawing.
3. Research symbolism: Flowers often have symbolic meanings associated with them. It can add depth and storytelling to your artwork if you incorporate flowers that have significance or represent a particular message.
4. Consider your skill level: If you’re a beginner, it’s recommended to choose flowers with simpler shapes and structures. As you gain experience and confidence, you can gradually challenge yourself with more intricate flower varieties.
5. Gather references: Look for reference images of the flowers you’re interested in drawing. This will guide you in capturing their unique features and ensure accuracy in your artwork. You can find references in books, online resources, or even take your own photographs.
Remember, the choice of flowers is ultimately a personal one. Follow your instincts and select the flowers that resonate with you. Don’t be afraid to experiment and mix different flower types to create a visually captivating arrangement.
Once you’ve chosen the type of flowers, you’re ready to move on to the next step: sketching the vase.
Step 2: Sketching the vase
The vase serves as the foundation and focal point of your flower drawing. It provides a structure for the flowers and adds visual interest to the composition. Follow these steps to sketch the vase:
1. Determine the shape and size: Decide on the shape and size of the vase you want to draw. It can be cylindrical, rectangular, hourglass-shaped, or any other form that inspires you. Consider the proportions in relation to the size of the flowers.
2. Use basic shapes as a starting point: Begin by sketching the basic shape of the vase using simple geometric forms like circles, rectangles, or ovals. This will give you a foundation to build upon and help you visualize the overall structure.
3. Add details and embellishments: Once you have the basic shape, start refining the details of the vase. Consider the rim, neck, and base of the vase, as well as any decorative elements like handles or patterns. Take your time to ensure the proportions are visually pleasing.
4. Pay attention to perspective: If you want to create a realistic drawing, pay attention to the perspective of the vase. Consider the vanishing points and how it influences the way the vase is seen from different angles. This will add depth and dimension to your artwork.
5. Erase and refine: Don’t be afraid to make adjustments as you go along. Use your eraser to correct any mistakes or make small changes to the shape or proportions of the vase. It’s all part of the creative process.
Remember to use light, light strokes when sketching the vase. They can easily be erased later when you add more detailed lines and shading. Take your time and experiment with different shapes and styles until you’re satisfied with the result.
Once you’ve sketched the vase, you’re ready to move on to the next step: drawing the stems and leaves for your flowers.
Step 3: Drawing the stems and leaves
The stems and leaves are an essential part of any flower arrangement. They provide the structure and support for the flowers, as well as contribute to the overall composition. Follow these steps to draw the stems and leaves for your flowers:
1. Determine the placement: Decide where you want the stems to originate from in the vase. Think about the arrangement and positioning of the flowers and how the stems will flow naturally within the composition.
2. Sketch the main stems: Use light, gentle lines to sketch the main stems. Start from the bottom of the vase and extend them upwards, considering the curves and angles. You can make them straight or add slight curves for a more organic look.
3. Add branching stems: To make the arrangement more realistic, include branching stems that diverge from the main stems. These branches can create a dynamic and natural flow in your drawing.
4. Draw the leaves: Start adding leaves along the stems. Consider the shape and size of the leaves for the specific flower variety you have chosen. They can be simple ovals, heart-shaped, or have more intricate patterns. Sketch them in a way that complements the overall design.
5. Vary the leaf sizes and angles: To create visual interest, vary the sizes of the leaves along the stems and change the angles at which they point. This will add depth and a sense of movement to your drawing.
6. Detail the leaf veins: As a final touch, you can add delicate details such as the veins on the leaves. These small lines can bring the leaves to life and add a realistic touch to your artwork.
Remember to use light, light strokes when sketching the stems and leaves. You can always go back and darken them later or add more details once you’re happy with the overall composition. Take your time and observe the natural structure of stems and leaves to create a visually appealing arrangement.
With the stems and leaves in place, it’s time to move on to the exciting part – adding the first layer of petals to your flowers.
Step 4: Adding the first layer of petals
The petals are the most visually striking and captivating part of any flower. Adding the first layer of petals will bring your flowers to life and establish their shape and form. Follow these steps to add the first layer of petals:
1. Identify the outer petals: Start by identifying the outermost layer of petals on each flower. These petals usually define the shape and are more prominent than the inner petals. Study the reference image to understand how they curve and overlap.
2. Sketch the outer petals: Lightly sketch the outlines of the outer petals using gentle strokes. Pay attention to the curvature and shape of each petal. Be observant of how they interlock and create a visually pleasing arrangement.
3. Add the inner petals: Once you’ve sketched the outer petals, move on to the inner petals. These are typically smaller and more intricate. They add depth and detail to the flower. Take your time to sketch the inner petals with care and precision.
4. Create variation: To make your flowers look natural and realistic, vary the size and shape of the petals. Flowers in nature often have slight variations in their petals, so don’t be afraid to experiment and add your creativity to the mix.
5. Consider petal overlaps: Pay attention to the areas where petals overlap each other. Add shading or thin lines to indicate the overlapping areas. This will give your flowers a sense of depth and dimension.
6. Use references: Continuously refer to your reference image or other floral references to ensure accuracy in depicting the petals. Observe the direction, shape, and details of the petals in the reference and incorporate them into your drawing.
Remember to take your time when adding the petals and be patient with your progress. It may take a few tries to achieve the desired look, but as you practice, your ability to capture the beauty of petals will improve.
With the first layer of petals completed, you’re ready to move on to the next step and bring depth and dimension to your flower drawing.
Step 5: Creating depth and dimension
Creating depth and dimension in your flower drawing is crucial for making it appear realistic and lifelike. It adds a sense of three-dimensionality, bringing your flowers to life on the paper. Follow these steps to create depth and dimension in your drawing:
1. Use shading techniques: Shading is an effective way to create depth and dimension in your artwork. Observe the light source in your reference image and use that as a guide for adding shadows. Use hatching, cross-hatching, or stippling techniques to add shading to the petals, stems, and leaves. Lightly build up the layers of shading to achieve a realistic look.
2. Pay attention to light and shadow: Study how the light falls on the flowers in your reference image. Identify the areas that are illuminated and the areas that are in shadow. Add shading accordingly to create the illusion of depth and volume. Remember that light and shadow can help define the shape and form of the flowers.
3. Consider highlights: Along with adding shadows, include highlights to enhance the dimensionality of your drawing. Use an eraser to gently lift off some of the graphite or colored pencil to create lighter areas where the light hits the flowers. This will give them a subtle glow and make them appear more three-dimensional.
4. Blend colors smoothly: If you are using colored pencils or markers, blending the colors smoothly can also contribute to creating depth. Use blending tools such as blending stumps or a soft brush to blend the colors together seamlessly. This eliminates harsh lines and creates a gradual transition of hues, giving the petals a more realistic appearance.
5. Use atmospheric perspective: If you’re drawing a bouquet or multiple flowers, consider using atmospheric perspective. This technique involves making distant flowers appear lighter and less detailed, while closer flowers are more vibrant and defined. This helps create a sense of depth and distance in your composition.
Remember that creating depth and dimension takes practice, so don’t be discouraged if it doesn’t come easily at first. Take your time and experiment with different shading techniques and lighting effects. With practice, you’ll develop your own unique style and improve your ability to create depth in your flower drawings.
With depth and dimension added, you’re ready to move on to the next step of drawing flowers in a vase: adding details to the vase itself.
Step 6: Adding details to the vase
Adding details to the vase is an essential step in bringing realism and visual interest to your flower drawing. These details can enhance the overall composition and make the vase appear more intricate and captivating. Follow these steps to add details to the vase:
1. Define the edges and contours: Use a darker pencil or fineliner to define the edges of the vase. Emphasize the curves, angles, and any decorative elements. This will give the vase a more defined and polished look.
2. Incorporate texture and patterns: Consider adding texture or patterns to the vase to make it visually engaging. This could be crosshatching, stippling, or even incorporating small designs or motifs. Texturing the vase can add depth and make it appear more tactile.
3. Add reflections or reflections: If you’re drawing a glass vase, think about the reflections and refractions that occur on its surface. Sketch these subtle reflections to create a sense of transparency and realism. Reflections can be seen as highlights or distorted shapes that mirror the surroundings.
4. Include any additional decorative elements: If the vase has any additional decorative elements such as handles, engravings, or patterns, make sure to add them in this step. These details can add charm and uniqueness to your drawing.
5. Consider the material of the vase: Depending on the material of the vase you’re drawing, such as ceramic, metal, or glass, make sure to capture the unique characteristics of that material. Study the reference image or real-life objects to observe how light interacts with the material and replicate it in your drawing.
6. Pay attention to proportions: Double-check the proportions of the vase in relation to the flowers. Ensure that the dimensions and shape of the vase are visually pleasing and harmonize with the overall composition.
Remember to use light, controlled strokes when adding details to the vase. Take your time and pay attention to minute details to achieve a high level of accuracy and realism in your drawing. Adding intricate details to the vase will elevate the overall visual impact of your flower drawing.
With the details of the vase complete, you’re almost finished with your beautiful flower drawing. The next step involves enhancing the colors of the flowers to make them truly stand out.
Step 7: Enhancing the flower colors
Enhancing the colors of the flowers is a crucial step in bringing vibrancy and life to your flower drawing. It’s the stage where you can add depth, highlights, and subtle variations to make your flowers truly captivating. Follow these steps to enhance the colors of your flowers:
1. Build up color layers: If you’re using colored pencils or markers, start by applying a base layer of color to the petals. Use light, circular motions to gradually build up the color intensity. Layering the colors will create depth and richness in the petals.
2. Consider light and shadow: Observe the light source in your reference image and consider how it affects the colors of the flowers. Add darker tones to areas that are in shadow and use lighter shades for areas that are illuminated. This will give your flowers a more three-dimensional effect.
3. Blend colors smoothly: If you’re using colored pencils, experiment with blending techniques to create smooth transitions between colors. Use a blending stump, cotton swab, or a soft brush to carefully blend the colors together. This will help create a seamless and natural look to the petals.
4. Introduce subtle variations: Flowers often have variations in color within their petals. Add subtle variations by layering different shades or using light strokes of different colors. This will add visual interest and make the flowers look more realistic.
5. Add highlights: Use a white colored pencil or a white gel pen to add highlights to the petals where the light hits them directly. This will create a sense of luminosity and make the flowers appear more dimensional. Apply these highlights sparingly and with a light hand.
6. Experiment with color combinations: Don’t be afraid to experiment with different color combinations to make your flowers more unique and eye-catching. Consider complementary colors, analogous colors, or even create your own color palette. Let your creativity guide you in choosing the colors that best represent the beauty of the flowers.
Remember that enhancing the flower colors is an opportunity to bring out their natural beauty and make them visually striking. Take your time and have fun exploring the vast range of colors and techniques available to you. With enhanced colors, your flower drawing will come to life in a vibrant and captivating way.
With the flower colors enhanced, it’s time to add another layer of realism to your drawing by incorporating shadows and highlights.
Step 8: Adding shadows and highlights
Adding shadows and highlights to your flower drawing is a crucial step in creating depth, dimension, and realism. Shadows give the flowers a sense of grounding and create the illusion of light, while highlights add brightness and emphasis to certain areas. Follow these steps to effectively incorporate shadows and highlights:
1. Identify the light source: Determine the direction from which the light is coming in your reference image. This will help you determine where the shadows will fall on the flowers and vase.
2. Shade the areas in shadow: Using a darker pencil or shade of your chosen medium, carefully shade the areas of the flowers that are in shadow. These shaded areas will give depth and volume to the flowers. Observe how the petals overlap or cast shadows on one another and shade accordingly.
3. Gradually build up shadow intensity: Start with lighter shades of color for the initial layers of shadows, then gradually build up the darkness and intensity. This layering process creates a more realistic and gradual transition from light to shadow.
4. Add highlights: Using an eraser or a white pencil, gently add highlights to the parts of the flowers and leaves that would catch the most light. This includes the edges of petals, the surface of leaves, and areas that are directly facing the light source. These highlights will bring brightness and emphasis to your drawing.
5. Pay attention to reflected light: Consider how light reflects off one object onto another. This can create soft, subtle highlights on nearby petals or leaves. Carefully observe your reference image to determine these areas and incorporate them into your drawing.
6. Blend and soften edges: To create a more realistic effect, blend the shaded areas and highlights using a blending stump, cotton swab, or a soft brush. This will help soften the edges and create a smoother transition between light and shadow.
Remember to observe and study your reference image closely, as it will guide you in properly placing shadows and highlights. Take your time and work gradually, adjusting as necessary to achieve the desired effect.
With shadows and highlights added, your flower drawing will come to life with depth, dimension, and a captivating interplay of light and shadow.
Now, you’re ready for the final step: applying finishing touches and making any necessary adjustments.
Step 9: Final touches and adjustments
As you near the completion of your flower drawing, it’s important to take a step back and assess the overall composition. This final step involves making any necessary adjustments and adding those special finishing touches that will bring your artwork to its full potential. Follow these steps to give your drawing that extra polished look:
1. Assess the overall composition: Take a moment to evaluate the balance, proportions, and visual impact of your drawing. Are the flowers arranged harmoniously? Does the vase complement the overall composition? Make any adjustments to ensure a visually appealing and cohesive composition.
2. Refine details: Carefully observe your drawing and look for any areas that may need additional refinement. This could include adding more details to the flowers, fine-tuning the texture of the vase, or adjusting any elements that may appear imbalanced. Take your time to bring out the finer features and characteristics of your subjects.
3. Check for accuracy: Double-check the accuracy of your drawing by comparing it to the reference image. Are the shapes, proportions, and colors true to the flowers and vase? Pay attention to the smallest details to ensure authenticity in your artwork.
4. Clean up stray marks: Carefully erase any stray marks or smudges that may have occurred during the drawing process. Use a clean eraser or a kneaded eraser to gently lift off any unwanted graphite or colored pencil marks. This will give your drawing a cleaner and more professional appearance.
5. Add final touches: Consider adding any final details or embellishments that will truly make your drawing unique. This could include adding subtle textures, delicate lines, or even a signature to your artwork. These final touches can add a personal touch and make your drawing truly special.
6. Step back for a fresh perspective: Once you feel satisfied with your drawing, step back and view it from a distance. This will give you a fresh perspective and help you identify any areas that may need further adjustments or refining. Make any necessary tweaks to achieve the desired result.
Remember, the final touches and adjustments are an opportunity to elevate your drawing to its highest potential. Trust your artistic instincts and take the time needed to perfect your artwork.
With the final touches complete, you have successfully drawn beautiful flowers in a vase. Take a moment to appreciate your artistic accomplishment and share your artwork with others to spread joy and inspiration.