
Why Clean Your Air Fryer Tray?
Keeping your air fryer tray clean is essential for several reasons. Here are a few key reasons why you should make it a priority to clean your air fryer tray regularly:
- Food Safety: Over time, food debris, grease, and oils can accumulate on the air fryer tray. These remnants can become a breeding ground for bacteria and other harmful pathogens, posing a risk to your health. Regularly cleaning your air fryer tray helps ensure that your food stays safe and free from contamination.
- Better Cooking Performance: A clean air fryer tray allows for more efficient and even cooking. When the tray is caked with residue, it can prevent the hot air from circulating properly, leading to uneven cooking. By keeping the tray clean, you’ll achieve optimal cooking performance and enjoy crisp and delicious results every time.
- Extended Lifespan: Regular maintenance and cleaning of your air fryer tray can help extend its lifespan. Neglecting to clean the tray can lead to the buildup of stubborn residue and stains that become increasingly difficult to remove. Over time, this can affect the overall functionality and longevity of your air fryer.
- Improved Taste and Odor: A clean air fryer tray ensures that there are no lingering food particles from previous cooking sessions. This helps prevent flavors from transferring, so your food maintains its intended taste. Additionally, cleaning the tray helps eliminate any unpleasant odors caused by built-up grease and residue.
- Easier Cooking Experience: Cleaning your air fryer tray regularly makes the overall cooking experience more enjoyable and hassle-free. By maintaining a clean tray, you’ll avoid the need to scrub away stubborn stains, allowing you to focus on creating delicious meals without the added stress of a dirty tray.
Cleaning your air fryer tray not only helps preserve the quality of your food but also ensures the longevity and performance of your appliance. Now that you understand the importance of cleaning the tray, let’s delve into the step-by-step process of how to clean your air fryer tray effectively.
Tools You’ll Need
Before you start cleaning your air fryer tray, gather the following tools:
- Mild Dish Soap: Choose a gentle dish soap that is suitable for cleaning kitchen utensils and appliances. Avoid using harsh chemicals or abrasive cleaners, as they can damage the surface of the tray.
- Soft Brush or Sponge: A soft-bristled brush or sponge will help you scrub away any stubborn residue without scratching the tray. Opt for a brush with nylon bristles or a sponge specifically designed for non-stick surfaces.
- Warm Water: Running warm water is essential for soaking, rinsing, and loosening food particles from the tray. Make sure the water is warm but not scalding hot, as excessive heat can affect the non-stick coating.
- Microfiber Cloth or Towel: A microfiber cloth or towel is perfect for drying the tray and preventing any water spots or streaks from forming. Its soft texture will not leave any lint on the surface.
- Cotton Swabs: Cotton swabs are useful for cleaning hard-to-reach areas, such as the corners and crevices of the air fryer tray. They can help remove any residue that the brush or sponge might have missed.
Having these tools on hand will ensure that you have everything you need to effectively clean your air fryer tray. Now let’s move on to the step-by-step process of cleaning the tray for optimal results.
Step 1: Unplug and Cool Down
Before you begin cleaning your air fryer tray, it is crucial to turn off and unplug the appliance. This step is important to ensure your safety and prevent any potential accidents.
Allow the air fryer to cool down completely before proceeding with the cleaning process. This will help avoid the risk of burns or injuries caused by hot surfaces.
It is recommended to wait at least 30 minutes to an hour for the air fryer to cool down. You can touch the tray gently to check if it’s cool to the touch.
Remember, never attempt to clean the air fryer tray while it is still hot as it can cause damage to the tray and put you at risk of burns.
Once the appliance has cooled down completely, you are ready to move on to the next step of removing the air fryer tray and beginning the cleaning process.
Step 2: Remove the Air Fryer Tray
Now that your air fryer has cooled down, it’s time to remove the air fryer tray for cleaning.
Open the air fryer drawer or pull out the tray from the appliance. In most air fryer models, the tray can be easily accessed by sliding it forward or lifting it out of the drawer.
Once you have removed the tray, place it on a stable and clean surface. This will ensure that you have a comfortable and convenient workspace for cleaning.
Take a moment to inspect the tray for any visible food debris, grease, or stains. This will help you identify areas that may require extra attention during the cleaning process.
Remember to handle the air fryer tray with care as it can be delicate and prone to damage. Avoid using excessive force when removing or handling the tray to prevent any unnecessary accidents.
With the air fryer tray now removed, you’re ready to move on to the next step of soaking it to loosen any stubborn residue.
Step 3: Soak the Tray
Soaking the air fryer tray is an effective way to loosen stubborn residue and make the cleaning process easier. Follow these steps to properly soak the tray:
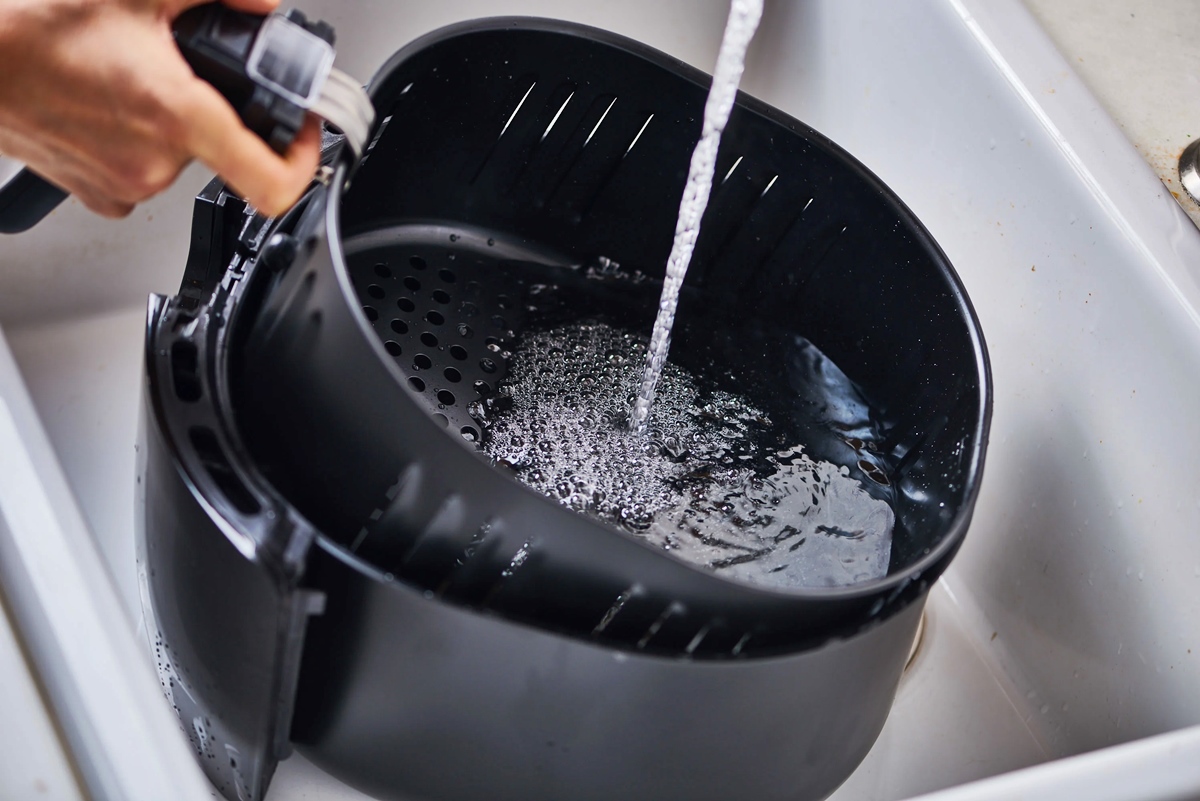
- Fill the Sink or a Basin: Start by filling your sink or a basin with warm water. Ensure that the water level is high enough to fully submerge the tray.
- Add Dish Soap: Add a small amount of mild dish soap to the warm water. Swirl the water gently to create a soapy solution.
- Place the Tray in the Water: Carefully place the air fryer tray in the water, ensuring that it is completely submerged. Allow it to soak for approximately 15-20 minutes. This will help to soften any stuck-on food particles and grease.
- Check for Stubborn Stains: After the soaking time has elapsed, check the tray for any remaining stubborn stains. If there are still areas that require further attention, you can use a soft brush or sponge to scrub them later in the cleaning process.
While the tray is soaking, you can move on to preparing the brush or sponge and gathering the other cleaning tools.
Soaking the air fryer tray not only helps in loosening the residue but also makes the subsequent cleaning steps more efficient. Once the tray has soaked for the recommended time, you’re ready to move on to the next step of scrubbing it to remove any remaining stubborn stains and debris.
Step 4: Scrub with a Brush
Once the air fryer tray has soaked and softened, it’s time to scrub away any remaining residue and stains. Follow these steps to effectively clean the tray:
- Prepare the Brush: Take your soft-bristled brush or sponge and wet it with warm water. Make sure the brush is not overly soaked, as you want to control the amount of moisture applied to the tray.
- Gently Scrub the Tray: Start scrubbing the air fryer tray with the wet brush or sponge. Use gentle circular motions or back-and-forth strokes to remove any food particles, grease, or stains. Pay extra attention to areas with stubborn residue and use a bit more pressure if needed.
- Focus on Non-Stick Coating: While scrubbing, be cautious around the non-stick coating of the tray. Avoid using abrasive materials or brushes that can scratch or damage the surface. Opt for a soft brush specifically designed for non-stick surfaces to protect the coating.
- Clean Corners and Crevices: Use cotton swabs dipped in warm water to clean the hard-to-reach corners and crevices of the air fryer tray. This will ensure that all areas of the tray are thoroughly cleaned and free from any residual debris.
- Rinse the Tray: Once you have scrubbed the tray and removed the residue, rinse it thoroughly with warm water. This will help remove any remaining soap or particles, leaving the tray fresh and clean.
By following these steps, you can effectively scrub away any grime and restore the cleanliness of your air fryer tray. Now that the tray is clean, it’s time to move on to the next step of rinsing and drying.
Step 5: Rinse and Dry the Tray
After scrubbing the air fryer tray, it’s crucial to rinse off any remaining soap and debris. Follow these steps to ensure a thorough rinse and proper drying of the tray:
- Rinse Under Warm Water: Hold the air fryer tray under warm running water, ensuring that all the soap and residue are rinsed away. Pay attention to every nook and cranny to ensure a complete rinse.
- Check for Residue: While rinsing, inspect the tray for any remaining residue or stains. If you spot any, use the brush or sponge to give those areas an extra gentle scrub.
- Dry the Tray: Once the tray is thoroughly rinsed, gently pat it dry with a clean microfiber cloth or towel. Avoid using rough materials that might scratch the surface of the tray.
- Air Dry: To ensure the tray is completely dry, let it air dry for a few hours or overnight. Placing it in a well-ventilated area will speed up the drying process.
Remember, it is crucial to ensure the tray is completely dry before reassembling and using your air fryer. Any moisture left on the tray can cause steam and affect the cooking process.
By following these steps, you can ensure that your air fryer tray is thoroughly rinsed and properly dried. Now that the tray is clean and dry, let’s move on to the next step of cleaning the heating element.
Step 6: Clean the Heating Element
While cleaning the air fryer tray is essential, it’s also important to clean the heating element to maintain the efficiency and performance of your air fryer. Follow these steps to clean the heating element:
- Unplug the Air Fryer: Before cleaning the heating element, ensure that the air fryer is unplugged and completely cooled down. This is crucial for your safety.
- Access the Heating Element: Most air fryers have a removable heating element that can be accessed by detaching a plate or cover. Refer to your air fryer’s manual to determine the best way to access the heating element.
- Inspect for Debris: Carefully inspect the heating element for any visible debris, such as food particles or grease. Use a soft brush or cloth to gently wipe away any loose debris.
- Remove Stubborn Residue: If there are stubborn residue or stains on the heating element, dampen a cloth or sponge with warm water and mild dish soap. Gently scrub the affected areas to loosen the residue. Avoid using excessive force to prevent damage to the heating element.
- Wipe Down: Once you have cleaned the heating element, use a dry cloth or towel to carefully wipe it down. Ensure that the heating element is completely dry before reassembling the air fryer.
- Reassemble: Once the heating element is clean and dry, follow the manufacturer’s instructions to reassemble the air fryer. Make sure all components are securely in place.
Regularly cleaning the heating element helps prevent any buildup that can affect the performance and efficiency of your air fryer. Now that the heating element is clean and the air fryer is ready to use, let’s move on to the next step of cleaning the exterior of the air fryer.
Step 7: Clean the Exterior of the Air Fryer
While cleaning the interior components of your air fryer is important, it’s equally essential to clean the exterior to keep it looking pristine. Here’s how to clean the exterior of your air fryer:
- Unplug the Air Fryer: Before cleaning the exterior, make sure your air fryer is unplugged and cooled down completely. Safety should always come first.
- Wipe with a Damp Cloth: Take a soft cloth or sponge and dampen it with warm water. Gently wipe the exterior surfaces of the air fryer, including the control panel and any buttons or knobs. This will remove any dust, fingerprints, or food particles.
- Pay Attention to Hard-to-Reach Areas: Use cotton swabs dipped in warm, soapy water to clean hard-to-reach areas, such as crevices, corners, and the spaces around buttons. Be careful not to let excess moisture seep into the seams or electronic components.
- Dry Thoroughly: Once you’ve wiped down the exterior surfaces, use a dry cloth or towel to remove any remaining moisture. Make sure the air fryer is completely dry before plugging it back in.
- Polish for Shine (Optional): If your air fryer has a stainless steel exterior, you can use a stainless steel cleaner or polish to restore its shine. Follow the instructions on the cleaner and use a soft cloth to achieve a polished finish.
Regular cleaning of the exterior not only keeps your air fryer looking good but also helps prevent build-up that can impact its overall appearance. With the exterior cleaned, you’re now ready to reassemble the air fryer for future use.
Step 8: Reassemble the Air Fryer
Now that you have thoroughly cleaned all the components of your air fryer, it’s time to reassemble everything for future use. Follow these steps to reassemble your air fryer:
- Ensure Everything is Dry: Double-check that all the components, including the air fryer tray and heating element, are completely dry. Any moisture left could affect the cooking process or cause damage to the air fryer.
- Place the Air Fryer Tray: Insert the clean and dry air fryer tray back into the appropriate slot or drawer in the air fryer. Make sure it fits securely and is properly aligned with the heating element.
- Reattach the Heating Element (if applicable): If you removed the heating element for cleaning, follow the manufacturer’s instructions to reattach it securely. Ensure that it is in the correct position and properly connected.
- Secure Any Detachable Parts: If there were any detachable parts or accessories that you removed during the cleaning process, such as racks or baskets, ensure they are properly secured back in place.
- Check for Proper Placement: Take a moment to double-check that all components are in their correct positions and properly locked or secured. This will ensure the safe and effective operation of your air fryer.
- Plug In the Air Fryer: Once everything is reassembled correctly, plug in your air fryer and ensure it’s connected to a stable power source.
With your air fryer properly reassembled, you’re now ready to enjoy cooking delicious and healthy meals. Remember to follow the manufacturer’s guidelines for operating your specific air fryer model.
Regularly cleaning and maintaining your air fryer will not only ensure its longevity but also guarantee optimal cooking performance for years to come. Lastly, let’s explore some helpful tips for regular maintenance to keep your air fryer in top shape.
Step 9: Regular Maintenance Tips
To keep your air fryer in optimal condition and ensure its longevity, regular maintenance is key. Here are some useful tips to help you maintain your air fryer:
- Regularly Clean the Tray: Clean the air fryer tray after each use to prevent the buildup of food particles and grease. This will make the cleaning process easier and ensure better cooking results.
- Wipe the Exterior: Give the exterior of the air fryer a quick wipe down after each use to remove any splatters or spills. This will help prevent staining or residue buildup.
- Check the Heating Element: Periodically inspect the heating element for any signs of damage or residue buildup. Clean it as necessary to maintain its efficiency and prevent any issues during cooking.
- Regularly Replace Filters (if applicable): If your air fryer has a filter, refer to the manufacturer’s instructions for replacing it at the recommended intervals. This will ensure proper airflow and prevent any blockages.
- Avoid Harsh Cleaners: Use mild dish soap and warm water for cleaning the components of your air fryer. Avoid abrasive cleaners or scouring pads, as they can damage the surfaces and non-stick coating.
- Store Properly: When not in use, store your air fryer in a clean and dry area. Ensure that all components are properly stored and protected from dust and potential damage.
- Follow the Manufacturer’s Instructions: Always refer to the specific guidelines provided by the manufacturer for cleaning and maintenance. Different air fryer models may have unique requirements, so it’s important to follow their recommendations.
By following these regular maintenance tips, you can keep your air fryer in excellent condition and enjoy its benefits for years to come. Integrated into your routine, these practices will help ensure optimal performance and a longer lifespan for your appliance.