
Tools and materials needed
Before you begin, make sure you have the following tools and materials ready:
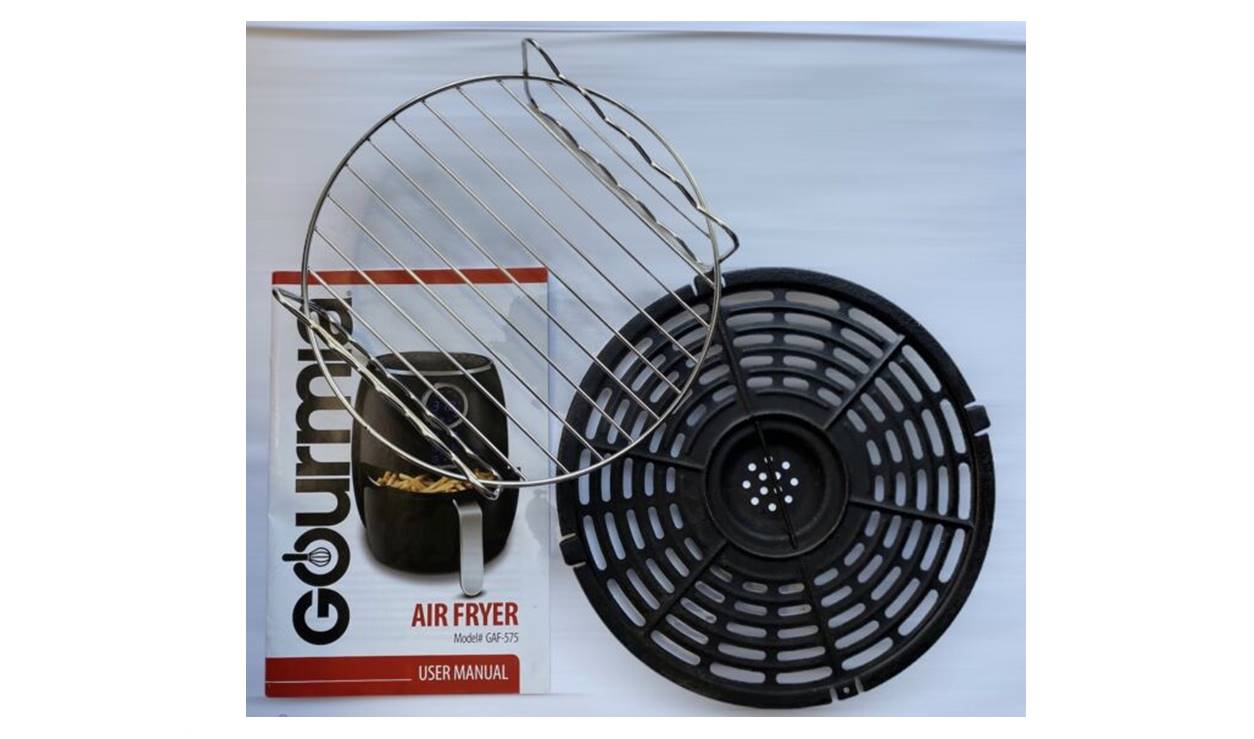
- A Gourmia Air Fryer
- A Crisper Tray (specific to your Gourmia Air Fryer model)
- A clean, dry cloth
The Gourmia Air Fryer is a popular kitchen appliance known for its ability to cook food using minimal oil, resulting in healthier meals. The Crisper Tray is an accessory designed specifically for Gourmia Air Fryers, providing an extra level of crispiness to your dishes.
Ensure that both the Gourmia Air Fryer and the Crisper Tray are in good working condition before you proceed with inserting the tray. It’s important to have a clean and dry cloth on hand to wipe any excess oil or debris on the Crisper Tray.
Having the necessary tools and materials ready will ensure a smooth and hassle-free process when it comes to inserting the Crisper Tray into your Gourmia Air Fryer. With these items at your disposal, you’re ready to move on to the next step.
Step 1: Understand the Crisper Tray
Before you start using the Crisper Tray in your Gourmia Air Fryer, it’s important to have a clear understanding of what it is and how it works. The Crisper Tray is specifically designed to enhance the crispiness of your food by allowing hot air to circulate evenly around it.
The Crisper Tray typically features a perforated or mesh bottom that helps promote airflow and ensures that the food is cooked evenly. It is often made of durable materials such as stainless steel or non-stick coated aluminum, which makes it easy to clean and maintain.
Before inserting the Crisper Tray, it’s essential to check for any signs of damage or wear. Make sure there are no dents, bends, or loose parts that might affect its functionality. Additionally, ensure that the size of the Crisper Tray matches your Gourmia Air Fryer model to ensure a proper fit.
It’s worth noting that the Crisper Tray is not suitable for all types of food. While it works well for items like chicken wings, fries, and other similar dishes, it may not be suitable for more delicate foods or liquids. Use caution and consult your Gourmia Air Fryer’s user manual for specific guidance on what foods are recommended for use with the Crisper Tray.
Understanding the Crisper Tray and its capabilities will allow you to make the most out of your Gourmia Air Fryer. With this knowledge, you can move on to the next step of inserting the Crisper Tray into your air fryer with confidence.
Step 2: Remove the Crisper Tray
Before you can insert the Crisper Tray into your Gourmia Air Fryer, you need to ensure it is properly removed from the appliance. Follow these steps to safely remove the Crisper Tray:
- Make sure the Gourmia Air Fryer is turned off and unplugged from the power source. Safety should always be your top priority during this process.
- Open the air fryer’s main compartment or access door, depending on the model you have. This will allow you to access the cooking area where the Crisper Tray is located.
- Gently but firmly pull the Crisper Tray towards you to remove it from the air fryer. Be cautious as it might be warm or hot due to previous use.
- Place the removed Crisper Tray on a heat-resistant surface or set it aside in a safe area. Avoid placing it on any delicate or heat-sensitive surfaces to prevent damage.
By following these steps, you can safely remove the Crisper Tray from your Gourmia Air Fryer. Taking proper care during this process ensures that you can proceed to the next step of inserting the Crisper Tray with ease and without any issues.
Step 3: Prepare the Air Fryer
Before you insert the Crisper Tray back into your Gourmia Air Fryer, it’s important to make some preparations to ensure optimal cooking results. Follow these steps to prepare the air fryer:
- Ensure that the Gourmia Air Fryer’s main compartment or access door is open, providing you with easy access to the cooking area.
- Inspect the interior of the air fryer for any food debris or residue from previous use. Use a clean and dry cloth to remove any remnants and ensure a clean cooking surface.
- Check the air fryer’s heating element and fan for any visible signs of blockage or damage. Clear away any obstructions that may hinder the airflow and cause uneven cooking.
- If your Gourmia Air Fryer features adjustable temperature settings, set it according to the desired temperature indicated in your recipe or the recommended temperature for the specific food you are preparing.
- If your air fryer has a preheat function, consider preheating it for a few minutes to ensure the cooking environment is at the optimal temperature before inserting the Crisper Tray.
Preparing the air fryer before inserting the Crisper Tray ensures that the cooking surface is clean, free from any obstructions, and at the desired temperature. These preparations are essential for achieving consistent and delicious results with your Gourmia Air Fryer.
Step 4: Insert the Crisper Tray
Now that you have prepared the Gourmia Air Fryer, it’s time to insert the Crisper Tray. Follow these steps to ensure a proper fit:
- Take the Crisper Tray and hold it with both hands. Position it above the cooking area in the air fryer.
- Align the edges of the Crisper Tray with the grooves or tracks on the sides of the air fryer. This will ensure that the tray slides in smoothly.
- Gently slide the Crisper Tray into the air fryer, taking care not to force it or apply excessive pressure. It should glide in easily if properly aligned.
- Push the Crisper Tray all the way in until it reaches the back of the air fryer. Ensure that it is inserted fully and sits flush with the walls of the cooking area.
By following these steps, you can properly insert the Crisper Tray into your Gourmia Air Fryer. The tray should fit snugly and securely, allowing for optimal airflow and even cooking of your food.
It’s important to note that each Gourmia Air Fryer model may have slight variations in how the Crisper Tray is inserted. If you encounter any difficulties or have concerns, refer to your air fryer’s user manual for model-specific instructions.
Once the Crisper Tray is properly inserted, you’re ready to move on to the next step and secure it in place before starting the cooking process.
Step 5: Secure the Crisper Tray
After inserting the Crisper Tray into your Gourmia Air Fryer, it’s important to ensure that it is securely in place before starting the cooking process. Follow these steps to secure the Crisper Tray:
- Check that the Crisper Tray is aligned and positioned correctly within the air fryer.
- Look for any locking mechanisms or features that may be present in your Gourmia Air Fryer model.
- If your air fryer has locking tabs or hooks, carefully engage them to secure the Crisper Tray in place.
- Give the Crisper Tray a gentle shake to confirm that it is properly secured and doesn’t move or wobble.
Securing the Crisper Tray is crucial to prevent any accidents or issues during the cooking process. It ensures that the tray stays in place, allowing for even cooking and preventing any potential spills or messes.
If your Gourmia Air Fryer does not have any specific locking mechanisms, rest assured that the snug fit of the Crisper Tray should keep it in place during cooking. However, it’s still a good practice to give it a gentle shake to double-check its stability.
By taking the time to secure the Crisper Tray properly, you can have peace of mind and confidently move forward with using your Gourmia Air Fryer for delicious meals.
Step 6: Start Using the Air Fryer with Crisper Tray
Now that the Crisper Tray is securely in place in your Gourmia Air Fryer, you’re ready to start using it to cook delicious meals. Follow these steps to begin:
- Ensure that the air fryer is plugged in and turned on, following the manufacturer’s instructions for power settings.
- Refer to your recipe or cooking instructions to determine the recommended temperature and cooking time for your desired dish.
- Set the temperature and cooking time on your Gourmia Air Fryer accordingly, using the control panel or knobs provided.
- Allow the air fryer to preheat, if necessary, to ensure the cooking environment reaches the desired temperature.
- Place the food you want to cook onto the Crisper Tray, ensuring an even and single layer for optimal results.
- Slide the Crisper Tray back into the air fryer, making sure it is properly aligned and securely in place.
- Close the air fryer’s main compartment or access door, trapping the hot air inside for efficient cooking.
- Monitor the cooking process through the air fryer’s transparent window or by periodically opening the compartment for a quick check.
- When the cooking time is complete, carefully remove the Crisper Tray from the air fryer using oven mitts or heat-resistant gloves.
- Allow the food to cool for a few minutes before serving, as it may be hot from the cooking process.
By following these steps, you can start using your Gourmia Air Fryer with the Crisper Tray to cook a variety of delicious meals. Experiment with different recipes and adjust cooking times and temperatures to achieve your desired level of crispiness and doneness.
Remember, always exercise caution when handling hot surfaces and follow proper safety protocols to prevent any accidents or injuries. Enjoy the convenience and health benefits of using your Gourmia Air Fryer with the Crisper Tray to create flavorful, crispy dishes with ease.
Step 7: Clean and Maintain the Crisper Tray
Keeping the Crisper Tray clean and well-maintained is essential to ensure its longevity and to prevent any buildup of residue that may affect the quality of your cooked food. Follow these steps to effectively clean and maintain the Crisper Tray:
- Allow the Crisper Tray to cool down completely before handling it for cleaning.
- Remove any excess oil, food particles, or residue from the Crisper Tray by gently scraping them off with a soft brush or cloth.
- Fill a sink or basin with warm water and a mild dish soap solution.
- Place the Crisper Tray into the soapy water and let it soak for a few minutes to loosen any stubborn stains or grime.
- Using a non-abrasive sponge or cloth, scrub the Crisper Tray in gentle, circular motions to remove any remaining residue.
- Rinse the Crisper Tray thoroughly with warm water to remove all traces of soap.
- Dry the Crisper Tray completely using a clean towel or by air-drying it on a dish rack.
- Inspect the Crisper Tray for any signs of damage, such as scratches or wear. If necessary, consider replacing it with a new one for optimal performance.
- Store the Crisper Tray in a clean and dry location, ensuring it is protected from any potential damage.
Regularly cleaning the Crisper Tray after each use will help maintain its functionality and ensure that your food maintains its desired crispiness. Additionally, proper maintenance and storage will prolong the lifespan of the Crisper Tray, allowing you to enjoy its benefits for a long time.
Always refer to the manufacturer’s instructions and recommendations for cleaning and maintenance specific to your Gourmia Air Fryer model. By following their guidelines, you can ensure that the Crisper Tray remains in optimal condition and continues to enhance your cooking experience.
Step 8: Tips and Tricks for Using the Crisper Tray
Using the Crisper Tray with your Gourmia Air Fryer opens up a world of possibilities for delicious, crispy meals. Here are some tips and tricks to help you make the most out of your Crisper Tray:
- Preheat the air fryer: Preheating the air fryer for a few minutes before inserting the Crisper Tray can help achieve a better crisp on your food.
- Avoid overcrowding: Ensure that you leave enough space between the food on the Crisper Tray for proper hot air circulation. Overcrowding may result in uneven cooking and less crispy results.
- Flip or shake halfway through: For certain foods, like fries or chicken wings, flipping or shaking them midway through the cooking process can help achieve an even crisp.
- Experiment with cooking times and temperatures: Different foods and personal preferences may require adjustments in cooking times and temperatures. Experiment to find the perfect balance for the crispiness you desire.
- Use cooking spray or oil sparingly: While the Crisper Tray helps to reduce the need for excessive oil, a light coating of cooking spray or a small amount of oil can enhance the crispy texture. Be mindful of the quantity used to avoid excessive greasiness.
- Clean the Crisper Tray promptly: Cleaning the Crisper Tray after each use prevents the buildup of residues that can affect the performance and crispiness of future meals.
- Try different recipes: Explore a variety of recipes specifically designed for air fryers with Crisper Trays. From crispy chicken tenders to roasted vegetables, the possibilities are endless.
- Monitor the cooking process: Keep an eye on the cooking progress through the air fryer’s transparent window or by briefly opening the compartment. This allows you to make adjustments if needed to achieve the desired level of crispiness.
- Get creative: Don’t be afraid to think outside the box and try new foods and flavor combinations. The Crisper Tray can be a versatile tool for creating delicious, crispy dishes beyond the standard favorites.
By following these tips and tricks, you can unlock the full potential of your Crisper Tray and Gourmia Air Fryer. Experiment, have fun, and enjoy the enhanced crispiness and deliciousness of your favorite meals.
Remember to always refer to the specific instructions and guidelines provided by the manufacturer for using the Crisper Tray with your Gourmia Air Fryer, as each model may have unique features or recommendations to consider.