
Select the Right Lamp
When it comes to rewiring a lamp, selecting the right lamp is the first step towards a successful project. Whether you have an antique piece that holds sentimental value or a modern lamp that needs a wiring replacement, choosing the right one is crucial. Here are a few key considerations to keep in mind when selecting a lamp for rewiring:
- Style and Design: Consider the style and design of the lamp. Determine if the lamp’s aesthetic and overall look align with your preferences and the space where it will be used. Whether you prefer a vintage-inspired lamp or a sleek and modern design, ensure the lamp has the desired style before proceeding with the rewiring process.
- Size and Proportions: Take into account the lamp’s size and proportions. Consider the height and width of the lamp to ensure it fits seamlessly into the intended space. Additionally, check that the lamp is structurally sound and in good condition before starting the rewiring process.
- Socket Compatibility: Pay attention to the socket compatibility of the lamp. Ensure that the socket can accommodate the type of bulb you wish to use. Different lamps may require different socket sizes and configurations, so it’s essential to check if the lamp’s socket is compatible with your lighting needs.
- Electrical Safety: Prioritize electrical safety when selecting a lamp for rewiring. Look for any signs of damage to the existing wiring or electrical components. Inspect the plug and cord for fraying or exposed wires, which may indicate potential hazards. Choosing a lamp in good condition will ensure a safer and more straightforward rewiring process.
- Budget: Consider your budget when selecting a lamp for rewiring. Determine how much you are willing to invest in the project, taking into account any additional costs for replacement parts or professional assistance, if needed. Balance your budgetary constraints with your desired lamp style and functionality.
By carefully considering these factors, you can select the perfect lamp for rewiring. Remember, this initial step sets the foundation for a successful rewiring project. Once you have chosen the ideal lamp, you can proceed to gather the necessary tools and materials for the next steps of the process.
Gather Your Tools and Materials
Before you begin the process of rewiring a lamp, it’s essential to gather all the necessary tools and materials to ensure a smooth and efficient project. Having everything prepared in advance will help avoid unnecessary interruptions or delays. Here are the essential tools and materials you will need:
- Screwdriver: A screwdriver, preferably a flathead or Phillips-head screwdriver, will be needed to remove any screws or fasteners holding the lamp together.
- Wire Cutters: Wire cutters are essential for cutting and trimming the lamp’s old wires and stripping the insulation from the new wires.
- Wire Strippers: Wire strippers are useful for removing the plastic insulation from the ends of the wires, allowing for proper connections.
- Replacement Cord: Depending on the condition of the existing cord, you may need to replace it. Make sure to choose a cord that matches the wattage and voltage requirements of the lamp.
- Replacement Socket: If the lamp’s socket is damaged or malfunctioning, you will need a new socket. Ensure the replacement socket is compatible with the lamp’s design and electrical requirements.
- Wire Connectors: Wire connectors, also known as wire nuts, are necessary for secure connections between wires. Choose connectors that match the wire gauge and have the appropriate size for the number of wires being joined.
- Insulating Tape: Insulating tape, such as electrical tape, provides an extra layer of protection for the wiring connections. It helps prevent exposed wires and reduces the risk of electrical hazards.
- Lampshade: If you plan to reassemble the lamp with its original lampshade, ensure that it is in good condition and free of any damage. If you prefer a new lampshade, select one that complements the lamp’s style and dimensions.
- Bulb: Don’t forget to have a new light bulb on hand. Choose a bulb with the appropriate wattage and type for the lamp’s socket requirements and your lighting preferences.
By having these tools and materials ready, you will be properly equipped to tackle the task of rewiring your lamp. It’s important to have all the necessary components to ensure a successful and safe rewiring process. With the tools in your possession, you are ready to proceed to the next steps of turning off the lamp and preparing for the rewiring process.
Turn off the Lamp and Unplug It
Before you begin any electrical work, it is crucial to prioritize safety. To ensure your well-being and prevent any accidents, it is essential to turn off the lamp and unplug it from the power source. Follow these steps to safely disconnect the lamp:
- Switch off the Lamp: Locate the lamp’s switch or knob and turn it off. This will ensure that the lamp is not running any electrical current while you work on it.
- Unplug the Lamp: Once the lamp is switched off, unplug it from the power outlet. This will cut off the power supply to the lamp, reducing the risk of electric shock while handling the wiring.
It is essential to remember that working with live electrical wires can be extremely dangerous. Even if the lamp appears to be off, there may be residual electrical charge in the wiring or internal components. By turning off the lamp and unplugging it from the power source, you create a safe environment to proceed with the rewiring process.
Additionally, avoid touching any exposed wires or metal parts of the lamp during this step, as residual charges can still exist even when the lamp is switched off. Safety should always be the top priority when working with electrical components.
By turning off the lamp and unplugging it, you have taken the necessary steps to ensure your safety. The next step is to remove the lampshade and light bulb before proceeding further with the rewiring process.
Remove the Lampshade and Light Bulb
Before you can begin the rewiring process, you need to remove the lampshade and light bulb from the lamp. This step allows for better access to the lamp’s internal components. Follow these steps to safely remove the lampshade and light bulb:
- Ensure the Lamp is Cool: Before removing the lampshade and light bulb, make sure the lamp has been turned off and has had sufficient time to cool down. This will prevent any risk of burning yourself while handling the lamp.
- Remove the Lampshade: Gently and carefully remove the lampshade by unscrewing it or detaching it from any clips or holders. Set the lampshade aside in a safe place where it won’t get damaged.
- Unscrew the Light Bulb: If the light bulb is still in the socket, turn it counterclockwise to unscrew and remove it. Place the light bulb in a secure location, ensuring it won’t break or be damaged.
- Inspect the Socket: Take a moment to inspect the socket for any signs of damage, such as burn marks or loose connections. If you notice any issues, it may be necessary to replace the socket during the rewiring process.
By removing the lampshade and light bulb, you create a clear workspace to proceed with the rewiring process. Remember to handle the light bulb and lampshade with care to avoid any accidental breakage or injury.
Now that the lampshade and light bulb have been safely removed, it’s time to focus on the socket shell, which needs to be taken off to access the existing wiring for rewiring.
Remove the Socket Shell
Once you have removed the lampshade and light bulb, the next step in the rewiring process is to remove the socket shell. The socket shell is the outer covering that protects the socket and wiring inside the lamp. Follow these steps to safely remove the socket shell:
- Inspect the Socket: Before proceeding, take a moment to inspect the socket shell for any visible screws, clips, or retaining rings that hold it in place. You may need to remove these components to release the socket shell.
- Loosen Screws or Remove Retaining Rings: If there are screws or retaining rings holding the socket shell in place, use a screwdriver or pliers to loosen or remove them. Be sure to keep track of any small components and set them aside in a safe location.
- Gently Pull the Socket Shell: Once any screws or retaining rings have been loosened or removed, gently pull the socket shell away from the lamp base. Be careful not to yank or force it, as there may be wire connections inside that need to be disconnected first.
- Disconnect Wire Connections: After removing the socket shell, you may see wire connections attached to it. If this is the case, carefully disconnect the wires by unscrewing or separating the wire connections. Take note of the wire colors and their corresponding connections for reassembly later.
By removing the socket shell, you now have clear access to the lamp’s wiring for rewiring. Inspect the socket and wires for any signs of damage, such as fraying, exposed wires, or loose connections. If the wiring appears to be compromised, it may be necessary to replace it during the rewiring process.
After removing the socket shell and ensuring the wiring is in good condition, you can proceed to the next step of the rewiring process: disconnecting the old wires from the socket to prepare for the installation of new ones.
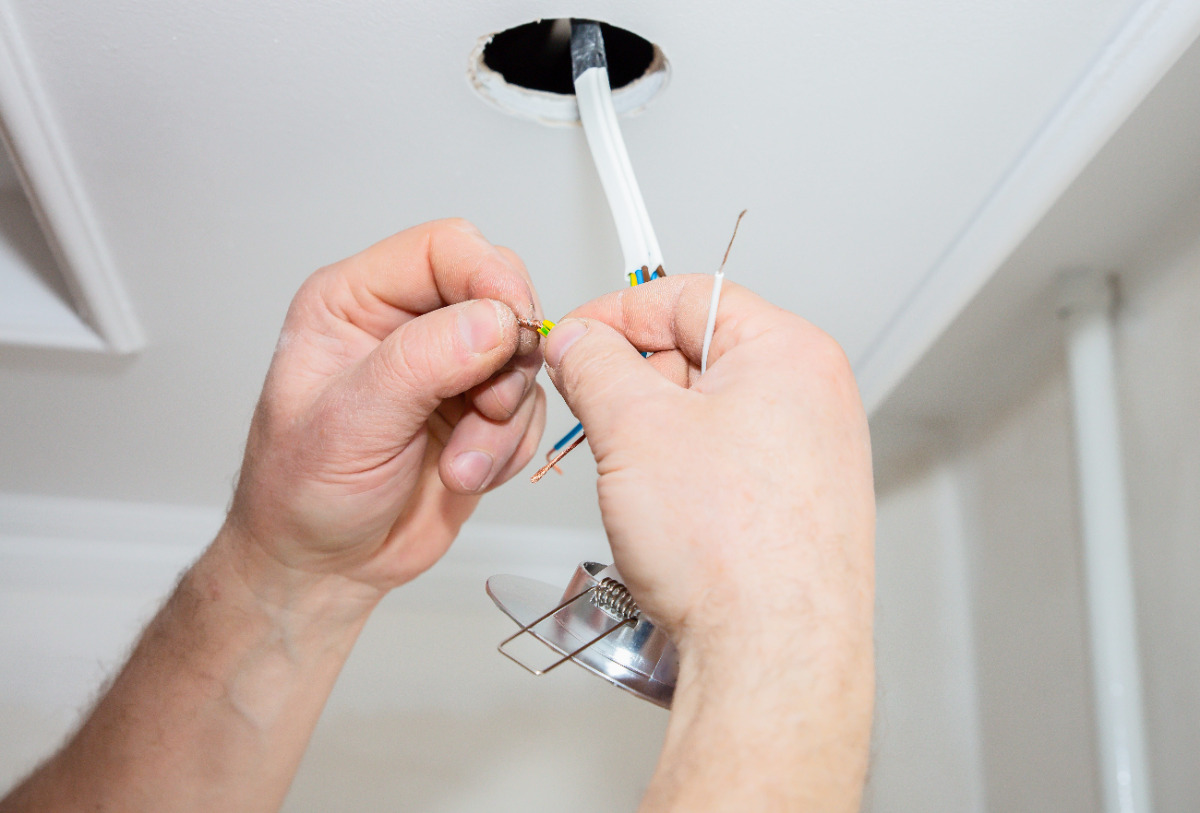
Disconnect the Old Wires from the Socket
With the socket shell removed, the next step in the rewiring process is to disconnect the old wires from the socket. Disconnecting the old wires allows for the installation of new ones, ensuring a secure and properly functioning electrical connection. Follow these steps to safely disconnect the old wires:
- Identify the Old Wires: Take a moment to identify the old wires connected to the socket. Typically, you will see two wires – one connected to the brass terminal and the other to the silver terminal. The color coding may vary, with black or brown wires commonly connected to the brass terminal and white or blue wires connected to the silver terminal.
- Prepare for Disconnection: Before disconnecting the old wires, ensure that the lamp is unplugged and turned off to eliminate any risk of electric shock. You may also want to take note of the wire positions or take a picture for future reference during the reassembly process.
- Unscrew the Wire Connections: To remove the old wires, use a screwdriver to unscrew the wire connections from the socket terminals. Turn the screws counterclockwise to loosen and release the wires. Ensure a firm grip on the wires as you unscrew to prevent any accidental pulling or damage.
- Separate the Wires: Once the screws are fully loosened, gently separate the old wires from the socket terminals. Take care not to damage the wires or the terminals during this process. If the wires are tightly wound around the terminals, untwist them to fully separate.
By disconnecting the old wires from the socket, you have successfully removed the existing electrical connections. Take a moment to inspect the old wires for any signs of damage, such as fraying, exposed copper, or brittleness. If the wires show any signs of deterioration, it’s crucial to replace them with new wires during the rewiring process.
Now that the old wires have been disconnected, we can move on to the next step of the rewiring process: stripping the ends of the new wires in preparation for attaching them to the socket.
Strip the Ends of the New Wires
With the old wires disconnected from the socket, the next step in the rewiring process is to strip the ends of the new wires. Stripping the wire ends ensures a clean and proper connection to the socket terminals, allowing for reliable electrical conductivity. Follow these steps to safely strip the ends of the new wires:
- Measure and Cut the New Wires: Measure and cut the new wires to the appropriate length, keeping in mind the distance between the socket terminals and the lamp base. Leave a little extra length to work with, as it is always better to have more wire than not enough.
- Prepare the Wire Strippers: Locate a pair of wire strippers with a cutting edge and various notches for different wire gauges. Choose the notch that matches the thickness of the wire you are using. Check the wire strippers to ensure they are clean and in good working condition.
- Position the Wire Stripper: Hold one end of the new wire between your thumb and forefinger, close to the wire insulation. Position the wire stripper over the end of the wire, making sure the desired gauge notch is aligned with the wire.
- Strip the Wire: Squeeze the wire stripper handles together firmly to cut through the wire insulation without damaging the underlying copper wire. Pull the wire stripper towards the end of the wire, removing the insulation in a single motion. Be cautious not to strip too much insulation, only enough to expose the required length of bare wire.
- Repeat for the Other Wire: Repeat the stripping process for the other end of the new wire. Ensure both ends are stripped to the same length, maintaining consistency for a balanced connection.
By properly stripping the ends of the new wires, you create a clean surface for solid electrical connections. Take a moment to inspect the stripped ends, ensuring there are no frayed or loose wire strands. If necessary, trim any excess strands to avoid potential short circuits.
With the new wires stripped and prepared, the next step is to attach them securely to the socket terminals as we continue with the rewiring process.
Attach the New Wires to the Socket
With the new wires stripped and ready, it’s time to attach them to the socket. Properly connecting the wires to the socket terminals ensures a secure and reliable electrical connection. Follow these steps to safely attach the new wires to the socket:
- Identify the Socket Terminals: Take a moment to identify the socket terminals. Typically, there will be a brass terminal and a silver terminal. The brass terminal is for the hot wire (typically black or brown), while the silver terminal is for the neutral wire (typically white or blue).
- Position the New Wires: Position one end of the new wire near the brass terminal, ensuring that the stripped end extends slightly beyond the terminal’s opening. Repeat the process for the other new wire and the silver terminal.
- Secure the Wires: Use a screwdriver to tighten the screw on each terminal, securing the new wires in place. Turn the screws clockwise to ensure a tight connection, making sure the bare wire is pressed against the terminal. Avoid overtightening the screws, as this may damage the wire or terminal.
- Check the Connections: After tightening the screws, double-check the connections to make sure they are secure. Gently tug on the wires to ensure they are firmly held in place. If any wires are loose, tighten the corresponding terminal screws until the connection is secure.
By attaching the new wires to the socket terminals, you have established a proper electrical connection. Take a moment to inspect the connections to ensure there is no exposed wire or loose strands that may cause a short circuit.
It’s important to note that the exact process of attaching the new wires to the socket may vary depending on the lamp’s design and socket type. Always refer to the manufacturer’s guidelines or seek professional assistance if you have any doubts or concerns.
With the new wires securely attached, you can proceed to reassemble the lamp, connecting the socket shell and other components to complete the rewiring process.
Reassemble the Lamp
After successfully attaching the new wires to the socket, the next step in the rewiring process is to reassemble the lamp. This involves putting all the components back together, ensuring that everything is properly aligned and secured. Follow these steps to safely reassemble the lamp:
- Position the Socket Shell: Begin by placing the socket shell back onto the lamp base, making sure it aligns properly with any screw holes or slots. Gently push it into place until it is snug and secure.
- Reconnect the Lampshade Holder: If your lamp has a separate lampshade holder or harp, reattach it to the lamp base. Slide the lampshade holder into the designated slots or brackets, adjusting its position if needed.
- Secure the Socket Shell: If there were screws, clips, or retaining rings that held the socket shell in place, reinsert and tighten them accordingly. Ensure that the socket shell is firmly secured to the lamp base.
- Reattach the Lampshade: Take the lampshade and carefully place it back onto the lampshade holder or attach it using the designated method, such as screws or clips. Make sure the lampshade is positioned straight and secure.
- Install the Light Bulb: Screw in a new light bulb into the socket, turning it clockwise until it is securely in place. Make sure to use a bulb that matches the lamp’s wattage and is appropriate for your lighting needs.
Throughout the reassembly process, pay attention to any small components or fasteners that were removed earlier. Ensure that all screws, clips, or retaining rings are accounted for and properly reattached as needed.
Once the lamp is fully reassembled, take a moment to inspect the overall appearance and stability. Make any necessary adjustments to ensure that the lamp looks aligned and balanced. Double-check that all connections are secure, wires are properly routed, and there are no signs of damage or loose components.
With the lamp successfully reassembled, the final step is to test the rewired lamp to ensure it functions safely and effectively.
Test the Rewired Lamp
After reassembling the lamp, it is essential to test the rewired connections to ensure the lamp functions properly and safely. Testing the lamp will confirm that the electrical wiring has been successfully replaced and that all components are functioning as intended. Follow these steps to test the rewired lamp:
- Plug in the Lamp: Begin by plugging the lamp into a working power outlet. Ensure that the outlet is properly grounded and that the lamp’s plug is securely inserted.
- Switch on the Lamp: Turn on the lamp using the switch or knob. Listen and look for any signs of abnormal buzzing, flickering, or sparking. If any issues arise, immediately switch off the lamp and unplug it to address the problem.
- Check the Light Bulb: Observe the light bulb to ensure that it is lit up without any irregularities. If the bulb fails to illuminate or shows intermittent lighting, it may be a sign of a faulty connection or a defective bulb. Replace the bulb if necessary.
- Inspect the Socket: While the lamp is turned on, carefully touch the socket to check if it is unusually warm or hot. A slightly warm socket is normal, but excessive heat could indicate an electrical issue. If the socket becomes too hot to touch, immediately switch off the lamp and unplug it.
- Test the Lamp’s Functionality: Test the lamp’s functionality by switching it on and off a few times, using any additional settings or features the lamp may have. Make sure that the lamp responds correctly and consistently.
During the testing phase, remain vigilant and attentive to any signs of malfunction or safety concerns. If you notice any abnormalities or suspect an electrical problem, it is crucial to seek professional assistance or consult an electrician to address the issue.
By thoroughly testing the rewired lamp, you confirm that the rewiring process was successful, ensuring a safe and functional lighting fixture for your enjoyment.