
Choosing the Right Time to Cut Roses
Roses are known for their beautiful and fragrant blooms, but cutting them at the wrong time can affect their longevity. To ensure your roses stay fresh and vibrant in a vase, it’s crucial to choose the right time to cut them.
Timing is everything when it comes to cutting roses. The ideal time to cut roses for a vase is early in the morning, just after the dew has dried. This is when the roses are fully hydrated from the night and the stems are at their strongest. Avoid cutting roses in the heat of the day or late in the afternoon, as the hot temperatures can cause the flowers to wilt quickly.
Another important factor to consider is the stage of the blooms. Look for roses that are at the “just opened” stage. They should have fully opened petals but still retain their shape and tightness. Cutting roses that are fully open can lead to a shorter vase life as they will deteriorate more quickly.
It’s also worth noting the weather forecast. Cutting roses on a dry day, with low humidity and minimal wind, will minimize stress on the plant and help to prevent fungal diseases from spreading. Wet or humid conditions can lead to rotting stems and decreased vase life for the cut roses.
Lastly, consider the purpose of the cut roses. If you’re planning to use the roses for a special occasion or event, make sure to cut them a day or two in advance to allow the blooms to fully open. For everyday enjoyment, cutting the roses when they’re nearly at peak bloom can provide you with several days of beauty in a vase.
By choosing the right time to cut your roses, you’ll ensure that they will have a longer vase life and continue to bring joy and beauty to your home. Remember to be mindful of the weather conditions, the bloom stage, and your intended use for the roses, and you’ll enjoy the best results when arranging them in a vase.
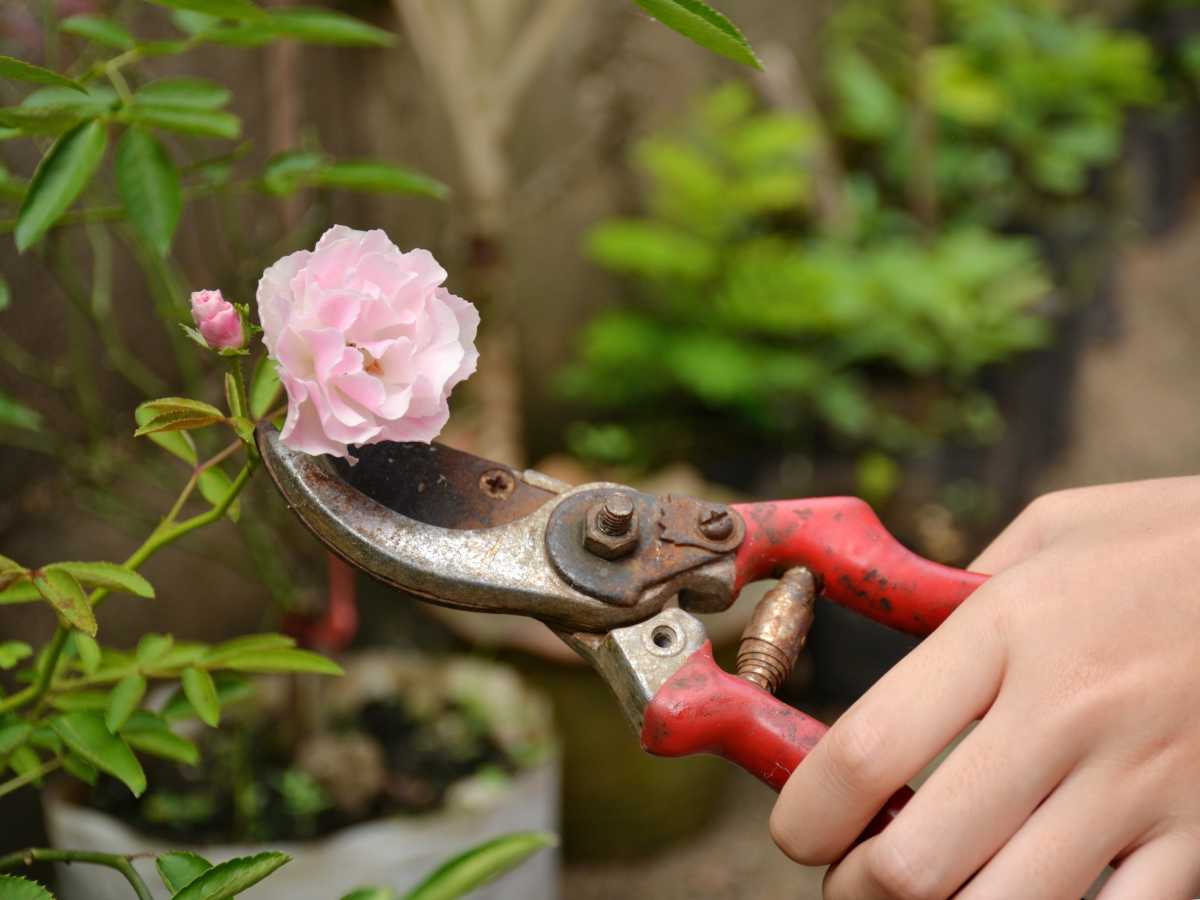
Selecting the Appropriate Tools
When it comes to cutting roses for a vase, having the right tools can make a significant difference in the outcome. Here are some essential tools to consider for the task:
1. Pruning Shears: Invest in a pair of high-quality pruning shears specifically designed for cutting roses. Look for shears with a sharp, bypass blade that can make clean cuts without crushing the stems. Avoid using dull or rusty shears as they can damage the roses and impede their ability to take up water.
2. Floral Knife: A sharp floral knife is another excellent tool for cutting roses. The thin, pointed blade of a floral knife allows for precise cuts and minimizes damage to the stems. This tool is especially useful for cutting roses with thick stems or in tight spaces within the rose bush.
3. Gloves: Rose bushes have thorns that can cause painful pricks. Protect your hands by wearing a sturdy pair of gardening gloves. Look for gloves with long cuffs to protect your forearms as well. Opt for gloves made of lightweight and breathable material, so you can comfortably handle the roses while still maintaining a good grip on your tools.
4. Clean Cloth or Paper Towel: Keep a clean cloth or paper towel nearby to wipe the tools between cuts. This will help prevent the spread of diseases or fungi from one rose to another. Sanitizing the blades of your pruning shears or floral knife can also help maintain the health of your rose bushes.
5. Bucket of Water: Prepare a bucket of water to place the cut roses immediately after cutting. This will prevent air bubbles from forming in the stems and ensure the roses stay hydrated. Additionally, having a bucket of water nearby is handy for cleaning your tools and for re-cutting the stems at an angle before arranging them in the vase.
By selecting the appropriate tools for cutting roses, you’ll ensure clean cuts, minimize damage to the plants, and help preserve the longevity of the cut roses in a vase. Remember to keep your tools clean, wear protective gloves, and have a bucket of water ready for immediate placement of the cut roses. With the right tools at hand, you’ll be well-equipped to create stunning floral arrangements that will brighten any space.
Identifying the Perfect Bloom Stage
Choosing roses at the perfect bloom stage is essential for creating a visually stunning arrangement that will last longer in a vase. Here are some tips to help you identify the ideal bloom stage:
1. Look for Partially Opened Buds: When selecting roses for cutting, aim for buds that are partially opened. These buds should have some firmness and show signs of color but still retain their shape. Avoid choosing roses that have fully opened and begun to droop, as they may not last as long once cut.
2. Consider the Color: Different rose varieties have varying rates of color development. Take note of the color of the rose at the desired bloom stage and select roses that are a shade or two lighter than that stage. This will ensure that, as the roses continue to open in the vase, they will reach the desired color without fading or browning quickly.
3. Assess Petal Shape and Texture: Examine the petals of the roses you are considering cutting. They should feel firm and resilient to the touch, without any signs of wilting or browning at the edges. Look for roses with smooth petals that are free from damage or deformities, as these will have a more visually appealing appearance in a vase.
4. Check for Healthy Foliage: The health and condition of the foliage can also indicate the bloom stage of the rose. Look for leaves that are green, glossy, and free from spots or discoloration. Healthy foliage is a good indicator that the roses are at an optimal bloom stage and will have a longer vase life.
5. Consider the Overall Appearance: Take a step back and consider the overall appearance of the rose. Look for well-balanced blooms with a symmetrical shape. Avoid roses with uneven or lopsided petals, as these may not open fully or evenly once cut.
By identifying the perfect bloom stage for cutting roses, you’ll ensure that your floral arrangements are visually appealing and have a longer vase life. Remember to look for partially opened buds with firmness, consider the color and petal shape, assess the health of the foliage, and consider the overall appearance of the rose. With a keen eye for the perfect bloom stage, you’ll be able to create stunning displays that showcase the beauty of your roses in a vase.
Locating an Ideal Stem Length
When cutting roses for a vase, the length of the stem plays a crucial role in the overall aesthetics and longevity of the arrangement. Here are some tips for locating the ideal stem length:
1. Consider the Vase Size: Before cutting the roses, take into account the size of the vase you plan to use. The stem length should be proportional to the height of the vase. Aim to select roses with longer stems for taller, more substantial vases, while shorter stems are suitable for smaller or more compact arrangements.
2. Account for Design and Proportion: The stem length can also influence the overall design and proportion of the floral arrangement. For a traditional bouquet, aim for stems that are roughly 1.5 times the height of the vase. However, for a more contemporary look, longer stems that extend beyond the height of the vase can create an elegant and dramatic effect.
3. Consider the Bloom Size: The size and weight of the blooms should also be taken into consideration when determining the ideal stem length. Roses with larger, heavy blooms may require longer stems to provide adequate support and prevent them from drooping in the vase. On the other hand, smaller blooms can be paired with shorter stems for a more delicate and compact arrangement.
4. Take Into Account the Growth Habit: Different rose varieties have distinct growth habits, which can affect the length of the stems. Some roses naturally produce longer, more upright stems, while others have shorter and more compact growth. Understand the growth habit of the specific rose variety you are working with and adjust the stem length accordingly.
5. Experiment and Adjust: Don’t be afraid to experiment with different stem lengths to find what works best for your specific arrangement and vase. Cut the initial stems slightly longer than needed and gradually trim them down until you achieve the desired height and proportion. Remember to cut the stems at a slight angle to facilitate water absorption.
By locating an ideal stem length for your cut roses, you’ll ensure a visually pleasing and well-balanced floral arrangement in the vase. Consider the size of the vase, account for design and proportion, think about the size of the blooms, take into account the growth habit of the roses, and be open to adjusting and experimenting. With a little practice and attention to detail, you’ll master the art of selecting the perfect stem length for your roses.
Preparing the Vase and Water
Properly preparing the vase and water is essential for ensuring the longevity and freshness of cut roses. Here are some steps to follow when preparing the vase and water:
1. Choose a Clean Vase: Start by selecting a clean vase that has been thoroughly washed with hot, soapy water. This will help remove any dirt, bacteria, or residue that could potentially harm the roses. Ensure that the vase is free from any debris or lingering soap before proceeding.
2. Sanitize the Vase: Before adding water, sanitize the vase by rinsing it with a mixture of one part bleach and nine parts water. Pour the solution into the vase, swish it around, and let it sit for a few minutes. Rinse the vase thoroughly with clean water to remove any remaining bleach solution.
3. Fill the Vase with Fresh Water: Fill the clean vase with fresh, lukewarm water. Ideally, use filtered or distilled water, as tap water may contain additives or chemicals that can shorten the vase life of the roses.
4. Add Flower Preservative: Flower preservatives, available at florist shops or garden centers, can help extend the life of cut roses. Follow the instructions on the package and add the appropriate amount of preservative to the water in the vase. This will provide essential nutrients and inhibit bacterial growth, keeping the roses fresh and vibrant for a longer duration.
5. Remove Excess Foliage: Before placing the roses in the vase, remove any excess foliage or leaves that would be submerged in the water. This will prevent the leaves from decomposing and creating a breeding ground for bacteria. Leave only a few leaves at the top of the stems to enhance the visual appeal of the arrangement.
6. Change the Water Regularly: To maintain the freshness of the cut roses, change the water in the vase every two to three days. Before refilling the vase, clean it again with hot, soapy water, rinse thoroughly, and repeat the steps of adding fresh water and flower preservative.
7. Trim the Stems: Finally, trim the stems of the roses at a diagonal angle before placing them in the vase. This will create a larger surface area for water absorption and prevent the ends from resting flat at the bottom of the vase, which can impede water uptake. Repeat this step every time you change the water.
By properly preparing the vase and water, you’ll create a favorable environment for your cut roses, allowing them to thrive and stay fresh for an extended period. Choose a clean vase, sanitize it, fill it with fresh water, add flower preservative, remove excess foliage, change the water regularly, and trim the stems. With these steps, your cut roses will have the best chance of staying beautiful and vibrant in the vase.
Making a Clean Cut
The technique used to cut the stems of roses can greatly impact their ability to absorb water and stay fresh in a vase. Making a clean cut is crucial for maintaining the health and longevity of cut roses. Here are some steps to follow when making a clean cut:
1. Use Sharp, Clean Tools: Before cutting the roses, ensure that your pruning shears or floral knife are sharp and clean. Dull blades can crush the stems, making it difficult for the roses to take up water. Wipe the tools with a clean cloth or paper towel to remove any dirt or debris that could potentially contaminate the cut.
2. Cut at a Diagonal Angle: Hold the rose stem firmly and make a diagonal cut, about 1 inch (2.5 cm) above the bottom of the stem. Cutting at a diagonal angle increases the surface area for water absorption, allowing the roses to take in more water and nutrients. This helps to prolong their freshness and prevent the stems from sitting flat at the bottom of the vase.
3. Avoid Crushing or Pinching the Stems: When cutting the stems, be careful not to crush or pinch them. This can damage the vascular system of the rose, hindering its ability to draw water and nutrients up to the blooms. Make a smooth and clean cut without putting excessive pressure on the stems.
4. Cut Underwater, if Possible: For maximum water uptake, consider cutting the stems underwater. Fill a bowl or basin with lukewarm water, then submerge the bottom few inches of the rose stems and make the diagonal cut. This technique helps to prevent air bubbles from entering the stem, ensuring uninterrupted water flow to the blooms.
5. Trim any Split or Damaged Ends: Inspect the cut ends of the rose stems after making the initial cut. If you notice any split or damaged ends, trim them off with a clean cut. This will promote better water absorption and prevent the spread of any potential diseases or infections that could affect the longevity of the roses.
6. Immediately Place the Roses in Water: After making the clean cut, place the roses in a vase filled with fresh water. Avoid leaving the cut roses exposed to air for an extended period, as this can cause wilting and dehydration. The sooner you can get the roses into water after making the cut, the better.
By taking the time to make a clean cut when trimming the stems of your roses, you’ll ensure optimal water uptake and extend the vase life of the blooms. Use sharp and clean tools, cut at a diagonal angle, avoid crushing or pinching the stems, consider cutting underwater, and trim any split or damaged ends. With these techniques, your cut roses will have the best chance of staying fresh and beautiful in the vase.
Removing Excess Leaves and Thorns
Before placing the roses in a vase, it is important to remove excess leaves and thorns from the stems. This not only enhances the appearance of the arrangement, but also helps to maintain the health and longevity of the cut roses. Here are some guidelines for removing excess leaves and thorns:
1. Start at the Bottom: Begin by removing any leaves or thorns located at the bottom portion of the stem that would be submerged in water once placed in the vase. These submerged leaves can decay quickly and promote bacterial growth, reducing the lifespan of the roses.
2. Strip the Leaves: Working your way up the stem, strip off any leaves that would fall below the water level in the vase. These submerged leaves can break down in the water, potentially causing it to become murky and breeding bacteria. Leave only a few leaves at the top of the stem for an attractive and natural appearance.
3. Watch Out for Thorns: As you remove the leaves, be mindful of any thorns on the stem. Using gardening gloves or a towel, carefully grip the stem and slide your hand upward to protect yourself from accidental pricks. Pinch or clip off the thorns close to the stem, taking care not to damage the rose or yourself in the process.
4. Preserve Some Foliage: While it’s important to remove excess leaves, preserving some foliage can enhance the visual appeal of the arrangement. Leave a few leaves towards the top of the stem to maintain a natural and lush appearance. These leaves can also contribute to the overall structural integrity of the arrangement.
5. Inspect and Clean: After removing the excess leaves and thorns, give each stem a quick inspection for any residual thorns or damaged foliage. If you spot any remaining thorns, carefully remove them using a pair of tweezers or rose stripper. Additionally, wipe the stems with a damp cloth to remove any dirt or debris that may have accumulated during the trimming process.
6. Dispose of Removed Leaves and Thorns: Properly dispose of the removed leaves and thorns in a trash bag or compost bin. Avoid leaving them on the ground or near the vase, as they can attract pests or decay, creating an unsanitary environment for the cut roses.
By removing excess leaves and thorns from the stems of your cut roses, you’ll not only improve the appearance of the arrangement but also help maintain its freshness and longevity. Start from the bottom, strip off submerged leaves, watch out for and remove thorns, preserve some foliage for aesthetics, inspect and clean the stems, and dispose of removed leaves and thorns properly. With these steps, your cut roses will be ready to shine in a beautiful and tidy vase.
Placing the Roses in the Vase Properly
Arranging the roses properly in the vase is crucial for creating a visually appealing display and maintaining their freshness and longevity. Here are some steps to follow when placing the roses in the vase:
1. Prepare the Vase: Ensure that the vase is clean and filled with fresh water, and that you have added any necessary flower preservative. Position the vase on a flat surface and choose a location where the roses can be easily admired.
2. Determine the Arrangement Style: Decide whether you want a classic, round-shaped bouquet or a more loosely arranged, natural-looking display. This will help you determine the arrangement style and guide the placement of the roses in the vase.
3. Begin with the Focal Flowers: Select the most visually striking roses or the largest blooms to serve as the focal point of the arrangement. Start by placing these roses in the center of the vase, adjusting their height to create the desired impact.
4. Add Supporting Roses: Surround the focal flowers with supporting roses, gradually building outward. Place the roses at different heights and angles to create depth and dimension in the arrangement. This will give a sense of movement and natural flow to the display.
5. Fill in the Gaps: Once the focal and supporting roses are placed, fill in any gaps or spaces between the roses with smaller blooms or filler flowers. This will add texture and volume to the arrangement, creating a visually pleasing display.
6. Adjust the Stem Heights: As you arrange the roses, periodically step back and assess the overall appearance of the display. If needed, trim the stems slightly to achieve your desired height and proportions. Remember to cut the stems at a diagonal angle to aid in water absorption.
7. Consider the Placement of Foliage: As a final step, assess the placement of foliage in the arrangement. If necessary, trim any leaves on the lower portions of the stems that would be submerged in water. Ensure that any remaining leaves are evenly distributed and contribute to the overall aesthetic of the display.
8. Rotate the Vase: To view your arrangement from all angles and ensure that it looks balanced, gently rotate the vase on its base. This will allow you to make any necessary adjustments and ensure that every side of the arrangement is pleasing to the eye.
By following these steps and taking care to arrange the roses properly in the vase, you’ll create a stunning display that showcases the beauty of the blooms. Prepare the vase, determine the arrangement style, start with focal flowers, add supporting roses and fillers, adjust stem heights, consider foliage placement, and rotate the vase for a well-balanced display. With careful placement, your roses will become the centerpiece of your space, bringing joy and beauty to any room.
Caring for Cut Roses in a Vase
Proper care is key to ensuring that cut roses stay fresh, vibrant, and long-lasting in a vase. By following some simple guidelines, you can extend the vase life of your roses and enjoy their beauty for longer. Here are some tips for caring for cut roses in a vase:
1. Keep the Water Clean: Regularly check the water in the vase and change it every two to three days, or when it becomes cloudy or discolored. By keeping the water clean and free from any bacteria or debris, you optimize the vase life of your roses.
2. Trim the Stems: Every time you change the water, trim the stems of the roses by about an inch (2.5 cm) at a diagonal angle. This allows for better water absorption and prevents the stems from sitting flat at the bottom of the vase, which can impede water uptake.
3. Provide Fresh Water: Along with trimming the stems, always give the roses fresh, lukewarm water. Avoid using cold water, as it can shock the stems and inhibit water uptake. Adding flower preservative according to the package instructions can also help nourish the roses and extend their vase life.
4. Place the Vase in a Cool Location: To prolong the freshness of the roses, keep the vase in a cool spot away from direct sunlight, heat sources, and drafts. Extreme temperatures can cause the roses to wilt quickly and shorten their lifespan.
5. Avoid Placement near Fruit: Avoid placing the vase of roses near ripening fruits, as fruits release ethylene gas, which can cause the roses to age prematurely. Ethylene can accelerate the wilting and petal discoloration of the roses.
6. Remove Faded Blooms and Leaves: Regularly inspect the arrangement and remove any faded or wilting blooms, as well as any leaves that have fallen below the water level. This helps prevent the spread of bacteria and enhances the appearance of the remaining roses.
7. Mist the Roses: To provide some moisture to the petals, you can lightly mist the roses with clean water. Use a spray bottle and mist them in the morning or evening, avoiding direct sunlight or extreme temperatures. This can help keep the petals hydrated and maintain their freshness.
8. Enjoy and Appreciate: Lastly, take the time to appreciate the beauty of your cut roses. Regularly change the water, trim the stems, provide fresh water, keep the vase in a suitable location, avoid fruit proximity, remove faded blooms and leaves, mist the roses, and most importantly, take a moment to enjoy and delight in their beauty.
With proper care and attention, your cut roses will stay fresh and vibrant in the vase, allowing you to enjoy their beauty for days to come. Follow these guidelines to ensure the longevity of your arrangement and create a stunning display that brings joy and elegance to your home or office.