
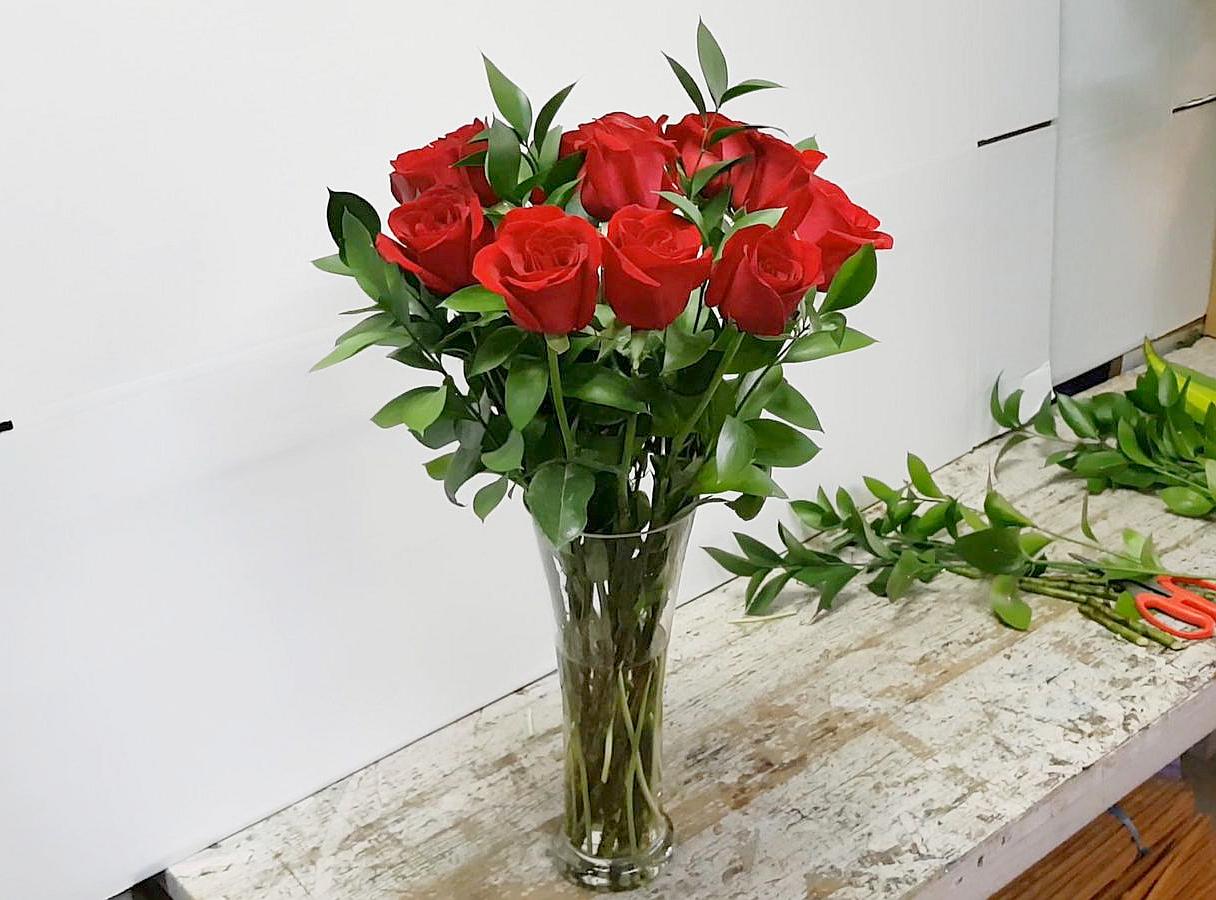
Choosing the Vase
Choosing the right vase is an important first step in creating a beautiful arrangement of roses. The vase you select will not only serve as a container for the roses but also play a vital role in enhancing their visual appeal. Here are some factors to consider when choosing a vase:
- Size: The size of the vase should match the number of roses you plan to arrange. A smaller vase may be suitable for a few roses, while a larger vase can accommodate a bigger arrangement.
- Shape: Vases come in various shapes, such as cylindrical, bud, or tall. Consider the shape of the roses you have and choose a vase that complements their form. For example, long-stemmed roses would look stunning in a tall, elegant vase.
- Material: Vases can be made from glass, ceramic, porcelain, or other materials. Each material has its own aesthetic appeal, so choose one that matches your desired style. Clear glass vases are versatile and allow the focus to remain on the roses.
- Color: The color of the vase can enhance or contrast with the color of the roses. Choose a color that complements the roses and harmonizes with the overall décor. A neutral-colored vase, such as white or clear, is a safe choice that will not clash with any rose color.
- Style: Consider the overall style or theme you want to achieve with your rose arrangement. If you prefer a modern look, opt for a sleek and minimalist vase. For a more romantic or vintage feel, choose a vase with intricate detailing or a unique shape.
Keep in mind that the vase should not overpower the roses but rather enhance their natural beauty. Take your time to find the perfect vase that will create a visually stunning backdrop for your rose arrangement.
Selecting the Roses
Choosing the right roses is crucial to ensure a captivating and harmonious arrangement. When selecting the roses for your vase, consider the following factors:
- Variety: Roses come in a wide range of varieties, each with their own unique color, shape, and size. From classic red roses to delicate pink, vibrant yellow, or majestic white, explore different varieties to find the ones that best suit your aesthetic vision.
- Color: The color of the roses can set the mood and create a focal point in your arrangement. Consider the occasion or the overall theme when selecting the color. Soft pastel hues can evoke a romantic atmosphere, while bright and bold colors can inject energy and vibrancy into the arrangement.
- Bloom stage: Decide whether you prefer roses that are still in bud form or ones that have fully bloomed. Buds are great for longevity and an arrangement that gradually reveals its beauty, while fully bloomed roses make a striking statement.
- Fragrance: Some roses have a delightful fragrance that can fill the room with a pleasant scent. If fragrance is an important factor for you, consider choosing varieties that are known for their aromatic qualities.
- Size: The size of the roses should be proportionate to the size of the vase. Ensure that they are not too tall or too short for the vase, as this can impact the overall aesthetic appeal of the arrangement.
When selecting the roses, go for ones that are fresh and free from any signs of damage or blemishes. Inspect the petals and leaves for any discoloration or wilting. Quality roses will have firm stems and petals and a healthy green color.
Remember, the key is to choose roses that resonate with your personal style and complement the chosen vase. Take the time to explore different rose varieties and color combinations to create a truly captivating arrangement.
Preparing the Roses
Before you begin arranging the roses in the vase, it’s important to properly prepare them to ensure their longevity and maximum beauty. Here are the essential steps to follow when preparing your roses:
- Trimming the stems: Start by trimming the stems of the roses at an angle. This helps the roses absorb water more effectively, keeping them hydrated and fresh for longer. Use sharp, clean garden shears or a sharp knife to make a clean cut.
- Removing leaves and thorns: Remove any leaves that will be submerged in water as they can rot and promote bacterial growth. Leave a few leaves towards the top of the stem to add a touch of greenery to the arrangement. Also, carefully remove any thorns on the stem that may interfere with the arrangement or cause injury.
- Hydrating the roses: Place the freshly trimmed roses in a clean vase filled with lukewarm water. Allow the roses to hydrate for a few hours or overnight before arranging them. This step ensures that the roses are well-hydrated and in optimal condition for arranging.
- Adding floral preservative: If you have floral preservative, mix it with the water in the vase according to the package instructions. Floral preservative helps to prolong the life of the roses and maintain their vibrant appearance.
- Reviving wilted roses: If any of the roses appear wilted or have drooping heads, you can try reviving them by immersing the entire stem in warm water for a few minutes. This can help to rehydrate the roses and restore their freshness before arranging.
By properly preparing the roses, you are ensuring that they are in the best possible condition to create a stunning and long-lasting arrangement. Take the time to trim the stems, remove leaves and thorns, and allow the roses to hydrate before moving on to the next step.
Trimming the Stems
Trimming the stems of the roses is an important step in preparing them for arranging in a vase. Proper stem trimming not only ensures the roses fit smoothly into the vase but also promotes better water absorption, keeping the flowers fresh and vibrant for a longer period. Here’s how to trim the stems effectively:
- Tools: Use a sharp pair of garden shears or floral scissors to make clean and precise cuts. Dull blades can crush the stem, making it harder for the roses to take up water.
- Cutting Angle: Trim the stems at a 45-degree angle. This creates a larger surface area for water absorption, allowing the roses to stay hydrated and nourished.
- Stem Length: Determine the desired length of the roses in the vase by measuring them against the vase. To ensure an even and visually pleasing arrangement, make sure all the rose stems are roughly the same length.
- Remove Extra Foliage: Strip away any foliage or thorns that will fall below the waterline in the vase. This prevents rotting and maintains water cleanliness.
When trimming the stems, it’s best to do it under running water to prevent air bubbles from forming in the stem, which can block water uptake. Hold the stem underwater and make a clean cut at a slight angle. Immediately transfer the trimmed rose to a container of water to prevent air from entering the stem.
It’s important to note that rose stems may have small air pockets that can impede water absorption. If you notice any such pockets, you can gently crush the bottom inch of the stem using a mallet or the back of your shears. This will help the roses take up water more effectively.
Properly trimming the stems is a crucial step in ensuring the longevity and beauty of your rose arrangement. By following these guidelines, you’ll be ready to move on to the next steps of creating a stunning floral display.
Removing Leaves and Thorns
Removing leaves and thorns from the stems of your roses is an important step in preparing them for arranging in a vase. Not only does it improve the overall aesthetic of the arrangement, but it also helps to prolong the lifespan of the roses by preventing bacterial growth and water contamination. Follow these guidelines to effectively remove leaves and thorns:
- Strip submerged leaves: Inspect the stem of each rose and remove any leaves that would be submerged in water once placed in the vase. Submerged leaves can decay, affecting the water quality and shortening the life of the blooms.
- Leave a few upper leaves: To add a touch of greenery and enhance the visual appeal of the arrangement, leave a few upper leaves on the stem. Choose healthy, undamaged leaves that will remain above the waterline in the vase.
- Protect your hands: When handling roses, it’s important to protect your hands from the thorns. You can use gardening gloves or wrap your hand with a clean towel or a thick cloth to prevent any injuries.
- Removing thorns: While optional, removing thorns can make the arrangement more manageable and safer to handle. Gently grasp the stem below the thorn and slide your hand toward the base of the thorn to remove it. Be careful not to pinch or squeeze the stem too firmly, which can damage it.
- Thorn alternatives: If you prefer to keep the thorns intact, you can use a technique called “burning off” the thorns. Pass the thorns through a flame quickly, which will cause them to burn off and leave a smooth surface. However, exercise caution and ensure proper ventilation when using this technique.
By removing leaves and thorns, you not only create a more visually appealing arrangement but also increase the longevity of the roses. Removing submerged leaves prevents water contamination, while taking off thorns makes handling the roses safer and more enjoyable.
Remember to handle the rose stems with care to avoid damaging the flowers or yourself. With the leaves and thorns removed, your roses are now ready for the next step in creating a beautiful and long-lasting arrangement.
Picking Complementary Fillers and Greens
When creating a stunning rose arrangement, it’s essential to choose complementary fillers and greens that enhance the beauty and visual appeal of the roses. These additional elements not only add texture and depth but also help to create a cohesive and harmonious composition. Consider the following tips when picking fillers and greens:
- Contrasting textures: Select fillers and greens that have contrasting textures to the smooth petals of the roses. This will add visual interest and dimension to the arrangement. For example, delicate baby’s breath or feathery astilbe can provide a soft and airy contrast to the boldness of roses.
- Complementary colors: Choose fillers and greens that complement the color of the roses. Look for shades and tones that harmonize with the roses’ hues. For example, if you have a bouquet of red roses, consider adding fillers with warm tones like orange or deep burgundy.
- Shapes and sizes: Consider the shape and size of the fillers and greens in relation to the roses. Opt for varieties that have a different form to create an interesting visual balance. For instance, long and cascading greenery like ivy or eucalyptus can beautifully frame the roses.
- Fragrance: If you want to add an extra layer of sensory delight, select fillers or greens that have a pleasant fragrance. Lavender or herbs like rosemary can bring a lovely aroma to the arrangement.
- Seasonal options: Take advantage of seasonal fillers and greens that are readily available. Seasonal foliage and flowers can add a touch of freshness and reflect the beauty of the time of year.
Experiment with different combinations of fillers and greens to find the perfect match for your roses. As you arrange them, step back and evaluate how they interact with the roses, ensuring that they complement rather than overpower them.
Remember, the fillers and greens should not overshadow the main attraction, which is the roses. They are meant to enhance the overall composition and create a visually captivating arrangement that showcases the beauty of the roses.
Creating a Focal Point
In any floral arrangement, creating a focal point is key to drawing attention and adding visual interest. By creating a focal point, you highlight the beauty and allure of the roses while elevating the overall composition. Here are some tips on how to create a captivating focal point:
- Single Rose Placement: Select a larger or uniquely shaped rose and place it slightly off-center in the arrangement. This will naturally draw the eye and create a focal point around the standout bloom.
- Color Contrast: Use roses in a contrasting color to the rest of the arrangement to create a focal point. For example, if the majority of the roses are pale pink, place a vibrant red rose in a prominent position to catch the attention.
- Height Variation: Vary the height of the roses in your arrangement, with the tallest rose positioned strategically in the center or slightly towards the back. The height difference will create depth and make the tallest rose the focal point of the display.
- Unique Container: Choose a distinctive container or vase that stands out from the rest of the arrangement. This eye-catching element will naturally draw attention and become the focal point.
- Contrasting Texture: Incorporate fillers or greens with contrasting textures to the smoothness of the roses. The textural variation will create a visual focal point and add dimension to the arrangement.
Creating a focal point is about intentionally directing the viewer’s gaze and adding a visual highlight to the arrangement. It enhances the overall impact and ensures that the beauty of the roses takes center stage.
As you arrange the roses, step back and assess the composition to determine where the focal point should be. Experiment with different techniques and elements until you achieve the desired effect that perfectly showcases the beauty of the roses.
Arranging Roses by Height
Arranging roses by height is an effective technique that adds visual interest and creates a well-balanced composition. By strategically positioning the roses based on their heights, you can create a pleasing flow and dynamic arrangement. Consider the following tips for arranging roses by height:
- Tallest in the center: Start by placing the tallest rose in the center of the arrangement. This establishes a focal point and provides a framework for the rest of the roses.
- Gradual height transition: Arrange the roses in a cascading fashion, with the tallest roses in the center and gradually decreasing in height towards the outer edges. This creates a beautiful tapering effect.
- Uniform height: Alternatively, you can arrange the roses at a uniform height if you desire a more structured and formal look. This works particularly well for compact vases or when you want to showcase the entire bouquet evenly.
- Layering: To add depth and dimension to the arrangement, layer shorter roses in front of taller ones. This technique allows each rose to be seen and prevents any single rose from being obscured.
- Intermingling heights: For a more natural and organic feel, you can intermingle roses of different heights throughout the arrangement. This approach works well for loose and garden-inspired arrangements.
When arranging roses by height, it’s important to step back and assess the overall balance and symmetry. Ensure that no section of the arrangement appears overly crowded or sparse. Adjust the positioning as necessary to create a harmonious visual flow.
Remember, the goal is to achieve a visually pleasing arrangement that showcases the beauty of each rose while maintaining a balanced and cohesive composition.
Filling in the Gaps
Filling in the gaps is an essential step in creating a lush and full-bodied rose arrangement. It ensures that the space between the roses is well-utilized, creating a cohesive and visually appealing display. Here are some tips for filling in the gaps:
- Filler Flowers: Use filler flowers, such as baby’s breath, statice, or waxflower, to add volume and fill in any empty spaces between the roses. These delicate blooms create a soft and airy effect, enhancing the overall design.
- Greenery and Foliage: Incorporate greenery and foliage to add texture and fill in any gaps. Ivy, eucalyptus, or ferns are excellent choices to create a natural and lush backdrop for the roses.
- Cluster Technique: Cluster smaller blooms together to create a focal point and add visual interest to areas with gaps. This technique helps to draw the eye and provide a fuller appearance to the arrangement.
- Branches or Twigs: Consider adding branches or twigs to fill in large gaps or add height to the arrangement. These natural elements can add an organic and whimsical touch to the overall design.
- Layering: Layer additional smaller roses or buds in the gaps to create depth and fill in empty spaces. This technique adds dimension and makes the arrangement look more abundant.
As you fill in the gaps, take a step back to assess the arrangement from different angles. Look for any areas that appear sparse or unbalanced and continue to add flowers or greens accordingly. The goal is to create a visually pleasing and well-proportioned arrangement that showcases the beauty of the roses.
Remember, filling in the gaps not only enhances the fullness and visual appeal of the arrangement but also creates a more cohesive and harmonious composition.
Assessing the Arrangement
Once you’ve finished arranging the roses, take a step back and assess the overall composition. Assessing the arrangement allows you to make any necessary adjustments to ensure that the arrangement is visually pleasing and meets your desired aesthetic. Consider the following factors when assessing the arrangement:
- Balance: Check for balance by ensuring that the arrangement is symmetrical and evenly distributed. The roses and other elements should not appear too crowded on one side or too sparse on the other.
- Proportions: Examine the proportions of the arrangement. The height, width, and depth of the arrangement should be in harmony, with no individual rose or greenery overpowering the overall design.
- Color Balance: Evaluate the color balance of the arrangement. Ensure that the color distribution is visually appealing, with the roses and other elements complementing each other and creating a harmonious color palette.
- Fillers and Greens: Check if the fillers and greens are distributed evenly throughout the arrangement. Make sure they accentuate the beauty of the roses without overwhelming them or creating clutter.
- Overall Cohesion: Look for overall cohesion and unity in the arrangement. Consider if the different elements work together to create a seamless and visually pleasing display.
As you assess the arrangement, don’t be afraid to make adjustments. Rearrange any roses or greenery that may need repositioning, and add or remove elements as necessary to achieve the desired look.
Remember, the goal is to create an arrangement that showcases the beauty of the roses while maintaining a balanced and visually appealing composition. Assessing the arrangement allows you to fine-tune the final result and ensure a captivating display.
Placing the Vase in a Suitable Location
Once you’ve created a beautiful arrangement of roses, placing the vase in a suitable location is crucial to fully showcase the arrangement and enhance its visual impact. Consider the following factors when deciding where to place the vase:
- Visibility: Choose a location where the arrangement can be easily seen and appreciated. Avoid placing it in a corner or behind other objects that may obstruct the view.
- Lighting: Consider the lighting in the room. Ensure that the arrangement is not placed in direct sunlight or near any heat sources, as this can cause the roses to wilt prematurely. Opt for a spot with natural light or gentle, indirect light for optimal longevity.
- Supportive Surface: Select a stable and level surface to place the vase on. Avoid uneven or wobbly surfaces that can potentially knock over the vase or disrupt the arrangement.
- Room Temperature: Keep the arrangement in a room with a moderate temperature. Extreme temperature fluctuations can affect the freshness and longevity of the roses.
- Complementary Décor: Consider the overall décor and style of the room. Choose a spot that complements the arrangement and enhances the aesthetic appeal. The vase’s color, shape, and style should harmonize with the surrounding elements.
- Traffic Flow: Be mindful of the flow of people in the room. Avoid placing the vase in a high-traffic area where it may be accidentally bumped or knocked over.
Once you’ve found the perfect location, take a moment to step back and admire the arrangement from different angles. Make sure the positioning allows for easy viewing and enjoyment of the beauty of the roses.
Remember, the placement of the vase contributes to the overall impact and enjoyment of the arrangement. Take the time to find the ideal spot to display your beautiful rose arrangement.