
Requirements for Watching Wyze Cam on PC
To watch your Wyze Cam on your PC, you will need to ensure that you have the following requirements:
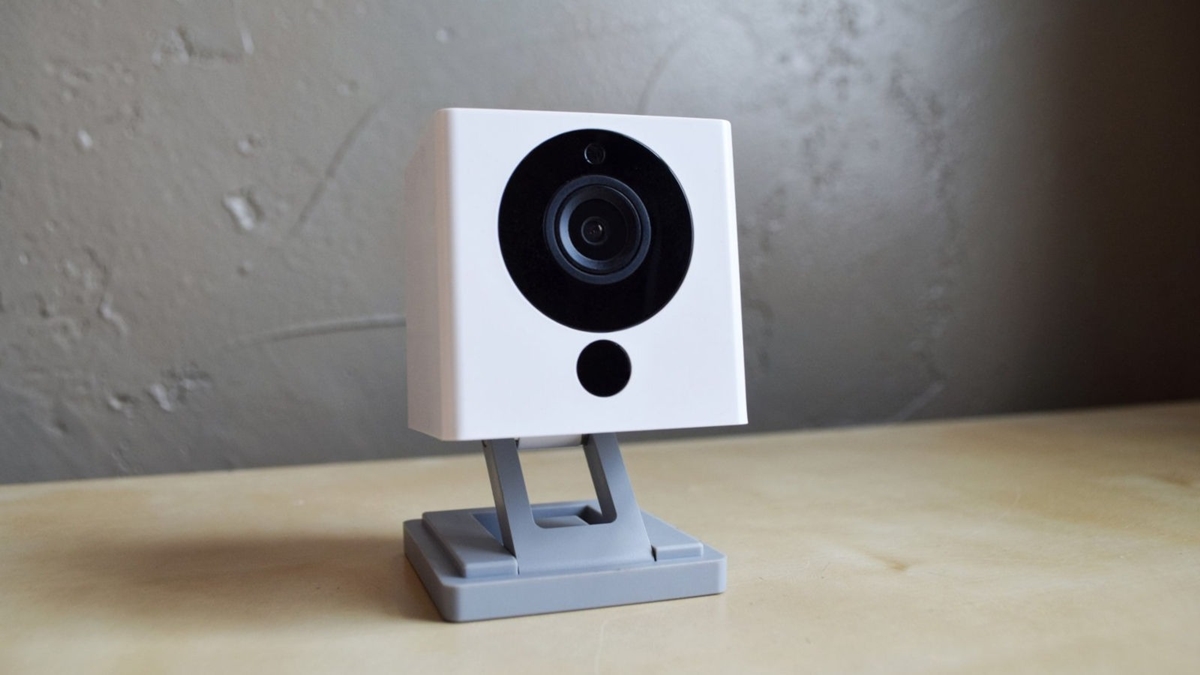
- Wyze Cam: Of course, you will need to have a Wyze Cam security camera that is compatible with PC viewing. The Wyze Cam is a popular and affordable option that offers high-quality video streaming and advanced features.
- Stable Internet Connection: A stable and reliable internet connection is crucial for streaming the live feed from your Wyze Cam to your PC. Make sure you have a strong Wi-Fi signal or an Ethernet connection.
- Windows PC: You will need a Windows PC to access and view your Wyze Cam. The Wyze app is currently available for Windows 8.1 and Windows 10 operating systems.
- Wyze Account: To access your Wyze Cam on your PC, you will need to have a Wyze account. If you haven’t already created one, you can easily sign up for free on the Wyze website or through the Wyze app.
- Wyze App: Lastly, you will need to have the Wyze app installed on your Windows PC. The Wyze app is available for download and installation from the Microsoft Store.
Ensure that you have met all these requirements before proceeding with the setup process. Having these in place will ensure a smooth and seamless experience when watching your Wyze Cam on your PC.
Setting up Wyze Cam for PC Viewing
Before you can start watching your Wyze Cam on PC, you need to set it up properly. Here’s a step-by-step guide on how to do it:
- Position the Wyze Cam: Choose a suitable location for your Wyze Cam. It should have a good view of the area you want to monitor and should be within the range of your Wi-Fi signal.
- Power on the Wyze Cam: Plug in the Wyze Cam using the provided USB cable and power adapter. The camera will start up and the LED light will turn solid yellow.
- Connect to the Wyze app: Download and install the Wyze app on your mobile device. Open the app and create a Wyze account if you haven’t already. Follow the instructions on the app to connect the Wyze Cam to your Wi-Fi network.
- Scan the QR code: Once your Wyze Cam is connected to your Wi-Fi network, the app will prompt you to scan the QR code on the camera. Align the QR code on the app with the camera’s lens until it is recognized.
- Set up a camera name: Give your Wyze Cam a unique name to easily identify it in the Wyze app.
- Adjust camera settings: Proceeed to adjust camera settings such as motion detection, sound detection, and video quality according to your preferences. These settings can be accessed through the Wyze app.
Once you have completed the setup process, your Wyze Cam is ready to be accessed on your PC. Next, you will need to download and install the Wyze app on your Windows PC to start viewing the live feed.
Downloading and Installing the Wyze App on Windows
To watch your Wyze Cam on your Windows PC, you will need to download and install the Wyze app. Follow these steps to get started:
- Open Microsoft Store: Launch the Microsoft Store on your Windows PC. You can find it in the Start menu or by searching for “Microsoft Store” in the search bar.
- Search for the Wyze app: In the Microsoft Store, use the search bar located at the top-right corner to search for the Wyze app. Type in “Wyze” and press Enter.
- Select the Wyze app: From the search results, click on the Wyze app to go to its store page.
- Click on “Install”: On the Wyze app’s store page, click on the “Install” button to start downloading and installing the app on your Windows PC.
- Wait for the installation to complete: The installation process may take a few moments, depending on your internet speed. During this time, do not close the Microsoft Store or interrupt the installation.
- Launch the Wyze app: Once the installation is complete, you can launch the Wyze app from the Start menu or by clicking on the “Open” button in the Microsoft Store.
- Login to your Wyze account: In the Wyze app, enter your Wyze account credentials to log in. If you don’t have an account, you can sign up for free within the app.
Once you have successfully downloaded and installed the Wyze app on your Windows PC, you will be ready to connect your Wyze Cam and start viewing the live feed on your PC.
Connecting Wyze Cam to Your PC
After setting up the Wyze Cam and installing the Wyze app on your Windows PC, it’s time to connect the camera to your PC. Follow these steps to establish the connection:
- Launch the Wyze app: Open the Wyze app on your Windows PC by clicking on its icon in the Start menu or on the desktop.
- Login to your Wyze account: Enter your Wyze account credentials to log in to the app. Ensure that you are using the same account you used during the initial setup process.
- Select your Wyze Cam: On the Wyze app’s home screen, you should see a list of connected Wyze cameras. Select the Wyze Cam that you want to connect to your PC.
- Connect via QR code: Click on the “QR Code” icon or option in the Wyze app. This will generate a QR code on your PC screen.
- Scan the QR code: Using your mobile device with the Wyze app installed, open the app and select the “Add a Device” option. Scan the QR code displayed on your PC screen with your device’s camera.
- Wait for the connection to establish: The Wyze app will automatically establish the connection between your Wyze Cam and your PC. This process may take a few moments.
- Confirm the connection: Once the connection is established, you will see a confirmation message on both your PC and mobile device. You are now ready to view the live feed of your Wyze Cam on your PC.
With the Wyze Cam successfully connected to your PC, you can now access and manage the camera’s settings, view live footage, and review recorded events directly from your Windows PC using the Wyze app.
Exploring the Wyze App Interface on PC
Once you have connected your Wyze Cam to your PC and opened the Wyze app, you will be presented with the app interface. Here’s a breakdown of the key elements and features:
- Live Feed: The live feed is the main screen of the Wyze app on your PC. It displays the real-time video stream from your Wyze Cam. You can see what your camera sees, hear audio if your camera has a built-in microphone, and even speak through the camera if it has a two-way audio feature.
- Device List: On the left or top side of the app interface, you will find a list of connected devices. This is where you can access and control multiple Wyze Cams that are associated with your Wyze account. Simply click or tap on a specific camera to switch to its live feed.
- Event Clips: The Wyze app allows you to review recorded events. These are motion-activated or sound-triggered clips that were captured by your Wyze Cam. You can find and playback these clips under the “Event” or “Clips” section of the app. Browse through the events and select the clip you want to view.
- Camera Settings: Accessing the camera settings is essential for customizing your Wyze Cam’s behavior and preferences. Whether it’s adjusting motion detection sensitivity, setting up schedules for recordings, or enabling device notifications, you can fine-tune these settings from the app’s interface on your PC.
- Cloud Storage: The Wyze app offers optional cloud storage services for recorded footage. By subscribing to a Wyze Cam Plus plan, you can gain access to extended video storage, person detection, and other advanced features. You can manage your cloud storage subscription from the app interface on your PC.
- Other Features: The Wyze app also provides additional features such as sharing camera access with family or friends, viewing multiple camera feeds simultaneously using the “Group” feature, and more. Explore the app and experiment with these features to make the most out of your Wyze Cam on your PC.
Take some time to navigate through the Wyze app interface on your PC. Familiarize yourself with the various options and features available to fully utilize the capabilities of your Wyze Cam.
Accessing Live Feed on Your PC
One of the primary reasons for setting up your Wyze Cam on your PC is to access the live feed directly from your computer. Here’s how you can conveniently view the live feed:
- Launch the Wyze app: Open the Wyze app on your Windows PC to get started. Make sure you have logged in to your Wyze account.
- Select the desired camera: If you have multiple Wyze Cams linked to your account, choose the specific camera whose live feed you wish to access. Click or tap on the camera’s name or thumbnail in the device list.
- View the live feed: Once you have selected the camera, the app will display the live feed on your PC. You can now see the real-time video stream from your Wyze Cam on the main screen.
- Control camera functions: While viewing the live feed, you can interact with your Wyze Cam using the controls provided by the app. Depending on the camera’s features, you can pan, tilt, or zoom the camera, enable two-way audio, or adjust the video quality.
- Switch between cameras: If you have multiple Wyze Cams, you can easily switch between cameras within the app. Simply go back to the device list and select the camera you want to view. This allows you to monitor different areas of your home or property from a single PC.
- Exit the live feed: When you are done viewing the live feed, you can exit the live feed screen by clicking on the ‘X’ button or navigating back to the device list in the Wyze app.
With the Wyze app on your PC, accessing the live feed from your Wyze Cam is seamless and convenient. Whether you want to keep an eye on your home, monitor a pet, or ensure the safety of your loved ones, the live feed feature allows you to have instant visual access at any time.
Viewing Recorded Events on PC
In addition to accessing the live feed of your Wyze Cam on your PC, the Wyze app also allows you to review recorded events. Follow these steps to view the recorded events on your Windows PC:
- Open the Wyze app: Launch the Wyze app on your PC by clicking on its icon.
- Select the camera: From the device list in the app, choose the Wyze Cam for which you want to view the recorded events.
- Go to the Event section: Look for the “Event” or “Clips” tab within the Wyze app interface. Click or tap on it to access the recorded events.
- Browse through the events: The Event section will display a list of recorded events, such as motion-triggered or sound-triggered clips. Scroll through the list to find the specific event you wish to view.
- Playback the event: Once you have found the desired event, click or tap on it to start playback. The Wyze app will play the recorded video clip, allowing you to review the event and see what triggered it.
- Manage event clips: The Wyze app provides options to manage event clips on your PC. You can save the clips to your local storage, delete unwanted clips, or share important clips with others.
- Adjust playback settings: During event playback, you can adjust various settings to enhance your viewing experience. This includes adjusting the playback speed, enabling audio, and using the timeline slider to navigate within the recording.
By accessing the recorded events on your PC, you can quickly review any moments of interest captured by your Wyze Cam. Whether it’s identifying an intruder, checking up on your pet’s activities, or simply reviewing daily events, the recorded events feature gives you the flexibility to review footage from the convenience of your Windows PC.
Adjusting Camera Settings and Preferences on PC
Customizing your Wyze Cam’s settings and preferences is crucial to tailor its behavior according to your specific needs. Here’s how you can adjust camera settings and preferences using the Wyze app on your PC:
- Launch the Wyze app: Open the Wyze app on your Windows PC by clicking on its icon or selecting it from the Start menu.
- Login to your Wyze account: Enter your Wyze account credentials to log in to the app.
- Select the desired camera: From the device list in the Wyze app interface, choose the Wyze Cam for which you want to adjust the settings.
- Access the camera settings: Look for the “Settings” icon or option within the app. Click or tap on it to access the camera settings and preferences.
- Adjust motion detection settings: One important camera setting is motion detection. You can control the sensitivity, detection zone, and notifications related to motion events. Customize these settings to optimize the camera’s performance for your specific environment.
- Configure sound detection: If your Wyze Cam supports sound detection, you can enable or adjust the sensitivity of this feature. This helps in capturing audio-triggered events and ensuring comprehensive monitoring.
- Set up recording schedules: The Wyze app allows you to set up recording schedules based on specific days and times. This is useful when you want your Wyze Cam to capture footage only during certain periods, saving storage space and ensuring focused monitoring.
- Enable device notifications: Stay informed by enabling device notifications. Once enabled, you will receive alerts on your PC when the camera detects motion or sound, allowing you to quickly respond to any potential events.
- Adjust video quality: Depending on your needs, you can adjust the video quality of your Wyze Cam to optimize streaming performance. Choose between standard definition (SD) or high definition (HD) video quality based on your internet connection and preference.
The Wyze app provides a user-friendly interface on your PC to easily access and adjust these camera settings and preferences. By personalizing the settings, you can ensure that your Wyze Cam operates according to your surveillance needs and preferences. Take some time to explore these settings and fine-tune them for optimal performance.