
Setting up Roku on your laptop
If you want to enjoy your favorite movies, TV shows, and streaming services on a bigger screen, setting up Roku on your laptop is the way to go. By following a few simple steps, you can easily connect your Roku device to your laptop and start streaming in no time. Let’s dive into the process of setting up Roku on your laptop.
The first step is to connect your Roku device to your laptop. You can do this by using an HDMI cable or by wirelessly mirroring your laptop’s screen to your Roku device. If you choose to use an HDMI cable, simply plug one end into the HDMI port on your laptop and the other end into the HDMI port on your Roku device. If you prefer a wireless connection, ensure that both your laptop and Roku device are connected to the same Wi-Fi network and follow the instructions for screen mirroring on your specific laptop model.
Once your Roku device is connected to your laptop, the next step is to install the Roku app. Visit the Roku website and download the app for your laptop’s operating system. Install the app by following the on-screen instructions, and once it’s installed, launch the app on your laptop.
Now it’s time to log into your Roku account. If you don’t have an account, you can create one for free on the Roku website. Open the Roku app on your laptop and enter your login credentials. Once you’re logged in, you’ll be able to access all the features and settings of your Roku device.
The next step is to link your Roku device to your laptop. To do this, go to the settings on your Roku app and select the option to pair your laptop with your Roku. Follow the instructions on the screen to complete the pairing process.
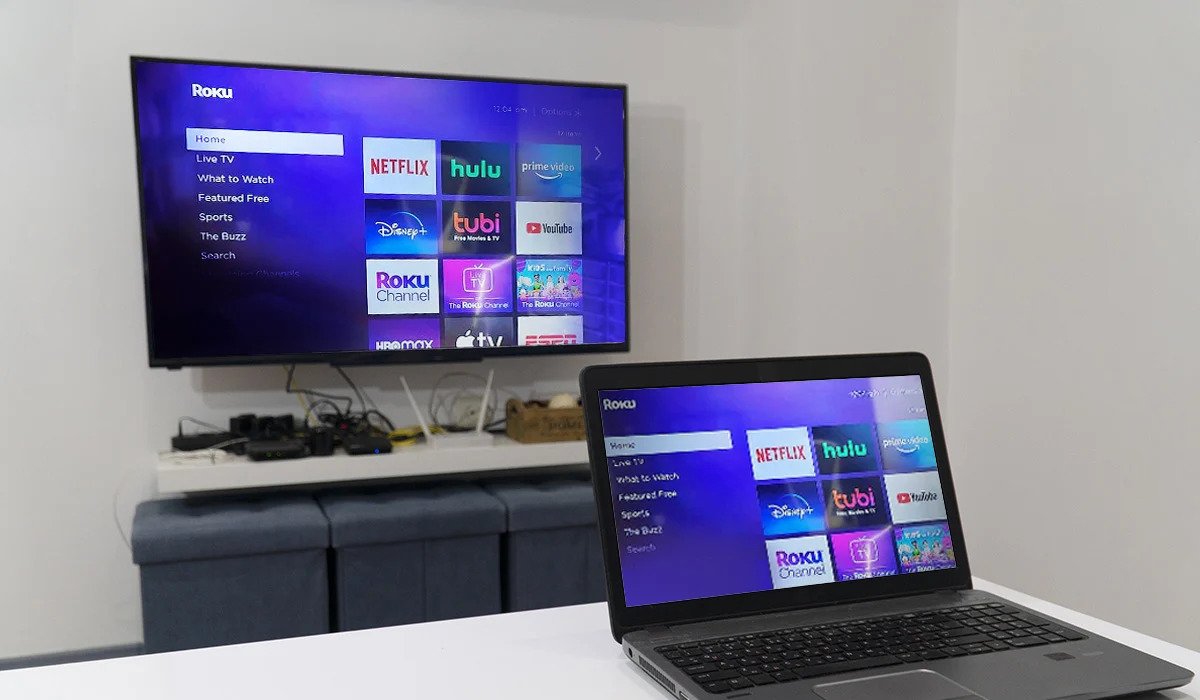
With your Roku device linked to your laptop, you can now start accessing Roku channels and streaming content. Open the Roku app on your laptop and navigate through the available channels. You can search for specific channels or browse through different categories to find the content you want to watch.
Once you’ve found a channel or show you want to watch, select it and begin streaming on your laptop. Use the navigation controls on your Roku app to pause, play, rewind, or fast forward through the content. You can also adjust the volume and screen settings directly from the app.
Lastly, take some time to explore the settings and preferences on your Roku app. You can customize the display settings, audio settings, and even set parental controls to manage the content accessible on your Roku device through your laptop.
Now that you’ve successfully set up Roku on your laptop, you can enjoy a wide range of entertainment options without needing a separate TV. Sit back, relax, and dive into a world of endless streaming possibilities right from your laptop screen!
Step 1: Connecting your Roku device to your laptop
Connecting your Roku device to your laptop is the first step to enjoy streaming content on a bigger screen. There are a couple of methods you can use to establish the connection, so let’s explore them below.
If you prefer a wired connection, you can use an HDMI cable to connect your Roku device to your laptop. Start by locating the HDMI port on your laptop and the corresponding port on your Roku device. Once you’ve identified them, simply plug one end of the HDMI cable into the HDMI port on your laptop and the other end into the HDMI port on your Roku device. Make sure the connection is secure and the cable is properly inserted into both devices.
Another option is to establish a wireless connection by mirroring your laptop’s screen to your Roku device. This method allows you to stream content from your laptop to your Roku device without the need for any physical cables. To do this, make sure both your laptop and Roku device are connected to the same Wi-Fi network. Then, on your laptop, go to the display settings and look for the option to mirror or cast your screen. Follow the instructions to connect to your Roku device wirelessly.
Once the connection is established, your laptop’s screen will be mirrored on your Roku device, allowing you to enjoy all your favorite content on a larger display. Whether you’re streaming movies, TV shows, or videos from your laptop, you’ll now be able to watch them in high-definition quality on your TV via the Roku device.
It’s important to note that the specific steps to connect your Roku device to your laptop may vary depending on the model and brand of your devices. Refer to the user manuals or online documentation for detailed instructions tailored to your equipment.
Now that you’ve successfully connected your Roku device to your laptop, you’re ready to move on to the next step of the setup process. In the following section, we’ll explore how to install the Roku app on your laptop for seamless streaming.
Step 2: Installing the Roku app on your laptop
In order to fully utilize the features and capabilities of your Roku device on your laptop, you’ll need to install the Roku app. The Roku app is available for various operating systems and can be easily downloaded and installed. Let’s walk through the process of installing the Roku app on your laptop.
First, visit the official Roku website. From the homepage, navigate to the “Products” or “Apps” section and locate the download link for the Roku app. Click on the link that corresponds to your laptop’s operating system (Windows, macOS, etc.).
Once you’ve clicked on the download link, the app will start downloading to your laptop. The download time will depend on your internet speed, so be patient while it completes.
Once the download is finished, locate the file on your laptop (it is usually saved in the “Downloads” folder) and double-click on it to start the installation process. Follow the on-screen instructions to install the Roku app on your laptop. The installation process may take a few minutes, so be sure not to close the installation window until it has completed.
Once the installation is complete, you will find the Roku app icon either on your desktop or in the list of installed applications on your laptop. Double-click on the app icon to launch it.
Upon launching the Roku app, you will be prompted to log in to your Roku account. If you don’t have an account yet, you can easily create one for free by following the on-screen instructions. Make sure to provide accurate information during the account creation process.
After logging in, you’ll have access to the full functionality of the Roku app on your laptop. You can explore different channels, search for specific content, and customize your Roku streaming experience.
That’s it! You’ve successfully installed the Roku app on your laptop. In the next section, we’ll discuss the steps to log into your Roku account on your laptop, which will further enhance your streaming experience.
Step 3: Logging into your Roku account on your laptop
In order to fully access and manage your Roku device on your laptop, you need to log into your Roku account. By logging in, you’ll be able to personalize your streaming preferences, sync your channels, and access your saved content. Let’s go through the process of logging into your Roku account on your laptop.
Open the Roku app that you installed on your laptop in the previous step. On the login screen, enter your email address and password that you used to create your Roku account. If you’re logging in for the first time, make sure to provide the correct login credentials.
Once you’ve entered your login credentials, click on the “Sign In” or “Log In” button. The app will validate your information and if it matches with a registered Roku account, you’ll be logged in successfully.
If you’re having trouble logging in, double-check that you’ve entered the correct email address and password. It’s worth noting that passwords are case-sensitive, so pay attention to capitalization if necessary. If you’ve forgotten your password, you can click on the “Forgot password” link and follow the instructions to reset it.
Upon successful login, you’ll gain access to your Roku account on your laptop. From here, you can manage your channels, add new channels, and even customize your streaming preferences. You can explore the various options available to enhance your Roku experience, such as enabling parental controls, setting up a PIN for purchases, and managing your subscription services.
Take a moment to familiarize yourself with the features and settings available in your Roku account. This will allow you to personalize your streaming experience and make the most out of your Roku device on your laptop.
Now that you’re logged into your Roku account, you’re ready to proceed to the next step, which involves linking your Roku device to your laptop. This will enable seamless communication between the two devices and enhance your ability to stream content from your laptop onto your TV screen via the Roku device.
Step 4: Linking your Roku device to your laptop
Linking your Roku device to your laptop is an essential step to ensure seamless communication between the two devices. By linking them, you’ll be able to control and stream content from your laptop to your Roku device. Let’s dive into the process of linking your Roku device to your laptop.
Firstly, ensure that your Roku device and laptop are connected to the same Wi-Fi network. This is crucial for successful device linking. If either device is connected to a different network, you won’t be able to establish the connection.
Next, open the Roku app on your laptop and navigate to the settings or configuration menu. Look for the option to link your Roku device. This option may vary depending on the version of the Roku app you’re using, but it is usually accessible from the main menu or settings section.
Click on the “Link Device” or similar option in the Roku app. It will scan for available Roku devices connected to the same Wi-Fi network. Once it locates your Roku device, select it from the list.
On your Roku device, you may see a code displayed on the screen. This code is necessary to complete the linking process. Ensure that the code displayed on your Roku device matches the code shown in the Roku app on your laptop. If the codes match, proceed to the next step.
Confirm the linking process by clicking on the “Link” or “Connect” button in the Roku app on your laptop. This will establish a secure connection between your Roku device and laptop.
Once the linking process is complete, you’ll receive a notification on your laptop confirming the successful connection. This signifies that your Roku device and laptop are now linked and ready to work together.
It’s important to note that the exact steps and terminology may differ slightly depending on the version of the Roku app and your specific Roku device model. If you encounter any difficulties during the linking process, refer to the official Roku support documentation or reach out to their customer support for assistance.
Now that your Roku device is successfully linked to your laptop, you can start exploring and accessing the various Roku channels and content from your laptop screen. In the next step, we’ll discuss how you can navigate the Roku interface on your laptop for an enjoyable streaming experience.
Step 5: Accessing Roku channels on your laptop
Once you have connected and linked your Roku device to your laptop, it’s time to start accessing the wide range of Roku channels available for streaming. Roku offers a vast selection of free and paid channels, including popular streaming services, TV networks, and niche content providers. Let’s explore how to access Roku channels on your laptop.
Launch the Roku app on your laptop. You will be greeted with the Roku home screen, which displays a variety of featured channels and content recommendations.
To browse and search for specific Roku channels, navigate to the “Channels” or “Channel Store” section in the Roku app. Here, you can explore different categories, such as movies, TV shows, news, sports, and more. You can also use the search function to find channels by name, genre, or specific keywords.
When you find a channel you’re interested in, select it to view more details and options. Here, you can read a brief description of the channel, view user ratings and reviews, and see any available subscription plans or free trial offers.
To add the channel to your Roku lineup, click on the “Add Channel” or “Install” button. This will initiate the installation process, and the channel will be added to your Roku channel list.
Once the channel is installed, you can access it directly from the Roku app’s home screen or navigate to it using the channel list or other organization features available in the app.
To launch a channel, simply click on its icon or name in the Roku app. The channel will open, and you can start browsing and streaming its content on your laptop screen. Use the navigation controls within the channel to explore different categories, access specific shows or movies, and customize your viewing experience.
Depending on the channel and the content provider, you may need to log in or authenticate your subscription to access certain content. Follow the on-screen instructions to log in with your credentials or link your subscription account to enjoy the full range of content offered by the channel.
Keep in mind that some channels may offer both free and paid content. While many channels offer free access to a selection of their content, others may require a paid subscription to unlock premium shows, movies, or extra features. Be aware of any subscription fees or additional costs associated with the channels you choose.
With the Roku app on your laptop, you have the flexibility to explore and add a wide variety of channels to your streaming lineup. This allows you to tailor your Roku experience to your specific interests and preferences.
In the next step, we’ll discuss how to navigate the Roku interface on your laptop and make the most out of your streaming experience.
Step 6: Navigating the Roku interface on your laptop
Now that you have access to a wide range of Roku channels on your laptop, it’s important to familiarize yourself with the Roku interface. Navigating the Roku interface efficiently will enhance your streaming experience and make it easier to discover new content. Let’s explore how to navigate the Roku interface on your laptop.
When you launch the Roku app on your laptop, you’ll be presented with the Roku home screen. This is the central hub where you can access your installed channels, recommended content, and search for new channels.
To navigate through the Roku interface, you can use the arrow keys or navigation buttons on your laptop keyboard. These keys will allow you to move up, down, left, and right within the Roku app.
When you want to select an item or open a channel, press the “Enter” or “OK” button on your keyboard. This will trigger the action associated with the selected item.
To go back to the previous screen or exit a channel, use the “Back” or “Exit” button on your keyboard. This will take you back to the previous menu or close the currently open channel.
As you navigate through the Roku interface, pay attention to the options available at the bottom or side of the screen. These options may include shortcuts to specific features or settings, such as Search, My Channels, Featured, Settings, and more.
One useful feature of the Roku app is the ability to search for specific content across all available channels. To access the search function, look for the search icon or the option labeled “Search” in the Roku app. Click on it to enter your search query using your laptop keyboard.
Once you’ve entered your search query, the Roku app will display relevant results from various channels. You can browse through the search results and select the desired content to start streaming.
Furthermore, the Roku app may offer additional features like recommendations based on your viewing history, personalized watchlists, and the ability to customize your Roku home screen layout. Take the time to explore these features and make adjustments according to your preferences.
Navigating the Roku interface on your laptop is intuitive and user-friendly. Familiarize yourself with the navigation shortcuts and explore the various options available to enhance your overall streaming experience.
In the next step, we’ll discuss how to adjust settings and preferences on your laptop to optimize your Roku streaming experience.
Step 7: Adjusting settings and preferences on your laptop
To optimize your Roku streaming experience on your laptop, you have the ability to adjust various settings and preferences. By customizing these options, you can tailor your Roku device to your specific needs and preferences. Let’s explore how to adjust settings and preferences on your laptop.
Open the Roku app on your laptop and navigate to the settings or configuration menu. The location of these settings may vary depending on the version of the Roku app, but it is typically accessible from the main menu or settings section.
Once you’re in the settings menu, you’ll find a range of options to customize your Roku experience. Here are some key settings and preferences you can adjust:
Display Settings: You can adjust the display resolution, screen aspect ratio, and other visual settings to optimize the picture quality on your laptop screen. Experiment with different settings to find the best configuration for your viewing pleasure.
Audio Settings: Customize the audio output settings to ensure optimal sound quality. You can adjust settings like audio format, volume leveling, and more. If you’re using external speakers or headphones, make sure to select the appropriate audio output device.
Network Settings: If you encounter any connectivity or streaming issues, you can check and adjust the network settings within the Roku app. This includes managing Wi-Fi connections, updating network configurations, and troubleshooting network-related problems.
Device Settings: Access device-specific settings like device name, system updates, and reset options. Keep your Roku device up-to-date by enabling automatic system updates to ensure you have the latest features and security enhancements.
Parental Controls: If you have children or want to restrict access to certain content, you can set up parental controls within the Roku app. This feature allows you to set viewing restrictions based on content rating, create a PIN code for restricted content, and manage viewing time limits.
Channel Customization: Customize your channel lineup by managing your installed channels, rearranging their order, and removing channels you no longer use. By organizing your channels, it will be easier to navigate and access your favorite content.
Explore the various settings and preferences available in the Roku app and adjust them according to your preferences. Don’t hesitate to experiment with different options to find the setup that best suits your streaming needs.
It’s worth noting that specific settings and preferences may vary depending on the Roku app version and your device model. Refer to the official Roku documentation or customer support resources for detailed instructions tailored to your specific setup.
Now that you’ve adjusted the settings and preferences on your laptop, you’re all set to enjoy a customized Roku streaming experience. Sit back, relax, and immerse yourself in your favorite movies, TV shows, and entertainment content right from your laptop screen!
Troubleshooting common issues when watching Roku on your laptop
While using Roku on your laptop, you may encounter some common issues. These issues can range from connectivity problems to playback errors. In this section, we’ll discuss some troubleshooting steps to help you resolve these issues and ensure a smooth streaming experience.
1. Connectivity Issues: If you’re experiencing connectivity issues between your laptop and Roku device, make sure both devices are connected to the same Wi-Fi network. Restart both your laptop and Roku device, and check if the connection improves. If the problem persists, try moving your devices closer to the Wi-Fi router to strengthen the signal.
2. Buffering or Playback Issues: If you’re encountering buffering or playback issues, first check your internet connection speed. Ensure that you have a stable high-speed internet connection. If the issue continues, try reducing video quality settings in the Roku app to lessen the strain on your network. You can also try clearing the cache and cookies on your laptop’s web browser to free up resources.
3. App Freezing or Crashing: If the Roku app on your laptop is freezing or crashing frequently, try closing and reopening the app. If the problem persists, uninstall and reinstall the Roku app on your laptop. Make sure you have the latest version of the app installed and that your laptop meets the system requirements for running the app smoothly.
4. Audio or Video Sync Issues: If you’re experiencing audio or video sync issues, check the audio and video settings on your Roku app. Ensure that the audio and video output settings are properly configured and synced. You can also try restarting your laptop and Roku device to see if it resolves the issue.
5. Remote Control Problems: If you’re facing issues with your remote control, make sure the batteries are functioning properly and inserted correctly. If the remote control still doesn’t work, try resetting the remote by removing and reinserting the batteries. You can also use the mobile app remote option in the Roku app on your laptop as an alternative.
6. Channel-Specific Issues: If you’re experiencing issues with a specific channel, try closing and reopening the channel. If the problem persists, uninstall and reinstall the channel. Check for any available channel updates and ensure that your Roku device firmware is up to date. If the issue continues, contact the channel’s customer support for further assistance.
If none of these troubleshooting steps resolve your issue, consult the official Roku support documentation or reach out to their customer support for further assistance. They have a dedicated support team that can help you troubleshoot and resolve any complex issues you may encounter.
By following these troubleshooting steps, you can overcome common issues and enjoy uninterrupted streaming on your laptop through your Roku device. Happy streaming!
Tips and tricks for an enhanced Roku experience on your laptop
As you continue to enjoy streaming content on your laptop through Roku, there are various tips and tricks you can utilize to enhance your overall experience. These tips and tricks will help you make the most out of your Roku device and maximize your streaming enjoyment. Let’s explore some of these tips:
1. Explore Hidden Channels: Roku offers a vast selection of channels, including some hidden gems. Take the time to explore the Roku Channel Store and discover lesser-known channels that cater to your specific interests. You may find niche content or hidden treasures that can add to your streaming repertoire.
2. Use Search Shortcuts: When searching for content, utilize search shortcuts to speed up the process. For example, instead of typing out the full title, use keywords or the first few letters to find what you’re looking for. This can save you time and effort when searching for specific shows, movies, or actors.
3. Customize Screensavers: Personalize your Roku experience by customizing the screensavers. Go into the Roku settings and select different screensaver options, including your own personal photos or preloaded artwork. This adds a personalized touch to your Roku experience when your device is idle.
4. Add Private Channels: In addition to the official Roku Channel Store, you can also add private channels to your Roku device. Private channels offer unique content and can be accessed by adding specific channel codes. Explore the Roku documentation or online communities to find and add these private channels.
5. Utilize Mobile App Features: Download the Roku mobile app on your smartphone or tablet, and take advantage of its features. The mobile app allows you to use your mobile device as a remote control, provides voice search capabilities, and even enables private listening through headphones connected to your mobile device.
6. Cross-Device Syncing: If you have multiple Roku devices, take advantage of the cross-device syncing feature. This allows you to sync your channels, preferences, and even your viewing progress across all your Roku devices. Simply log in with the same Roku account on each device to enable syncing.
7. Stay Updated: Keep your Roku device and apps up to date by regularly checking for system updates. Roku releases software updates that bring new features, performance improvements, and security enhancements. By staying updated, you ensure that you have access to the latest features and bug fixes.
8. Organize Your Channel List: As you accumulate more channels, consider organizing your channel list. Rearrange the order of your channels to prioritize your favorites, and remove channels you no longer use. This simplifies navigation and makes it easier to find the channels you enjoy the most.
9. Take Advantage of Free Trials: Many subscription-based channels on Roku offer free trial periods. Take advantage of these trials to explore new channels and decide if they’re worth subscribing to. Just remember to cancel the trial before it ends if you decide not to continue with the subscription.
10. Explore Roku Community Forums: Join Roku community forums and online communities to connect with other Roku users. These forums provide helpful tips, guidance, and recommendations for getting the most out of your Roku device. You can also find troubleshooting assistance and discover new channels and features.
By incorporating these tips and tricks into your Roku experience, you can enhance your streaming enjoyment and make the most out of your Roku device on your laptop. Whether it’s discovering new channels, personalizing your screensavers, or utilizing the mobile app features, these tips will take your streaming experience to the next level.