
Safety Precautions
When taking apart a watch, it is important to follow safety precautions to protect yourself and prevent any damage to the delicate components. Here are some key safety guidelines to keep in mind:
- Work in a well-ventilated area to avoid inhaling any dust or fumes.
- Wear protective eyewear to safeguard your eyes from flying debris.
- Use a magnifying glass or a loupe to examine small parts closely, but be cautious not to strain your eyes.
- Keep your work area clean and organized to minimize the risk of losing or misplacing components.
- Use appropriate tools for the job and handle them with care to prevent injury.
- Work slowly and methodically, avoiding any sudden movements that could cause parts to fly out of your hands.
- Avoid excessive force when handling delicate components to prevent damage.
- Keep your hands clean and dry to ensure a firm grip on small parts.
- Avoid wearing jewelry or loose clothing that could get caught in the watch or tools.
- Take breaks and rest your eyes regularly to prevent eye strain.
Following these safety precautions will help ensure a smooth and safe watch disassembly process. Remember to always prioritize your safety and take your time to complete each step carefully and accurately.
Tools and Materials Needed
Before starting the process of taking a watch apart, gather the necessary tools and materials. Having the right equipment will make the disassembly process easier and more efficient. Here are the essential tools and materials you will need:
- Screwdriver set: Invest in a good quality set of screwdrivers with various sizes and types of heads, including flathead and Phillips-head screwdrivers. These will be used to remove screws that secure the watch components.
- Tweezers: Get a pair of precision tweezers with fine tips. These are essential for handling small and delicate watch parts, such as springs and gears.
- Case opener: Depending on the type of watch case, you may require a specific case opener tool. It could be a watch case knife, a watch case opener wrench, or a watch case back remover.
- Case holder: A case holder is used to secure the watch case while you work on it. This prevents slipping or scratching the case during disassembly.
- Hand puller: This tool is necessary for safely removing the watch hands without causing any damage. It ensures a gentle and precise removal of the hands from the movement.
- Loupe or magnifying glass: A magnifying tool is essential for examining small watch components closely. It helps to identify any dust, dirt, or damage that needs attention.
- Cleaning solution: Use a watch cleaning solution specifically designed for watch parts. It helps remove dirt, dust, and oils that accumulate on the components over time.
- Lubricants: Choose high-quality lubricants designed for watches to ensure smooth operation and longevity of the movement. Different types of lubricants are used for various parts, such as gears and jewels.
- Soft cloth: Keep a soft, lint-free cloth handy for cleaning and drying the watch components. Avoid using abrasive materials that could scratch or damage the parts.
- Container: Use a small container or a tray to keep the disassembled components organized and prevent loss or mix-up of parts.
By having the necessary tools and materials on hand, you will be prepared for a successful watch disassembly process. Remember to handle the tools with care and store them properly for future use.
Removing the Crown and Stem
The crown and stem assembly of a watch is responsible for setting the time and date. Before disassembling the watch, you need to remove the crown and stem. Here is how you can do it:
- Locate the crown on the side of the watch case.
- Gently pull the crown out to its most extended position, which is usually the time-setting position.
- Look for a small button or release mechanism near the base of the crown or on the watch case.
- Press the button or release mechanism while gently pulling the crown away from the watch case.
- If you don’t find a release mechanism, it is likely that the crown is screw-down type. In this case, rotate the crown counterclockwise until it loosens enough to pull it out.
- Once the crown is removed, you will see the stem attached to it.
- If the stem is held in place by a small screw, use a screwdriver to remove the screw.
- For a stem held by a locking mechanism, locate the release button or tab near the stem and press or push it to release the stem.
- Gently pull the stem out of the watch case, making sure to remember its orientation.
With the crown and stem removed, you can proceed with the disassembly of other watch components. Remember to handle the crown, stem, and any accompanying screws or parts with care to avoid damage or loss.
Removing the Case Back
The case back of a watch protects the internal components and provides access for servicing. To begin disassembling the watch, you’ll need to remove the case back. Follow these steps:
- Inspect the case back for any visible screws or notches.
- If there are screws, use the appropriate screwdriver from your set to carefully unscrew and remove them. Set the screws aside in a secure place.
- If there are notches, you will need a specialized case back opener tool or case back remover wrench. Insert the tool into the notches and carefully apply pressure to rotate and loosen the case back.
- If the case back is a snap-on type, it may require a case back knife. Gently insert the case back knife into the gap between the case back and the case, then apply a slight twisting motion to pry the case back off.
- Take note of any gaskets on the case back, which help ensure the watch’s water resistance. Carefully remove and set them aside for cleaning and inspection.
Once the case back is removed, you will have a clear view of the watch’s movement and other internal components. Take care to handle the case back and screws with caution to avoid scratches or dropping them.
Remember, not all watches have easily removable case backs. Some luxury or vintage watches may require advanced techniques or special tools for case back removal. If you are unsure about how to remove the case back of a specific watch model, it is recommended to consult a professional watchmaker or refer to the manufacturer’s instructions.
Removing the Movement
The movement, also known as the watch’s engine, is the heart of the watch that drives its functionality. To proceed with disassembling the watch, the movement needs to be removed. Follow these steps:
- Inspect the movement and identify any screws or clamps holding it in place. These securing mechanisms may vary depending on the watch model.
- Use the appropriate screwdriver from your set to carefully remove any screws that are holding the movement in place.
- If there are clamps securing the movement, use a pair of tweezers to gently release and remove them.
- Once the movement is no longer secured, carefully lift it out of the watch case.
- Pay attention to any wiring, connectors, or springs that may still be attached to the movement. Carefully disconnect or unhook them as necessary.
- Set the removed movement aside on a clean and soft surface.
During this process, it is crucial to handle the movement with extreme care to prevent any damage. Avoid applying excessive force or unnecessary pressure that could potentially harm the delicate components.
Remember to maintain a clean and organized workspace to prevent any dust or debris from entering the movement or getting lost in the disassembly process. Keep track of any screws or small parts that are removed, as they will need to be properly reinstalled during the reassembly phase.
Separating the Dial and Hands
The dial, also known as the face of the watch, along with the hands, play an essential role in displaying the time. To continue with the disassembly process, you’ll need to separate the dial and hands. Follow these steps:
- Inspect the watch dial and hands to identify any screws or pins holding them in place.
- If there are screws, use a suitable screwdriver to carefully remove them. Set the screws aside in a secure place.
- If there are pins, locate the small holes on the dial where the hands are attached.
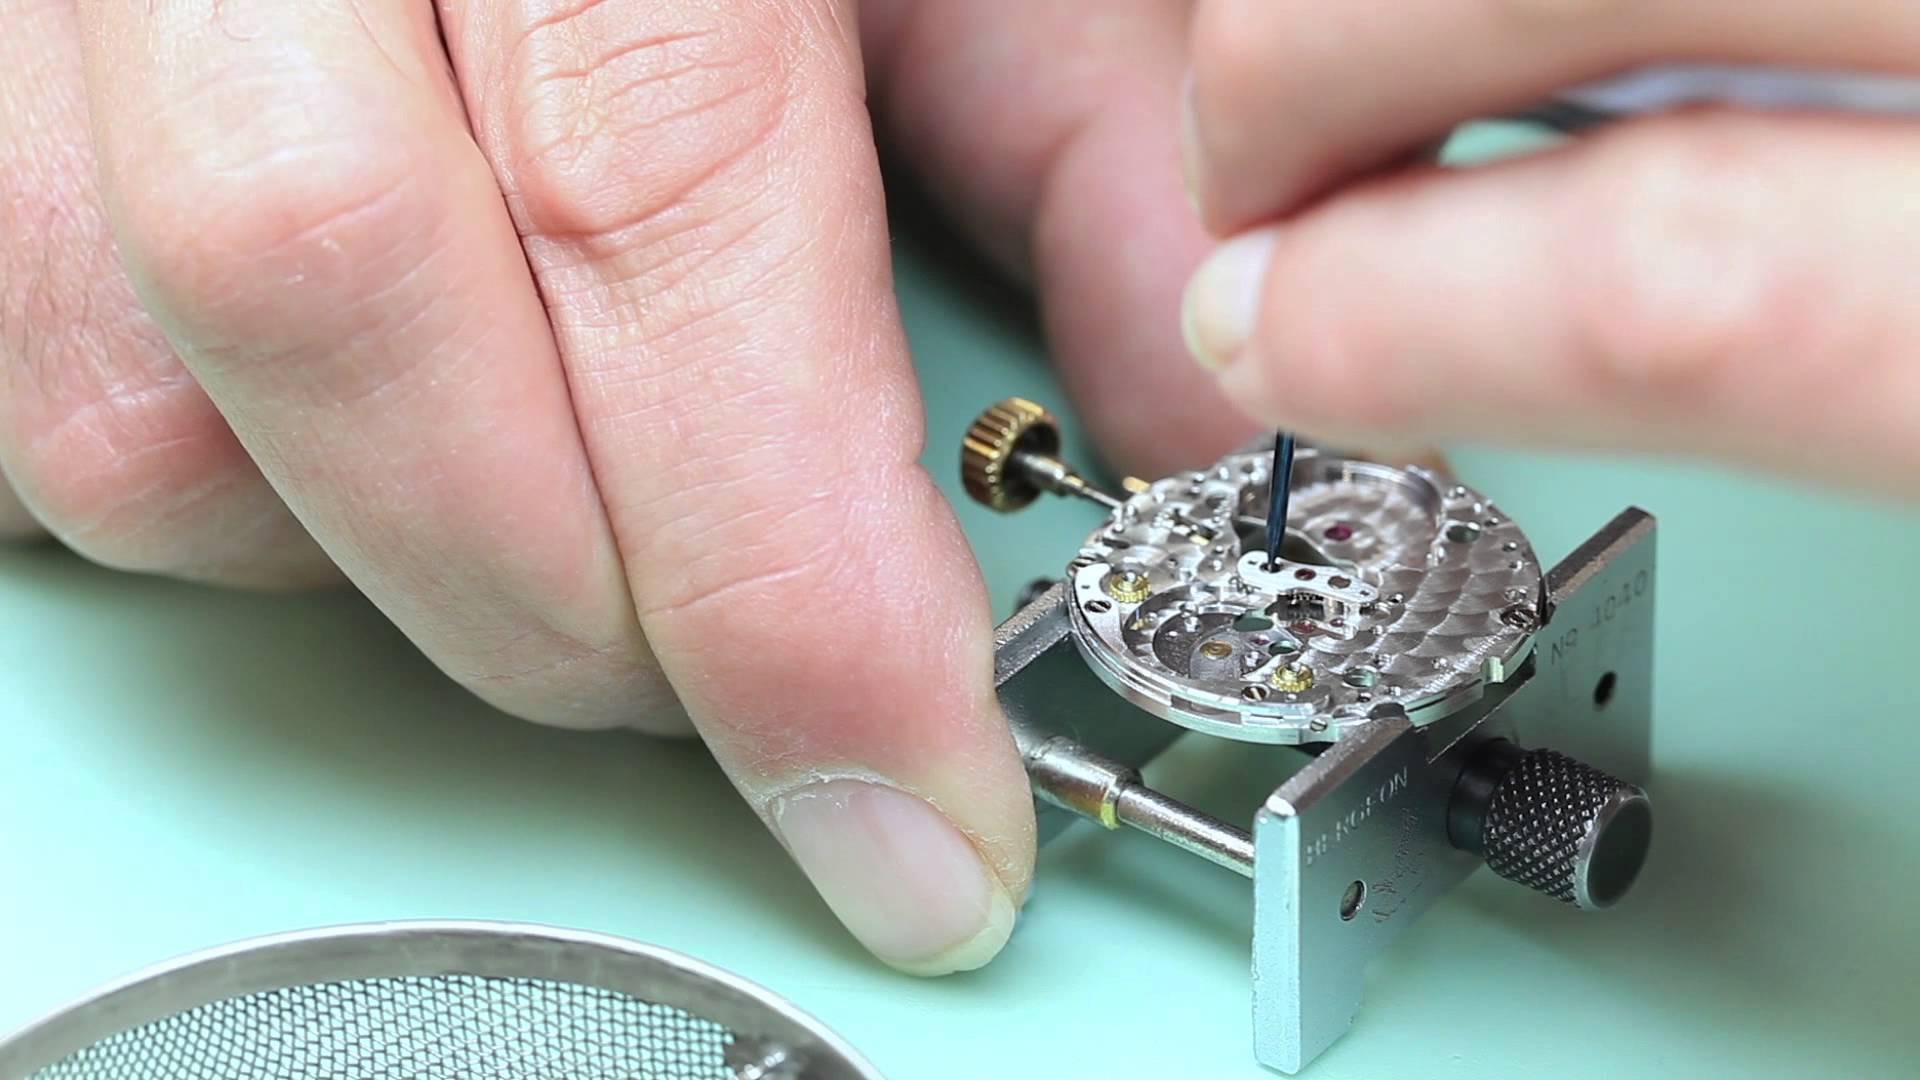
- Use a hand puller tool designed for watch hands to gently pull the hands upward to disengage them from the dial. Apply steady and consistent pressure to avoid bending or damaging the hands.
- If there are multiple hands, remove them one by one, taking note of their order and orientation.
- Once the hands are removed, inspect the dial for any additional components or attachments that need to be detached.
- Handle the dial with care, avoiding any contact with the hands or other components to prevent scratches or damage.
Separating the dial and hands can be delicate work, especially when dealing with vintage or delicate watch models. Take your time, work patiently, and exercise caution throughout the process.
Keep the removed screws, pins, and hands in a secure container or tray to ensure they don’t get misplaced or mixed up with other components. By properly organizing and documenting the steps you take, you’ll make the reassembly process much smoother.
Disassembling the Movement
Disassembling the movement of a watch involves breaking it down into individual components for cleaning, inspection, and repair if necessary. Here is a step-by-step guide to disassembling the movement:
- Refer to the watch’s technical documentation or research the specific watch model to familiarize yourself with its movement’s intricacies and potential challenges.
- Start by removing any visible screws holding the movement’s outer plate or bridge in place. Use the appropriate screwdriver to carefully unscrew and remove them, taking note of their original locations.
- Once the outer plate or bridge is removed, gently lift it away, exposing the internal components of the movement.
- Inspect the movement and identify any additional screws, pins, or clips that secure other parts.
- Carefully remove these components one by one, following the manufacturer’s instructions or technical drawings if available.
- As you disassemble the movement, keep each part organized and separated. Use a clean and soft cloth or designated containers to prevent mixing or misplacing the components.
- Continue removing the different parts of the movement, such as the balance wheel, escapement, gear train, and jewel bearings. Take caution to handle these delicate components carefully.
Remember to work in a clean and controlled environment to minimize the risk of dust, debris, or other contaminants entering the movement. Keep track of the sequence and orientation of each component you remove, as this will be crucial during the reassembly process.
Disassembling the movement requires patience, precision, and a steady hand. If at any point you encounter difficulties or feel unsure, it is advisable to seek the guidance of a professional watchmaker to avoid causing accidental damage to the intricate movement.
Cleaning and Lubricating the Components
After disassembling the components of the watch movement, it’s important to clean them thoroughly to remove any dirt, dust, or old lubricants. Cleaning and lubricating the components will ensure optimal performance and longevity. Here’s a step-by-step guide to the cleaning and lubrication process:
- Prepare a designated cleaning solution suitable for watch components. Avoid using harsh chemicals or solvents that could damage the delicate parts. Follow the manufacturer’s instructions for dilution ratios if applicable.
- Submerge the disassembled components in the cleaning solution and gently agitate them to dislodge any dirt or debris. Use a soft-bristled brush, such as a toothbrush, to carefully clean hard-to-reach areas.
- Rinse the components thoroughly with clean water to remove any traces of the cleaning solution.
- Dry the components using a lint-free cloth or air blower. Ensure they are completely dry before proceeding to the next step.
- Apply the appropriate lubricants to the specific parts of the movement. Use watch-specific lubricants designed for different components (e.g., gears, jewels, escapement). Refer to the watch’s technical documentation or consult a professional for guidance on the correct lubrication points and types.
- Apply the lubricants sparingly, following the recommended amounts. Excess lubrication can lead to issues such as oil buildup or interference with movement performance.
- Use a clean, lint-free cloth or a specialized oiling tool to distribute the lubricant evenly and remove any excess from the components.
- Inspect each component for cleanliness and proper lubrication. Ensure that all surfaces are adequately covered without any visible residue.
Remember, cleaning and lubricating watch components require attention to detail and precision. Take your time, handle the components gently, and double-check that each part is in optimal condition before proceeding to the reassembly phase.
If you are unsure about the cleaning and lubrication process or lack the necessary expertise, it is recommended to seek the assistance of a professional watchmaker. They have the knowledge and experience to ensure proper cleaning techniques and appropriate lubrication for your specific watch model.
Assembling the Movement
Assembling the movement is the crucial step of putting all the cleaned and lubricated components back together. It requires careful attention to detail and precision. Here’s a step-by-step guide to help you assemble the movement:
- Refer to the technical documentation or any notes you took during the disassembly process to ensure you follow the correct sequence and orientation of the components.
- Start by reassembling the basic structure of the movement, such as placing the gears and other larger components back in their original positions.
- As you insert each component, ensure they align properly with their corresponding pivots or shafts.
- Check for any specific assembly instructions or diagrams provided by the manufacturer to ensure the proper alignment and positioning of each component.
- Take care not to force any components into place. They should fit smoothly and without resistance.
- Once the larger components are in place, proceed to install the smaller parts, such as screws, pins, and springs. Use the appropriate tools and take care not to overtighten the screws or cause any damage.
- Regularly inspect the assembled movement to ensure each component is securely in place and functions as intended.
- When all the components have been properly assembled, give the movement a gentle shake or rotate the crown to ensure the smooth and unrestricted movement of the gears and other rotating parts.
Throughout the assembly process, maintain cleanliness by handling the components with clean and dry hands, and work in a clean environment free from dust and debris. Avoid touching the delicate surfaces of the movement components to minimize the risk of contamination or damage.
If you encounter any difficulties during the assembly or feel unsure about a particular step, it is advisable to seek the assistance of a professional watchmaker. They have the expertise and experience to ensure a proper and accurate assembly of the movement.
Reinstalling the Dial and Hands
Once the movement has been assembled, it’s time to reinstall the dial and hands to bring the watch back to its functional state. Follow these steps to properly reinstall the dial and hands:
- Carefully inspect the dial for any dust, debris, or fingerprints. If necessary, use a soft cloth or compressed air to clean it before installation.
- If the dial has alignment markers or feet, ensure they are properly positioned and aligned with the corresponding holes or pins on the movement.
- Gently place the dial on top of the movement, ensuring a snug fit and aligning any screws holes or pins.
- If the dial is secured by screws, use the appropriate screwdriver to tighten them. Be cautious not to overtighten the screws to avoid damaging the dial or movement.
- If the dial has feet or clips, carefully press them into their respective holes, ensuring they are securely in place without causing any stress to the dial or movement.
- Next, reinstall the hands in the correct order and position. Refer to your documentation or notes from the disassembly process to ensure correct alignment.
- Use a hand presser or a hand fitting tool to gently press the hands onto their corresponding posts, ensuring they are secure and properly aligned.
- Set the time on the watch and observe the movement of the hands to ensure they move smoothly and point to the correct markers on the dial.
Throughout the reinstallation process, handle the dial and hands with clean and dry hands to prevent any oils, fingerprints, or smudges. Avoid applying excessive force when installing the components to minimize the risk of damage.
If you encounter any difficulties or have concerns about the reinstallation process, it is recommended to seek the assistance of a professional watchmaker. They can ensure that the dial and hands are properly aligned and securely attached, resulting in a well-functioning timepiece.
Reinstalling the Movement
After successfully assembling the dial and hands, the next step is to carefully reinstall the movement into the watch case. Follow these steps to ensure a proper reinstallation:
- Inspect the watch case for any debris or dust that may have accumulated during the disassembly process. Use a lint-free cloth or a soft brush to gently clean the case interior.
- Ensure that any gaskets or seals that were removed previously are clean and in good condition. If necessary, lubricate them lightly with an appropriate lubricant to maintain their functionality.
- Hold the movement carefully by its edges or use a pair of tweezers to position it correctly within the case, ensuring that any protruding stems or pins align with their respective holes or slots.
- Once the movement is properly aligned, gently press it into the case, ensuring a snug fit without applying excessive force. Take care to avoid any contact between the movement and the case to prevent scratches or damage.
- If the movement is secured with screws or clamps, consult your documentation or notes to identify the proper components and their positions. Carefully install and tighten them, taking care not to overtighten to prevent damage.
During the reinstallation process, pay attention to the movement’s alignment within the case, ensuring that any stem, crown, or other components line up properly with their corresponding features on the case. Make any necessary adjustments to ensure smooth operation and functionality.
Once the movement is securely installed, give the watch a gentle shake or rotate the crown to confirm that the movement is functioning properly and moving freely within the case.
If you encounter any difficulties or uncertainties during the reinstallation process, it is recommended to seek the assistance of a professional watchmaker. They have the expertise and experience to ensure a proper and secure reinstallation of the movement into the watch case.
Attaching the Case Back
With the movement successfully reinstalled, it’s now time to attach the case back to complete the watch assembly. Follow these steps to properly attach the case back:
- Inspect the case back for any dust, debris, or fingerprints. Use a soft cloth or compressed air to clean it before installation.
- Ensure that any gaskets or seals that were removed previously are clean and in good condition. Lubricate them lightly with an appropriate lubricant to maintain their functionality.
- Align the case back with the watch case, ensuring that any notches, grooves, or screws match up appropriately.
- If the case back uses screws, carefully place them in their respective holes and use a suitable screwdriver to tighten them. Be cautious not to overtighten the screws, as it can damage the case or affect the sealing.
- If the case back is a snap-on style, apply even pressure around the circumference of the case back while gently pushing it into place. Listen or feel for a satisfying click, indicating that the case back is securely attached.
- Gently check the case back for any gaps or misalignment. If necessary, readjust and ensure a proper fit.
Throughout the process of attaching the case back, handle it with clean and dry hands to avoid leaving smudges, fingerprints, or oils on the surface. Take care not to scratch or damage the case or any seals during the installation.
Once the case back is securely attached, the watch is almost fully assembled. However, there is one more crucial step before it’s ready to be worn or tested.
Note: Some watches, especially those with complicated features or unique designs, may require specialized tools or techniques for attaching the case back. It is recommended to consult the watch’s technical documentation or seek the guidance of a professional watchmaker if you are uncertain about the specific requirements for your watch model.
Adjusting the Crown and Stem
The crown and stem are essential components of a watch that allow for time-setting, date adjustments, and winding. After attaching the case back, it is important to properly adjust the crown and stem to ensure smooth operation and functionality. Follow these steps to adjust the crown and stem:
- Check the position of the crown in its normal resting state. If it is protruding too far or feels loose, adjustments may be needed.
- If the crown is too loose, gently tighten any screws or clasps within the watch movement that secure the stem in place. Take care not to overtighten to avoid damaging the stem or movement.
- If the crown is too difficult to pull out or push in, it may require lubrication. Use a small amount of watch-specific lubricant on the stem and inside the crown to ease its movement. Ensure the lubricant is applied sparingly to prevent excess buildup.
- Test the crown and stem by gently pulling it out to the time-setting position and rotating it in both directions. Ensure it engages smoothly and remains firmly in the desired position.
- If the crown and stem have multiple positions for date adjustments or other functions, test each position to ensure proper engagement and alignment.
- If the crown has a screw-down function, such as with diver’s watches, ensure it is securely tightened to maintain water resistance.
- If necessary, make any additional adjustments or lubrication to ensure the crown and stem operate effortlessly and reliably.
Properly adjusting the crown and stem is crucial for the overall functionality and convenience of the watch. It ensures that users can easily set the time, date, and winding mechanism without any issues.
If you encounter any difficulties or uncertainties during the adjustment process, it is recommended to seek the assistance of a professional watchmaker. They can provide guidance and make any necessary adjustments to ensure the crown and stem operate smoothly and securely.
Final Inspection and Testing
After completing the assembly and adjustments of the watch, it is crucial to perform a thorough inspection and testing to ensure its proper functionality and performance. Follow these steps for the final inspection and testing:
- Visually inspect the watch for any visible flaws, scratches, or misalignments. Take note of any areas that require further attention or adjustment.
- Check that the hands move smoothly and accurately in response to time-setting movements. Ensure they align properly with the markers on the dial.
- Wind the watch if necessary and monitor the power reserve. Verify that the watch is running and keeping time accurately.
- Perform additional functional tests based on the specific features of the watch, such as date adjustments, chronograph functions, or other complications.
- Check the functionality of any additional features, such as a rotating bezel or a push-button crown.
- Pay attention to the winding mechanism, ensuring that it operates smoothly and effectively.
- Verify the water resistance if applicable, ensuring that the watch is sealed properly and functions correctly in water.
- Record all observations and make any necessary adjustments or repairs based on the findings of the inspection and testing.
- Once satisfied with the overall performance and functionality, clean the watch case and strap or bracelet to remove any fingerprints or residues.
Conducting a final inspection and comprehensive testing is essential to ensure that the watch is in optimal working condition before it is returned to its owner or made available for sale. It allows for any necessary adjustments or remedial actions to be taken to address any identified issues.
If you encounter any difficulties or uncertainties during the inspection and testing process, it is recommended to consult a professional watchmaker. They have the expertise and tools to thoroughly evaluate the watch and make any necessary adjustments or repairs to ensure its proper functionality.