
Tools Needed
Before you embark on removing the watch crystal, it’s important to gather all the necessary tools to ensure a smooth and successful process. Here is a list of essential tools you’ll need:
- Watchmaker’s screwdrivers: These precision screwdrivers come in various sizes and are specifically designed for working on watches. Make sure to have a set that includes both flathead and Phillips-head screwdrivers.
- Case knife or case opener: This tool is used to carefully pry open the caseback without scratching or damaging it. There are different types of case openers available, such as a watch case knife, case wrench, or case back pry tool.
- Tweezers: Fine point tweezers are essential for handling small and delicate watch parts, such as dials and hands. Look for tweezers with a non-magnetic, anti-static coating that will prevent any accidental magnetization or static electricity.
- Crystal lift or crystal press: These tools are used to remove the watch crystal by gently lifting or pressing it out of the case. Depending on the type of watch crystal you’re dealing with, you may need a crystal lift or a crystal press.
- Crystal gasket remover: If your watch crystal has a gasket seated around it, a crystal gasket remover tool can help safely remove it without causing any damage.
- Soft cloth or watch pad: To protect the watch case and prevent scratches, use a soft cloth or a watch pad as a secure surface to work on.
- Loupe or magnifying glass: A loupe or magnifying glass with a high magnification power can help you inspect the watch crystal and other parts closely for any defects or dirt.
These are the essential tools needed to remove a watch crystal effectively and without causing any damage. It’s important to have these tools on hand before you begin the process to ensure a successful outcome.
Step 1: Prep Work
Before diving into the process of removing the watch crystal, it’s crucial to prepare the workspace and the watch itself. This step ensures a smooth and organized process. Follow these steps to properly prepare:
- Gather all the necessary tools: Collect all the tools needed for the specific watch crystal removal method you’ll be using. This includes the watchmaker’s screwdrivers, case knife or opener, tweezers, crystal lift or press, crystal gasket remover, soft cloth or watch pad, and a loupe or magnifying glass.
- Choose a clean and well-lit workspace: Find an area with ample lighting and a clean, clutter-free surface to work on. A tabletop or a clean watchmaker’s bench is ideal.
- Remove all distractions: Ensure there are no distractions nearby that could hinder your focus, such as loud noises or other objects that may obstruct your workspace.
- Secure the watch: Place a soft cloth or watch pad on your workspace to protect the watch case from scratches. Gently lay the watch face down on the cloth or pad, ensuring it is stable and won’t move around while you work on it.
- Inspect the watch: Take a close look at the watch to identify any areas of concern, such as loose screws, damaged parts, or signs of moisture. Make note of anything that needs attention or repair before proceeding with the crystal removal.
- Safety first: It’s important to prioritize safety during the entire process. Avoid wearing loose clothing, remove any jewelry that could potentially scratch the watch, and handle all tools with care to prevent injury.
By taking these preparatory steps, you are setting yourself up for a successful watch crystal removal. Having a clean and organized workspace, gathering the necessary tools, and ensuring the watch is secure and free from distractions will make the entire process much smoother.
Step 2: Removing the Strap or Bracelet
Before you can proceed with removing the watch crystal, it is often necessary to remove the strap or bracelet that is attached to the watch case. Follow these steps to safely detach the strap or bracelet:
- Assess the attachment mechanism: Depending on the watch model, the strap or bracelet may be attached using spring bars, screws, or pins. Look for the appropriate mechanism used in your watch and prepare the necessary tools accordingly.
- Identify the release points: Locate the release points where the strap or bracelet connects to the watch case. These are usually found on the underside of the lugs or on the sides of the case.
- Use the appropriate tools: If your watch uses spring bars, a spring bar tool is usually required. For watches with screws or pins, a screwdriver or pin removal tool will be needed. Select the appropriate tool and size that matches the attachment mechanism and carefully insert it into the release point.
- Release the strap or bracelet: Gently apply pressure to the release point while simultaneously pushing or pulling the tool in the opposite direction. This should release the spring bar, screw, or pin, allowing the strap or bracelet to detach from the watch case.
- Repeat the process: If your watch has multiple attachment points, repeat the above steps to remove each strap or bracelet section. Take your time and be gentle to avoid damaging the watch or the strap/bracelet.
- Store the strap or bracelet safely: Once removed, keep the strap or bracelet in a safe and clean location to prevent any damage or loss. Consider using a small container or ziplock bag to keep all the pieces together.
By following these steps, you’ll be able to remove the strap or bracelet from your watch case, allowing you easier access to the watch crystal during the subsequent steps. Take your time and be cautious when handling the watch and the tools to prevent any accidental damage.
Step 3: Removing the Caseback
After removing the strap or bracelet, the next step in removing the watch crystal is to take off the caseback. This will give you access to the internals of the watch. Follow these steps to safely remove the caseback:
- Identify the type of caseback: Determine whether your watch has a screw-down caseback or a snap-off caseback. Screw-down casebacks have indentations to fit a specific tool, while snap-off casebacks can be gently pried off with a case knife or opener.
- Choose the appropriate tool: Select the appropriate tool based on the type of caseback. For screw-down casebacks, use a case opener or wrench that matches the indentations. For snap-off casebacks, a case knife or opener will be needed.
- Position the tool: Insert the tool into the notches or gaps on the caseback. For screw-down casebacks, make sure the tool is securely seated. For snap-off casebacks, position the blade of the case knife or opener at a slight angle, just enough to fit into the gap.
- Apply gentle pressure: If you have a screw-down caseback, turn the tool counterclockwise to loosen and unscrew it. For a snap-off caseback, carefully apply gentle pressure and apply even force to pry it open. Avoid using excessive force as this may damage the caseback or the watch.
- Remove the caseback: Once the caseback is loose, unscrew it completely or continue prying it open with the case knife or opener. Be careful not to damage any delicate parts inside the watch.
- Inspect and clean the caseback: Take this opportunity to inspect the caseback for any signs of moisture, damage, or debris. Clean it if necessary using a soft cloth or a watch cleaning solution, ensuring it is free from any dirt or residue.
By following these steps, you’ll be able to remove the caseback of your watch, granting access to the internal components. Remember to exercise caution and be gentle throughout the process to avoid any damage to the watch or its delicate parts.
Step 4: Removing the Movement
With the caseback off, you now have access to the movement inside the watch. Removing the movement is necessary to safely remove the watch crystal. Follow these steps to remove the movement:
- Identify the movement retaining mechanism: Look for the mechanism that holds the movement in place. Depending on the watch model, it may be secured using screws, clips, or a retaining ring.
- Identify and remove the movement retaining screws: If your watch has screws holding the movement, use the appropriate screwdriver to remove them. Be careful not to drop or lose the screws during this process.
- Release the movement retaining clips: For watches with retaining clips, carefully lift or push the clips to release them from the movement. Take note of their position before removing to ensure correct reassembly later.
- Remove the retaining ring: Some watches may use a retaining ring to secure the movement. If applicable, use a pair of tweezers or a specialized tool to carefully remove the retaining ring. Take extra care to avoid any damage to the ring or the movement.
- Gently lift out the movement: Once all retaining mechanisms are released, gently lift the movement out of the case. Use your fingertips or a pair of tweezers to grip the movement’s edges, taking care not to touch any delicate components.
- Place the movement in a safe and clean space: Set the movement aside in a secure and clean location, such as on a soft cloth or a watch pad. Ensure it is away from any potential damage or contamination.
Removing the movement is a critical step in the process of removing the watch crystal. By following these steps carefully and patiently, you will be able to safely detach the movement from the case, preparing it for the next stage of the crystal removal process.
Step 5: Removing the Dials and Hands
With the movement out of the case, the next step in removing the watch crystal is to remove the dials and hands. This ensures safe access to the crystal. Follow these steps to remove the dials and hands:
- Assess the dial and hand attachment: Examine the dial and hands to determine how they are attached. They may be secured using screws, friction-fit, or a specialized mounting system.
- Use the appropriate tools: Based on the attachment method, select the appropriate tools. For screw-secured dials and hands, use a screwdriver that fits the screws. For friction-fit attachments, a hand-removing tool or a hand puller may be needed.
- Remove the dial: If the dial is secured with screws, carefully unscrew them using the appropriate screwdriver. If it is a friction-fit dial, use a specialized tool or a small suction cup to gently lift it away from the movement. Take care not to damage the dial or any underlying components.
- Remove the hands: For hands attached with tiny screws, unscrew them using a suitable screwdriver. If the hands are friction-fit, use a hand-removing tool or carefully pry them off with a hand puller. Take extra caution to avoid bending or damaging the delicate hands.
- Store the removed dials and hands: Place the removed dials and hands in a secure and clean location, such as in a small container or a ziplock bag. Keep them separate to prevent any damage or confusion during reassembly.
By following these steps, you’ll be able to safely remove the dials and hands from the movement, providing clear access to the watch crystal. Handle the dials and hands with care to avoid any accidental damage during the removal process.
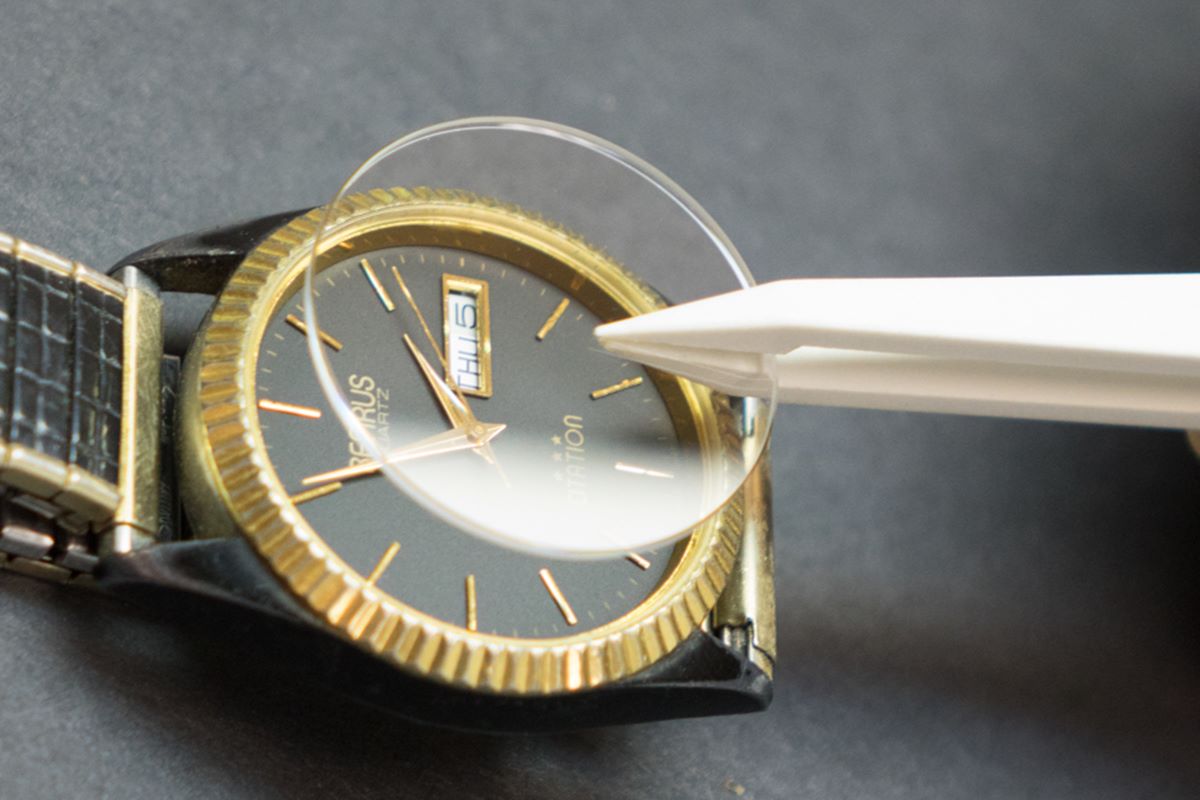
Step 6: Removing the Watch Crystal
Now that you have reached the stage of removing the watch crystal, follow these steps to safely and successfully remove it:
- Assess the type of watch crystal: Identify the type of watch crystal your timepiece has. Common types include acrylic, mineral glass, or sapphire crystal. Each type may require different techniques or tools for removal.
- Choose the appropriate method: Based on the type of watch crystal, select the most suitable method for removal. For example, acrylic crystals can often be gently pried off with a crystal lift tool or case knife, while mineral glass or sapphire crystals may require a crystal press for safe extraction.
- Prepare the watch crystal removal tool: If using a crystal lift tool, adjust it to match the size of the watch crystal. If using a crystal press, ensure the appropriate dies are installed that fit the crystal diameter.
- Apply gentle pressure or leverage: If using a crystal lift tool or case knife, carefully insert it underneath the watch crystal edge. Gently lift or apply pressure to dislodge the crystal from its seating. If using a crystal press, position the watch case with the crystal on the appropriate die and carefully press down to remove it.
- Inspect the removed watch crystal: Once the watch crystal is removed, carefully examine it for any damage or signs of wear. Clean it using a soft cloth and watch cleaning solution if necessary.
Removing the watch crystal requires precision and caution to avoid any damage to the watch case or the crystal itself. It is crucial to select the correct method and tools for the specific type of crystal to ensure a successful removal process.
Step 7: Cleaning and Reassembling
After removing the watch crystal, it’s essential to clean both the crystal and the other components before reassembling the watch. Follow these steps to ensure a thorough cleaning and proper reassembly:
- Clean the watch crystal: Use a soft cloth or a watch cleaning solution to gently clean the removed watch crystal. Remove any fingerprints, smudges, or debris that may have accumulated on the surface. Take care not to scratch or damage the crystal during this process.
- Clean the other components: Take the opportunity to clean the other components of the watch, including the caseback, movement, dials, hands, and any other parts that were removed. Use a soft cloth or a watch cleaning solution to remove any dirt or residue.
- Inspect for any damage: While cleaning, carefully inspect all the components for any signs of damage, including scratches, cracks, or loose parts. Take note of any issues that need to be addressed or repaired before reassembling the watch.
- Reassemble the watch: Once the components are cleaned and inspected, follow the reverse order of the disassembly process to reassemble the watch. Pay attention to aligning the dials, hands, and movement correctly. Use the appropriate tools to secure everything in place, whether it’s screws, clips, or a retaining ring.
- Check for proper functioning: After reassembling the watch, ensure that all the components are securely in place and that the hands move freely without obstruction. Set the time and test any additional functions to verify that the watch is functioning properly.
By carefully cleaning and reassembling the watch components, you’ll ensure that they are in optimal condition and ready for use. Take your time during this step to ensure a precise and successful reassembly process.
Step 8: Attaching the Strap or Bracelet
Now that the watch is cleaned and reassembled, the next step is to attach the strap or bracelet back to the watch case. Follow these steps to securely attach the strap or bracelet:
- Identify the attachment points: Look for the openings or holes on the watch case where the strap or bracelet will be attached. These are typically located on the lugs or sides of the watch case.
- Prepare the strap or bracelet: Before attaching, ensure there are no twists or tangles in the strap or bracelet. Straighten it out and make sure it is positioned correctly.
- Insert the spring bars or screws: Depending on the type of attachment mechanism, insert the spring bars or screws into the appropriate holes on the watch case. Make sure they are securely fastened and properly aligned.
- Guide the strap or bracelet onto the attachment points: Gently guide the strap or bracelet onto the spring bars or screws, ensuring they fit securely into the attachment points. If necessary, use a spring bar tool to compress the spring bars for easier insertion.
- Apply gentle pressure: Once the strap or bracelet is in position, apply gentle pressure to ensure a snug fit. Make sure it is comfortable and properly positioned around the wrist.
- Double-check the attachment: Verify that the strap or bracelet is securely attached to the watch case by giving it a gentle tug. Ensure there is no excessive movement or looseness.
By following these steps, you’ll be able to securely attach the strap or bracelet back to the watch case. Take your time to ensure a proper and secure attachment, as a well-fitted strap or bracelet enhances both the comfort and functionality of the watch.
Step 9: Closing the Caseback
Once the strap or bracelet is attached, the next crucial step is to properly close and secure the caseback of the watch. Follow these steps to ensure a secure and sealed caseback:
- Clean the caseback: Before closing the caseback, wipe it clean to remove any fingerprints, dirt, or residue. This ensures a clean surface for sealing.
- Align the caseback: Carefully align the caseback with the watch case, ensuring that any engravings or markings are positioned correctly.
- Use the appropriate closing method: Depending on the watch model, you may need to screw down the caseback or snap it into place. Ensure you follow the correct method for your specific watch.
- If screw-down caseback: Use the appropriate tool, such as a case opener or wrench, to securely tighten the caseback. Turn it clockwise to ensure a tight seal, but be careful not to overtighten, as it can damage the case or the threads.
- If snap-on caseback: Apply gentle pressure evenly around the edges of the caseback, firmly pressing it into place. Ensure that it snaps or clicks securely into the case.
- Ensure a proper seal: If your watch is intended to be water-resistant, make sure the caseback is properly sealed and checked for any potential gaps or openings that may compromise the watch’s water resistance.
- Double-check the closure: Once the caseback is closed, give it a gentle twist or push to ensure that it is securely and snugly in place.
By following these steps, you’ll be able to close the caseback of your watch properly. A securely closed caseback not only protects the internal components but also maintains the watch’s overall functionality and, in the case of water-resistant watches, its water resistance capabilities.
Step 10: Final Inspection and Testing
The last step in the process of removing a watch crystal is to conduct a final inspection and testing to ensure that the watch is functioning properly and that all components are in place. Follow these steps for a thorough inspection:
- Check for any loose parts: Carefully examine the watch for any loose screws, pins, or other components that may have become dislodged during the removal process. Tighten or reattach any loose parts as necessary.
- Verify proper timekeeping: Set the time on the watch and observe its timekeeping accuracy. Ensure that the hands move smoothly and align correctly with the dial markings.
- Test additional functions: If your watch has additional functions, such as date display or chronograph features, test their functionality to ensure they are working properly.
- Check for any visible defects: Inspect the watch for any visible defects, such as scratches, scuffs, or marks, that may have occurred during the crystal removal process. If necessary, address any cosmetic issues or contact a professional watchmaker for repair.
- Ensure proper water resistance: If your watch is designed to be water-resistant, consider conducting a water resistance test. This can be done by either submerging the watch in water or using a specialized pressure testing device for more accurate results. If there are any concerns about water resistance, consult a professional watchmaker.
By conducting a thorough inspection and testing, you can ensure that the watch crystal removal process was successful and that the watch is in proper working condition. Any issues or concerns identified during this step should be addressed promptly to maintain the longevity and functionality of the timepiece.