
Tools Needed
In order to change the band of your Samsung watch, you’ll need a few essential tools. These tools will help you to safely and effectively remove the old band and attach the new one. Here’s what you’ll need:
- Spring Bar Tool: This tool is commonly used for removing and inserting watch bands. It has a small, pointed end that can fit into the spring bar holes and easily release the band.
- Cloth or Towel: Having a cloth or towel on hand is useful for protecting your watch face and band from scratches or damage during the band changing process.
- New Watch Band: Of course, you’ll need a new watch band that is compatible with your Samsung watch. Make sure to choose a band that matches the watch’s size and style preferences.
- Pliers (optional): Pliers can be helpful if the old band is difficult to remove. They provide extra grip and leverage during the removal process.
- Patience: Changing a watch band can sometimes require a bit of patience, especially if it’s your first time doing it. Remember to stay calm and take your time to avoid any accidental damage.
By having these tools at your disposal, you’ll be fully equipped to change the band of your Samsung watch easily and efficiently. Now that you have gathered all the necessary tools, let’s move on to the next step: determining the type of band.
Step 1: Determine the Type of Band
Before you start the process of changing your Samsung watch band, it’s important to determine the type of band that your watch uses. Samsung watches typically come with two common types of bands: the traditional pin-and-buckle style or the newer quick-release style.
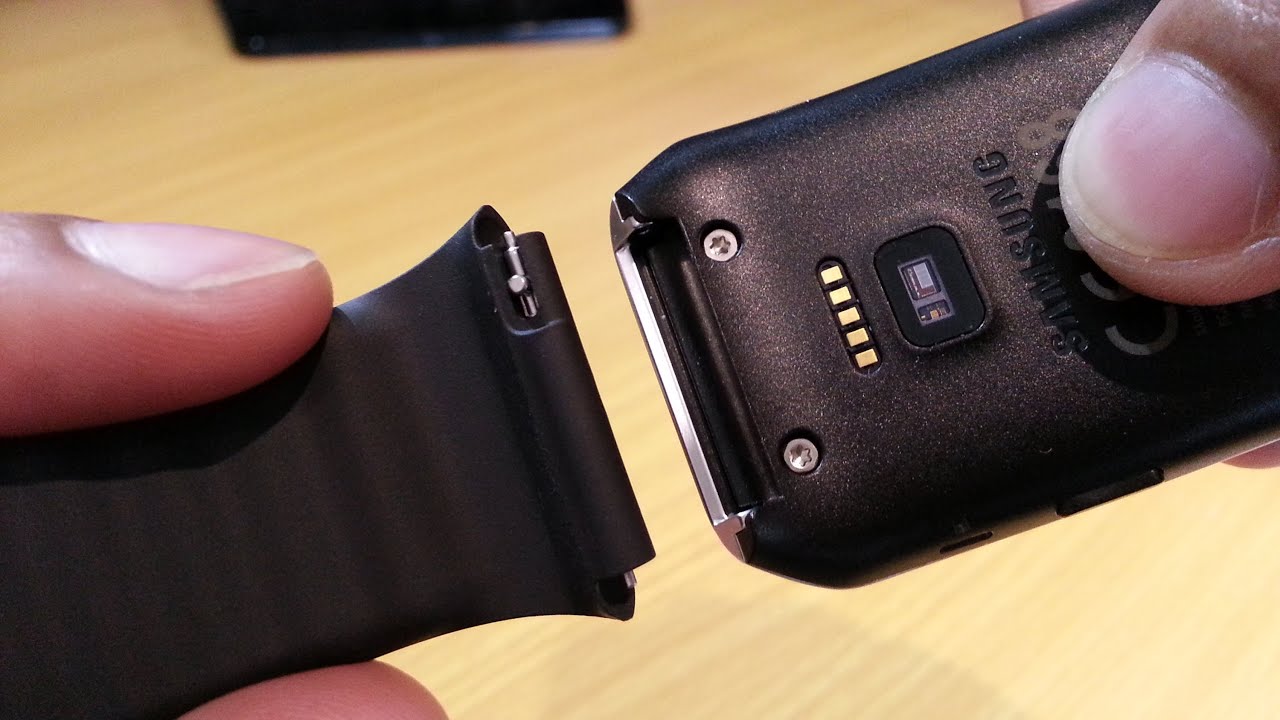
To identify the type of band your watch has, carefully examine the area where the band connects to the watch case. If you see small holes on either side of the band, it is most likely a pin-and-buckle style band. On the other hand, if you notice small release buttons on the back of the band, then your watch has a quick-release style band.
Knowing the type of band is crucial as it will determine the specific steps you need to follow to remove and attach the new band. Pin-and-buckle style bands require the use of a spring bar tool to release the pins holding the band in place, while quick-release bands can be easily removed by pressing the release buttons.
If you’re unsure about the type of band or encounter any difficulties while determining it, referring to your watch’s user manual or contacting Samsung support can provide you with the necessary guidance.
Now that you’ve successfully identified the type of band your Samsung watch has, you are ready to move on to the next step: removing the old band.
Step 2: Remove the Old Band
Now that you’ve determined the type of band on your Samsung watch, it’s time to remove the old band. The process will vary depending on whether you have a pin-and-buckle style band or a quick-release style band.
If you have a pin-and-buckle style band:
- Place your watch face down on a soft cloth or towel to protect it from scratches.
- Locate the small spring bar holes on each side of the band where it connects to the watch case.
- Insert the pointed end of the spring bar tool into one of the holes and apply gentle pressure to compress the spring bar.
- While keeping the spring bar compressed, carefully slide the band away from the watch case and remove it.
- Repeat the process on the other side of the band to fully detach it from the watch.
If you have a quick-release style band:
- Position your watch face down on a cloth or towel to avoid any scratches.
- Locate the small release buttons on the back of the band near the watch case.
- Simultaneously press both release buttons and slide the band away from the watch case. It should easily detach.
- Repeat the process on the other side of the band to fully remove it from the watch case.
While removing the old band, it’s essential to handle your watch with care to prevent any accidental damage. Take your time and be gentle throughout the process.
With the old band successfully removed, you’re now ready to move on to the next step: attaching the new band.
Step 3: Attach the New Band
With the old band removed, it’s time to attach the new band to your Samsung watch. The process will again depend on the type of band you have: pin-and-buckle or quick-release style.
If you have a pin-and-buckle style band:
- Take your new band and ensure that it is properly aligned with the watch case. The pins on the band should align with the small spring bar holes on the watch.
- Insert one end of the spring bar into one of the holes on the watch case. Use the spring bar tool to compress the spring bar and slide it into place.
- Repeat the previous step for the other end of the band, ensuring that both spring bars are securely in place.
- Gently tug on the band to ensure it is properly attached and secure.
If you have a quick-release style band:
- Align the new band with the watch case, making sure the release buttons on the band are facing towards the release button slots on the watch.
- Insert one end of the band into the corresponding release button slot on the watch case.
- Press down on the release button while sliding the band into place. You should hear or feel a click when it is securely attached.
- Repeat the previous steps for the other end of the band, ensuring both sides are properly attached.
After attaching the new band, give it a gentle tug to ensure that it is securely in place and won’t come loose during regular use.
Now that the new band is successfully attached to your Samsung watch, it’s time to move on to the next step: adjusting the fit to ensure optimal comfort.
Step 4: Adjusting the Fit
Once you’ve attached the new band to your Samsung watch, it’s important to ensure that it fits comfortably on your wrist. Here are a few steps to help you adjust the fit:
- Place the watch on your wrist and evaluate the fit. Determine if it feels too tight or too loose.
- If the band is too tight, you’ll need to remove some links or adjust the buckle to a looser hole. Consult the instructions or manual that came with your new band to understand how to make these adjustments.
- If the band is too loose, you’ll need to add links or tighten the buckle by moving it to a closer hole.
- Follow the instructions provided with your new band to adjust the size accordingly. This may involve adding or removing links or using a tool to adjust the buckle.
- Once you’ve made the necessary adjustments, put the watch back on your wrist and assess the fit again. Continue making small adjustments until you achieve the desired comfort and snugness.
Remember, it’s important to find a balance between a band that is secure and comfortable. It shouldn’t be too tight that it restricts your wrist movement, but it shouldn’t be so loose that it slides around excessively.
Take your time with the fitting process, as achieving the perfect fit will ensure that you can wear your Samsung watch for extended periods without discomfort.
After adjusting the fit, it’s time to move on to the final step: testing and finalizing the band change.
Step 5: Testing and Finalizing the Change
Now that you’ve attached the new band to your Samsung watch and adjusted the fit, it’s time to test the band and ensure everything is working correctly. Follow these steps to complete the finalization process:
- Put the watch on your wrist and securely fasten the new band.
- Move your wrist around in different directions to test the band’s flexibility and comfort. It should feel secure and not slide around excessively.
- Check that the band is properly aligned with the watch case and does not cause any obstruction to the watch’s features, such as buttons or sensors.
- Verify that the band lugs (the parts that connect the band to the watch case) are securely in place and not loose or wobbly.
- Inspect the overall appearance of the watch with the new band. Ensure that it enhances the style and aesthetics of the watch.
If you encounter any issues during testing, such as a loose band, misalignment, or discomfort, revisit the previous steps to make adjustments or ensure that the band is properly attached.
Once you are satisfied with the fit, appearance, and functionality of the new band, you have successfully completed the process of changing the band on your Samsung watch!
Remember to keep the old band in a safe place in case you decide to switch back to it in the future or use it as a backup.
Enjoy wearing your freshly customized Samsung watch with its brand new band that suits your style and preferences.