
Why is it important to adjust your watch clasp?
When it comes to wearing a watch, getting the right fit is essential for both comfort and style. A properly adjusted watch clasp ensures that the watch stays securely on your wrist without being too loose or tight. It not only enhances your overall wearing experience but also prevents the watch from slipping off or leaving uncomfortable markings on your skin.
A watch clasp that is too loose can be a nuisance as the watch may slide around your wrist and become a distraction. Not only does this compromise the functionality of the watch, but it also poses a risk of damage or loss. Imagine wearing a loose-fitting watch during intense physical activities – a misplaced step or a sudden movement could easily send the watch flying off your wrist.
On the other hand, a watch clasp that is too tight can cause discomfort and restrict blood circulation to your hand. It may leave unsightly marks on your skin or cause irritation. Wearing a tight watch clasp for an extended period could eventually lead to more serious health issues, such as carpal tunnel syndrome or nerve damage.
Additionally, an unsuitably adjusted watch clasp can have an impact on the aesthetics of your watch. A loose clasp can make the watch appear sloppy and ill-fitting, while a tight clasp pulls the straps too tight, distorting the overall balance and symmetry of the timepiece.
Tools you’ll need
Before you start adjusting your watch clasp, make sure you have the following tools handy:
- Spring bar tool – This tool is used to remove and reattach the watch links. It has a pointed end that fits into the spring bar holes to release them.
- Tweezers – Tweezers come in handy for holding small watch parts and placing them accurately.
- Microfiber cloth – A soft cloth is essential for cleaning the watch and preventing scratches during the adjustment process.
- Pin pusher or pushpin – This tool can be used as an alternative to a spring bar tool for removing and inserting spring bars.
- Jeweler’s loupe – While not necessary, a jeweler’s loupe can be helpful for inspecting the tiny components of your watch clasp.
Having these tools readily available will make the watch clasp adjustment process much easier and ensure that you can achieve the desired fit with precision.
Step 1: Determine how many links to remove
Before you start adjusting your watch clasp, it’s important to determine the correct number of links to remove for a comfortable fit. Here’s how:
- Put the watch on your wrist and fasten it to the desired snugness.
- Take note of how the watch sits on your wrist. If it’s too loose, the watch will slide up and down easily. If it’s too tight, it will leave marks or feel uncomfortable.
- Pull the watchband away from your wrist to reveal the clasp. If there is an excess of links, the clasp will sit too far down your wrist. If the clasp is near the edge of your wrist, you may need to add links instead of removing them.
- Remove the watch from your wrist and lay it on a flat surface.
- Count the number of links on both sides of the clasp. This will help you evenly adjust the watchband.
- Decide on the number of links you need to remove based on your initial observation and the desired fit.
It’s important to remember that you should never remove too many links at once. It’s better to start with one or two and then assess the fit again. You can always remove additional links if needed. Taking your time during this step will ensure that you achieve the perfect fit for your watch.
Step 2: Remove the necessary links
Once you have determined how many links to remove, you can proceed to adjust your watch clasp. Follow these steps to remove the necessary links:
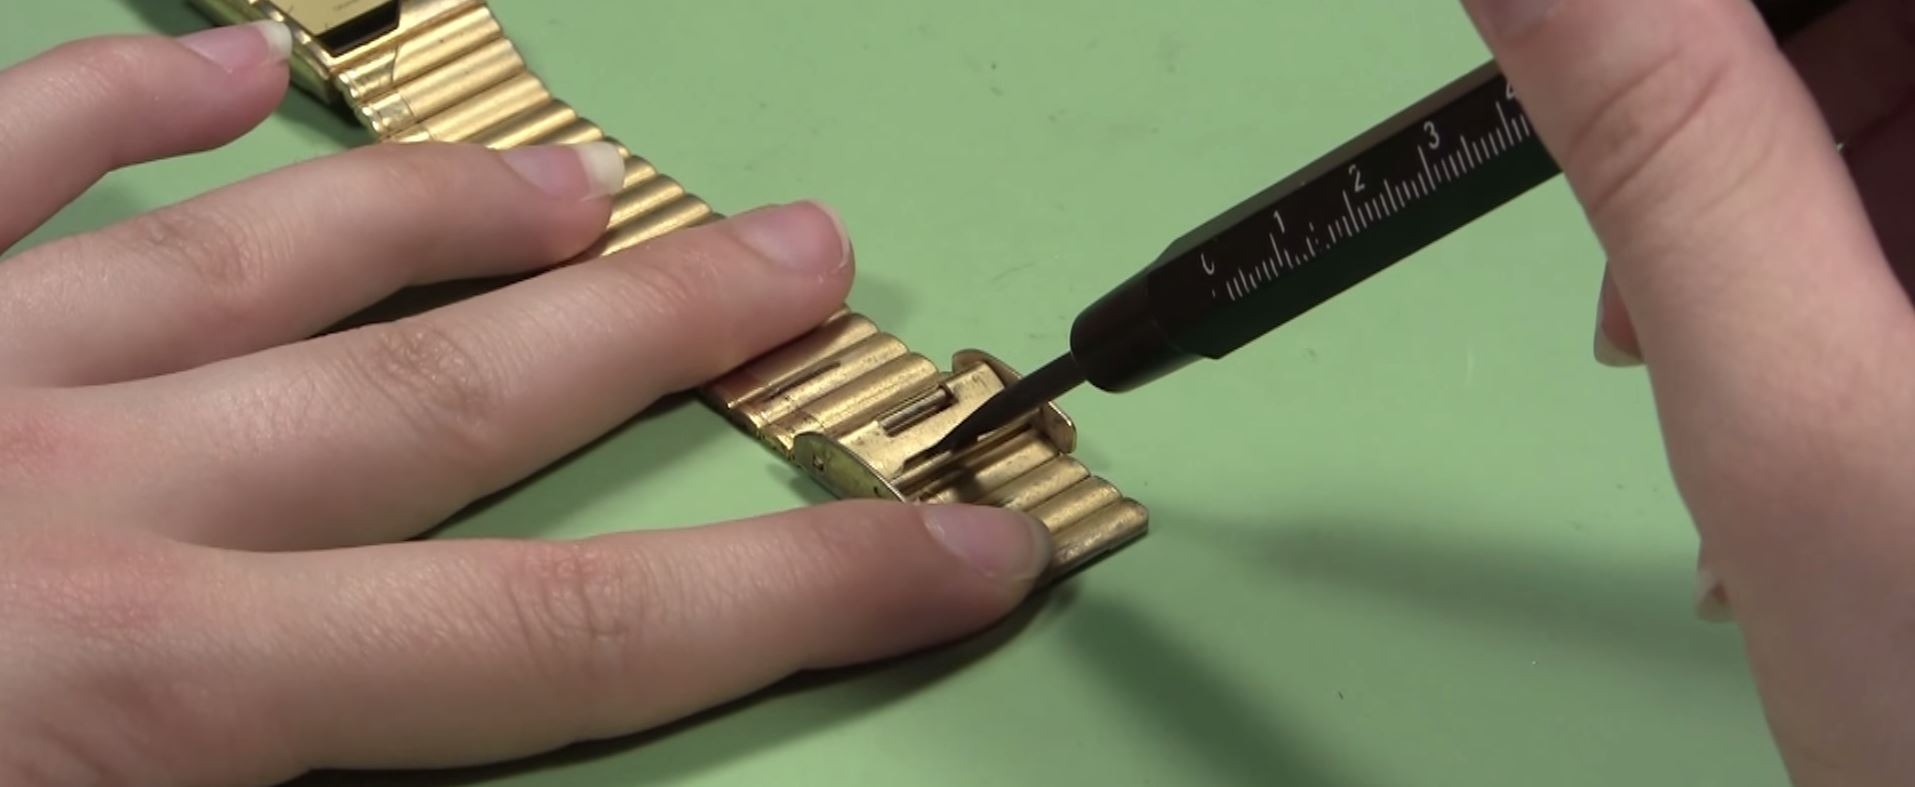
- Using a spring bar tool or pin pusher, locate the small pin or screws at the edge of the watchband near the clasp.
- Insert the tool into the pinhole or screw head and apply gentle pressure to release the spring bar or screws.
- Once the spring bar or screws are released, carefully pull the corresponding links away from the clasp. Be cautious not to scratch the watch or damage the links.
- Continue removing the links until you have reached the desired fit. Remember to maintain an even distribution of links on both sides of the clasp for aesthetic purposes.
- Set aside the removed links in a safe place in case you need to add them back in the future or if you plan to resize the watch for a different wrist size.
When removing links, it’s important to work slowly and steadily to avoid any accidental damage. If you are unsure or uncomfortable with this process, it’s always recommended to seek the assistance of a professional watchmaker or jeweler.
Step 3: Reattach the clasp and links
After removing the necessary links, it’s time to reattach the clasp and remaining links to complete the adjustment process. Follow these steps:
- Take the clasp end of the watchband and align it with the last link on the other end of the watchband.
- Insert the spring bar or screws into the corresponding holes or slots of the clasp, ensuring they are properly aligned.
- Use your spring bar tool or pin pusher to push the spring bars or tighten the screws, securing the clasp in place.
- Once the clasp is securely attached, check the fit of the watch on your wrist. Adjust the clasp position if necessary to ensure a comfortable and snug fit.
- Reattach the remaining links, one by one, by inserting the spring bars or tightening the screws in the same manner as you did with the clasp.
Make sure each link is properly aligned and secure before moving on to the next one. Take your time during this step to ensure a precise and secure attachment of the clasp and links.
It’s recommended to periodically check the fit of your watch after reattaching the clasp and links to ensure that it is still comfortable and properly adjusted. If needed, make further adjustments by adding or removing links as necessary.
Step 4: Test the fit
Once you have reattached the clasp and links, it’s important to test the fit of your watch to ensure it is comfortable and properly adjusted. Follow these steps:
- Put the watch on your wrist and fasten the clasp.
- Move your wrist around to assess the comfort and security of the watch. Make sure it doesn’t slide or rotate excessively.
- Check the tightness of the watchband. It should be snug enough to stay in place but not so tight that it leaves marks or restricts blood circulation.
- Run your finger between the watchband and your wrist to ensure there is a small amount of space for air circulation.
- Wear the watch for a few minutes and pay attention to any discomfort or irritation. If it feels too tight or causes any pain, you may need to readjust the fit by adding or removing additional links.
It’s essential to find the right balance between comfort and security when testing the fit of your watch. Make adjustments as necessary to achieve the desired fit that allows freedom of movement while staying securely in place on your wrist.
If you are still not satisfied with the fit or encounter any issues, it’s recommended to consult a professional watchmaker or jeweler for further assistance.
Alternative method: Using a clasp adjustment tool
If you want to adjust your watch clasp but prefer a more convenient and precise method, you can utilize a clasp adjustment tool. This tool is specially designed to make the process easier and less time-consuming. Here’s how to use it:
- Ensure that your watchband has micro-adjustment holes or slots on the clasp. These are small holes or slots that allow for fine adjustments to the length of the watchband.
- Insert the clasp adjustment tool into the micro-adjustment holes or slots on the clasp.
- Use the adjustment tool to either push or pull the clasp, depending on the type of adjustment mechanism your watch clasp has.
- Move the clasp incrementally to achieve the desired fit. Take your time and make small adjustments to ensure a comfortable and secure fit.
- Test the fit of the watchband by wearing the watch and assessing its comfort and security on your wrist.
Using a clasp adjustment tool can be a quicker and more precise way to adjust your watch clasp. It allows for fine-tuning the length of the watchband without the need to remove or add links. However, not all watchbands have micro-adjustment holes or slots, so this method may not be applicable for all watches.
It’s worth noting that if you are unsure about using a clasp adjustment tool or unsure if your watchband supports this method, it’s best to consult the watch’s manufacturer or a professional watchmaker for guidance.
Tips for adjusting different types of clasps
Adjusting watch clasps can vary depending on the type of clasp your watch has. Here are some tips to help you navigate the adjustment process for different types of clasps:
1. Deployment Clasp:
- If your deployment clasp has micro-adjustment holes, use a clasp adjustment tool or pin to move the clasp in small increments for a precise fit.
- Some deployment clasps have additional push buttons or levers that allow for easy adjustment. Familiarize yourself with these mechanisms to make the process smoother.
2. Fold-over Clasp:
- For fold-over clasps with micro-adjustment holes, use a clasp adjustment tool to move the clasp up or down for a better fit.
- If your fold-over clasp lacks micro-adjustment holes, remove or add links to achieve the desired fit.
3. Push-button Release Clasp:
- With push-button release clasps, locate the hidden buttons on the sides of the clasp and press them simultaneously to release the clasp.
- Follow the same process as adjusting a fold-over or deployment clasp by either utilizing micro-adjustment holes or removing/adding links.
4. Leather Strap Clasp:
- For leather strap clasps, the adjustment typically involves making new holes in the strap using a leather hole punch.
- Make small adjustments at a time and check the fit regularly to ensure you don’t overdo it.
5. Elastic Strap Clasp:
- If your watch has an elastic strap with a clasp, adjusting the fit can be as simple as sliding the clasp along the elastic band to the desired position.
- Experiment with different placements until you find the most comfortable fit.
Remember, it’s crucial to refer to your watch’s user manual for specific instructions on adjusting your particular clasp type. If you’re uncertain or uncomfortable with the process, seek assistance from a professional watchmaker or jeweler.